
Let’s be honest: Halloween isn’t just for kids anymore. It’s for anyone who wants an excuse to consume absurd amounts of sugar while admiring snacks dressed in tiny costumes. Are you tired of those gory, bloody-eyeball cupcakes that look more like a medical hazard than a tasty snack? I totally feel you. Halloween food can be fun, charming, and deliciously festive without turning your kitchen into a crime scene.
If you’re hosting a spooky soirée, prepping classroom goodies, or just lounging on the couch binge-watching scary movies, these 10 Cute Halloween Treats That Are Almost Too Adorable to Eat will steal the show. They are ridiculously easy to whip up, require zero pastry degree credentials, and look like they came straight out of a boutique bakery. Grab your favorite mug of spiced cider (or a generous pour of Pinot Noir 😉), and let’s make some magical spooky treats
1. Silly Strawberry Ghost Pops
These juicy fresh strawberries wrapped in smooth white chocolate are proof that ghosts don’t have to be terrifying. They take about 15 minutes to assemble and bring a fresh, sweet balance to your dessert table.
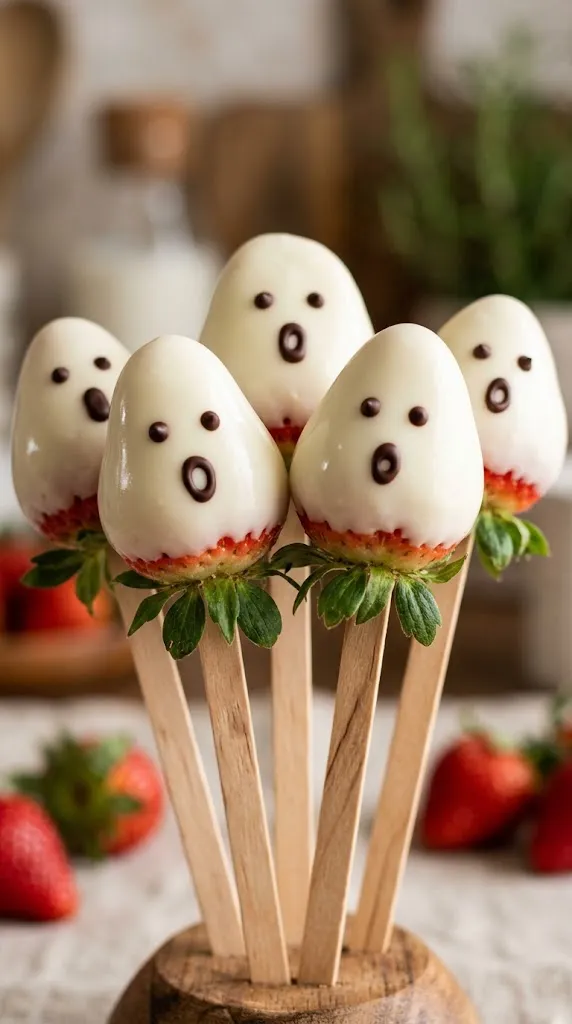
Ingredients
- 1 lb fresh, large strawberries (washed and completely dried)
- 10 oz white candy melts or high-quality white chocolate chips
- 1 tsp coconut oil (for silky melting)
- 2 oz dark chocolate chips (for the spooky face details)
- 12 wooden lollipop sticks
Step-by-Step Instructions
- Line a large baking sheet with parchment paper.
- Insert a wooden lollipop stick firmly into the stem end of each strawberry.
- Melt the white candy melts with the coconut oil in a microwave-safe bowl, heating in 30-second bursts until completely smooth.
- Dip each strawberry into the melted white chocolate, swirling gently until coated. Hold the strawberry upside down for a few seconds to let the excess drip off.
- Place the coated strawberries on your prepared parchment paper.
- Melt the dark chocolate chips in a small piping bag or sandwich bag. Snip a tiny corner off the bag.
- Pipe two small eyes and an oval “O-shaped” mouth onto each white chocolate strawberry to create a sweet ghost face.
- Chill in the fridge for 15 minutes until the chocolate sets firm.
Why You’ll Love It
You get all the decadent richness of chocolate-covered fruit with a cheerful Halloween twist. Plus, the natural tartness of the strawberry cuts through the rich white chocolate. IMO, this is the ultimate guilt-free spooky indulgence!
2. Salty-Sweet Pretzel Spider Webs
Who knew arachnids could taste so delicious? These crisp, salty pretzel webs laced with white chocolate strike the perfect balance between crunchy and sweet.
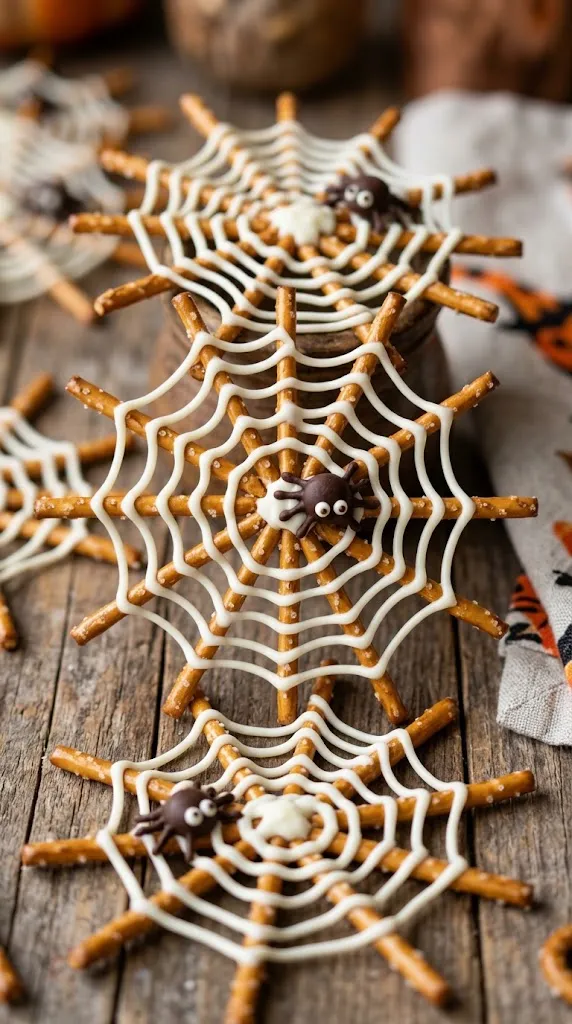
Ingredients
- 40 pretzel sticks
- 8 oz white baking chocolate or white candy coating
- 20 mini candy spiders or dark chocolate chips for spider bodies
- Black sprinkles (optional)
Step-by-Step Instructions
- Lay a sheet of parchment paper flat on your kitchen counter.
- For each web, arrange 8 pretzel sticks in a circle, meeting in the middle like the spokes of a wheel.
- Melt your white baking chocolate in the microwave at 50% power, stirring every 30 seconds until completely melted.
- Transfer the melted chocolate to a zip-top bag and cut off a tiny tip from one corner.
- Pipe a generous dollop of white chocolate right in the center where all the pretzel ends meet to bind them together.
- Pipe concentric circles outward from the center over the pretzel sticks to form a delicate web pattern.
- Place a mini candy spider in the center of each web before the chocolate hardens.
- Let the webs sit at room temperature for 20 minutes until completely set.
Why You’ll Love It
Who doesn’t love a 3-ingredient miracle treat that requires zero actual baking? I once tried making these with dark chocolate, but white chocolate gives that vibrant, authentic web look that pops on any serving platter.
3. Mini Pumpkin Rice Krispie Treats
Take the classic gooey marshmallow treat we all grew up with, turn it bright orange, and shape it into the cutest little pumpkin you’ve ever seen!
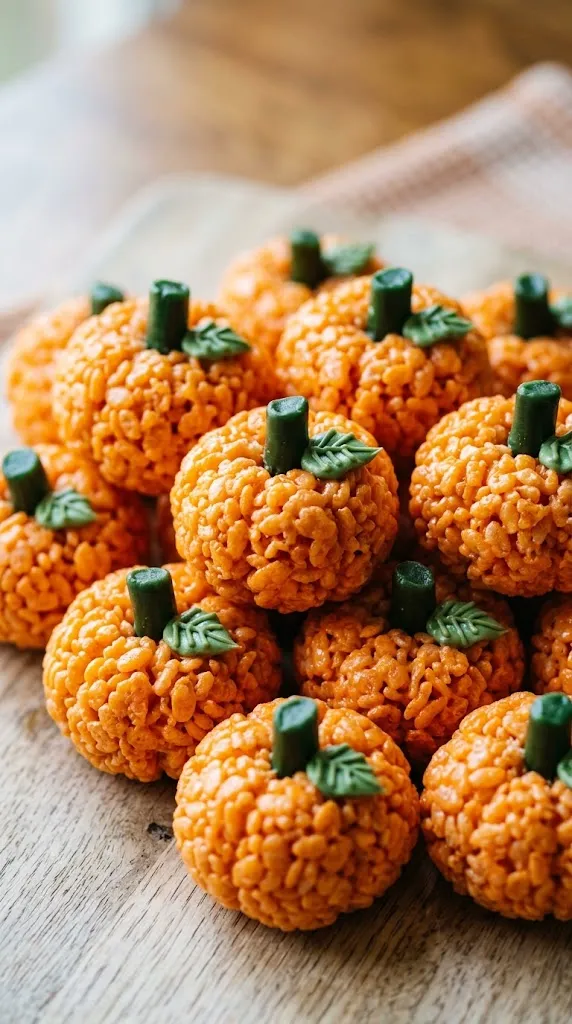
Ingredients
- 3 tbsp unsalted butter
- 10 oz mini marshmallows
- 1 tsp orange food coloring gel
- 6 cups crisp rice cereal
- 12 green Tootsie Rolls or mini Rolos (for stems)
- 1 tube green decorating icing (for leaves)
Step-by-Step Instructions
- Melt the unsalted butter over low heat in a large pot.
- Add the mini marshmallows and stir constantly until melted into a smooth, gooey mixture.
- Remove the pot from the heat and stir in the orange food coloring gel until you achieve a vibrant pumpkin shade.
- Fold in the crisp rice cereal until every piece gets coated in marshmallow goodness.
- Let the mixture cool for 3–5 minutes until safe to handle. Coat your hands generously with cooking spray or butter.
- Portion the mixture into 12 equal balls and gently roll them into compact pumpkin shapes.
- Press a small indentation into the top of each ball using your thumb.
- Press a green Tootsie Roll segment into the top center for a stem, and pipe a small green icing leaf right beside it.
Why You’ll Love It
They are chewy, rich, nostalgic, and bring an instant pop of vibrant orange to your dessert layout. Kids adore making these because molding the warm cereal mixture feels just like edible playdough 🙂
4. Mini Mummy Hot Dog Bites
If you need a savory break from all the sugar, these savory mummy bites are your best friend. They are crisp, buttery, and guaranteed to vanish off your snack table in seconds.
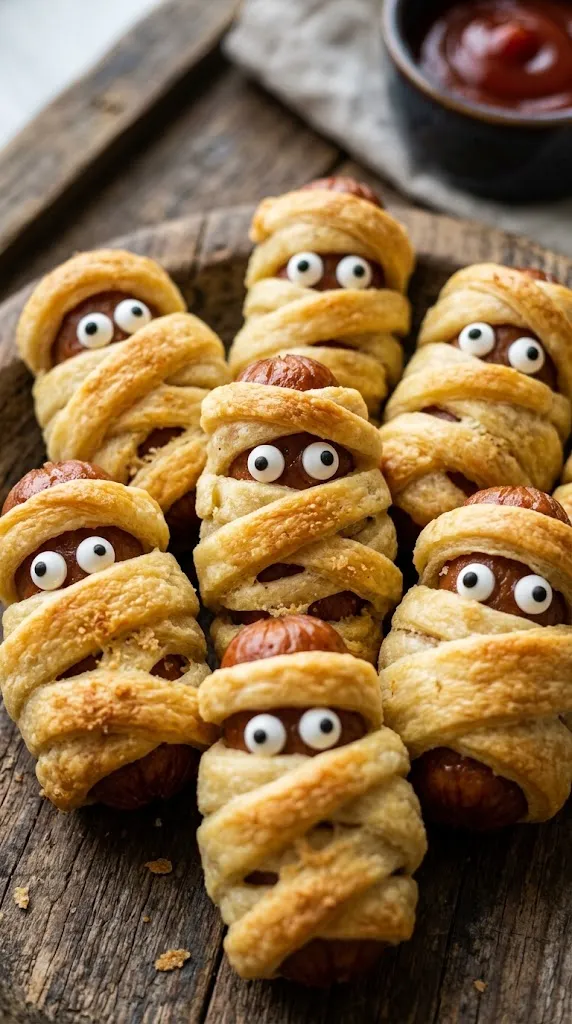
Ingredients
- 1 can (8 oz) refrigerated crescent dough sheet
- 24 mini cocktail sausages (Lil’ Smokies)
- 1 tbsp yellow mustard or ketchup
- 24 pairs edible candy eyes (or tiny mustard dots)
Step-by-Step Instructions
- Preheat your oven to 375°F (190°C) and line a baking sheet with parchment paper.
- Unroll the refrigerated crescent dough sheet on a cutting board.
- Slice the dough lengthwise into thin strips (about 1/4-inch wide) using a pizza cutter.
- Wrap 2–3 dough strips around each mini cocktail sausage, crisscrossing them to look like mummy bandages. Leave a small gap near the top for the mummy face.
- Place wrapped sausages on the baking sheet spaced 1 inch apart.
- Bake for 10–12 minutes until the dough turns golden brown and puffy.
- Let cool for 5 minutes, then dab a tiny drop of yellow mustard onto the exposed sausage area and stick on two edible candy eyes.
Why You’ll Love It
It’s the ultimate party appetizer that pleases both toddlers and full-grown adults. The savory sausage wrapped in flaky dough provides the cozy comfort food vibes every fall gathering needs.
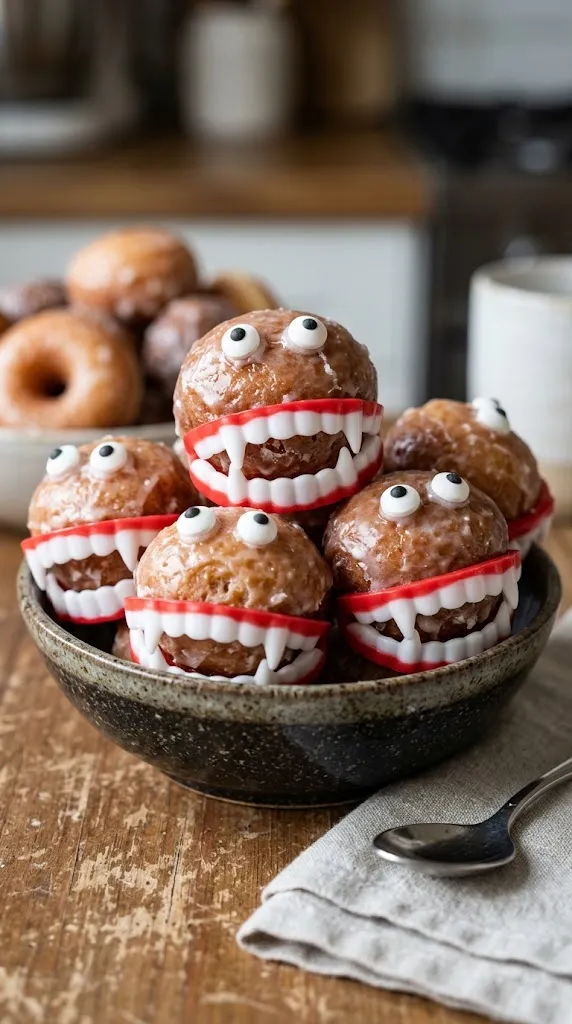
5. Playful Vampire Doughnut Bites
Transform store-bought glazed doughnut holes into goofy, fanged monsters in less time than it takes to brew your morning coffee!
Ingredients
- 12 store-bought glazed doughnut holes
- 12 pairs plastic vampire fangs (washed and dried)
- 24 mini edible candy eyes
- 2 tbsp red cookie icing or cherry gel
Step-by-Step Instructions
- Gently slice each glazed doughnut hole open horizontally through the middle, leaving the back attached like a hinge.
- Insert a set of plastic vampire fangs into the center slice of each doughnut hole.
- Pipe two small dots of red cookie icing on the top of the doughnut and attach two mini edible candy eyes.
- Drizzle a tiny drop of red icing around the plastic fangs to mimic silly vampire blood.
- Serve immediately on a dark platter for maximum dramatic effect.
Why You’ll Love It
Talk about zero cooking! This non-recipe recipe relies strictly on fun assembly, making it a huge lifesaver when you need a last-minute contribution for an October party.
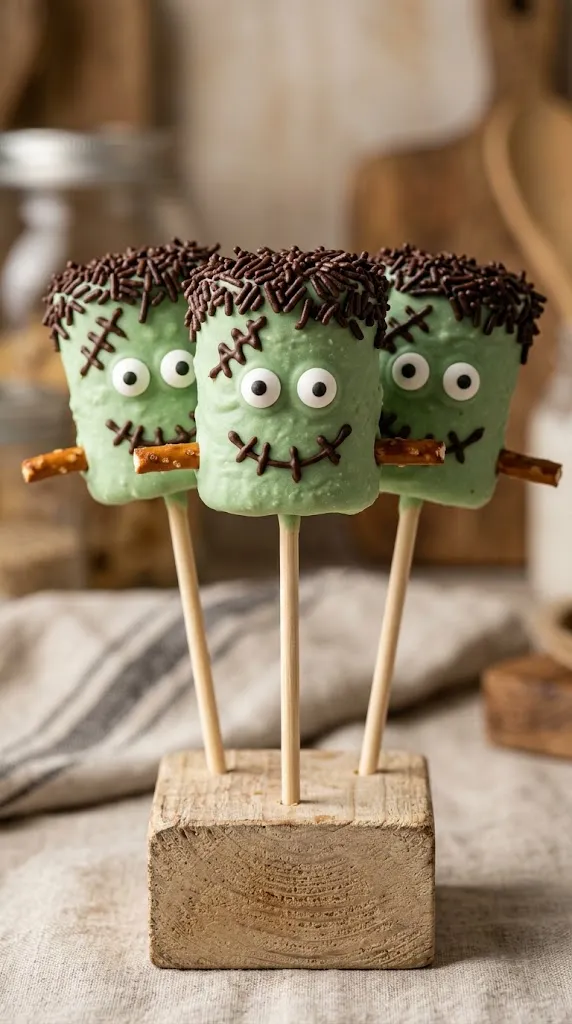
6. Friendly Frankenstein Marshmallow Pops
These sweet green monster pops are almost too adorable to eat. Soft marshmallows dipped in vibrant green candy coating make the ultimate sweet tooth treat.
Friendly Frankenstein Marshmallow Pops
Ingredients
- 12 jumbo marshmallows
- 10 oz bright green candy melts
- 1/2 cup chocolate jimmies / sprinkles (for hair)
- 24 mini pretzel sticks (broken into small pieces for neck bolts)
- 24 candy eyes
- 1 tube black decorating gel
- 12 paper lollipop sticks
Step-by-Step Instructions
- Push a paper lollipop stick halfway into each jumbo marshmallow.
- Melt the bright green candy melts in a deep glass cup in the microwave, stirring every 30 seconds until smooth.
- Dip each marshmallow fully into the green melted candy, letting excess drop back into the cup.
- While the green coating is still wet, dip the top flat top of the marshmallow into chocolate sprinkles to create Frankenstein’s spiky hair.
- Push two small mini pretzel stick pieces into opposite sides of the bottom of the marshmallow to make neck bolts.
- Attach two candy eyes onto the green face area.
- Once set (about 10 minutes), use the black decorating gel to draw a stitched mouth and a tiny scar.
Why You’ll Love It
Frankenstein is usually portrayed as brooding and scary, but these soft marshmallow pops turn him into a lovable cutie. The combination of salty pretzel with sweet marshmallow and chocolate is pure perfection!
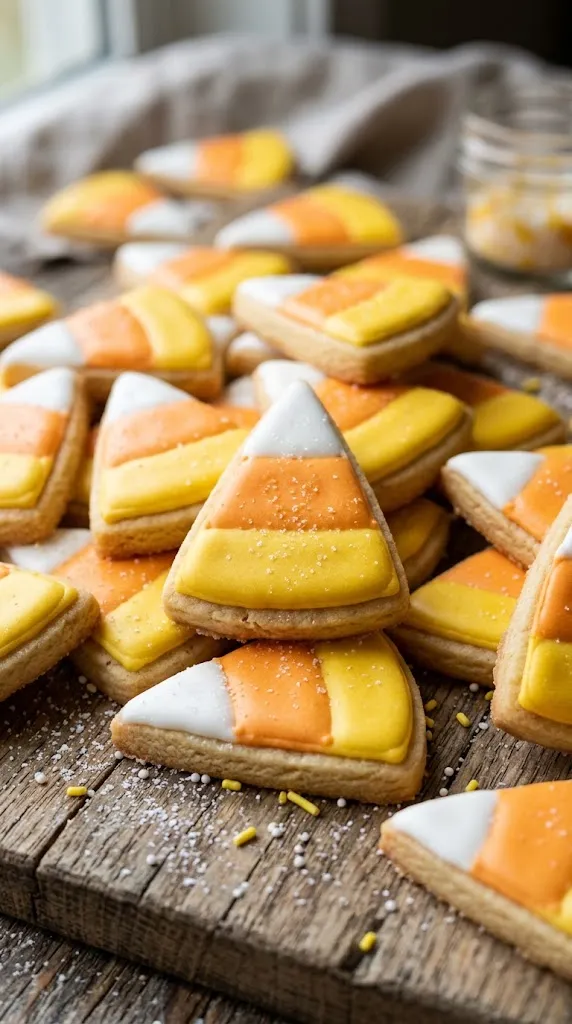
7. Candy Corn Layered Sugar Cookies
Even if you’re not a big fan of actual candy corn (I know it’s a controversial topic!), these buttery sugar cookies dressed up in iconic white, orange, and yellow icing are impossible to resist.
Ingredients
- 1 log (16.5 oz) refrigerated sugar cookie dough
- 1/4 cup all-purpose flour
- 1 cup white royal icing
- Yellow food coloring gel
- Orange food coloring gel
Step-by-Step Instructions
- Knead the refrigerated sugar cookie dough with the all-purpose flour on a lightly floured surface.
- Roll the dough out to 1/4-inch thickness and cut into neat triangles using a sharp knife or cookie cutter.
- Bake according to package directions at 350°F (175°C) for 8–10 minutes until edges are barely light golden. Let cool completely.
- Divide your white royal icing into three bowls. Keep one white, tint the second orange, and tint the third yellow.
- Pipe or spread a yellow strip at the wide base of each triangle cookie.
- Fill in the middle band with orange icing.
- Pipe the top point of the cookie with white icing. Smooth out borders with a toothpick.
Why You’ll Love It
You get all the cheerful nostalgic color blocking of iconic Halloween candy built on top of a delicious, soft-baked butter cookie. FYI, royal icing sets firm, making these super stackable for cookie exchanges!
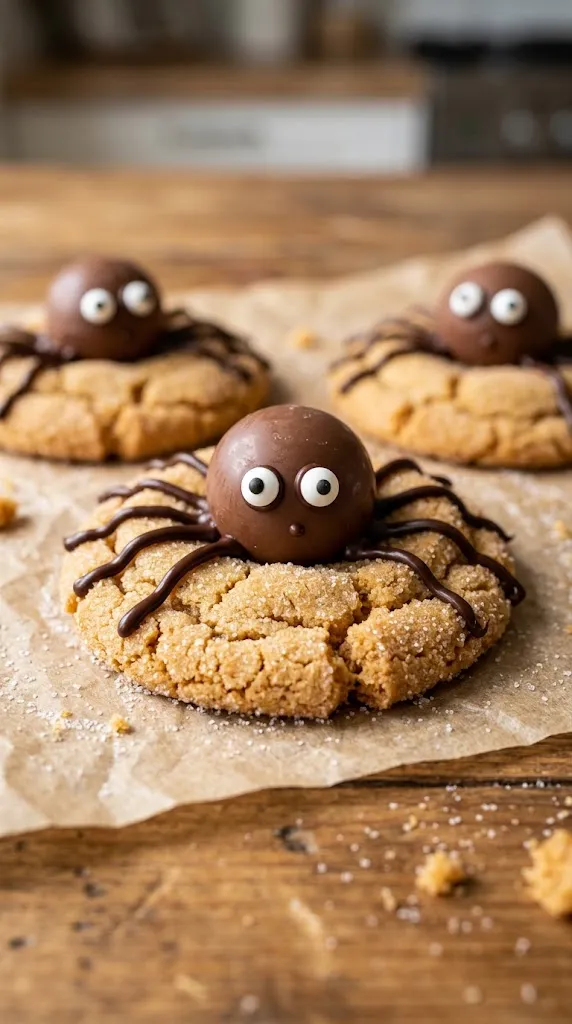
8. Creepy-Cute Peanut Butter Spider Cookies
Rich, soft peanut butter cookies topped with smooth milk chocolate truffles create the ultimate sweet-and-salty spider you’ll actually want to find in your kitchen.
Ingredients
- 1 cup creamy peanut butter
- 1/2 cup granulated sugar
- 1/2 cup packed light brown sugar
- 1 large egg
- 1 tsp vanilla extract
- 24 round chocolate truffles or chocolate milk balls
- 1/2 cup melted chocolate chips (for legs)
- 48 mini candy eyes
Step-by-Step Instructions
- Preheat oven to 350°F (175°C) and line a baking sheet with parchment.
- Mix creamy peanut butter, granulated sugar, light brown sugar, egg, and vanilla extract together in a bowl until smooth dough forms.
- Roll dough into 1-inch balls and place on the baking sheet.
- Bake for 10–12 minutes. As soon as you remove them from the oven, use the back of a round spoon to press a deep indentation into the center of each hot cookie.
- Let cookies cool for 10 minutes until lukewarm (if too hot, the chocolate truffle will melt into a puddle!).
- Place a round chocolate truffle into the indentation of each cookie.
- Pipe 8 legs onto the cookie starting from the truffle body using melted chocolate chips in a small piping bag.
- Use a dab of melted chocolate to glue two mini candy eyes onto each truffle face.
Why You’ll Love It
That classic peanut butter and milk chocolate combination never disappoints. These cookies are thick, soft, delightfully chewy, and guaranteed to impress everyone who sees them.
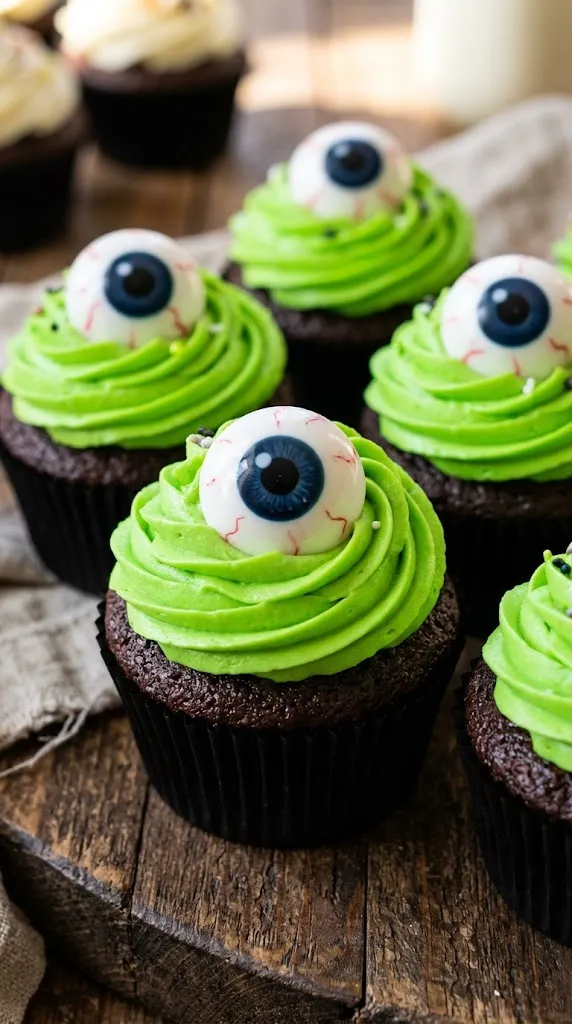
9. Googly-Eyed Monster Cupcakes
Bring your dessert tray to life with these fluffy chocolate cupcakes piled high with vibrant, colorful frosting and tons of misaligned candy eyes!
Ingredients
- 1 box chocolate cake mix (plus ingredients called for on box)
- 2 cups vanilla buttercream frosting
- Neon purple, green, and orange gel food coloring
- 1 box assorted sizes candy eyes
Step-by-Step Instructions
- Bake 24 cupcakes using your favorite chocolate cake mix according to package instructions. Allow to cool completely.
- Divide the vanilla buttercream frosting into three bowls and color each with a different neon food coloring gel.
- Fit piping bags with a multi-opening grass tip or star piping tip. Fill each bag with a different colored frosting.
- Pipe fun, furry-textured mounds or whimsical star swirls onto each cooled cupcake.
- Scatter multiple assorted sizes candy eyes randomly over the frosting — mix big ones with tiny ones to create quirky, friendly monster faces.
Why You’ll Love It
There’s no wrong way to decorate these monsters! You can make them silly, goofy, or completely lopsided. It’s an ideal recipe for getting creative without worrying about perfection.
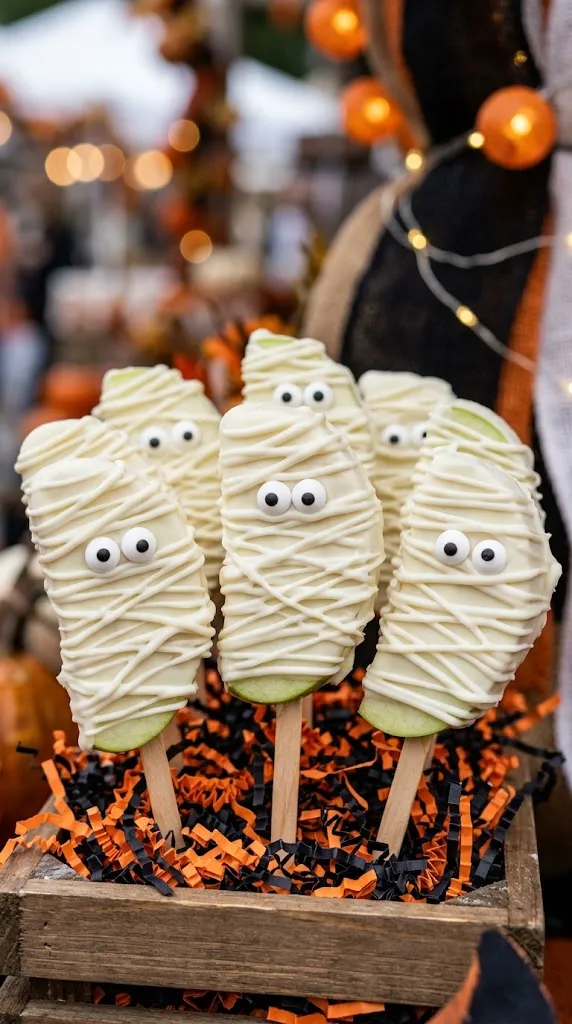
10. Crisp Apple Mummy Pops
Looking for a slightly lighter, refreshing treat to balance out the sugar rush? Fresh, tart Granny Smith apple slices dipped in creamy white chocolate are crispy, juicy, and insanely tasty.
Ingredients
- 3 large Granny Smith apples (sliced into 1/2-inch thick rounds)
- 1 tbsp lemon juice
- 12 oz white melting chocolate
- 24 edible candy eyes
- 12 wooden popsicle sticks
Step-by-Step Instructions
- Pat the Granny Smith apple slices completely dry with paper towels. Brush lightly with lemon juice to prevent browning.
- Cut a tiny slit in the bottom of each slice and insert a wooden popsicle stick.
- Melt the white melting chocolate in a microwave-safe bowl in 30-second bursts until completely smooth.
- Dip each apple slice into the white chocolate until fully coated, letting the excess drip back into the bowl. Place on parchment paper.
- Pour remaining melted white chocolate into a piping bag with a small tip. Drizzle crisscrossing lines over the coated apples to mimic mummy wraps.
- Press two edible candy eyes into the top third of each mummy before the chocolate sets.
- Refrigerate for 15 minutes to allow the chocolate shell to harden.
Why You’ll Love It
The sharp tartness of fresh green apples cuts through the sweetness of white chocolate like a dream. It offers a wonderful crisp texture and delivers a wholesome twist on classic dipped candy apples.