
Halloween party planning usually goes one of two ways. You either spend three days stressing over complex pastry techniques, or you panic-buy a couple of bags of fun-sized candy, dump them into a plastic bowl, and pray nobody judges you.
Can we agree there has to be a better middle ground?
You don’t need a degree in pastry arts to pull off Halloween food that gets everyone reaching for their phones before they take a bite. All it takes is a little clever presentation, a few smart shortcuts, and a generous dose of edible silliness.
Whether you’re hosting a full-blown costume bash, throwing a movie night with friends, or just trying to convince your kids to eat something with actual protein before they embark on a sugar craze, these seven fun Halloween food ideas will do the trick. They hit that sweet spot of looking wildly creative without sending your stress levels through the roof.
Grab a cozy drink, blast your favorite spooktacular playlist, and let’s turn your kitchen into a delicious monster lab!
1. Mummy Hot Dogs with Zesty Honey Mustard
Who says Halloween food has to be sweet to be top-tier? These mummy hot dogs take a classic childhood favorite and turn it into the ultimate crowd-pleasing appetizer. They take roughly fifteen minutes of active effort, yet people will act like you spent hours wrapping dough.

Ingredients
-
1 package (8 count) high-quality beef hot dogs (or plant-based sausages)
-
1 can (8 oz) refrigerated crescent roll dough
-
1 tablespoon melted butter
-
1/2 teaspoon garlic powder
-
Yellow mustard or candy eyeballs for the eyes
-
For the dip: 3 tablespoons mayonnaise, 2 tablespoons yellow mustard, 1 tablespoon honey
Step-by-Step Instructions
-
Preheat your oven to 375°F (190°C) and line a large baking sheet with parchment paper.
-
Unroll the crescent dough sheet on a cutting board and press the perforations together to seal them.
-
Use a pizza cutter or sharp knife to slice the dough lengthwise into thin, 1/4-inch strips.
-
Take one hot dog and wrap 3 to 4 strips of dough around it to create the “mummy bandages.” Leave a small gap near the top for the face!
-
Place the wrapped mummies on your baking sheet. Brush the dough lightly with melted butter mixed with garlic powder.
-
Bake for 13 to 15 minutes, or until the dough turns a rich, golden brown.
-
Let them cool for 2 minutes, then dab two small dots of mustard (or press in candy eyes) in the gap for the eyes. Whisk the mayo, mustard, and honey together in a small bowl and serve immediately!
Why You’ll Love It
These hit that perfect nostalgic sweet spot between savory, buttery dough and juicy hot dog. FYI, using garlic butter on the dough instead of plain oil completely transforms these from basic kids’ food into an addictive adult snack. I made these for a horror movie marathon last year, and the plate was cleared before the opening credits even finished!
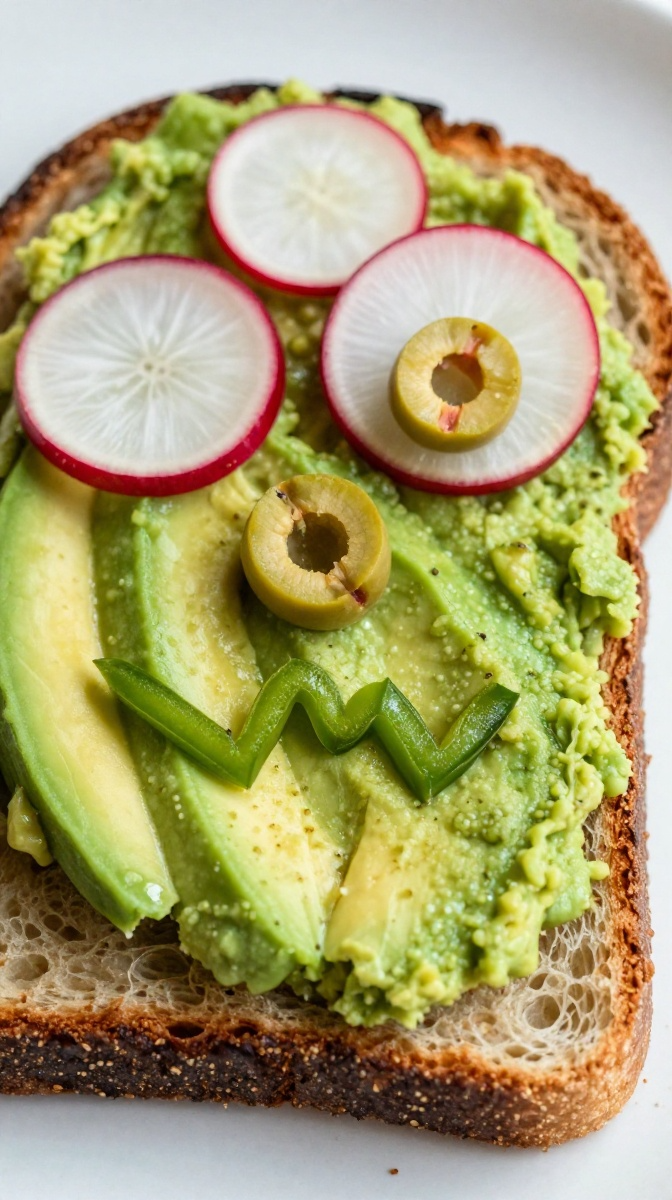
2. Spooky Monster Avocado Toast
If you think toast can’t be festive, prepare to stand corrected. Monster avocado toast is the ultimate Halloween breakfast or quick party snack. It’s colorful, packed with healthy fats, and gives you complete artistic freedom to make the absolute weirdest faces possible out of fresh veggies.
Ingredients
-
4 thick slices of sourdough or artisan bread, toasted
-
2 ripe avocados
-
1 tablespoon fresh lime juice
-
1/2 teaspoon sea salt
-
1/4 teaspoon red pepper flakes
-
Toppings for faces: sliced radishes, black olives, sliced cucumbers, cherry tomatoes, and microgreens
Step-by-Step Instructions
-
Slice open the avocados, scoop the flesh into a bowl, and mash it thoroughly with lime juice and sea salt.
-
Toast your artisan bread until it reaches a deep, sturdy crunch (soft toast leads to soggy monster faces, and nobody wants that).
-
Spread a generous layer of mashed avocado over each slice, pushing it all the way to the edges.
-
Use round radish slices topped with black olive rings to build bulging eyes.
-
Slice cucumber peels or red bell peppers into jagged zig-zags to construct scary monster teeth.
-
Scatter microgreens across the top edge to create messy, wild monster hair. Finish with a pinch of red pepper flakes for an extra kick!
Why You’ll Love It
It’s fresh, creamy, zesty, and lets you eat something genuinely nourishing amidst the season’s endless sugar rush. Plus, building the faces is oddly therapeutic. I once tried using pickled red onions for the mouths instead of fresh peppers, and the extra tang was so good I’ve never gone back.
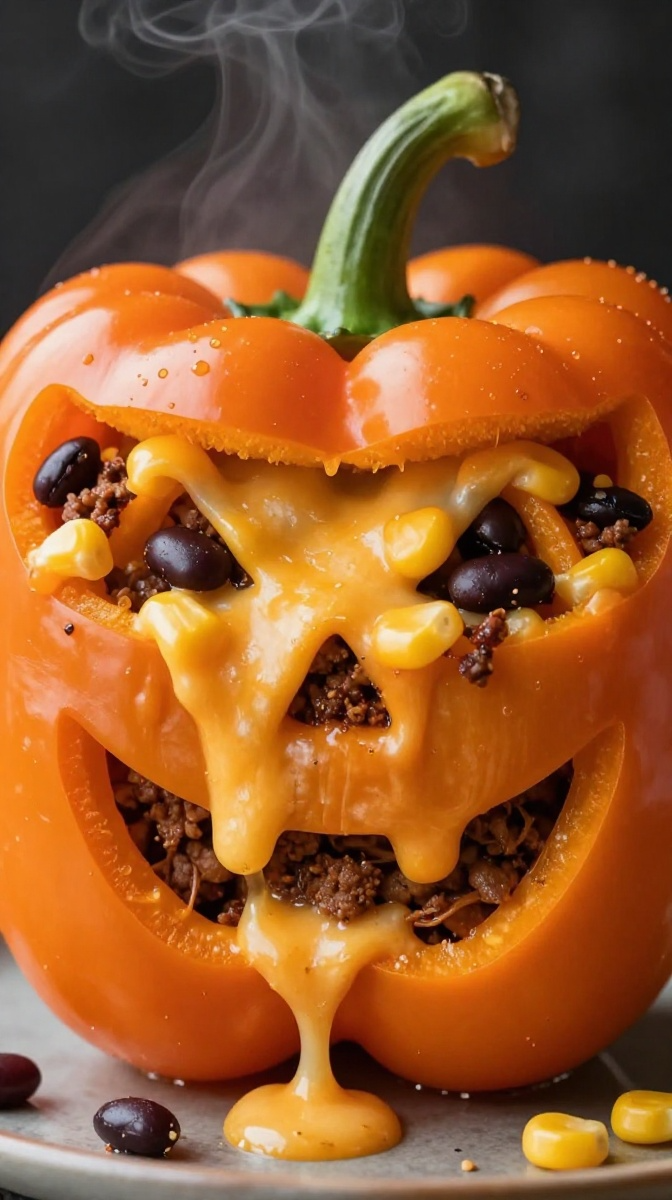
3. Mini Jack-o’-Lantern Stuffed Peppers
Stuffed peppers are a weeknight staple, but carve a tiny jack-o’-lantern face into a orange bell pepper, and suddenly you have a viral-worthy Halloween centerpiece. They are hearty, comforting, and surprisingly easy to prep ahead of time.
Ingredients
-
4 medium orange bell peppers (choose wide ones that stand upright on their own)
-
1 lb lean ground turkey or ground beef
-
1 cup cooked brown rice or quinoa
-
1 cup black beans, rinsed and drained
-
1 cup fire-roasted diced tomatoes, drained
-
1 cup shredded Mexican blend cheese
-
1 taco seasoning packet
Step-by-Step Instructions
-
Cut off the tops of the orange bell peppers and set them aside. Scoop out the seeds and inner membranes.
-
Use a small, sharp paring knife to carve small jack-o’-lantern eyes, a triangle nose, and a toothy smile into one side of each pepper.
-
Pre-cook the carved peppers by placing them in a microwave-safe dish with 2 tablespoons of water, covering tightly, and microwaving on high for 3 minutes to soften slightly.
-
Brown the ground meat in a skillet over medium heat, drain any excess fat, and stir in the taco seasoning along with 1/4 cup of water.
-
Stir the cooked rice, black beans, diced tomatoes, and half of the cheese into the seasoned meat until fully combined.
-
Stuff each carved pepper to the brim with the warm filling, top with the remaining cheese, and replace the pepper tops.
-
Place upright in a baking dish and bake at 375°F (190°C) for 20 minutes until the cheese melts and the peppers are tender.
Why You’ll Love It
You get all the smoky, savory flavors of a loaded taco bowl tucked inside a sweet, tender roasted pepper. They look adorably spooky sitting on a platter, and they happen to be low-carb friendly if you skip the rice. Who says festive food can’t double as a wholesome weeknight dinner?
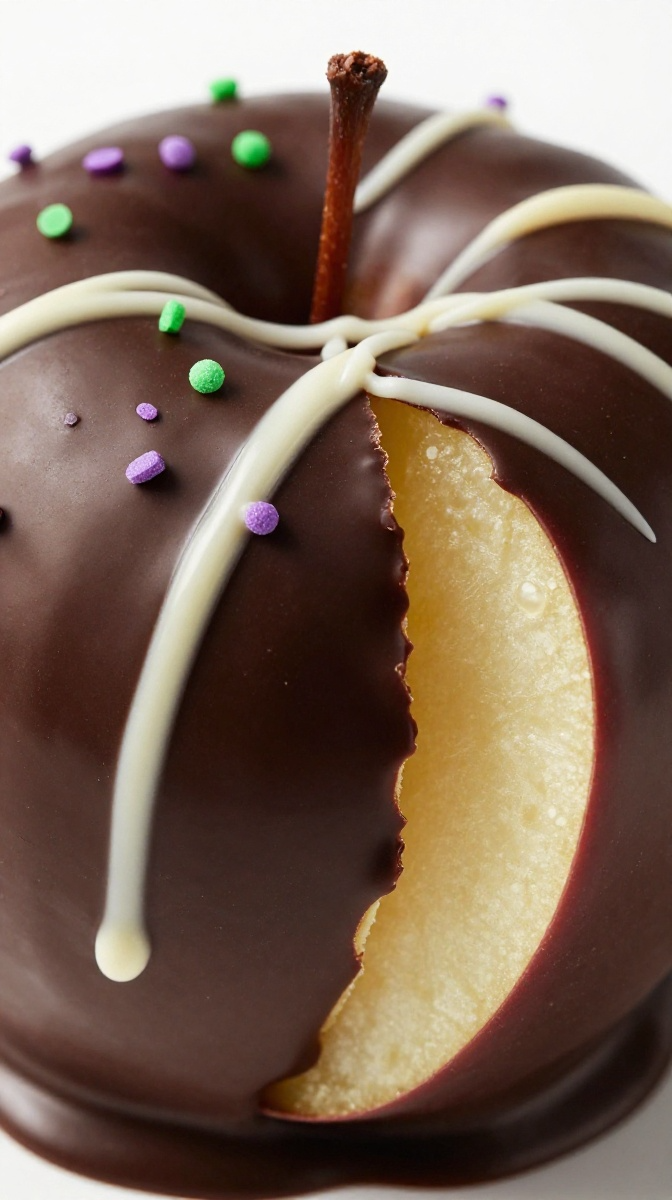
4. Poison Apple Candy Pops
Caramel apples are a staple of autumn, but these poison apple pops take things up a notch. By dipping crisp apple slices into dark chocolate and decorating them with spooky sprinkles, you get all the candy apple vibes without breaking your teeth or making a total mess of your kitchen.
Ingredients
-
3 large Honeycrisp or Granny Smith apples, thoroughly washed and dried
-
8 oz high-quality dark chocolate melting wafers or semi-sweet chocolate chips
-
1 teaspoon coconut oil (helps the chocolate melt smoothly)
-
1/2 cup white chocolate chips for drizzling
-
Black, purple, and green sprinkles
-
Wooden popsicle sticks
Step-by-Step Instructions
-
Slice each apple into thick, 1/2-inch rounds, discarding the center core pieces containing seeds.
-
Pat the apple slices completely dry with paper towels (moisture is the ultimate enemy of smooth melted chocolate!).
-
Make a small slit in the bottom rind of each apple slice and insert a sturdy wooden popsicle stick.
-
Melt the dark chocolate and coconut oil together in a microwave-safe bowl in 30-second bursts, stirring between each until silky smooth.
-
Dip each apple pop completely into the dark chocolate, allowing the excess to drip back into the bowl.
-
Lay the pops on a parchment-lined tray, sprinkle immediately with festive toppings, and drizzle with melted white chocolate for a “cobweb” effect.
-
Chill in the refrigerator for 15 minutes until the chocolate sets firm.
Why You’ll Love It
The sharp snap of cold, dark chocolate paired with the tart, juicy crunch of a fresh apple slice is absolute perfection. Eating a whole candied apple on a stick is a messy battle, but these portion-controlled slices are pure genius. IMO, Granny Smith apples work best here because their sharp tartness cuts right through the rich chocolate.
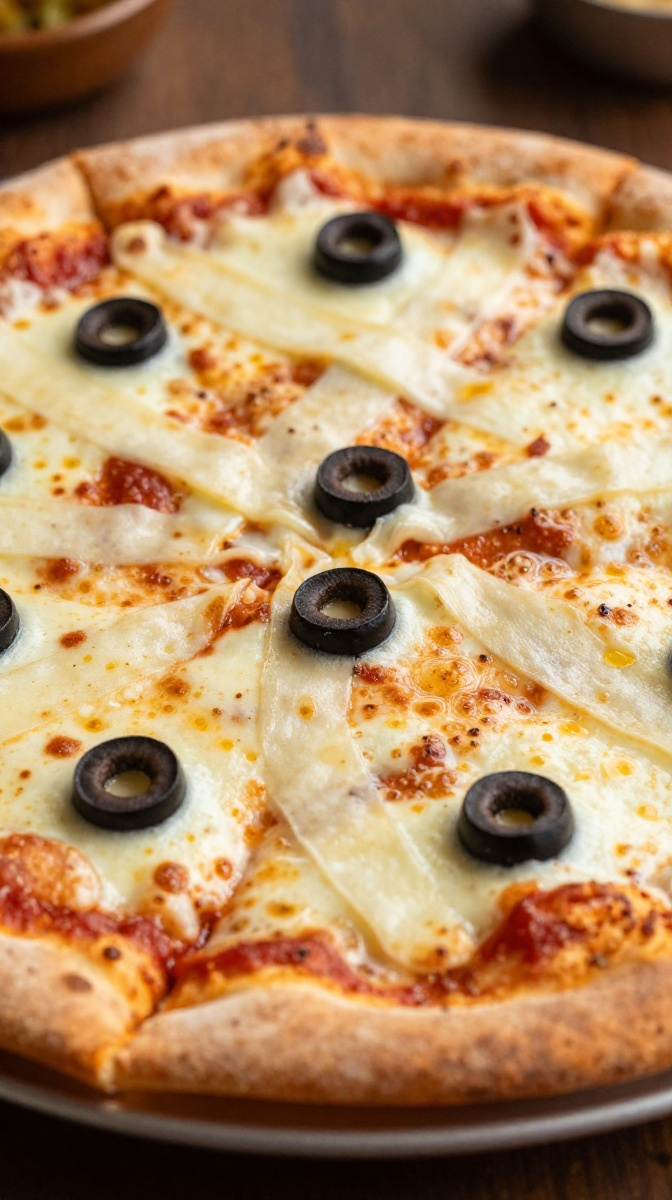
5. Easy Mummy Pizza Bites
When you need a party food option that appeals to literally everyone from picky toddlers to late-night adult partygoers, pizza is the answer. These individual mummy pizza bites utilize canned biscuits as a base, meaning you can whip up a batch of two dozen in under twenty minutes.
Ingredients
-
1 can (16 oz) refrigerated flaky layers biscuits
-
1 cup rich marinara or pizza sauce
-
8 sticks of low-moisture mozzarella string cheese
-
1/2 cup sliced black olives
-
1 teaspoon Italian seasoning
Step-by-Step Instructions
-
Preheat your oven to 375°F (190°C) and line two baking sheets with parchment paper.
-
Separate each biscuit into two thinner rounds by peeling them apart along their natural flaky layers. Lay them flat on the prepared sheets.
-
Press the center of each biscuit round down slightly with your fingers to create a small rim.
-
Spoon a generous tablespoon of marinara sauce into the center of each round and spread it almost to the edges.
-
Pull the string cheese into thin, irregular strips. Lay the cheese strips crisscross over the sauce to look like mummy wrappings.
-
Place two olive slices on top of each mini pizza to serve as the mummy eyes.
-
Dust light Italian seasoning across the top and bake for 10 to 12 minutes until the edges are golden and the cheese is melted and bubbly.
Why You’ll Love It
They are warm, gooey, bite-sized, and deliver all the savory comfort of traditional pizza with zero dough-rolling hassle. The flaky biscuit crust gets wonderfully crispy on the bottom while staying fluffy inside. They are effortlessly customizable too—feel free to sneak a slice of pepperoni under the mummy wraps!
6. Witch’s Brew Guacamole Bowl
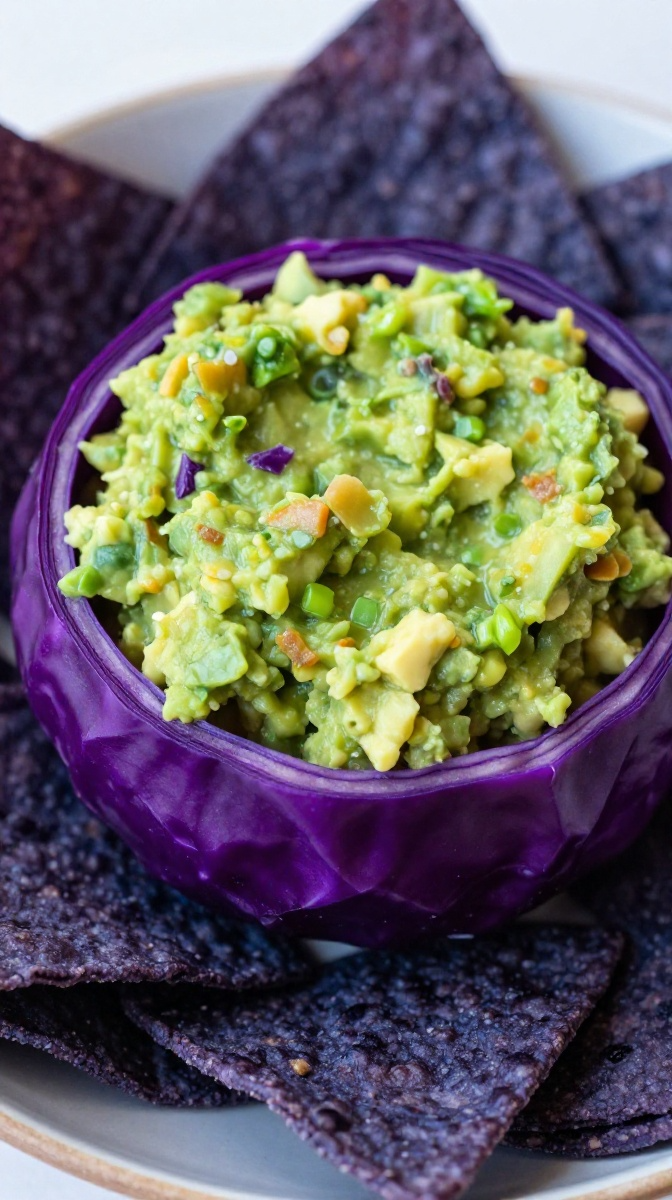
Guacamole is already elite party food, but serving it inside a hollowed-out cabbage “cauldrons” surrounded by ghostly white chips turns a basic dip into an eye-catching party centerpiece. It’s fresh, tangy, naturally gluten-free, and guaranteed to be the first dish emptied on the buffet table.
Ingredients
-
3 large ripe avocados
-
1/2 medium red onion, finely diced
-
1 jalapeno pepper, seeded and finely minced
-
1/2 cup fresh cilantro, chopped
-
1 large lime, juiced
-
1/2 teaspoon garlic powder & 1/2 teaspoon sea salt
-
1 small head of purple cabbage (for the witch’s cauldron bowl)
-
Blue corn or ghost-shaped tortilla chips for serving
Step-by-Step Instructions
-
Prepare the cabbage bowl by carefully slicing a thin layer off the bottom of the purple cabbage so it sits flat. Cut off the top third and hollow out the center with a knife and spoon, leaving a sturdy outer wall.
-
Slice open the avocados, remove the pits, and scoop the flesh into a medium bowl.
-
Mash the avocado with a fork, keeping it slightly chunky for a superior texture.
-
Fold in the diced red onion, minced jalapeno, chopped cilantro, lime juice, garlic powder, and salt.
-
Taste test and adjust the lime juice or salt if necessary (always trust your palate over a recipe card!).
-
Spoon the guacamole into your hollowed-out purple cabbage cauldron.
-
Place the cauldron in the center of a wide platter and surround it with dark blue corn or spooky ghost-shaped tortilla chips.
Why You’ll Love It
The striking visual contrast between the bright green guacamole and the vibrant purple cabbage is an absolute showstopper on any party table. It requires zero actual cooking, tastes incredible, and keeps your dip presentation clean and festive. Do yourself a favor and leave the avocado pits in the bowl if you are prepping ahead—it helps prevent browning!
7. Chocolate Frankenstein Peanut Butter Cups
Commercial candy is fine, but homemade peanut butter cups are on an entirely different level of deliciousness. By tinting white chocolate a spooky Frankenstein green and layering it over a rich peanut butter filling, you create a gourmet Halloween treat that rivals any fancy chocolate shop.

Ingredients
-
1 cup creamy peanut butter
-
1/4 cup powdered sugar
-
2 tablespoons melted butter
-
1/4 teaspoon salt
-
12 oz white chocolate melting wafers
-
Green gel food coloring
-
1/4 cup dark chocolate chips (for the hair and facial details)
-
Candy eyeballs
Step-by-Step Instructions
-
Line a 12-cup muffin tin with black or Halloween-themed paper cupcake liners.
-
In a medium bowl, mix the creamy peanut butter, powdered sugar, melted butter, and salt until smooth and fudge-like.
-
Melt the white chocolate wafers in 30-second increments in the microwave until completely smooth. Stir in a few drops of green gel food coloring until you reach a vibrant “Frankenstein” green.
-
Spoon a tablespoon of green chocolate into the bottom of each muffin liner, tapping the tray lightly on the counter to level it out.
-
Scoop a small ball of the peanut butter mixture, flatten it into a disc, and drop it gently into the center of each chocolate base.
-
Cover the peanut butter layer with another tablespoon of green chocolate, ensuring it flows down the sides to enclose the filling completely.
-
Melt the dark chocolate chips and use a toothpick or piping bag to draw spiky hair and stitched scars across the top. Press two candy eyes into the soft chocolate.
-
Chill in the fridge for 30 minutes until completely firm before peeling off the paper wrappers.
Why You’ll Love It
That classic combination of salty peanut butter and sweet chocolate never fails, but the fresh homemade filling blows store-bought cups out of the water. They look adorable, taste rich, and freeze extraordinarily well if you want to make them a week before your party.
Quick Comparison: Prep Times & Vibe Check
Need to figure out which of these spooky recipes fits your schedule tonight? Here is a quick breakdown to help you plan your Halloween kitchen strategy:
Pro Tips for Stress-Free Halloween Food Prep
Before you go wild in the kitchen, keep these simple food styling tricks in your back pocket to ensure everything looks amazing with zero panic:
-
Invest in Candy Eyeballs: You can buy a giant bottle of candy eyes online or at your local grocery store for a few bucks during October. Stick two candy eyes on practically any food item—from meatballs to brownies—and it immediately becomes a “Halloween recipe.”
-
Gel Color > Water-Based Liquid Color: When coloring chocolate or frostings, always use gel food coloring. Standard liquid food dye adds too much water, which can cause melted chocolate to seize up into an unusable, grainy mess.
-
Prep Fillings Ahead: For recipes like the mini pizzas or stuffed peppers, chop all your vegetables and mix your savory fillings the night before. When party day arrives, all you have to do is assemble and bake!
Wrap-Up: Time to Get Spooky in the Kitchen!
Hosting a memorable Halloween gathering doesn’t mean you have to exhaust yourself making intricate gingerbread haunted houses or spending hundreds of dollars on catering. Food should be fun, interactive, and delicious above all else.
Whether you go all-out with a full spread of these recipes or simply whip up a bowl of Witch’s Brew Guacamole for movie night, you are bound to bring some playful magic to the table.
Which of these Halloween food ideas are you going to try first? Put on your favorite spooky playlist, grab your aprons, and let the creepy culinary fun begin! 😊