
Ever served a dessert so gruesome your guests hesitated before taking a bite, only to devour the entire platter 30 seconds later? That is the exact vibe we are chasing this spooky season.
Forget boring orange-sprinkled sugar cookies. Halloween deserves drama, flair, and just enough creep factor to make your party guests double-take. But here is the golden rule: it must taste incredible. Nobody wants to eat dry cardboard just because it looks like a bat.
Whether you are throwing a wild monster mash or just snacking on the couch while watching horror movies, these seven Halloween cookie recipes hit that sweet spot between nightmare-fuel visual appeal and total flavor perfection. Grab your baking sheets, light a pumpkin-scented candle, and let’s get baking! 🙂
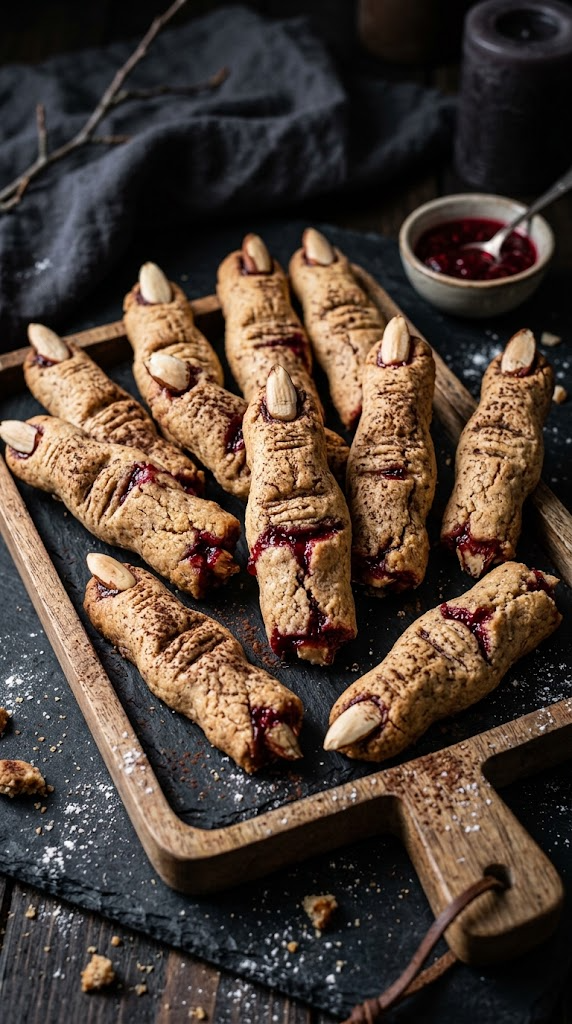
1. Severed Witch Finger Shortbread Cookies
These look freakishly real—wrinkles, bloodied cuticles, dirty fingernails and all. Serve them on a dark slate platter to make your party guests cringe before they fall in love with the buttery crunch.
Ingredients
- 1 cup unsalted butter, softened
- 1 cup powdered sugar
- 1 large egg
- 1 tsp almond extract
- 1 tsp vanilla extract
- 2 ¾ cups all-purpose flour
- 1 tsp baking powder
- 1 tsp salt
- ¾ cup sliced almonds
- ⅓ cup seedless red raspberry jam
Step-by-Step Instructions
- Beat the softened butter, powdered sugar, egg, almond extract, and vanilla extract in a large bowl until smooth and creamy.
- Whisk together the flour, baking powder, and salt in a separate bowl. Gradually add the dry mixture to the butter mix until a firm dough forms. Wrap it in plastic and chill for 40 minutes.
- Roll tablespoon-sized portions of dough into finger-length logs. Squeeze slightly near the top and middle to form realistic-looking knuckles. Use a butter knife to score small horizontal lines across the knuckles.
- Press a sliced almond firmly into the tip of each dough log to form the fingernail.
- Bake at 350°F (175°C) for 12–14 minutes until light golden.
- Let cool completely. Pop off the almond fingernail, dab a bit of raspberry jam underneath, and press the almond back on so the blood oozes out around the cuticle!
Why You’ll Love It
The intense almond flavor paired with buttery shortbread makes these wildly addictive. I once served these without warning my roommate, and her genuine shriek was worth every second of prep time. Plus, that tart raspberry jam balances out the rich shortbread seamlessly.
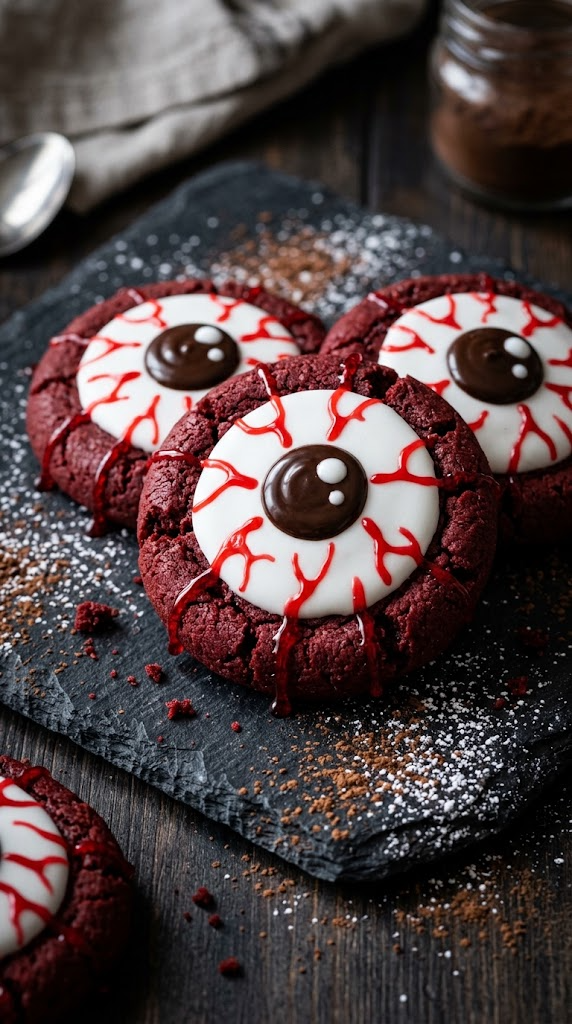
2. Bloodshot Red Velvet Eyeball Cookies
Soft, cake-like red velvet cookies topped with white chocolate iris domes and vivid bloodshot veins. They stare right back at you, practically begging you to eat them.
Ingredients
- 1 box red velvet cake mix
- 2 large eggs
- ⅓ cup vegetable oil
- 1 cup white chocolate melting wafers
- ¼ cup dark chocolate chips
- 1 tube red decorator icing gel
Step-by-Step Instructions
- Mix the red velvet cake mix, eggs, and vegetable oil in a bowl until a thick dough forms.
- Scoop 1-inch balls onto a parchment-lined baking sheet.
- Bake at 350°F (175°C) for 9–10 minutes. Immediately after pulling them from the oven, press a white chocolate melting wafer upside-down into the center of each warm cookie.
- Let the cookies cool completely so the wafer sets flat.
- Melt the dark chocolate chips and pipe a small black dot in the center of each white wafer for the pupil.
- Use the red decorator icing gel to draw squiggly, bloodshot veins extending from the base of the cookie up to the eyeball center.
Why You’ll Love It
Cake mix hacks save so much time during busy holiday prep, IMO. You get that rich, cocoa-infused red velvet chewiness without measuring out ten different dry ingredients. They look delightfully gory on a dessert spread!
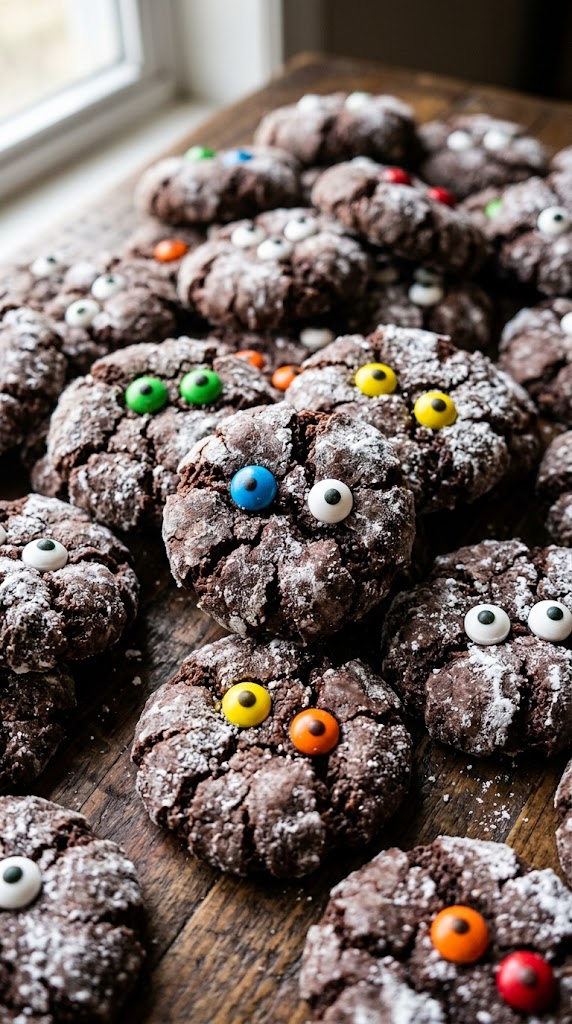
3. Triple Chocolate Monster Crinkle Cookies
Deep chocolate crinkle cookies that fracture open during baking to reveal vivid, colorful candy eyes hiding inside the dark cracks.
Ingredients
- 1 cup all-purpose flour
- ½ cup unsweetened Dutch-process cocoa powder
- 1 cup granulated sugar
- ½ cup vegetable oil
- 2 large eggs
- 1 tsp baking powder
- ½ cup powdered sugar (for rolling)
- 1 package candy googly eyes (various sizes)
Step-by-Step Instructions
- Whisk the cocoa powder, granulated sugar, and vegetable oil together in a bowl. Beat in the eggs one at a time.
- Stir in the flour and baking powder until fully combined. Cover and chill the dough in the fridge for at least 2 hours (do not skip chilling, or the cookies will flatten!).
- Roll dough into 1-inch balls, then roll them generously in the powdered sugar until completely coated white.
- Place on a parchment-lined pan and bake at 350°F (175°C) for 10–12 minutes.
- The moment you take them out of the oven, press 3 to 5 candy googly eyes into the warm, cracked crevices of each cookie.
Why You’ll Love It
Who doesn’t love a fudge-like chocolate cookie that melts in your mouth? The contrast between the dark cocoa, stark white powdered coating, and misaligned goofy candy eyes gives these a hilarious, spooky charm that kids and adults go crazy for.
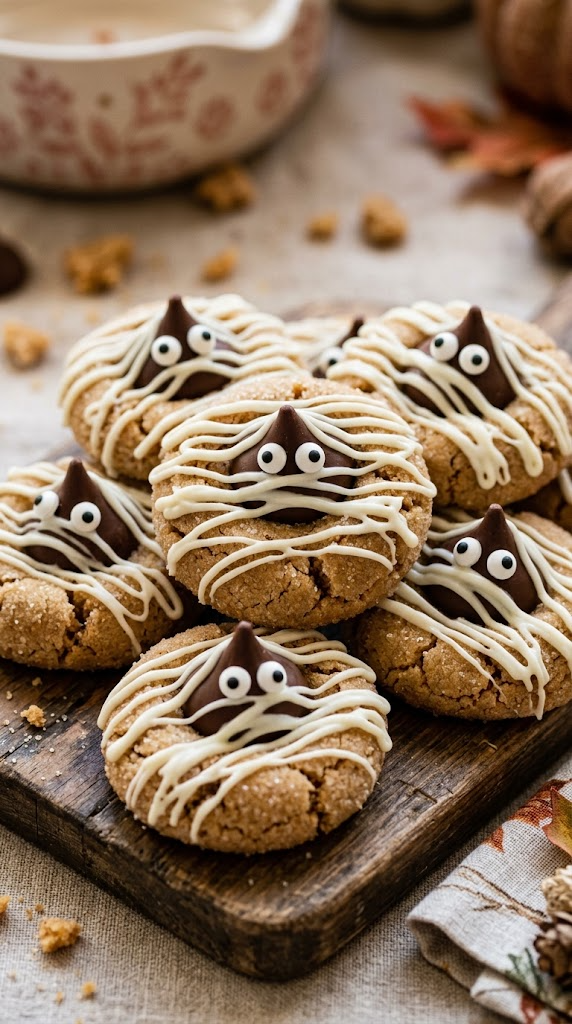
4. Peanut Butter Mummy Blossom Cookies
A spooky spin on the classic peanut butter blossom! Soft peanut butter cookies wrapped in white chocolate mummy bandages with glowing little candy eyes peeking out.
Ingredients
- 1 cup creamy peanut butter
- ½ cup granulated sugar
- ½ cup packed light brown sugar
- 1 large egg
- 1 tsp vanilla extract
- 1 ¾ cups all-purpose flour
- 1 tsp baking soda
- 24 milk chocolate kisses, unwrapped
- ½ cup white chocolate chips (melted)
- 48 mini candy eyes
Step-by-Step Instructions
- Cream the creamy peanut butter, granulated sugar, and brown sugar together until fluffy. Add the egg and vanilla extract.
- Stir in the flour and baking soda until a thick peanut butter dough forms.
- Roll into 1-inch balls, toss in extra granulated sugar if desired, and bake at 375°F (190°C) for 8–10 minutes.
- Immediately press a milk chocolate kiss into the center of each cookie as soon as they leave the oven. Cool completely.
- Melt the white chocolate chips and transfer to a zip-top bag with a tiny corner snipped off.
- Pipe crisscross white chocolate lines over the cookie and chocolate kiss to look like mummy bandages, attaching two mini candy eyes right in the middle!
Why You’ll Love It
Salted peanut butter combined with rich milk chocolate is a timeless combo. The white chocolate drizzle adds just enough extra sweetness without overpowering the nutty cookie base. They look impressively detailed despite taking minimal effort to decorate.
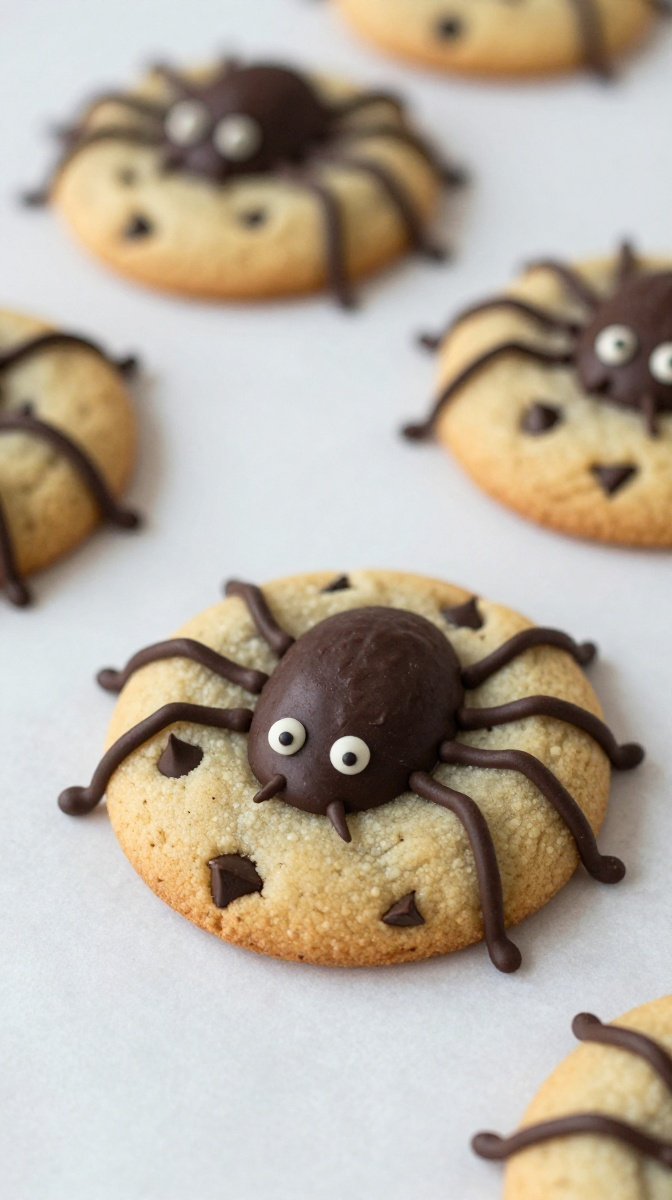
5. Creepy Crawly Chocolate Chip Spider Cookies
Classic golden chocolate chip cookies hijacked by fuzzy-looking chocolate spiders crawling across the surface.
Ingredients
- ¾ cup unsalted butter, melted
- ¾ cup brown sugar
- ½ cup granulated sugar
- 1 large egg + 1 egg yolk
- 2 cups all-purpose flour
- ½ tsp baking soda
- 1 ½ cups semi-sweet chocolate chips (divided)
Step-by-Step Instructions
- Whisk the melted butter, brown sugar, and granulated sugar until smooth. Beat in the egg, egg yolk, and vanilla.
- Fold in the flour, baking soda, and 1 cup of chocolate chips.
- Scoop thick dough mounds onto your baking sheet and bake at 325°F (165°C) for 12–14 minutes until the edges are golden brown.
- As soon as the cookies come out, press 3–4 whole chocolate chips upside-down into the top of each hot cookie to serve as the spider bodies.
- Melt the remaining ½ cup of chocolate chips. Pipe tiny spider legs extending outward from each chocolate chip body using a toothpick or fine piping tip.
Why You’ll Love It
You don’t need fancy skills or expensive molds to pull off a killer Halloween treat. Everyone loves a warm, gooey chocolate chip cookie, and the subtle spider detail makes people hesitate just long enough for a quick laugh before taking a bite.
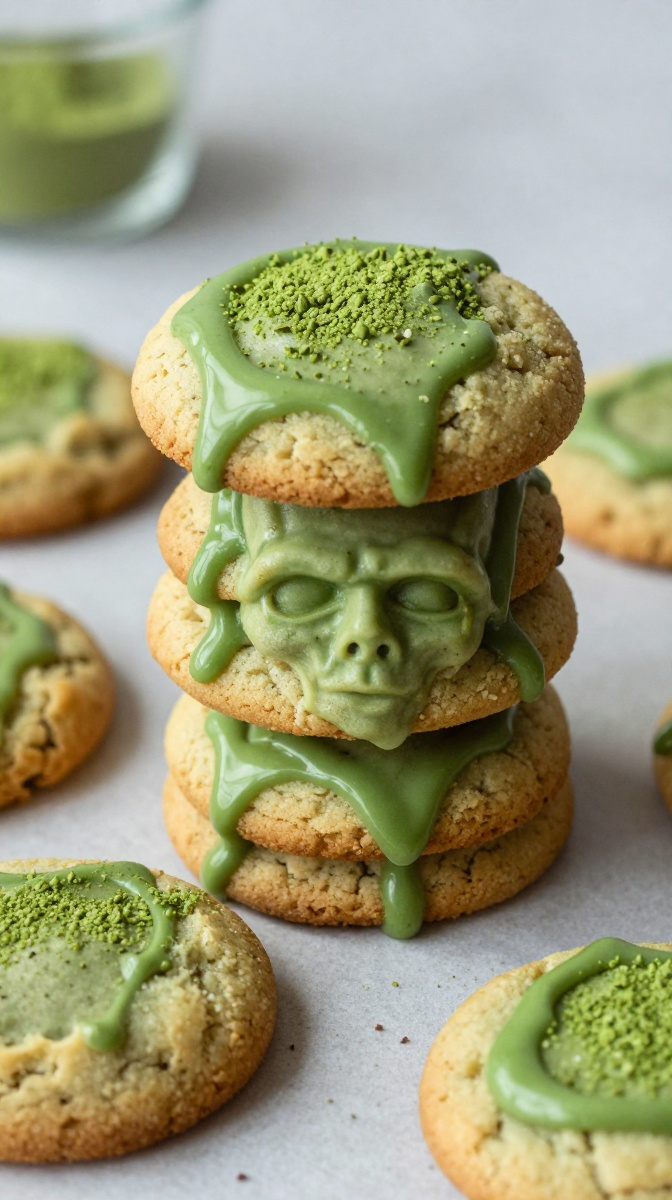
6. Toxic Waste Matcha Frankenstein Cookies
Bright green matcha sugar cookies styled like Frankenstein’s monster, complete with dark chocolate stitches, jagged hair, and glowing eyes.
Ingredients
- 1 cup unsalted butter, room temperature
- 1 cup granulated sugar
- 1 large egg
- 2 ½ cups all-purpose flour
- 2 tbsp culinary-grade matcha green tea powder
- ½ tsp baking powder
- 1 cup dark chocolate melting wafers
- 1 package medium candy eyes
Step-by-Step Instructions
- Beat the butter and granulated sugar until fluffy. Add the egg.
- Sift together the flour, matcha powder, and baking powder. Slowly mix into the wet ingredients until a vibrant green dough forms.
- Roll dough out to ½-inch thickness and cut into rectangular shapes. Bake at 350°F (175°C) for 10–11 minutes. Let cool.
- Melt the dark chocolate wafers. Dip the top edge of each rectangular cookie into the chocolate to create Frankenstein’s jagged hair.
- Pipe dark chocolate stitches across the forehead and cheeks, then use a tiny dab of chocolate to stick two candy eyes onto each face.
Why You’ll Love It
Matcha provides a gorgeous, natural green hue without needing half a bottle of artificial food dye! The earthy, slightly bitter green tea taste cuts through the sweet chocolate perfectly, making this option a hit for sophisticated palates.
7. Bloody Glass Shard Sugar Cookies
Crisp sugar cookies topped with jagged pieces of “shattered glass” made from clear hard candy, drenched in a tart blood-red raspberry drizzle.

Ingredients
- 1 batch pre-made sugar cookie dough (or homemade)
- 1 cup clear mints or hard glass candies (like Fox’s or Isomalt)
- ½ cup red raspberry gel icing or cherry dessert syrup
- 1 tbsp powdered sugar
Step-by-Step Instructions
- Roll out your sugar cookie dough and cut into round circles. Bake at 350°F (175°C) for 10–12 minutes until pale golden. Cool completely.
- Crush the clear hard candies inside a heavy-duty zip-top bag using a rolling pin until you have sharp, jagged fragments.
- Lightly dust the top of each cooled cookie with powdered sugar for a pale background.
- Carefully press 2–3 sharp “glass” candy shards upright into the top surface of each cookie.
- Generously splatter or drip the red raspberry gel around the base of the glass shards so it looks like fresh blood dripping down the cookie!
Why You’ll Love It
These look straight out of a Hollywood horror set! The crunch of the candy glass paired with the soft sugar cookie and tart raspberry gel gives you an amazing texture contrast. FYI, these will definitely be the most photographed item on your snack table.
Wrapping Up the Spooky Snack Fest
Halloween baking doesn’t have to mean choosing between cool designs and great taste. These seven recipes deliver high visual impact while keeping the flavor front and center.
Whether you want the quick assembly of the Creepy Crawly Spider Cookies or the jaw-dropping realism of the Severed Witch Fingers, there is a recipe here to elevate your Halloween dessert game. Grab your apron, pick a recipe, and get ready to impress every ghost and ghoul in your neighborhood! 🙂