
Halloween baking has a very specific kind of magic. You can take an ordinary batch of cookies or cupcakes, add a few candy eyes, some chocolate, and a little dramatic decorating, and suddenly dessert looks like it belongs in a haunted bakery. And honestly, that’s exactly why I love Halloween baking.
You don’t need professional decorating skills or a kitchen full of fancy equipment. These 8 Halloween baking ideas keep things simple, delicious, and fun enough for kids to help. Whether you’re planning a Halloween party, making treats for school, or just want something festive for movie night, you’ll find something worth baking here.
I’ve also kept the recipes practical. No ingredient list that requires a treasure hunt through five grocery stores. No decorating technique that makes you question your life choices. Just spooky treats that actually taste as good as they look. 🙂
1. Spooky Halloween Monster Cookies
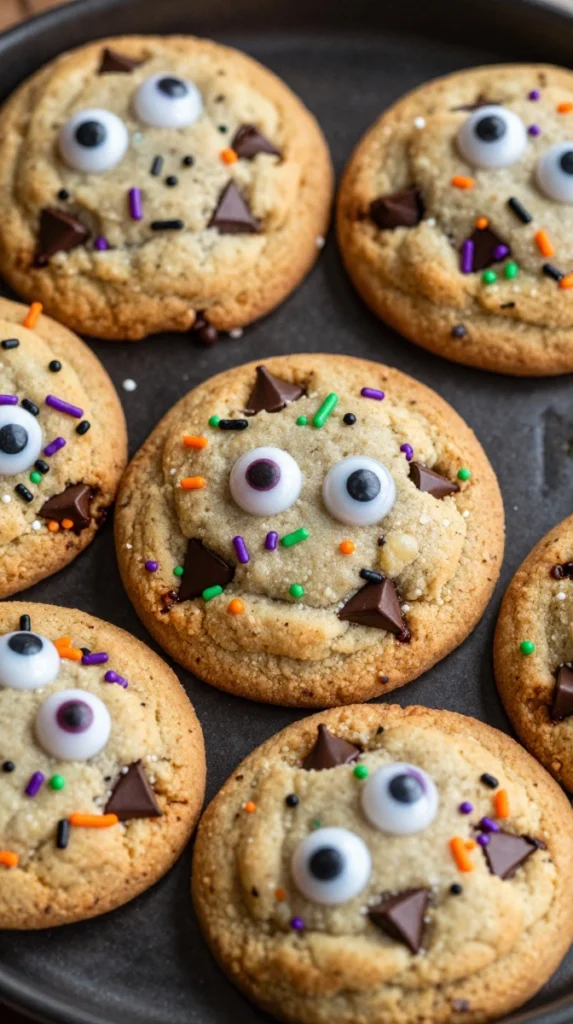
Soft, chewy cookies with chocolate chips, candy eyes, and colorful sprinkles? Yes, please. These Halloween monster cookies look wonderfully chaotic, which means you don’t have to decorate them perfectly.
The best part? Kids can take over the decorating while you enjoy a very deserved coffee.
Ingredients
- 2 ¼ cups all-purpose flour
- 1 teaspoon baking soda
- ½ teaspoon salt
- ¾ cup unsalted butter, softened
- ¾ cup brown sugar
- ½ cup granulated sugar
- 1 large egg
- 1 teaspoon vanilla extract
- 1 cup chocolate chips
- ½ cup Halloween-colored sprinkles
- Candy eyeballs
Step-by-Step Instructions
- Preheat your oven to 350°F (175°C) and line a baking sheet with parchment paper.
- Whisk together the flour, baking soda, and salt in a medium bowl.
- Beat the softened butter with both sugars until creamy and fluffy.
- Add the egg and vanilla extract, then mix until smooth.
- Gradually add the dry ingredients and mix just until the dough comes together.
- Fold in the chocolate chips and Halloween sprinkles.
- Scoop the dough onto the prepared baking sheet, leaving plenty of space between each cookie.
- Press a few candy eyes into each dough ball.
- Bake for 9–12 minutes, until the edges turn lightly golden.
- Let the cookies cool on the baking sheet for a few minutes before transferring them to a rack.
Why You’ll Love It
These cookies stay soft in the center while the chocolate chips create little pockets of gooey goodness. I prefer adding the candy eyes before baking because they stick nicely to the dough.
For an extra spooky batch, use orange, purple, black, and green sprinkles. And don’t worry if every monster looks different—that actually makes them more fun.
2. Ghostly Chocolate Cupcakes
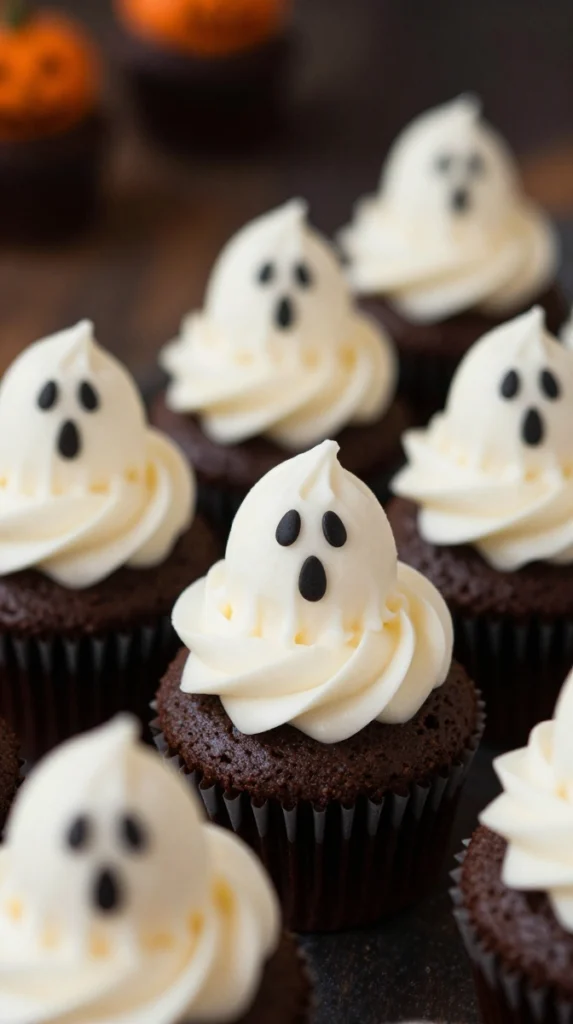
Want a Halloween dessert that gets an instant “aww” from the crowd? Make these ghost cupcakes.
Rich chocolate cupcakes get topped with fluffy white frosting and tiny candy eyes. They look fancy enough for a party but require surprisingly little effort.
Ingredients
For the cupcakes:
- 1 ½ cups all-purpose flour
- ¾ cup cocoa powder
- 1 ½ teaspoons baking powder
- ½ teaspoon baking soda
- ½ teaspoon salt
- 1 cup sugar
- 2 large eggs
- ½ cup vegetable oil
- 1 teaspoon vanilla extract
- ¾ cup milk
- ½ cup hot water
For the frosting:
- 1 cup unsalted butter, softened
- 3 cups powdered sugar
- 2 teaspoons vanilla extract
- 2–3 tablespoons milk
- Candy eyeballs
Step-by-Step Instructions
- Heat your oven to 350°F (175°C) and place cupcake liners into a muffin tin.
- Combine the flour, cocoa powder, baking powder, baking soda, and salt.
- In another bowl, whisk the sugar, eggs, oil, and vanilla.
- Add the dry ingredients gradually, alternating with the milk.
- Slowly mix in the hot water. The batter will look thin, but that’s exactly what you want.
- Fill each cupcake liner about two-thirds full.
- Bake for 18–22 minutes.
- Cool the cupcakes completely before decorating.
- Beat the butter until creamy, then gradually add powdered sugar.
- Add vanilla and enough milk to create a thick but pipeable frosting.
- Pipe tall swirls of frosting onto each cupcake to create ghost shapes.
- Add two candy eyes to each ghost.
Why You’ll Love It
The chocolate cupcake tastes rich without becoming overly sweet, while the fluffy frosting balances everything nicely.
FYI, don’t frost warm cupcakes. I learned that lesson the messy way once, and my “ghosts” looked more like melted snowmen.
3. Halloween Spiderweb Brownies
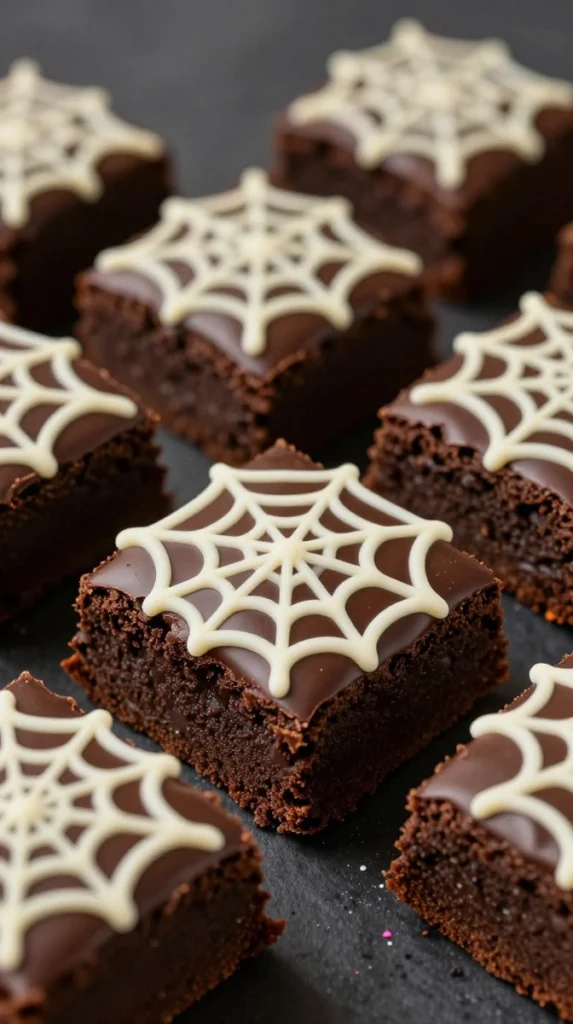
If you love fudgy brownies, stop scrolling. These Halloween spiderweb brownies turn a basic chocolate dessert into a centerpiece with almost zero decorating stress.
The spiderweb design looks impressive, but you only need melted white chocolate or icing and a toothpick.
Ingredients
- 1 cup unsalted butter
- 2 cups granulated sugar
- 4 large eggs
- 1 teaspoon vanilla extract
- 1 cup all-purpose flour
- ¾ cup cocoa powder
- ½ teaspoon salt
- 1 cup chocolate chips
- ½ cup white chocolate, melted
Step-by-Step Instructions
- Preheat your oven to 350°F (175°C).
- Line a square baking pan with parchment paper.
- Melt the butter and let it cool slightly.
- Whisk in the sugar, eggs, and vanilla.
- Add the flour, cocoa powder, and salt.
- Fold in the chocolate chips.
- Spread the batter evenly into the prepared pan.
- Bake for 25–30 minutes.
- Let the brownies cool completely.
- Melt the white chocolate and drizzle it in several circles over the brownie surface.
- Drag a toothpick from the center toward the edge at regular intervals.
- Chill briefly so the web design sets before slicing.
Why You’ll Love It
These brownies give you that perfect combination of crispy edges and fudgy centers. The white chocolate spiderweb also adds a little sweetness without drowning out the chocolate.
For a darker Halloween look, sprinkle a tiny amount of black or dark chocolate cookie crumbs around the edges. Spooky without turning the brownie into a craft project.
4. Creepy Mummy Sugar Cookies
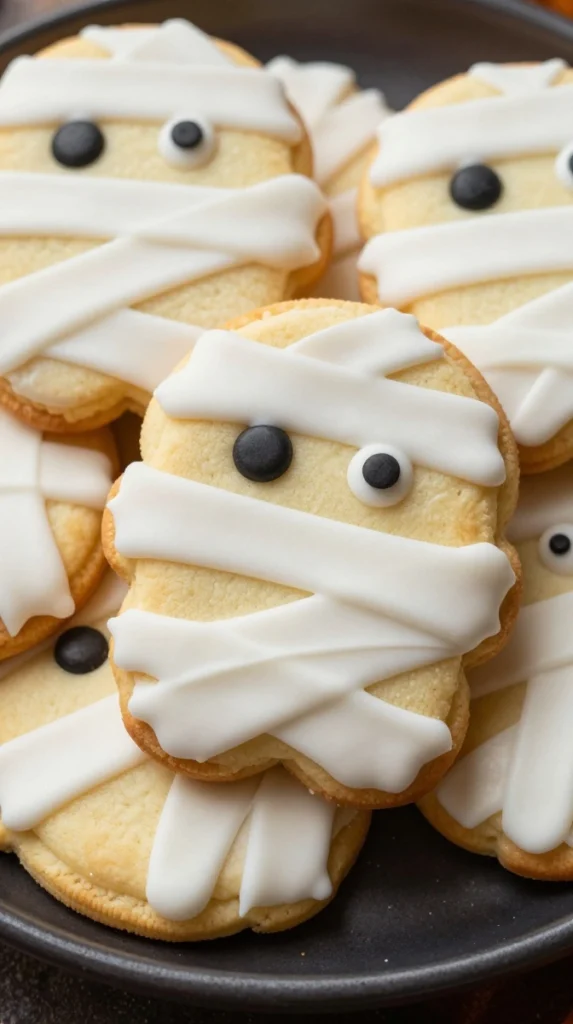
These mummy sugar cookies prove that imperfect decorating can actually work in your favor.
You’ll cover simple sugar cookies with messy-looking strips of white icing and finish them with candy eyes. The messier the icing lines, the more mummy-like they look. Finally, a decorating technique that rewards chaos.
Ingredients
- 2 ¾ cups all-purpose flour
- 1 teaspoon baking powder
- ½ teaspoon salt
- 1 cup unsalted butter, softened
- 1 cup granulated sugar
- 1 large egg
- 2 teaspoons vanilla extract
- 2 cups powdered sugar
- 2–3 tablespoons milk
- ½ teaspoon vanilla extract
- Candy eyeballs
Step-by-Step Instructions
- Mix flour, baking powder, and salt in a bowl.
- Beat butter and sugar until light and creamy.
- Add the egg and vanilla.
- Slowly mix in the dry ingredients.
- Chill the dough for about 30 minutes.
- Roll the dough onto a lightly floured surface.
- Cut it into rectangles or oval shapes.
- Bake at 350°F (175°C) for 8–10 minutes.
- Cool the cookies completely.
- Whisk powdered sugar, milk, and vanilla until smooth.
- Pipe thin, uneven lines across each cookie.
- Add two candy eyes before the icing sets.
Why You’ll Love It
The cookies taste buttery and lightly sweet, while the icing adds just enough extra sweetness.
You can also use chocolate cookie dough for darker mummy cookies. IMO, chocolate mummies look especially dramatic on a Halloween dessert table.
5. Pumpkin Spice Halloween Muffins
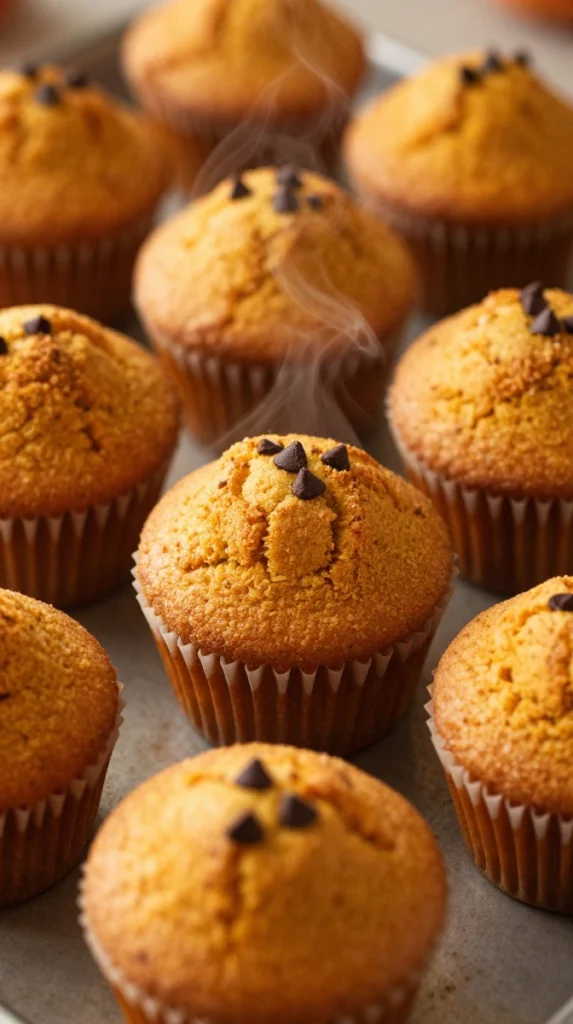
Not every Halloween dessert needs candy eyeballs. Sometimes you just want something warm, cozy, and packed with pumpkin spice.
These Halloween pumpkin muffins bring all those fall flavors into a soft, tender bake that works beautifully for breakfast, brunch, or dessert.
Ingredients
- 1 ¾ cups all-purpose flour
- 1 teaspoon baking soda
- ½ teaspoon baking powder
- ½ teaspoon salt
- 1 ½ teaspoons pumpkin pie spice
- 1 cup pumpkin puree
- ½ cup brown sugar
- ½ cup granulated sugar
- 2 large eggs
- ½ cup vegetable oil
- 1 teaspoon vanilla extract
- ½ cup chocolate chips
Step-by-Step Instructions
- Preheat your oven to 350°F (175°C).
- Line a muffin tin with paper liners.
- Whisk flour, baking soda, baking powder, salt, and pumpkin spice.
- In another bowl, mix pumpkin, both sugars, eggs, oil, and vanilla.
- Add the dry mixture to the wet mixture.
- Stir gently until combined.
- Fold in the chocolate chips.
- Divide the batter evenly among the muffin cups.
- Bake for 18–22 minutes.
- Check the center with a toothpick before removing the muffins.
- Cool for several minutes before serving.
Why You’ll Love It
These muffins taste like autumn in the best possible way. Pumpkin keeps the crumb moist, while cinnamon-heavy pumpkin spice gives every bite that cozy fall flavor.
For Halloween morning, serve them warm with butter. Nobody needs to know you ate one before breakfast officially started.
6. Witch Finger Shortbread Cookies

These witch finger cookies look creepy enough to make people hesitate before grabbing one—and then they grab three.
Buttery shortbread creates the perfect base because you can shape it easily without complicated dough work.
Ingredients
- 1 cup unsalted butter, softened
- ¾ cup powdered sugar
- 1 teaspoon vanilla extract
- 2 ¼ cups all-purpose flour
- ¼ teaspoon salt
- Whole almonds
- Red or strawberry jam
- Green food coloring, optional
Step-by-Step Instructions
- Beat the butter and powdered sugar until smooth.
- Add vanilla and mix well.
- Gradually add flour and salt.
- Add a small amount of green food coloring if you want witchy green fingers.
- Chill the dough for 20–30 minutes.
- Divide the dough into small portions.
- Roll each portion into a finger-like shape.
- Press an almond onto one end to create the fingernail.
- Use a knife to make small lines around the knuckles.
- Bake at 350°F (175°C) for about 10–12 minutes.
- Cool completely.
- Add a little red jam around the almond for a creepy finishing touch.
Why You’ll Love It
These cookies deliver a buttery, crumbly texture with a fun Halloween presentation.
The trick involves keeping the dough fairly thick. If you make the fingers too thin, they can spread during baking and turn into strange green sticks. Trust me, nobody wants witch twigs.
7. Halloween Graveyard Chocolate Cake
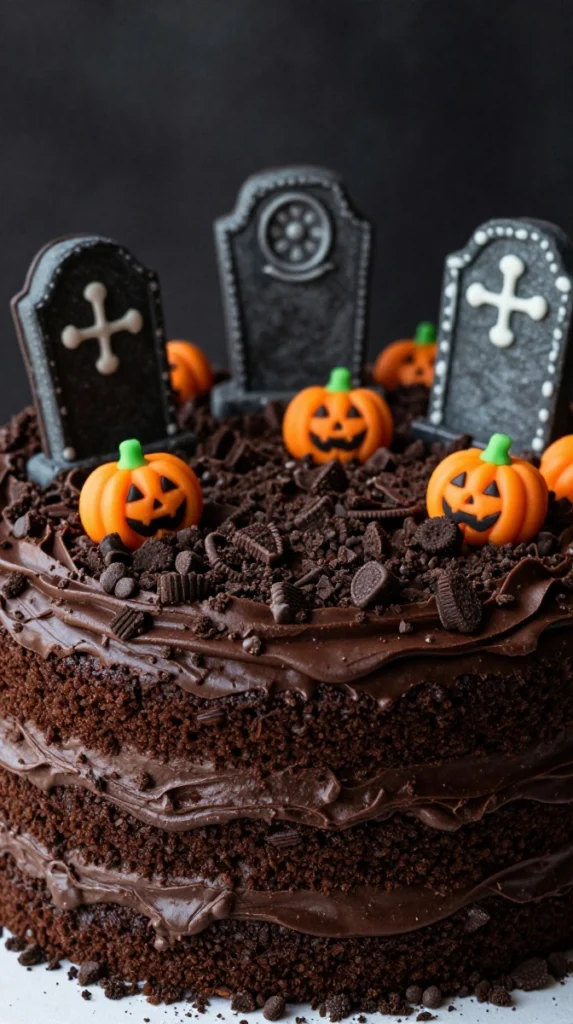
Ready for a Halloween dessert that makes a serious statement?
This Halloween graveyard cake layers rich chocolate cake with creamy frosting, crushed chocolate cookies, and simple cookie tombstones. It looks elaborate, but most of the decoration involves strategically placing cookies. My favorite kind of strategy.
Ingredients
For the cake:
- 2 cups all-purpose flour
- ¾ cup cocoa powder
- 1 ½ cups sugar
- 1 ½ teaspoons baking powder
- 1 teaspoon baking soda
- ½ teaspoon salt
- 2 eggs
- 1 cup milk
- ½ cup vegetable oil
- 1 teaspoon vanilla
- 1 cup hot water
For decoration:
- Chocolate frosting
- Chocolate sandwich cookies, crushed
- Shortbread cookies
- White decorating icing
- Candy pumpkins, optional
- Chocolate chips
Step-by-Step Instructions
- Preheat your oven to 350°F (175°C).
- Grease and line two round cake pans.
- Mix the flour, cocoa, sugar, baking powder, baking soda, and salt.
- Add eggs, milk, oil, and vanilla.
- Mix until smooth.
- Add hot water slowly and stir carefully.
- Divide the batter between the pans.
- Bake for 25–30 minutes.
- Cool both cake layers completely.
- Place one cake layer on a serving plate and cover it with frosting.
- Add the second layer and frost the entire cake.
- Crush chocolate sandwich cookies and press them around the top to create “dirt.”
- Cut shortbread cookies into tombstone shapes.
- Write spooky messages such as “RIP” using white icing.
- Push the cookie tombstones into the cake.
- Add candy pumpkins or chocolate pieces for extra decoration.
Why You’ll Love It
This cake combines rich chocolate flavor with creamy frosting and crunchy cookie “dirt.”
You can also turn the decorating into a family activity. Give everyone a few cookies and let them create their own tombstones. Just prepare for at least one “Here Lies Dad” cookie. It’s basically inevitable.
8. Chocolate-Dipped Halloween Pretzel Rods

Need a Halloween baking idea that takes almost no time? These chocolate-dipped Halloween pretzel rods have your back.
Technically, you’re not doing much baking here, but who cares? Halloween dessert rules clearly allow shortcuts when the result looks this good.
Ingredients
- 12 large pretzel rods
- 2 cups chocolate chips or melting chocolate
- ½ cup white chocolate
- Halloween sprinkles
- Candy eyeballs
- Mini chocolate candies, optional
Step-by-Step Instructions
- Line a baking sheet with parchment paper.
- Melt the chocolate in short microwave intervals, stirring between each one.
- Dip each pretzel rod into the melted chocolate.
- Let excess chocolate drip back into the bowl.
- Place the coated pretzels on parchment.
- Melt the white chocolate.
- Drizzle it over the pretzels using a spoon or piping bag.
- Add Halloween sprinkles while the chocolate remains wet.
- Press candy eyes into the chocolate for a monster effect.
- Refrigerate for 15–20 minutes, until completely set.
Why You’ll Love It
These treats combine salty, crunchy pretzels with rich chocolate, so they avoid the overly sweet problem that sometimes happens with Halloween desserts.
They also make fantastic party favors. Wrap individual pretzel rods in clear bags and tie them with Halloween ribbon. Easy, cute, and far less stressful than making 50 decorated cupcakes.
FAQ’s
You don’t need to transform your kitchen into a professional pastry studio to make impressive Halloween treats. A few simple tricks can make everything look much more polished.
1. Keep Candy Eyes Handy
Candy eyeballs can turn almost anything into a Halloween dessert. Cookies, cupcakes, brownies, pretzels, and even muffins can get an instant spooky makeover.
2. Don’t Overdecorate
Halloween desserts already have plenty of personality. A few sprinkles and candy eyes often look better than covering every inch with decorations.
3. Let Baked Goods Cool Completely
This sounds obvious, but it matters. Warm cookies can spread, warm cupcakes can destroy frosting, and warm cakes can turn decorating into a sticky disaster.
Give everything time to cool.
4. Mix Textures
A good Halloween dessert should taste interesting, not just look spooky.
Try combining:
- Soft cake with crunchy cookies
- Fudgy brownies with creamy frosting
- Buttery cookies with sweet icing
- Salty pretzels with rich chocolate
That sweet-and-salty contrast can make simple treats surprisingly addictive.
5. Use Store-Bought Shortcuts
Nobody awards medals for making every ingredient from scratch.
Use ready-made frosting, cake mix, cookies, or melting chocolate when you need to save time. Spend your energy on the parts that actually make the dessert special.
How to Plan a Halloween Dessert Table
If you’re making several of these Halloween baking ideas for a party, don’t make everything on the same day.
Bake cookies and brownies a day ahead, then decorate them later. You can also prepare cake layers ahead of time and frost them on the day of your event.
For a fun dessert table, combine different shapes, colors, and textures:
- Monster cookies for something colorful
- Ghost cupcakes for a cute centerpiece
- Spiderweb brownies for chocolate lovers
- Mummy cookies for spooky fun
- Pumpkin muffins for cozy fall flavor
- Witch fingers for creepy presentation
- Graveyard cake as the main attraction
- Chocolate pretzels for an easy grab-and-go treat
That gives your guests plenty of choices without forcing you to make eight complicated desserts at once.
Final Thoughts
Halloween baking should feel fun, not like a three-day endurance challenge.
These 8 Halloween baking ideas give you plenty of ways to create spooky, delicious treats without needing advanced decorating skills. From fudgy spiderweb brownies and ghost cupcakes to creepy witch fingers and a dramatic graveyard cake, each recipe brings something different to the dessert table.
My personal picks? The spiderweb brownies win for chocolate lovers, while the mummy cookies win for easiest decorating. And if you need a last-minute party treat, those chocolate-dipped pretzel rods are almost impossible to mess up.
So grab the chocolate, sprinkle the table with a little flour, put on your favorite Halloween playlist, and start baking. After all, a little spooky chaos in the kitchen is practically part of the celebration. 🎃