
Picture this: you host a legendary spooky gathering, line your kitchen counter with appetizers, turn around to grab a drink, and poof—the food table is completely bare before 8:00 PM. That is the exact kind of high-stakes party drama we are going for today. Nobody wants to spend four hours meticulously hand-carving radishes into miniature human eyeballs just to watch them sit untouched next to a bowl of store-bought potato chips.
We need Halloween party snacks that strike the ultimate balance: dangerously delicious, visually stunning for your feed, and ridiculously simple to throw together. Whether you are feeding a horde of ravenous trick-or-treaters or hosting a classy midnight costume bash for adults, these eight crowd-pleasers guarantee empty platters. Grab a mug of hot spiced cider (or a giant glass of Pinot Noir 😉), and let’s whip up the ultimate festive lineup!
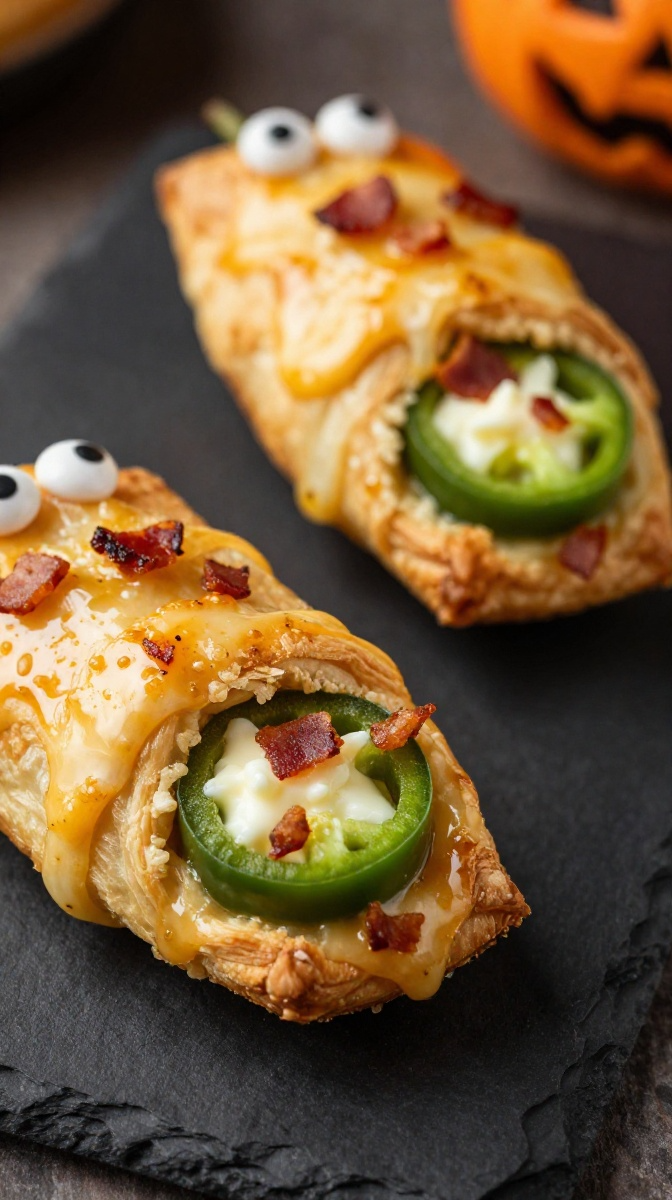
1. Cheesy Bacon Jalapeño Mummy Poppers
If you want an appetizer that vanishes the literal second you set the tray down, these spicy, bacon-laced mummy poppers reign supreme. They deliver the ultimate savory crunch with just enough kick to wake up everyone’s taste buds.
Image Prompt: Vertical 9:16 aspect ratio, dramatic close-up macro food photograph of Cheesy Bacon Jalapeño Mummy Poppers. Vibrant green jalapeño halves stuffed with melted white cream cheese and crispy bacon bits, wrapped artfully in golden-brown puff pastry strips with tiny candy eyes peeking out. 85% of the frame is dominated by the glossy, bubbling cheese and flaky, golden pastry texture resting on a dark slate board. Pinterest-trending aesthetic, moody festive Halloween party lighting, warm depth of field.
Ingredients
- 10 fresh jalapeño peppers, halved lengthwise and seeded
- 8 oz cream cheese, softened to room temperature
- 1 cup sharp cheddar cheese, finely shredded
- 4 slices crispy cooked bacon, finely crumbled
- 1/2 teaspoon garlic powder
- 1 sheet refrigerated puff pastry (or crescent dough sheet)
- 1 large egg (beaten for egg wash)
- 40 edible candy eyes (or sliced black olives)
Step-by-Step Instructions
- Preheat your oven to 400°F (200°C) and line a large baking sheet with parchment paper.
- Slice the jalapeños in half lengthwise and scrape out the seeds and ribs using a spoon. (Pro tip: Wear gloves unless you enjoy accidental eye-searing disaster later!).
- Beat the softened cream cheese, sharp cheddar cheese, crumbled bacon, and garlic powder together in a medium bowl until smooth.
- Spoon the cheesy filling generously into each hollowed jalapeño half.
- Unroll your puff pastry sheet and slice it into long, thin strips (about 1/8-inch wide) using a pizza cutter.
- Wrap 2 to 3 pastry strips around each stuffed jalapeño, crisscrossing the dough to look like mummy bandages while leaving a small opening for the face.
- Brush the pastry strips lightly with beaten egg wash and bake for 15 to 18 minutes until the dough puffs up golden-brown and the cheese bubbles.
- Press two candy eyes into the hot cheese opening immediately after pulling them from the oven.
Why You’ll Love It
The smoky bacon and rich cream cheese tame the heat of the jalapeños, giving you the perfect bite every single time. IMO, puff pastry works a thousand times better than crescent dough here because it bakes up way flakier and less doughy.
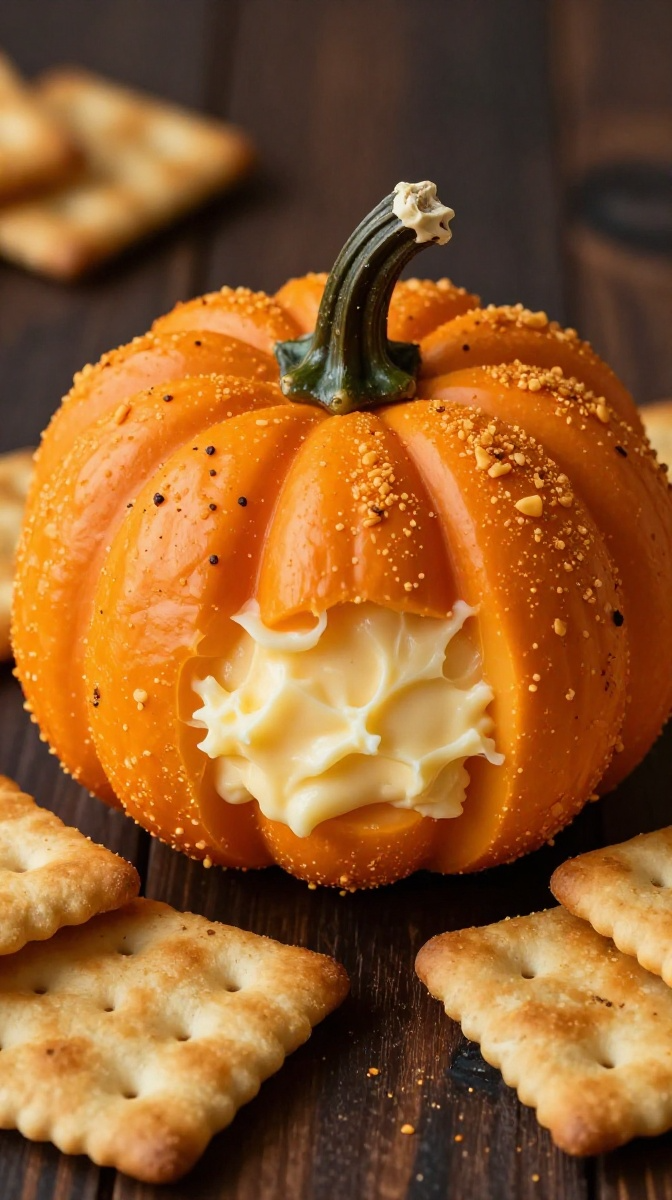
2. Loaded Pumpkin-Shaped Cheese Ball
A giant mound of savory cheddar, garlic, and bacon disguised as a adorable little pumpkin? Yes, please. It takes ten minutes of actual effort, but it looks like a centerpiece from a high-end catering menu.
Image Prompt: Vertical 9:16 aspect ratio, vibrant close-up macro photograph of a Pumpkin-Shaped Cheese Ball. A plump, bright orange cheese ball rolled in crushed Doritos with realistic pumpkin ridges, topped with a real bell pepper stem, surrounded by crunchy butter crackers. 85% food filling the vertical frame, rich cream cheese textures, sharp colorful contrast, moody dark wooden table background, eye-catching Pinterest food blog style.
Ingredients
- 16 oz cream cheese, softened
- 2 cups extra sharp cheddar cheese, finely shredded
- 1/2 cup crispy bacon bits
- 1/4 cup green onions, finely chopped
- 1/2 teaspoon smoked paprika
- 1/2 teaspoon onion powder
- 1 cup Nacho Cheese Doritos (or cheese crackers), finely crushed
- 1 whole bell pepper stem (saved from cooking)
- Assorted butter crackers and pretzel thins for serving
Step-by-Step Instructions
- Mix the softened cream cheese, shredded cheddar, bacon, green onions, smoked paprika, and onion powder in a large bowl until thoroughly combined.
- Scoop the mixture out onto a sheet of plastic wrap and shape it into a smooth, compact ball.
- Wrap the plastic wrap tightly around the cheese ball.
- Wrap 4 thick rubber bands around the plastic-wrapped ball vertically to press deep, pumpkin-like indents along the sides.
- Chill in the refrigerator for at least 2 hours (or overnight) so it holds its shape.
- Remove the rubber bands and plastic wrap, then roll the firm cheese ball in crushed Doritos until completely coated in vibrant orange crumbs.
- Press the bell pepper stem right into the top center to complete the illusion and serve with crackers.
Why You’ll Love It
You get a rich, smoky, bite-sized appetizer spread that guests cannot stop slathering onto crackers. I once tried making this with store-bought cheddar powder instead of Doritos, but trust me—the chip coating delivers a far superior crunch!
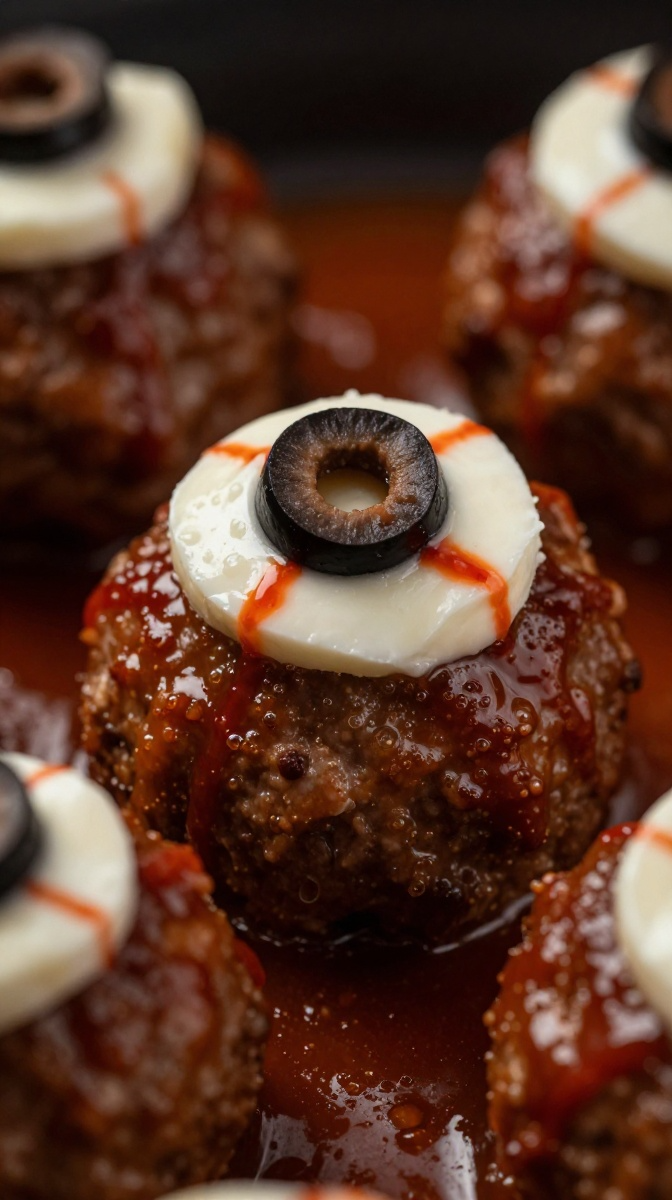
3. Smoky BBQ Meatball “Eyeballs”
When party guests graze on snacks all night, they crave real, hearty protein. These glazed BBQ meatballs dress up like creepy eyeballs, making them as fun to look at as they are satisfying to eat.
Image Prompt: Vertical 9:16 aspect ratio, dramatic close-up macro photograph of Smoky BBQ Meatball Eyeballs. Juicy, glazed Italian meatballs topped with a melted round slice of white mozzarella, a dark black olive pupil, and thin red sriracha blood veins. 90% of the frame filled with glossy, bubbling sauce and savory meatball textures, dark gothic moody food photography style, warm party lighting.
Ingredients
- 24 fully cooked frozen Italian meatballs (thawed)
- 1 1/2 cups smoky sweet BBQ sauce
- 1/2 cup cranberry sauce (or cherry preserves for a tang)
- 12 slices provolone or mozzarella cheese
- 12 pitted black olives, sliced into thin rings
- 2 tablespoons Sriracha sauce or ketchup (for details)
Step-by-Step Instructions
- Combine the meatballs, BBQ sauce, and cranberry sauce in a slow cooker or large skillet over medium heat until heated through and glossy (about 15 minutes).
- Punch out 24 small round circles from your cheese slices using a small round cookie cutter or the wide end of a piping tip.
- Place a hot glazed meatball onto a serving platter or individual appetizer spoons.
- Lay a cheese circle on top of each meatball so it melts slightly from the heat.
- Top each cheese circle with a black olive ring to create the pupil.
- Dip a toothpick in Sriracha and trace tiny squiggly lines across the white cheese to mimic bloodshot veins.
Why You’ll Love It
The combination of tart cranberry and smoky BBQ sauce creates a glaze that hits every single tastebud. They stay warm and juicy in a slow cooker all night long, which means zero stress for you once the party starts. 🙂
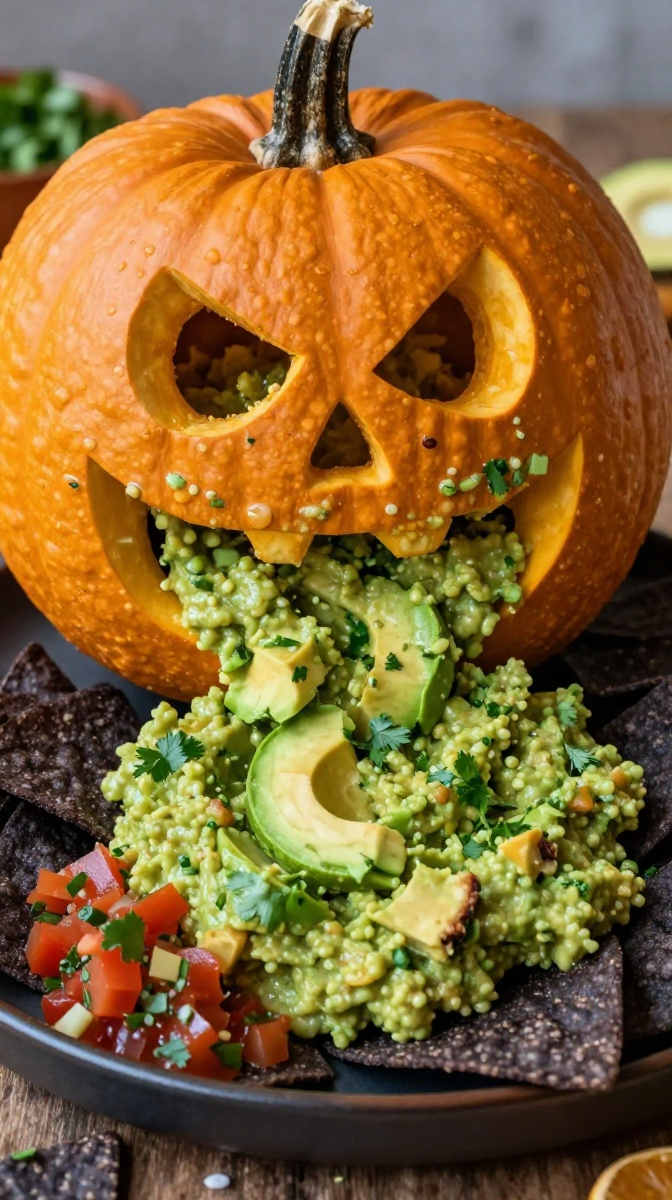
4. Spooky Guacamole “Vomit” Monster Platter
Let’s be honest: Halloween is the one time of year when gross-sounding food is a massive hit. This hilarious guacamole setup gets endless laughs and doubles as the ultimate dipping station.
Image Prompt: Vertical 9:16 aspect ratio, ultra close-up food photograph of a Halloween Guacamole Monster Platter. A carved miniature pumpkin spilling rich, chunky green guacamole onto a dark platter, surrounded by black blue-corn tortilla chips and salsa. 85% food filling the frame, extreme texture details on the fresh avocado, cilantro, and crispy tortilla chips, rustic table surface, Pinterest viral food photography style.
Ingredients
- 1 small sugar pumpkin or hollowed-out butternut squash
- 4 ripe avocados, pitted and peeled
- 1/2 cup white onion, finely diced
- 1/2 cup fresh cilantro, chopped
- 1 large Roma tomato, seeded and diced
- 1 lime, juiced
- 1 teaspoon sea salt
- 1 bag blue corn tortilla chips (for maximum color contrast)
Step-by-Step Instructions
- Clean the outside of your small pumpkin and carve a goofy, wide-open monster mouth near the bottom third.
- Scoop out all the seeds and guts inside the pumpkin so it sits flat on a wide serving board.
- Mash the ripe avocados in a bowl, leaving a few chunky bits for optimal texture.
- Fold in the diced onion, fresh cilantro, diced tomato, lime juice, and sea salt until mixed thoroughly.
- Position your carved pumpkin on the edge of a large platter.
- Spoon some guacamole inside the pumpkin mouth, letting the majority spill out across the platter like a green river.
- Surround the guacamole stream with dark blue corn tortilla chips for dipping.
Why You’ll Love It
Who doesn’t love a interactive dip that makes people crack up before they even take a bite? The fresh, zesty flavor balances out all the heavy cheese and candy floating around your kitchen.
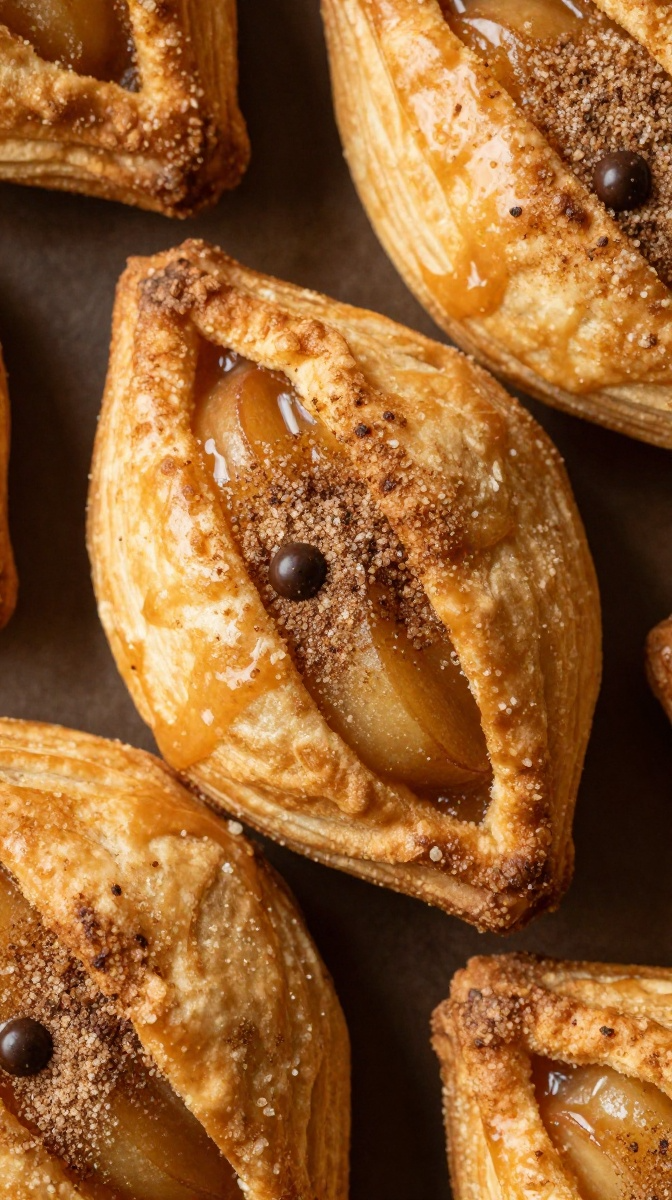
5. Cinnamon Sugar Mummy Apple Hand Pies
Need a sweet treat that doesn’t feel like a total candy overload? These flaky, warm apple hand pies give you all the cozy fall vibes of a classic autumn bakery with a cheeky, spooky design.
Image Prompt: Vertical 9:16 aspect ratio, macro overhead close-up shot of Cinnamon Sugar Mummy Apple Hand Pies. Golden, flaky pie crust strips wrapped over a rich caramel apple filling, sprinkled with sparkling coarse cinnamon sugar, featuring melted chocolate eyes. 90% of the image frame covered by warm bakery pastries, crispy crust texture, warm golden lighting, dark moody background.
Ingredients
- 2 sheets pre-made refrigerated pie crust
- 2 cups Granny Smith apples, peeled and finely diced
- 2 tablespoons un salted butter
- 3 tablespoons brown sugar
- 1 teaspoon ground cinnamon
- 1/2 teaspoon vanilla extract
- 1 egg (whisked with 1 tbsp water for egg wash)
- 2 tablespoons coarse sparkling sugar
- Melted dark chocolate (for piping eyes)
Step-by-Step Instructions
- Melt the butter in a saucepan over medium heat, then cook the diced apples, brown sugar, and cinnamon for 6 to 8 minutes until softened. Stir in the vanilla and cool completely.
- Roll out one pie crust sheet and cut out 8 large rectangles (about 3×4 inches) to serve as your bottom bases.
- Unroll the second pie crust sheet and cut it into thin, uneven 1/4-inch strips using a pastry wheel or knife.
- Spoon 2 tablespoons of cooled apple filling onto the center of each pie crust base, leaving a 1/4-inch border around the edges.
- Lay pie crust strips crisscross across the apple filling to create mummy wrappings, pressing the ends tightly into the base edges to seal.
- Brush the tops with egg wash, sprinkle generously with coarse cinnamon sugar, and bake at 400°F (200°C) for 15 to 18 minutes until deep golden brown.
- Pipe two dots of melted dark chocolate onto the exposed filling after cooling to create eyes.
Why You’ll Love It
You get all the rich, buttery flavor of an authentic homemade apple pie in a portable, single-serve format. FYI, swapping Granny Smith for Honeycrisp apples works nicely if you prefer a sweeter, less tart pie filling!
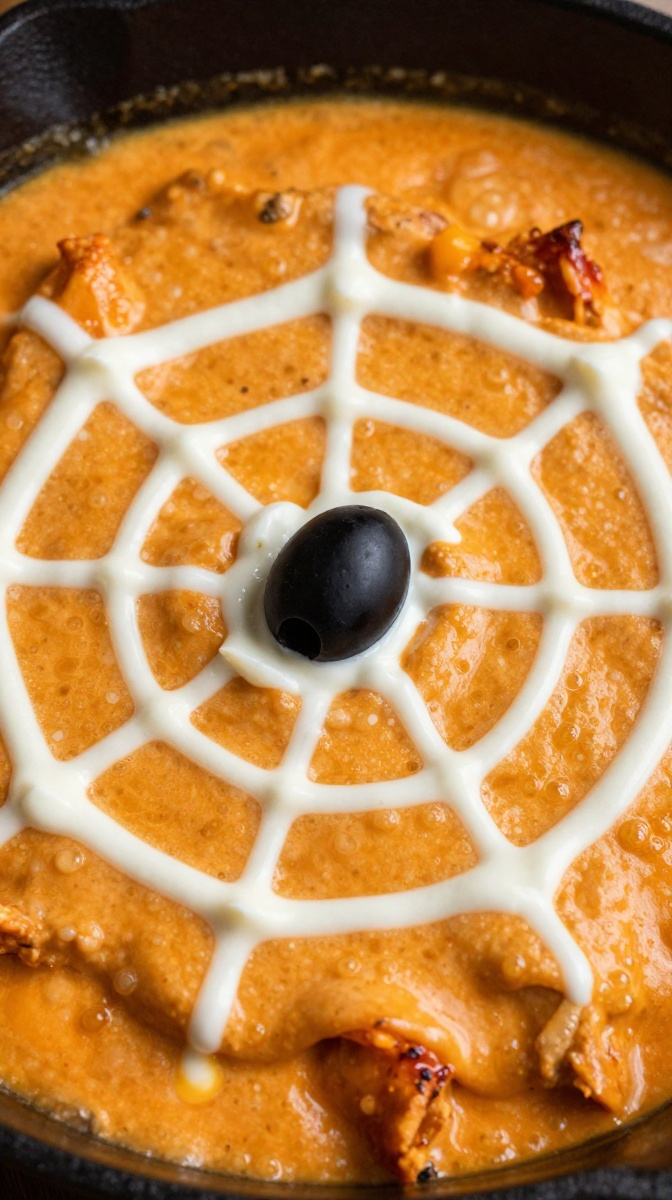
6. Buffalo Chicken “Spiderweb” Dip
Buffalo chicken dip is an absolute staple for any gathering, but swirling a garlic cream cheese spiderweb across the surface elevates it from standard game-day grub to a showstopping Halloween centerpiece.
Image Prompt: Vertical 9:16 aspect ratio, warm close-up macro photograph of Buffalo Chicken Spiderweb Dip. Bubbling orange buffalo dip topped with a precise white cream cheese spiderweb pattern, centered with a black olive spider. 85% food filling the vertical image, rich molten cheese textures, vibrant spicy orange sauce, dark skillet background, high contrast Pinterest viral look.
Ingredients
- 3 cups shredded cooked chicken breast (rotisserie chicken works wonders here)
- 8 oz cream cheese, softened
- 1/2 cup Frank’s RedHot sauce
- 1/2 cup ranch dressing (or blue cheese dressing)
- 1 1/2 cups shredded Colby Jack cheese
- 3 tablespoons sour cream or softened cream cheese (for the web)
- 1 whole black olive (cut in half for body, sliced for spider legs)
Step-by-Step Instructions
- Preheat your oven to 375°F (190°C) and grease a round 9-inch pie dish or cast-iron skillet.
- Mix the shredded chicken, softened cream cheese, hot sauce, ranch dressing, and 1 cup of Colby Jack cheese together until well blended.
- Spread the mixture evenly into your greased baking dish and top with the remaining 1/2 cup of shredded cheese.
- Bake for 20 minutes until the edges bubble vigorously and the top cheese melts completely.
- Put your sour cream (or softened cream cheese) into a small zip-top bag and snip off a tiny corner tip.
- Pipe 3 concentric circles on top of the hot dip, then drag a toothpick from the center circle outward to create an intricate spiderweb design.
- Assemble your black olive pieces in the middle of the web to look like a creepy spider.
Why You’ll Love It
It’s warm, spicy, outrageously cheesy, and completely addicting. Serving this with tortilla chips or celery sticks guarantees people will scrape the pan clean before the night ends.
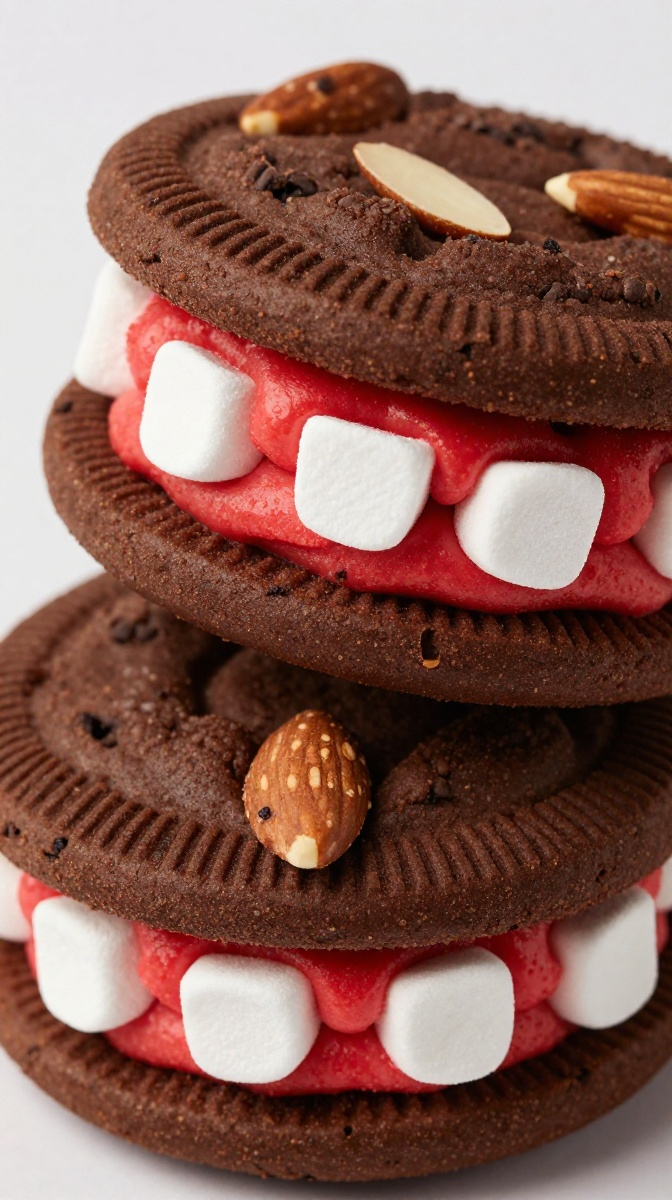
7. Monster Mouth Cookie Sandwiches
Looking for a dessert that takes under 15 minutes and requires zero actual baking? These red-velvet monster mouths look hilariously spooky and deliver a sugar rush that kids and adults will fight over.
Image Prompt: Vertical 9:16 aspect ratio, vibrant macro photo of Monster Mouth Cookie Sandwiches. Chewy chocolate cookies stuffed with bright red vanilla frosting, mini marshmallow teeth, and slivered almond fangs. 85% of frame occupied by the colorful dessert item, high contrast red, white, and dark chocolate tones, sharp bakery details, trendy Pinterest aesthetic.
Ingredients
- 16 pre-baked chocolate chip cookies (or red velvet cookies)
- 1 cup vanilla frosting
- 4 drops red food coloring
- 2 cups mini marshmallows
- 1/2 cup slivered almonds (for vampire fangs)
Step-by-Step Instructions
- Stir the red food coloring into the vanilla frosting until it turns a deep, bloody red color.
- Slice all your cookies in half crosswise to create 32 semi-circle pieces.
- Spread a generous tablespoon of red frosting across the flat underside of each cookie half.
- Line up mini marshmallows vertically along the curved edge of half the cookies to look like a row of white teeth.
- Top each marshmallow-lined bottom with another frosted cookie half to form a wide-open “mouth.”
- Stick two slivered almonds into the frosting on either side of the front mouth to act as sharp vampire fangs.
Why You’ll Love It
You don’t even have to turn your oven on to make these jaw-dropping desserts. Some people use store-bought sugar cookies here, but chocolate or red velvet cookies create a far more dramatic visual contrast against those white marshmallow teeth!
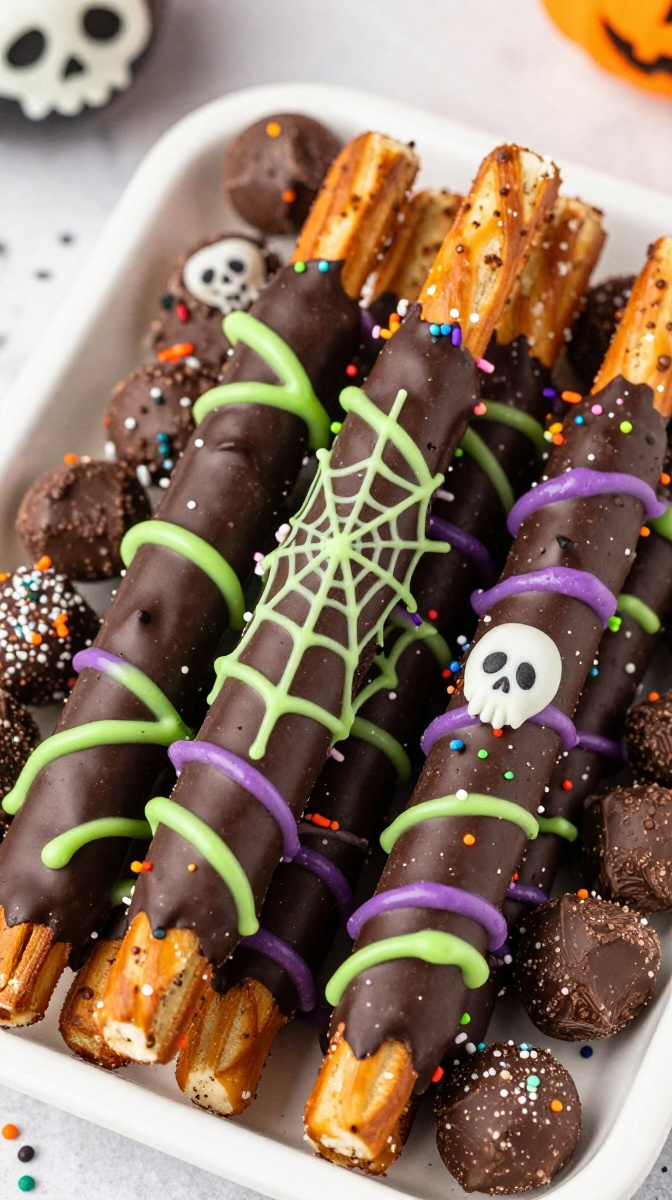
8. Poison Apple Dark Chocolate Pretzel Rods
Salty pretzels dipped in glossy dark chocolate and drizzled with neon green candy melts hit every sweet-and-salty craving on your board while looking straight out of a witch’s cauldron.
Image Prompt: Vertical 9:16 aspect ratio, close-up colorful photograph of Poison Apple Dark Chocolate Pretzel Rods. Thick pretzel rods coated in glossy dark chocolate, drizzled with neon green and purple candy melt spiderwebs, topped with spooky sprinkles. 85% frame coverage with crunchy chocolate treats, bright crisp lighting, festive Halloween platter layout, Pinterest viral aesthetic.
Ingredients
- 15 jumbo pretzel rods
- 12 oz dark chocolate melting wafers or semi-sweet chips
- 1/2 cup neon green candy melts
- 1/2 cup purple candy melts
- 2 tablespoons Halloween-themed sprinkles (orange, black, and green)
Step-by-Step Instructions
- Melt the dark chocolate in a tall glass or wide microwave-safe bowl in 30-second bursts, stirring until silky smooth.
- Dip each pretzel rod three-quarters of the way into the melted dark chocolate, letting excess chocolate drip back into the glass.
- Place the chocolate-coated pretzels onto a parchment-lined baking sheet to set for 10 minutes.
- Melt the neon green and purple candy melts in separate small ziplock bags in the microwave.
- Snip a tiny corner off each bag and drizzle the bright neon colors vigorously across the hardened dark chocolate.
- Shower the wet drizzle with spooky sprinkles and let them cool until set completely hard.
Why You’ll Love It
They take zero cooking skills, look incredibly glossy on a party platter, and can be made up to three days before your event. Who doesn’t love a stress-free party snack that frees up your schedule on Halloween night?
The Ultimate Halloween Snack Survival Plan
Throwing a memorable Halloween bash shouldn’t feel like surviving a horror movie in your own kitchen. The real trick to pulling off an effortless spread is balancing hot, savory crowd-pleasers—like those Cheesy Bacon Jalapeño Mummy Poppers and Buffalo Chicken Spiderweb Dip—with make-ahead sweet treats like Poison Apple Pretzel Rods.
Prep your ingredients the morning of the party: chop your veggies, mix your cheese balls, and melt your chocolate early. When your guests arrive in costume, you can effortlessly bake off the warm bites, pour yourself a drink, and actually enjoy your own party. Which one of these legendary snacks will disappear from your table first?