
Who actually has time to spend six hours baking intricate sugar cookies on a Tuesday night? Exactly—nobody!
When October rolls around, we all want festive, spooky treats that look like they came straight out of a boutique bakery, but demand about 10% of the effort. Enter the magic of witch hat cookies. They’re adorable, absurdly delicious, and so easy to assemble that you can whip up a batch while sipping your favorite pumpkin spice latte (or a bold Cabernet, no judgment here 😉).
Whether you need a last-minute contribution for your kid’s school party or want to impress your friends at a spooky movie marathon, these 8 witch hat cookie recipes have you covered. Grab your piping bags and let’s get baking!
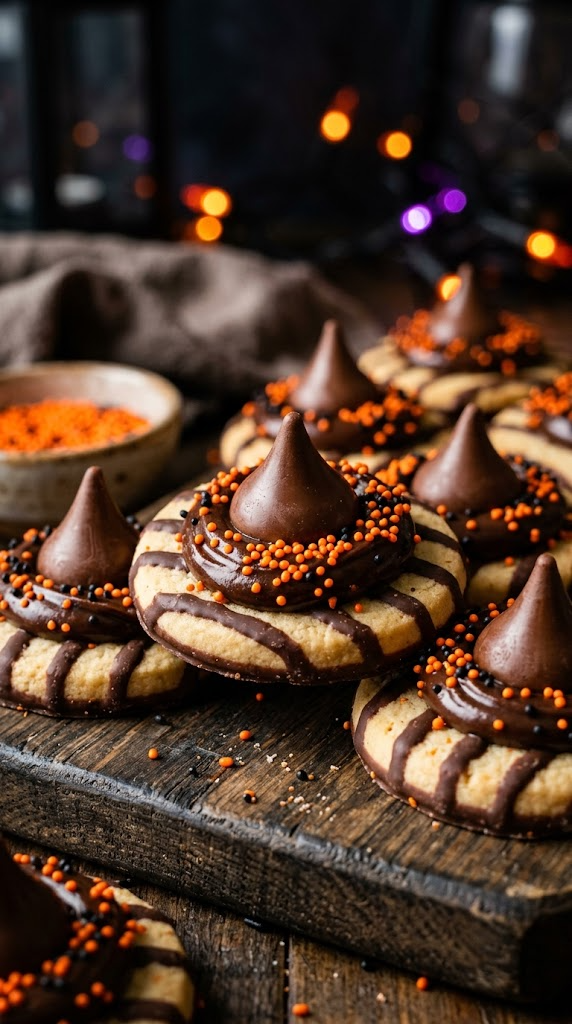
1. Classic Hershey’s Kiss Fudge Stripe Witch Hats
The Ultimate No-Bake Halloween Miracle
If you can open a box of cookies and unwrap chocolate, you’re already qualified to make these! They combine butter fudge striped cookies with rich chocolate kisses for an instant crowd-pleaser.
Ingredients
- 1 package Fudge Striped Cookies (store-bought works best)
- 1 bag Hershey’s Kisses (unwrapped)
- 1 tube orange or purple decorate icing
- 1 tbsp Halloween sprinkles (optional)
Step-by-Step Instructions
- Lay the fudge striped cookies bottom-side up on a baking sheet lined with parchment paper.
- Pipe a small circle of orange icing directly over the center hole of each cookie.
- Unwrap a Hershey’s Kiss and press it firmly onto the icing ring until a small border of icing squeezes out to create the hatband.
- Add a tiny dot of icing to create a miniature buckle using yellow sprinkles.
- Let them sit for 15 minutes to set before serving.
Why You’ll Love It
You make these in under ten minutes flat without turning on your oven once. They hit the exact sweet spot of buttery shortbread and chocolate meltiness that kids and adults go crazy for. IMO, this is the highest reward-to-effort ratio in the entire baking universe!
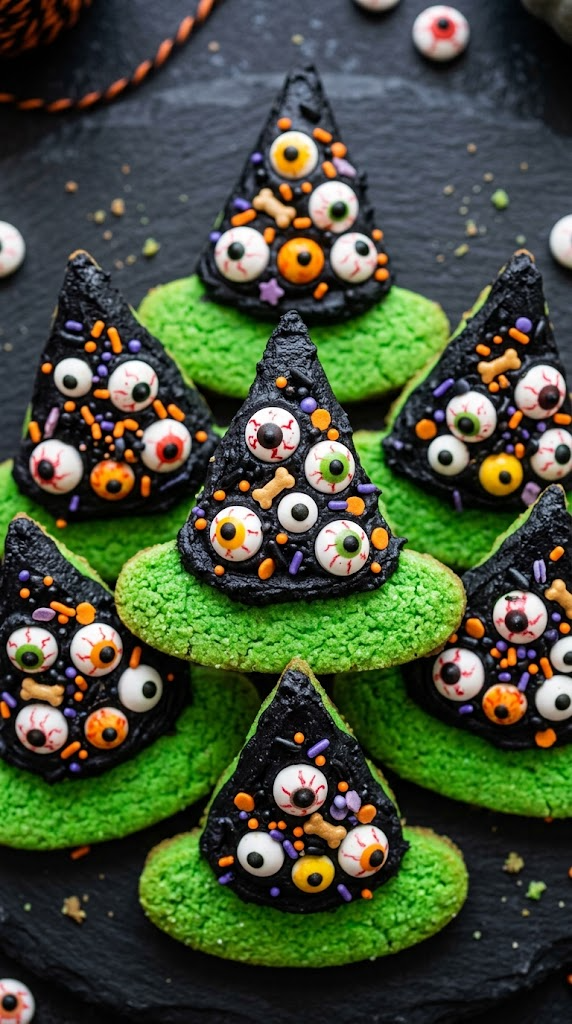
2. Wicked Green Slimy Sugar Cookie Hats
Bright, Bold, and Completely Unapologetic
Turn traditional sugar cookies into vibrant, neon green witch hats topped with spooky edible eyes and pitch-black frosting cones.
Ingredients
- 1 batch classic sugar cookie dough (homemade or refrigerated tube)
- 1 tsp neon green gel food coloring
- 1 cup black royal icing
- 1 pack candy eyeball decorations
- 1 tbsp black sanding sugar
Step-by-Step Instructions
- Knead the neon green gel food coloring into your sugar cookie dough until bright and uniform.
- Roll out the dough to 1/4-inch thickness and cut out 3-inch circles for the brims.
- Bake at 350°F (175°C) for 8 to 10 minutes, then let them cool completely on a wire rack.
- Pipe a tall, pointed cone of black royal icing right into the center of each cool green base.
- Press two candy eyeball decorations into the icing and sprinkle with black sanding sugar for extra texture.
Why You’ll Love It
The high-contrast neon green and jet-black look incredible on any dessert table spread. I once tried using liquid food dye instead of gel dye here—huge mistake, it watered down my dough! Stick to gel for those crisp, eye-popping colors.
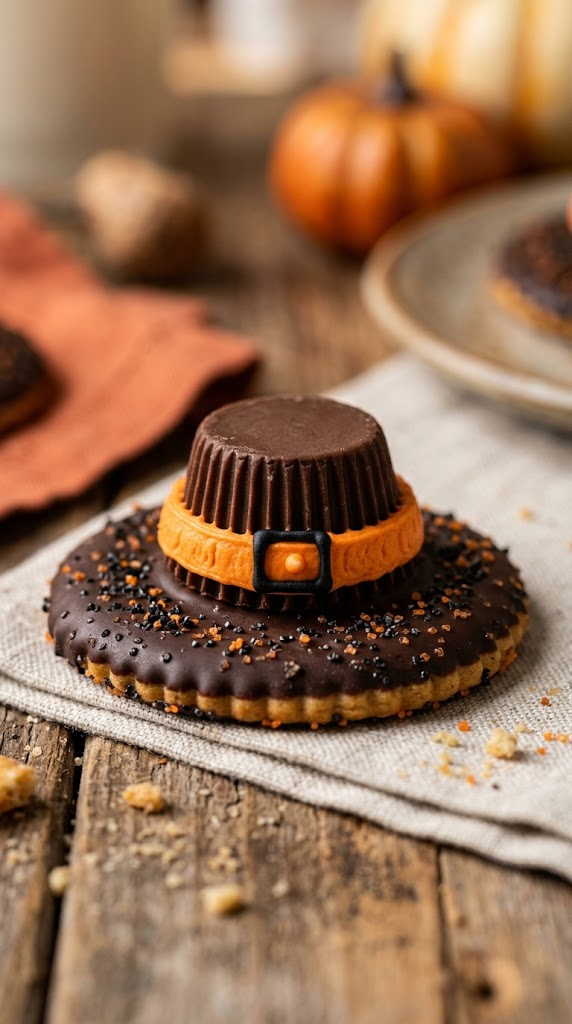
3. Salty-Sweet Peanut Butter Cup Witch Hats
The Ultimate Flavor Combo for Peanut Butter Lovers
Combine crispy Ritz crackers, creamy peanut butter cups, and rich dark chocolate for the ultimate sweet and salty treat.
Ingredients
- 24 Ritz crackers
- 24 miniature peanut butter cups (unwrapped)
- 1 cup dark chocolate melting wafers
- 1/2 cup orange decorating frosting
- 1 pinch sea salt flakes
Step-by-Step Instructions
- Melt the dark chocolate melting wafers in a microwave-safe bowl in 30-second bursts.
- Dip each Ritz cracker into the melted chocolate, coat fully, and place on wax paper.
- Press an inverted miniature peanut butter cup onto the center of each chocolate-covered cracker while still wet.
- Let the chocolate shell harden completely in the fridge for 10 minutes.
- Pipe a neat ring of orange decorating frosting around the base of the peanut butter cup and dust with sea salt flakes.
Why You’ll Love It
The crunch of the salty cracker balances out the dense peanut butter cup perfectly. Most people bring plain chocolate treats to parties, so this salty-sweet twist instantly stands out from the rest.
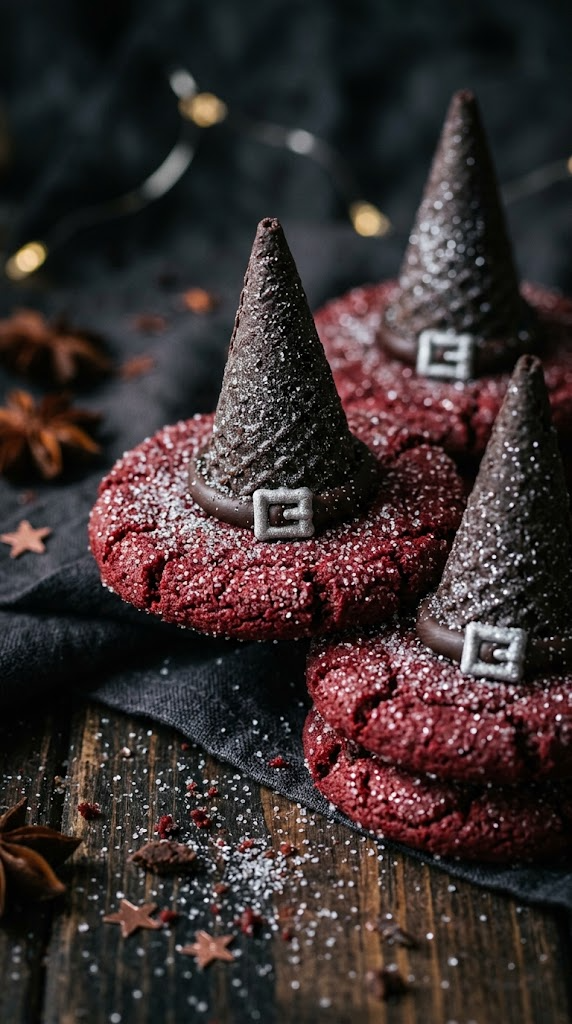
4. Deep Red Velvet Sparkle Witch Hats
Elegant, Gothic, and Utterly Delicious
These deep crimson cookies bring a touch of gothic elegance to your Halloween snack table with rich cocoa flavors and silver sugar dust.
Ingredients
- 1 box red velvet cake mix
- 2 eggs
- 1/3 cup vegetable oil
- 24 dark chocolate truffle cones (or dark Hershey’s Kisses)
- 2 tbsp silver edible glitter
Step-by-Step Instructions
- Mix the red velvet cake mix, eggs, and vegetable oil in a bowl until a dense dough forms.
- Scoop 1-inch dough balls and roll them in silver edible glitter.
- Bake at 350°F (175°C) for 9 minutes until the edges set.
- Immediately press a dark chocolate truffle cone into the center of each hot cookie right out of the oven.
- Cool completely on a wire rack so the chocolate cone fuses to the base.
Why You’ll Love It
Red velvet adds a soft, chewy texture that contrasts amazingly with the solid chocolate cone. They look like high-end bakery creations, yet take under twenty minutes of actual hands-on work.
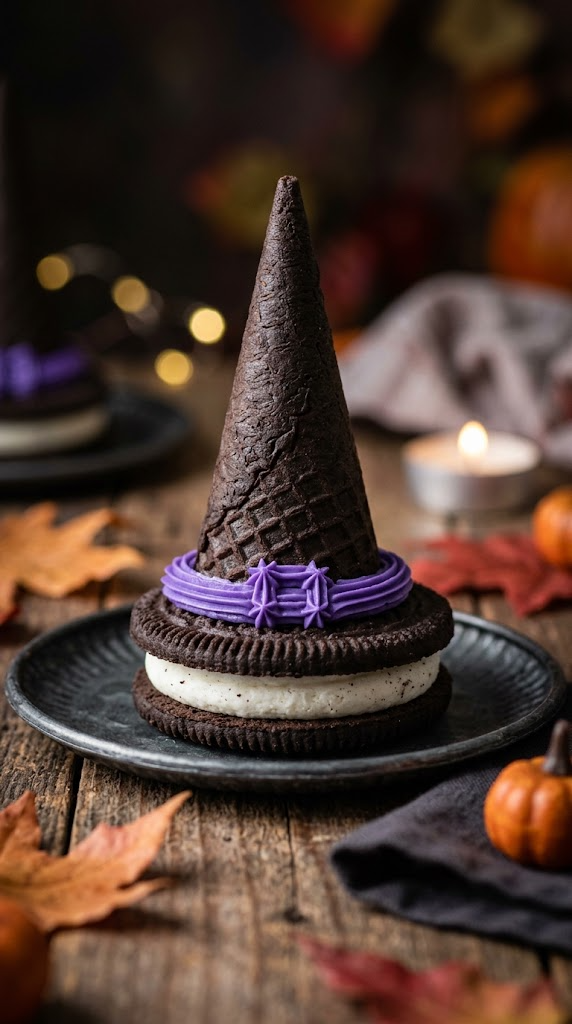
5. Spooky Oreo Double-Stuff Cone Hats
Towering Treats for Big Chocolate Cravings
Why settle for a tiny hat when you can build a massive, towering witch hat using ice cream cones and double-stuffed Oreos?
Ingredients
- 1 package Double Stuf Oreos
- 12 sugar ice cream cones
- 1.5 cups chocolate fudge frosting
- 1/2 cup purple pipeable frosting
- 1/2 cup Halloween sprinkles
Step-by-Step Instructions
- Twist open your Double Stuf Oreos carefully, keeping the cream intact on one half (eat the plain half, bonus cook treat! 🙂).
- Trim the wide base of the sugar ice cream cones so they sit flat on top of the cookie.
- Coat the outside of each sugar cone generously in chocolate fudge frosting.
- Set each frosted cone firmly onto the center of an Oreo base.
- Pipe a thick band of purple pipeable frosting around the join line and toss on some Halloween sprinkles.
Why You’ll Love It
These huge, 3D witch hat cookies act as dynamic centerpieces for any spooky party table. Kids adore helping frost the cones, even if things get a little messy along the way!
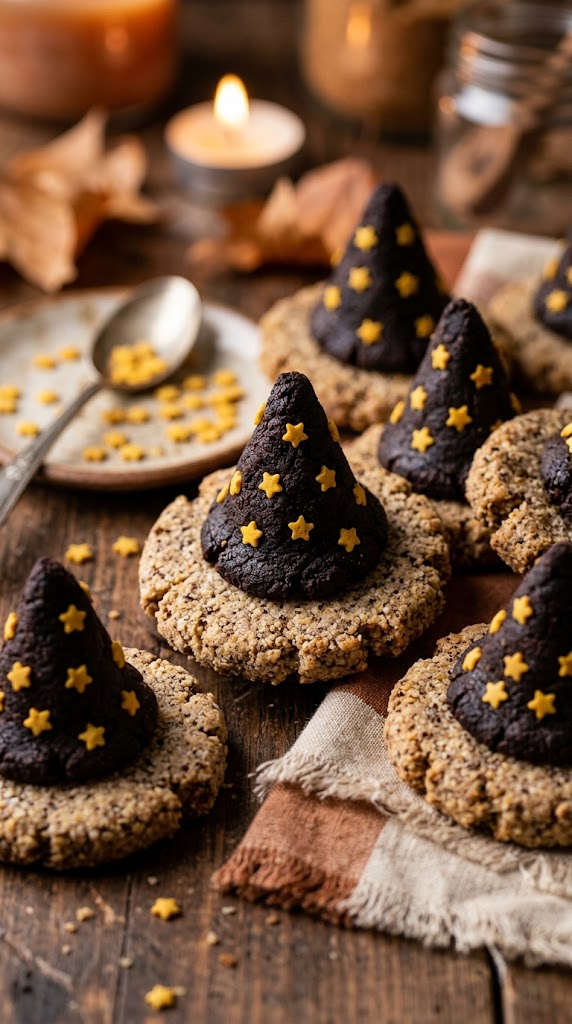
6. Golden Gluten-Free Almond Stars & Hats
Dietary-Friendly without Sacrificing Flavor
Nobody gets left out of Halloween fun with these rich, nutty, gluten-free almond flour cookies topped with dark cocoa points.
Ingredients
- 2 cups almond flour
- 1/4 cup pure maple syrup
- 1/4 cup melted coconut oil
- 1 tsp almond extract
- 24 gluten-free dark cacao cones
- 2 tbsp yellow star sprinkles
Step-by-Step Instructions
- Stir together almond flour, pure maple syrup, melted coconut oil, and almond extract until a pliable dough forms.
- Press dough flat and cut 2-inch round cookie bases with a circular cutter.
- Bake on parchment at 325°F (165°C) for 11 minutes until golden brown around the edges.
- Attach a gluten-free dark cacao cone using a dab of melted dark chocolate while the bases are slightly warm.
- Decorate the edge with bright yellow star sprinkles to finish the magical look.
Why You’ll Love It
They’re naturally sweetened, rich in healthy fats, and won’t trigger gluten sensitivities. FYI, the subtle almond extract flavor makes these taste like top-tier Italian bakery treats!
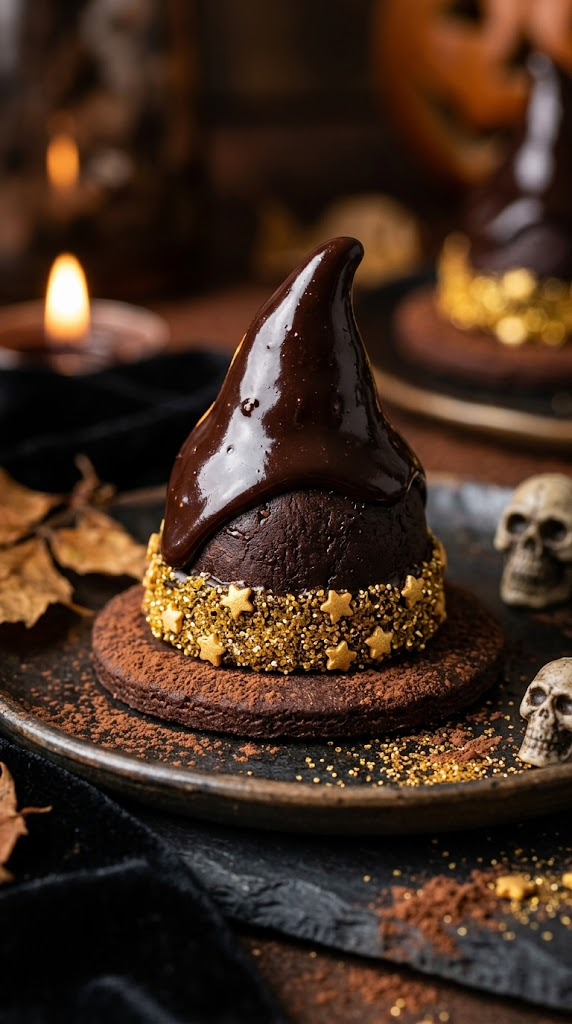
7. Luxurious Dark Chocolate Truffle Hats
Decadent Treats for the Adult Halloween Party
Decadent, rich, and dipped in glossy dark ganache—these witch hats belong at sophisticated cocktail parties paired with dark red wine.
Ingredients
- 1 package chocolate wafer cookies
- 12 store-bought dark chocolate truffles
- 1 cup dark chocolate chips
- 1/2 cup heavy whipping cream
- 2 tbsp edible gold glitter
Step-by-Step Instructions
- Heat heavy whipping cream until scalding, pour over dark chocolate chips, and whisk until a smooth ganache forms.
- Place chocolate wafer cookies onto a wire cooling rack over a baking sheet.
- Dip the bottom of each dark chocolate truffle in ganache and set it in the center of a wafer.
- Pour remaining warm ganache over the top of each stack to coat the entire hat in a silky sheen.
- Dust with edible gold glitter right before the ganache sets completely.
Why You’ll Love It
These melt in your mouth with an intense, velvety chocolate rush that puts standard candy to shame. They look like they cost $8 each at an artisan chocolatier!
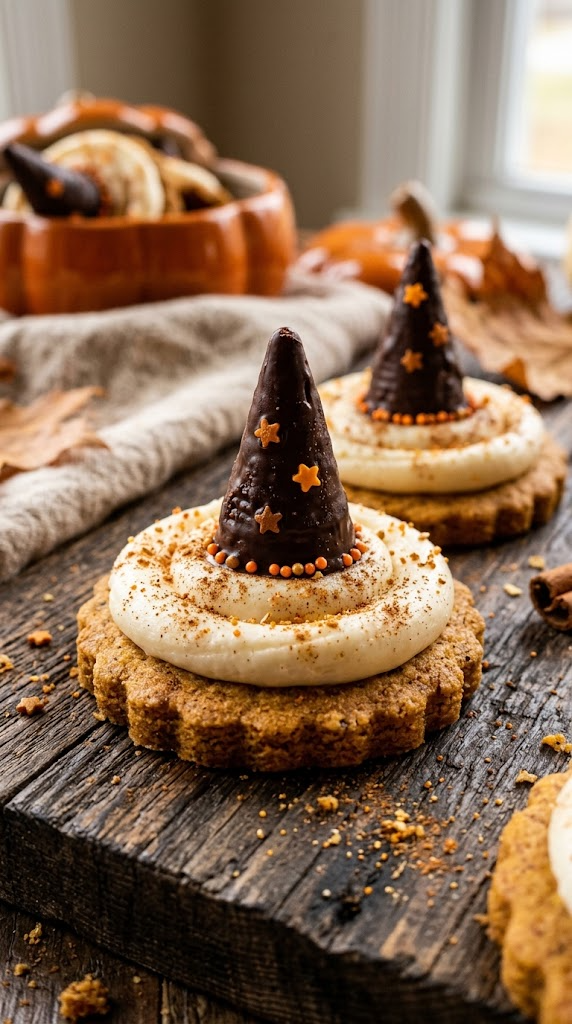
8. Spiced Pumpkin Bugle Witch Hats
The Ultimate Sweet, Savory, and Crunchy Mashup
Crispy, curved Bugles snacks covered in chocolate make the most realistic, bent witch hat tips atop warm pumpkin spice cookies.
Ingredients
- 1 batch pumpkin spice cookie dough
- 1 bag Bugles corn snacks
- 1 cup milk chocolate melting wafers
- 1/2 cup cream cheese frosting
- 1 tsp pumpkin pie spice
Step-by-Step Instructions
- Scoop and bake small rounds of pumpkin spice cookie dough at 350°F (175°C) for 10 minutes until fluffy.
- Melt the milk chocolate melting wafers and dip individual Bugles corn snacks until fully coated, then let set on wax paper.
- Spread a dollop of cream cheese frosting over the top of each baked pumpkin cookie.
- Position one chocolate-coated Bugle at a tilted angle into the center frosting to resemble a bent, crooked witch hat.
- Dust lightly with extra pumpkin pie spice for an aromatic autumn finish.
Why You’ll Love It
The curved shape of the Bugle creates that iconic, whimsical “crooked hat” look that straight chocolate kisses just can’t match. Plus, the combination of salty corn snack, rich chocolate, and spiced pumpkin is pure perfection!
Which Witch Hat Cookie Will You Bake First?
Who doesn’t love a spooky Halloween treat that takes minimal effort yet delivers maximum visual impact? From 10-minute no-bake Hershey’s Kiss creations to decadent truffle-dipped masterpieces, these 8 witch hat cookies bring magic, fun, and ridiculous flavor to your October festivities.
Pick your favorite recipe (or make a whole platter of all eight!), grab your ingredients, and enjoy every single bite. Happy Halloween, and happy baking! 🎃✨