
Halloween gets a whole lot more fun when the food looks almost too cute to eat. Whether you’re filling a school party table, hosting a spooky get-together, or handing out treats before the trick-or-treaters arrive, these cute Halloween treats bring plenty of festive charm without turning your kitchen into a disaster zone.
I love Halloween recipes that look impressive but secretly require very little effort. After all, nobody needs a three-hour baking project when there are costumes to fix and candy wrappers everywhere, right? These Halloween party treats use simple ingredients, easy decorating tricks, and plenty of spooky personality.
You’ll find creepy-cute cookies, chocolate treats, fruity snacks, and no-fuss party bites below. Most work beautifully for Halloween parties, school events, classroom celebrations, and trick-or-treat night.
1. Spooky Monster Eyeball Brownie Bites 👁️
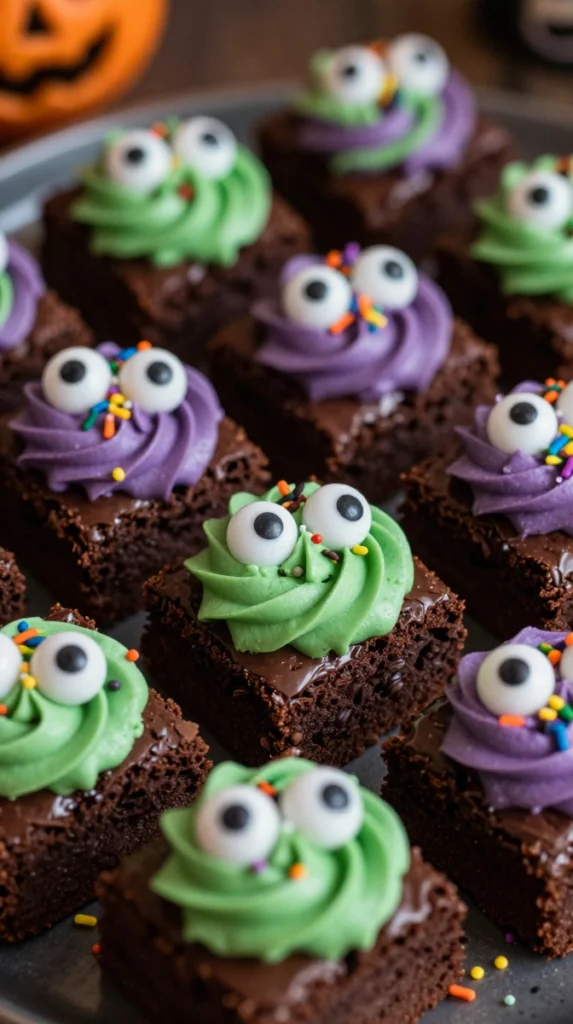
These little brownie bites bring maximum Halloween drama with almost zero decorating stress. Rich chocolate brownies, colorful frosting, and candy eyeballs make every bite look like it’s watching you.
Ingredients
- 1 box brownie mix plus ingredients listed on the package
- ½ cup chocolate frosting
- ½ cup green or purple frosting
- Candy eyeballs
- Halloween sprinkles
- Mini chocolate chips, optional
Step-by-Step Instructions
- Prepare the brownie batter according to the package directions.
- Spoon the batter into a greased mini muffin pan.
- Bake until the centers look set but still slightly fudgy.
- Let the brownie bites cool completely.
- Spread a small swirl of frosting over each brownie.
- Add one or two candy eyeballs to each bite.
- Finish with a few Halloween sprinkles.
Why You’ll Love It
The fudgy chocolate center pairs perfectly with sweet frosting, while the candy eyeballs instantly create that Halloween look. I prefer mini brownies because guests can grab one without committing to a giant square of dessert.
Party tip: Make these a day ahead and decorate them once they cool. Easy win.
2. Mummy Chocolate-Covered Pretzel Rods
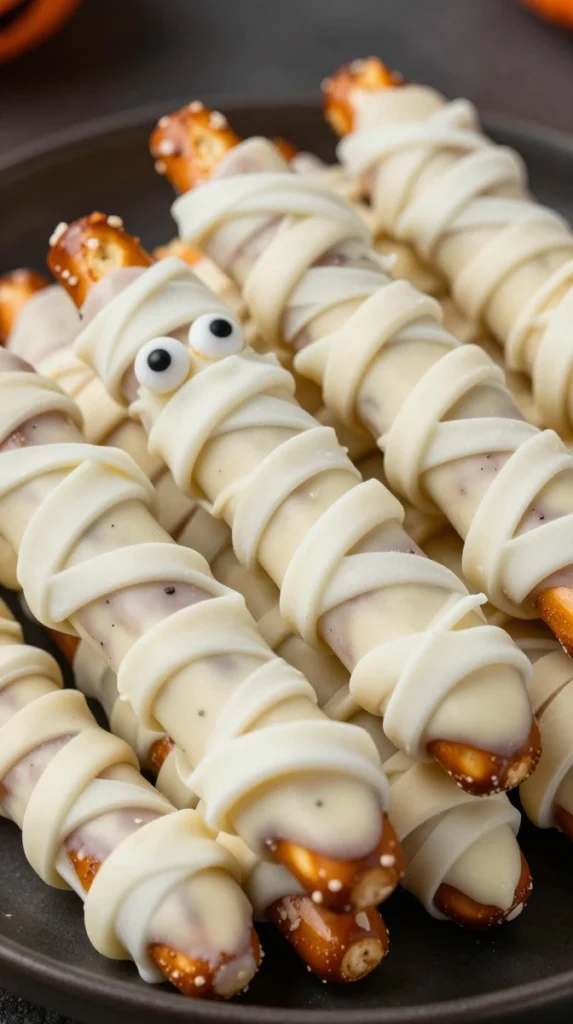
Crunchy pretzels wrapped in creamy white chocolate make the cutest little edible mummies. They look fancy, but honestly, the decorating technique basically involves drizzling chocolate everywhere and calling it Halloween. 🙂
Ingredients
- 12 pretzel rods
- 1½ cups white chocolate melting wafers
- 24 candy eyeballs
- ¼ cup dark chocolate, melted
- Halloween sprinkles, optional
Step-by-Step Instructions
- Melt the white chocolate according to the package directions.
- Dip each pretzel rod into the melted chocolate, leaving a small section uncovered for easy handling.
- Place the coated pretzels on parchment paper.
- Let the chocolate cool slightly.
- Drizzle thin lines of white chocolate across each pretzel to create mummy bandages.
- Press two candy eyeballs near the top.
- Let the chocolate set completely before serving.
Why You’ll Love It
The salty pretzel balances the sweetness of the chocolate, so these don’t taste overwhelmingly sugary. Kids can also help decorate them, which makes this a fun Halloween school treat project.
FYI: Store them in an airtight container once the chocolate sets.
3. Halloween Monster Rice Krispie Treats
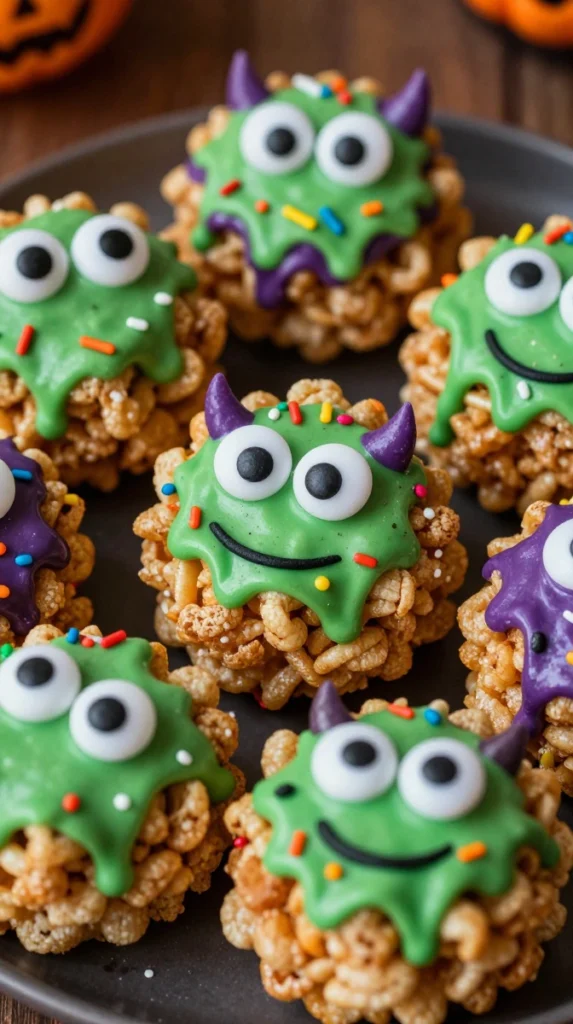
Classic crispy cereal treats get a monster makeover with colorful candy melts and googly-looking eyes. They’re chewy, crunchy, colorful, and ridiculously cute.
Ingredients
- 6 cups crispy rice cereal
- 4 cups mini marshmallows
- 3 tablespoons butter
- 1 cup green candy melts
- ½ cup purple candy melts
- Candy eyeballs
- Halloween sprinkles
Step-by-Step Instructions
- Melt the butter in a large saucepan over low heat.
- Add the marshmallows and stir until smooth.
- Remove the pan from the heat.
- Stir in the crispy rice cereal until evenly coated.
- Press the mixture firmly into a lined baking pan.
- Let it cool before cutting into squares.
- Dip or drizzle each square with melted candy melts.
- Add candy eyeballs and sprinkles while the coating remains soft.
- Let the decorations set before serving.
Why You’ll Love It
These treats require no oven, which makes them especially handy for busy Halloween afternoons. You can also change the colors to match your party theme.
I love using several monster faces instead of trying to make every treat identical. Halloween food should look a little chaotic—it’s practically part of the theme.
4. Mini Halloween Spider Cookies 🕷️
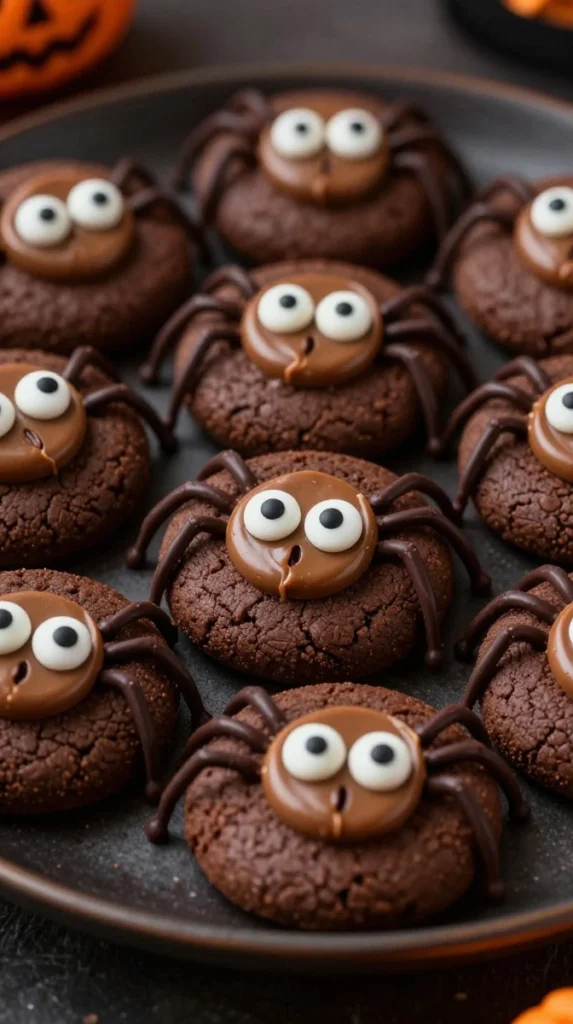
Chocolate cookies become adorable little spiders with peanut butter cups, candy eyes, and chocolate legs. They look complicated until you actually make them.
Ingredients
- 12 chocolate cookies
- 12 mini peanut butter cups
- ¼ cup melted chocolate
- 24 candy eyeballs
- Chocolate sprinkles or thin chocolate lines for legs
Step-by-Step Instructions
- Place the chocolate cookies on a parchment-lined tray.
- Unwrap the mini peanut butter cups.
- Add a small amount of melted chocolate to the center of each cookie.
- Press one peanut butter cup onto the chocolate.
- Attach two candy eyeballs using tiny dots of melted chocolate.
- Pipe four thin chocolate legs on each side.
- Let the chocolate set completely.
Why You’ll Love It
The combination of chocolate cookie and peanut butter gives these treats that classic sweet-and-salty flavor I never get tired of. They also look fantastic piled onto a Halloween dessert platter.
For school events: Check your school’s allergy rules before using peanut butter, and swap in a nut-free alternative when needed.
5. Boo! Banana Ghost Pops 🍌👻
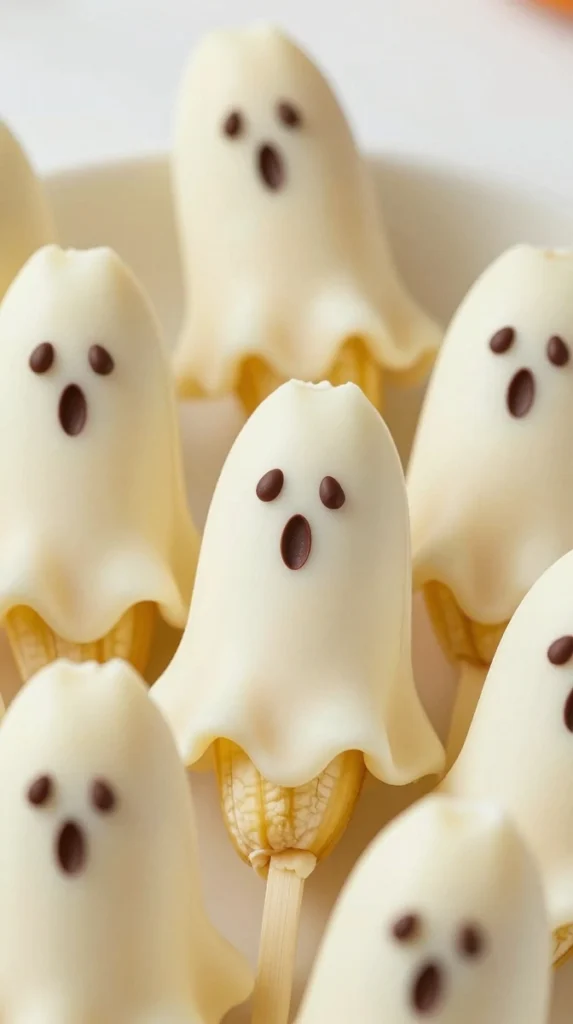
Need something lighter for a Halloween party table? These adorable banana ghosts bring fresh fruit into the candy-filled chaos.
Ingredients
- 3 bananas
- ½ cup white chocolate chips
- 1 teaspoon coconut oil
- Mini chocolate chips for eyes
- Popsicle sticks
Step-by-Step Instructions
- Peel the bananas and cut each one in half.
- Insert a popsicle stick into the flat end of each banana piece.
- Freeze the banana pieces for about 30 minutes.
- Melt the white chocolate with coconut oil.
- Dip or spoon the chocolate over each banana.
- Add two chocolate-chip eyes before the coating sets.
- Freeze again until firm.
Why You’ll Love It
The banana adds natural sweetness while the white chocolate creates that ghostly coating. These work particularly well when you want a cute Halloween treat for kids without putting another bowl of candy on the table.
My favorite trick: Don’t overcoat the bananas. A thinner layer keeps the fruit-to-chocolate ratio much more enjoyable.
6. Witch Hat Cookie Treats 🧙♀️

These witch hats look like tiny edible decorations, but underneath all that spooky cuteness sits a seriously satisfying chocolate-cookie combination.
Ingredients
- 12 round chocolate cookies
- 12 chocolate waffle cones
- 1 cup chocolate frosting
- ½ cup orange candy melts
- Halloween sprinkles
- Powdered sugar, optional
Step-by-Step Instructions
- Place the cookies on a tray lined with parchment.
- Fill each waffle cone with chocolate frosting.
- Turn the cone upside down and place it on top of a cookie.
- Melt the orange candy melts.
- Pipe a small orange band around the base of each cone.
- Add Halloween sprinkles before the candy coating sets.
- Let the treats sit until firm.
Why You’ll Love It
These have the perfect mix of crunchy cookie, crisp cone, and creamy frosting. Plus, you can assemble them quickly when you realize guests are arriving in 20 minutes. We’ve all been there.
For a classroom party, make smaller versions using mini cones and mini cookies.
7. Halloween Monster Donut Holes
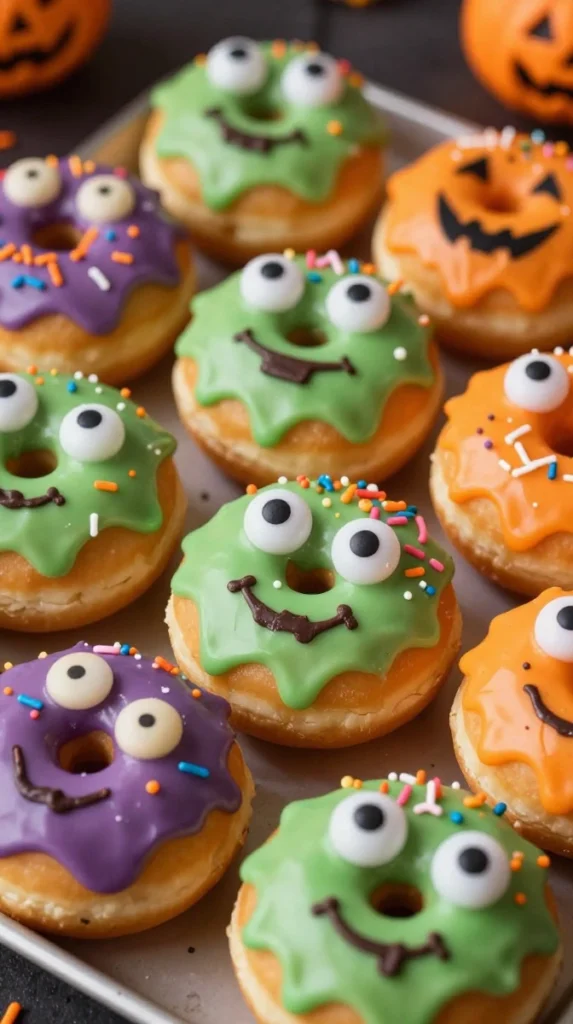
Grab a package of donut holes and turn them into tiny edible monsters. This recipe proves once again that frosting and candy eyes can make almost anything Halloween-ready.
Ingredients
- 12–16 plain or glazed donut holes
- 1 cup colorful frosting
- Candy eyeballs
- Halloween sprinkles
- Black decorating gel
- Mini candy pieces, optional
Step-by-Step Instructions
- Arrange the donut holes on a parchment-lined tray.
- Spread colorful frosting over the top of each one.
- Add one, two, or three candy eyeballs.
- Use black decorating gel to create goofy mouths.
- Add sprinkles or small candy pieces for extra texture.
- Chill the decorated donut holes for 15–20 minutes before serving.
Why You’ll Love It
You don’t need to bake anything, which makes these ideal for last-minute Halloween party treats. Kids can also create their own monster faces, making the decorating part almost as entertaining as eating them.
IMO, the three-eyed monsters always disappear first.
8. Pumpkin Rice Cereal Balls 🎃
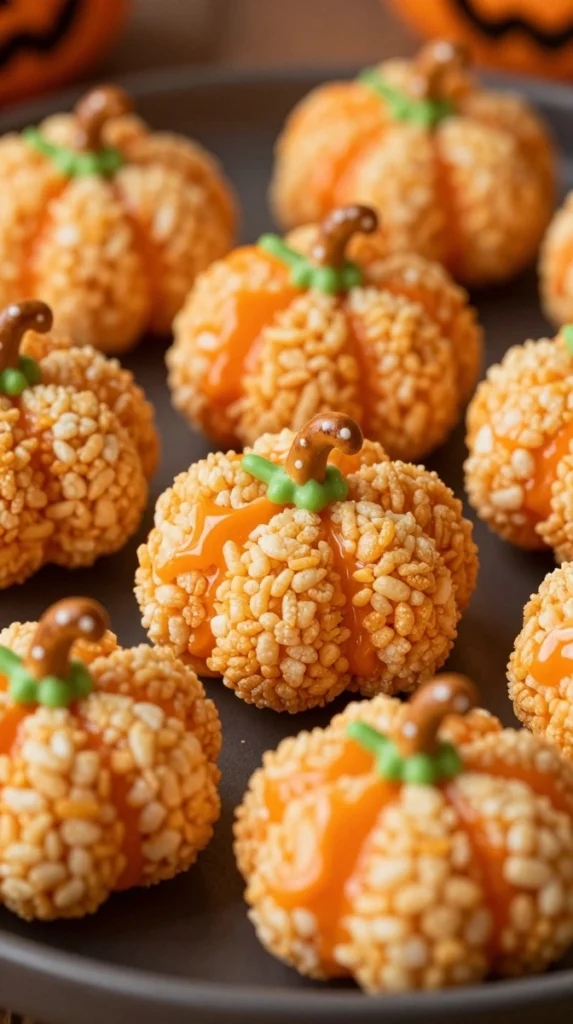
Turn classic marshmallow cereal treats into adorable little pumpkins with orange candy coating and tiny pretzel stems.
Ingredients
- 4 cups crispy rice cereal
- 3 cups mini marshmallows
- 2 tablespoons butter
- 1½ cups orange candy melts
- Mini pretzel pieces
- Green decorating gel
Step-by-Step Instructions
- Melt butter in a saucepan over low heat.
- Add marshmallows and stir until smooth.
- Remove from heat and mix in the cereal.
- Let the mixture cool slightly.
- Grease your hands lightly and shape the mixture into small balls.
- Insert a small pretzel piece into the top of each ball.
- Dip or drizzle each ball with melted orange candy coating.
- Use green decorating gel to add tiny leaves or vines.
- Allow the coating to set.
Why You’ll Love It
These pumpkin treats bring plenty of Halloween color without requiring complicated cookie cutters or piping skills. They also pack easily, which makes them great for school Halloween parties.
Tip: Keep your hands lightly buttered while shaping the cereal mixture. Otherwise, you may accidentally create one enormous marshmallow glove.
9. Chocolate-Dipped Strawberry Ghosts 🍓👻
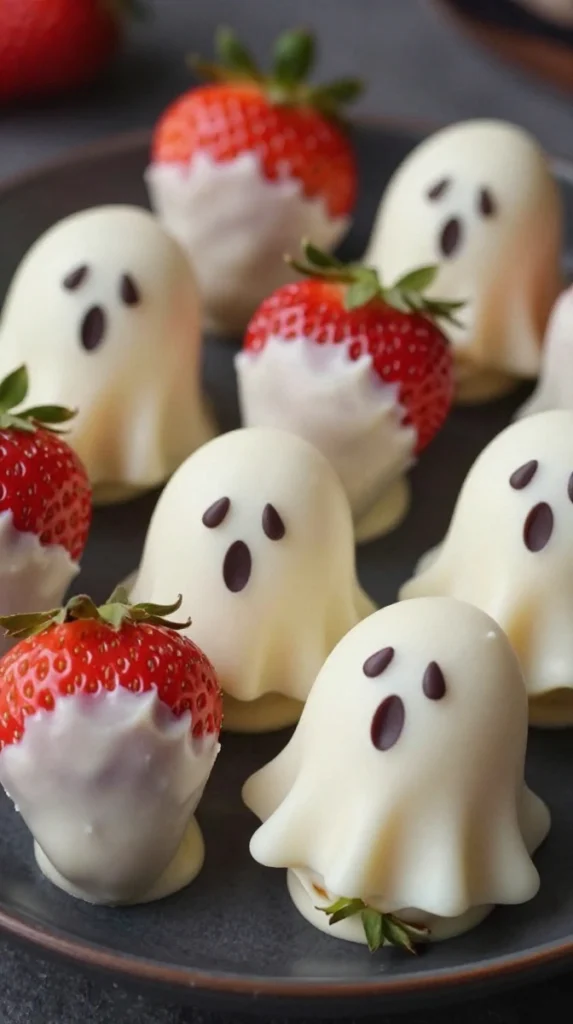
Fresh strawberries get a spooky white-chocolate makeover in this simple Halloween dessert. They look elegant enough for an adult party but cute enough for kids.
Ingredients
- 1 pound fresh strawberries
- 1½ cups white chocolate melting wafers
- ½ teaspoon coconut oil
- Mini dark chocolate chips
- Dark chocolate decorating gel
Step-by-Step Instructions
- Wash the strawberries and dry them completely.
- Melt the white chocolate with the coconut oil.
- Hold each strawberry by the leaves and dip it into the chocolate.
- Let excess chocolate drip back into the bowl.
- Place each strawberry on parchment paper.
- Add two small chocolate eyes while the coating remains soft.
- Use dark chocolate gel to create tiny ghost mouths.
- Refrigerate until the chocolate sets.
Why You’ll Love It
The strawberries add a bright, juicy contrast to the rich white chocolate. They also make your dessert table look a little more polished without requiring pastry-chef skills.
Important: Dry the strawberries thoroughly before dipping them. Water and melted chocolate have a relationship status of “absolutely not.”
Easy Tips for Making Cute Halloween Treats
You don’t need a cabinet full of specialty decorating tools to make these recipes look fantastic. A few basic supplies can transform simple snacks into party-worthy Halloween treats.
Keep these essentials nearby:
- Candy eyeballs
- Orange, purple, green, and black candy melts
- Halloween sprinkles
- Decorating gel
- Parchment paper
- Mini pretzels
- Popsicle sticks
- Small piping bags or zip-top bags
A zip-top bag works surprisingly well for simple chocolate drizzles. Snip off a tiny corner, squeeze gently, and you have a makeshift piping bag.
Make-Ahead Strategy
If you’re preparing treats for a Halloween party, don’t save everything for the afternoon of the event.
Make brownies, cereal treats, and cookies one day ahead. Decorate them after they cool and store them in airtight containers. Keep fruit-based treats refrigerated until serving.
For school events, choose treats that travel well and avoid ingredients that your school prohibits. Nobody wants the Halloween party to turn into a trip to the office because someone brought the wrong snack.
How to Choose the Best Halloween Treat for Your Event
Different Halloween events call for different kinds of treats.
For School Events
Choose easy-to-handle options such as:
- Monster Rice Krispie Treats
- Mummy Pretzel Rods
- Pumpkin Cereal Balls
- Mini Spider Cookies
Individual portions make serving much easier, especially when twenty little hands suddenly reach for the dessert table.
For Halloween Parties
Go for treats that create a visual centerpiece:
- Witch Hat Cookies
- Chocolate-Dipped Strawberry Ghosts
- Monster Brownie Bites
- Monster Donut Holes
Arrange them on a large tray and mix different shapes and colors. The variety makes the table feel abundant without requiring dozens of different recipes.
For Trick-or-Treat Night
Keep things simple and portable.
Mummy pretzel rods, brownie bites, and cereal treats work particularly well because guests can grab them quickly. If you plan to serve fruit-based treats, keep them chilled until you need them.
Simple Halloween Treat Decorating Ideas
Want to customize these recipes without making another trip to the store? Use what you already have.
Candy eyes: Add them to brownies, cookies, donut holes, cereal treats, or fruit.
Chocolate drizzle: Melt chocolate and drizzle it over pretzels, cookies, or strawberries.
Colored frosting: Green instantly creates a monster or witch theme, while orange gives almost anything a pumpkin vibe.
Pretzels: Break them into pieces for spider legs, pumpkin stems, or crunchy decorations.
Sprinkles: A small handful can make plain treats look intentionally festive.
And remember: Halloween treats don’t need perfect decorations. A crooked chocolate line can easily become a mummy bandage. A lopsided eye can become a goofy monster. Honestly, perfection would probably make them less fun.
FAQ’s
What are the easiest cute Halloween treats for a party?
Mummy pretzel rods, monster donut holes, and Halloween Rice Krispie treats rank among the easiest options because they require little or no baking. You can decorate them quickly with candy melts, frosting, and candy eyes.
What Halloween treats work best for school events?
Choose individually portioned treats that travel easily, such as cereal treats, brownie bites, cookies, or pretzel rods. Always check the school’s ingredient and allergy policies before preparing them.
Can I make Halloween treats ahead of time?
Absolutely. Most cookies, brownies, cereal treats, and chocolate-covered pretzels can handle advance preparation. Store them in airtight containers and decorate them ahead of time so you have less work on party day.
How can I make Halloween treats look cute without special tools?
Use candy eyeballs, colorful sprinkles, melted chocolate, and decorating gel. You can also use a zip-top bag with a tiny corner snipped off to create simple lines and faces.
Final Thoughts
Halloween food doesn’t need complicated recipes or professional decorating skills. With a few simple ingredients, you can turn brownies into monsters, pretzels into mummies, bananas into ghosts, and ordinary cookies into tiny spiders.
These 9 cute Halloween treats for parties, school events, and trick-or-treat night give you plenty of options for every kind of celebration. Pick one or two for a quick snack, or make several and create a full spooky dessert table.
The best part? Every recipe keeps the focus where it belongs: delicious food that looks ridiculously cute. 🎃👻
And if one monster ends up with three eyes instead of two? Congratulations—you’ve just created a limited-edition Halloween character.