
Halloween deserves more than a bowl of candy dumped on the counter. If you’re hosting a spooky party, planning a Halloween movie night, or want something ridiculously cute to serve with coffee, Halloween baked goods can turn an ordinary dessert table into the star of the night.
And honestly, who says Halloween baking needs to be complicated? You don’t need professional decorating skills or a kitchen full of mysterious gadgets. A few familiar ingredients, some chocolate, colorful frosting, and a little spooky creativity can do plenty.
I’ve rounded up 9 easy Halloween baked goods that look festive without making you spend the entire day in the kitchen. Some look creepy, some look adorable, and a few manage to pull off both at once. 🙂
So grab your mixing bowl, preheat the oven, and prepare for your kitchen to smell dangerously good.
1. Spooky Spiderweb Chocolate Brownies
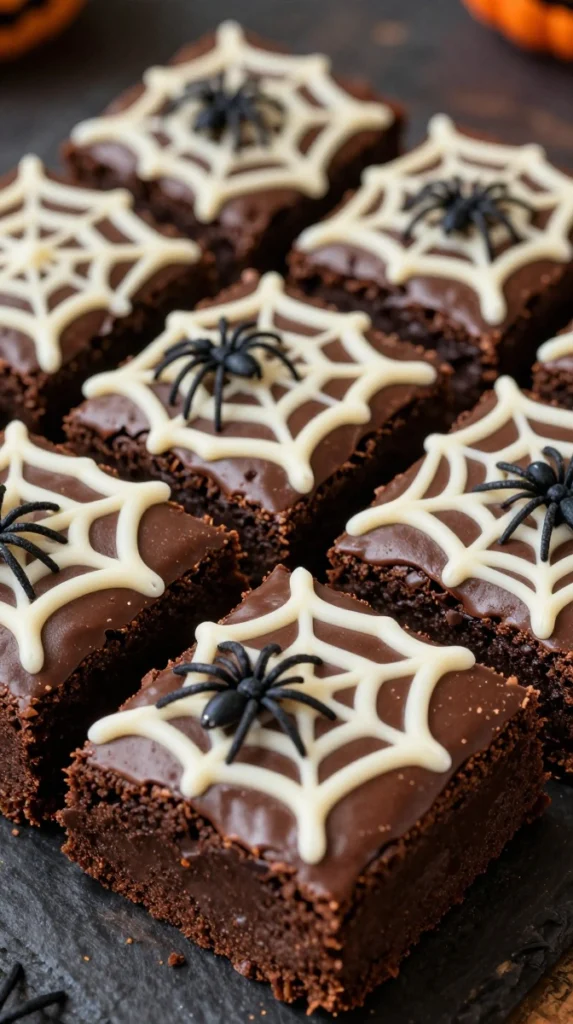
Rich chocolate brownies already have the Halloween mood going. Add a simple white chocolate spiderweb on top, and suddenly you have a dessert that looks far more complicated than it actually is.
The best part? You can use your favorite brownie recipe or a boxed mix when time gets tight. Nobody needs to know. Your secret stays between us.
Ingredients
- 1 cup unsalted butter, melted
- 2 cups granulated sugar
- 4 large eggs
- 1 teaspoon vanilla extract
- 1 cup all-purpose flour
- ¾ cup unsweetened cocoa powder
- ½ teaspoon salt
- ½ cup chocolate chips
- ½ cup white chocolate chips
- Optional: candy spiders
Step-by-Step Instructions
- Heat your oven to 350°F (175°C) and line a square baking pan with parchment paper.
- Whisk the melted butter and sugar together until smooth.
- Add the eggs and vanilla, then whisk until everything blends nicely.
- Stir in the flour, cocoa powder, and salt. Mix just until the batter comes together.
- Fold in the chocolate chips.
- Spread the batter into the prepared pan and bake for about 25–30 minutes.
- Let the brownies cool completely before decorating.
- Melt the white chocolate and transfer it to a piping bag or small zip-top bag.
- Pipe several circles across the brownie surface, then drag a toothpick from the center outward to create the spiderweb pattern.
- Add a few candy spiders if you want maximum Halloween drama.
Why You’ll Love It
These brownies deliver that deep, fudgy chocolate flavor everyone expects from a great brownie, while the spiderweb decoration gives them serious party appeal.
My tip: Don’t overbake them. A slightly fudgy center tastes much better than a dry brownie pretending to be cake.
2. Halloween Monster Sugar Cookies
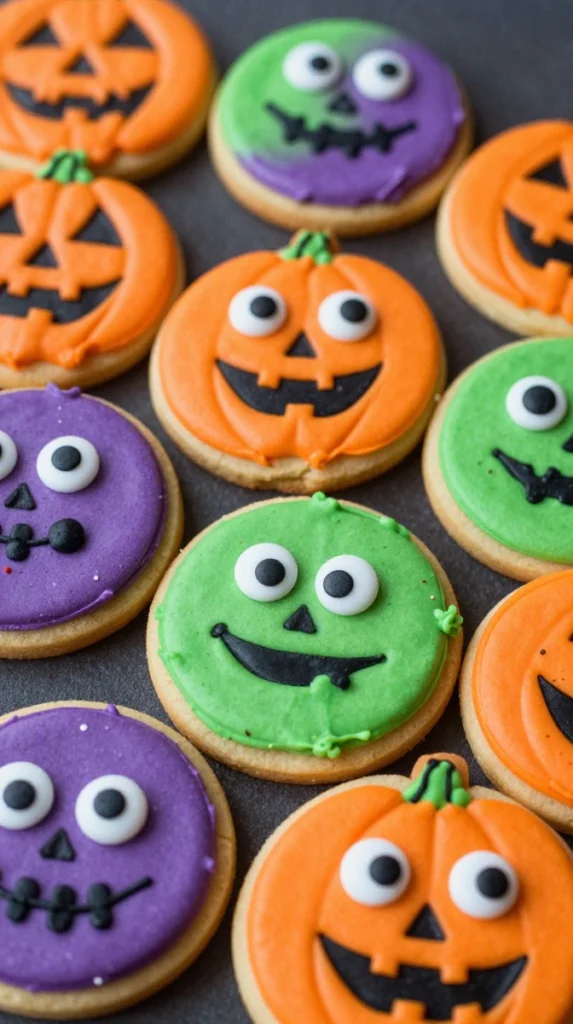
Want a Halloween dessert that kids can decorate themselves? These monster sugar cookies make an excellent edible activity.
Give everyone cookies, frosting, candy eyes, and sprinkles, then let the chaos begin. The uglier the monster looks, the better it works.
Ingredients
- 1 cup unsalted butter, softened
- 1 cup granulated sugar
- 1 large egg
- 2 teaspoons vanilla extract
- 2½ cups all-purpose flour
- 1 teaspoon baking powder
- ½ teaspoon salt
- Buttercream frosting
- Gel food coloring
- Candy eyes
- Optional: Halloween sprinkles
Step-by-Step Instructions
- Cream the butter and sugar until light and fluffy.
- Beat in the egg and vanilla.
- Whisk the flour, baking powder, and salt separately.
- Gradually add the dry ingredients to the butter mixture.
- Chill the dough for about 30 minutes.
- Roll the dough and cut it into circles or Halloween shapes.
- Place the cookies on a lined baking sheet.
- Bake at 350°F (175°C) for about 9–11 minutes.
- Cool the cookies completely.
- Tint your frosting with different colors and spread it over the cookies.
- Add candy eyes, sprinkles, and tiny frosting details to create your monsters.
Why You’ll Love It
These cookies let you turn dessert into entertainment. Every monster can look completely different, which makes them especially fun for Halloween parties with kids.
FYI: Gel food coloring gives you stronger colors without making your frosting runny.
3. Pumpkin Spice Cupcakes With Cinnamon Frosting
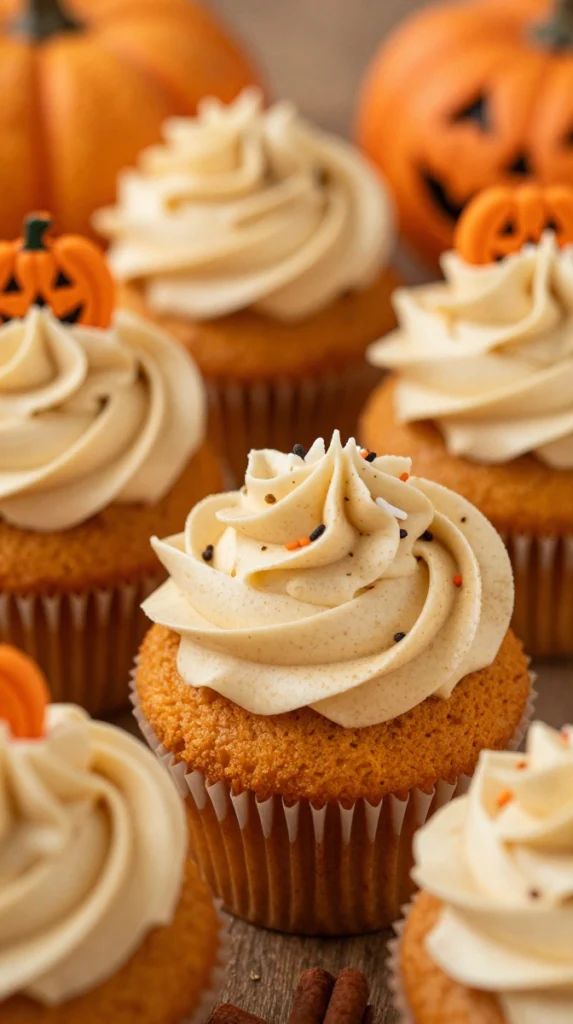
Pumpkin spice and Halloween belong together. These cupcakes taste warm, cozy, and perfectly autumnal, while a few spooky decorations make them party-ready.
If you love pumpkin desserts, you’ll probably have trouble keeping these around until Halloween night.
Ingredients
- 1½ cups all-purpose flour
- 1 teaspoon baking powder
- ½ teaspoon baking soda
- 1 teaspoon pumpkin pie spice
- ½ teaspoon salt
- ½ cup brown sugar
- ½ cup granulated sugar
- 2 large eggs
- ½ cup vegetable oil
- 1 cup pumpkin puree
- 1 teaspoon vanilla extract
- Cream cheese or vanilla frosting
- ½ teaspoon cinnamon
Step-by-Step Instructions
- Heat the oven to 350°F (175°C) and line a muffin tin with cupcake liners.
- Whisk together the flour, baking powder, baking soda, pumpkin spice, and salt.
- In another bowl, whisk the sugars, eggs, oil, pumpkin puree, and vanilla.
- Add the dry ingredients to the wet ingredients.
- Stir gently until the batter looks smooth.
- Divide the batter among the cupcake liners.
- Bake for 18–22 minutes.
- Cool completely before frosting.
- Mix cinnamon into your frosting.
- Pipe the frosting onto each cupcake.
- Finish with Halloween sprinkles, candy pumpkins, or tiny chocolate decorations.
Why You’ll Love It
The pumpkin keeps these cupcakes moist, while cinnamon adds extra warmth to the frosting. They taste like autumn in cupcake form.
I especially like these with a cup of strong coffee. Cake for breakfast? I’m not saying you should, but I’m also not judging.
4. Creepy-Cute Mummy Cookies
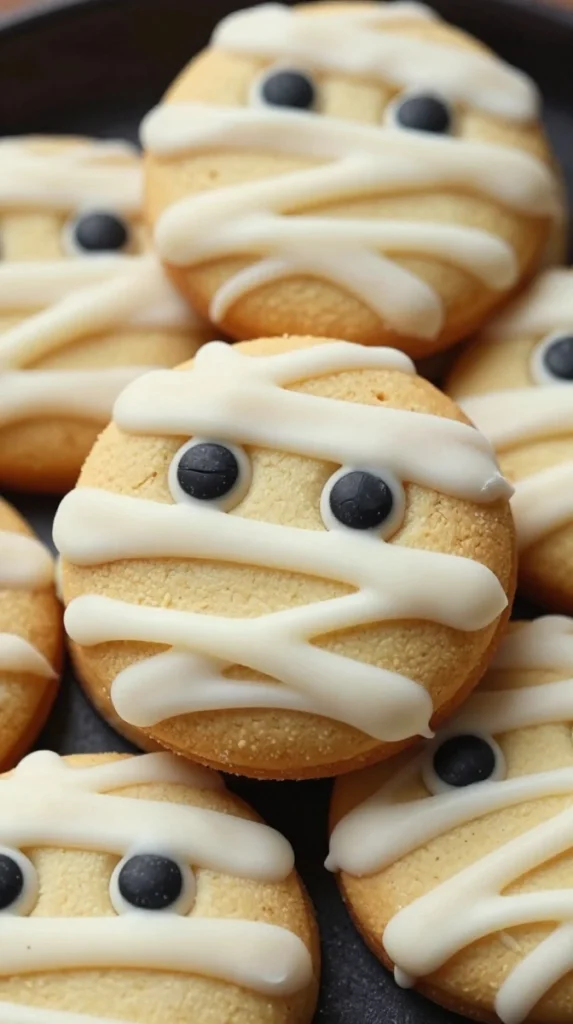
Mummy cookies prove that Halloween desserts don’t need elaborate decorations. A simple cookie, melted white chocolate, and candy eyes can create an adorable little army of mummies.
And yes, they look almost too cute to eat. Almost.
Ingredients
- 1 batch sugar cookie dough
- 1 cup white chocolate chips
- ½ cup dark chocolate chips
- Candy eyes
- Optional: orange or black sprinkles
Step-by-Step Instructions
- Prepare your favorite sugar cookie dough.
- Shape the dough into small oval cookies.
- Bake according to your recipe until the edges turn lightly golden.
- Let the cookies cool completely.
- Melt the white chocolate.
- Spread or drizzle white chocolate across each cookie in thin, uneven lines.
- Add two candy eyes before the chocolate sets.
- Use melted dark chocolate to add tiny details around the eyes.
- Allow the chocolate to firm up before serving.
Why You’ll Love It
These cookies require very little decorating skill. The messy chocolate lines actually make the design better, so perfectionists can finally relax.
Pro tip: Keep the chocolate slightly thick when drizzling. Super-thin chocolate lines can disappear into the cookie.
5. Halloween Monster Brownie Bites
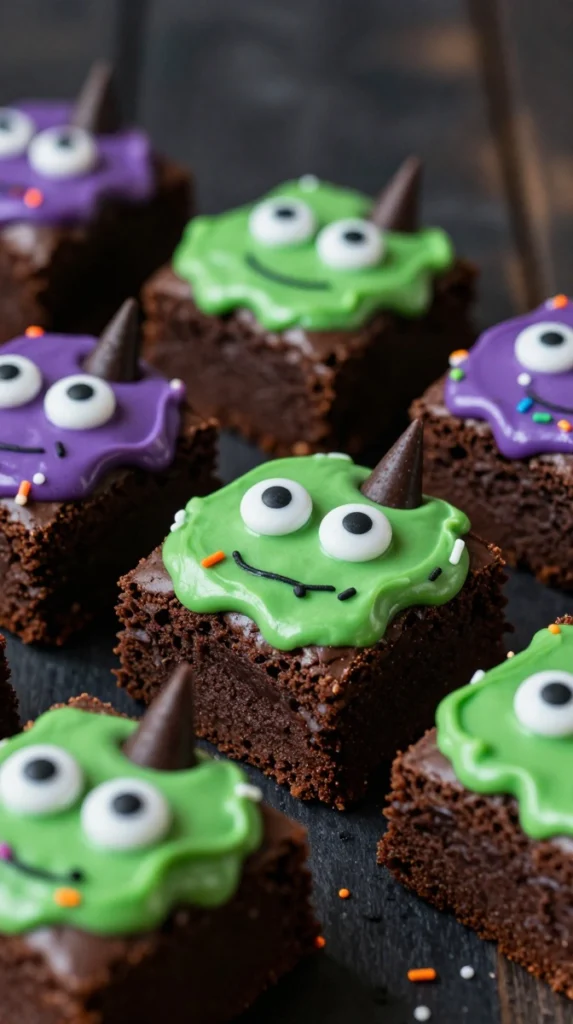
Tiny brownies become party-worthy when you cover them with colorful frosting and candy eyes.
These little bites work especially well when you’re serving lots of desserts because guests can grab one without committing to an entire giant slice.
Ingredients
- 1 batch fudgy brownies
- Buttercream frosting
- Green, purple, orange, or black gel food coloring
- Candy eyes
- Chocolate chips
- Optional: Halloween sprinkles
Step-by-Step Instructions
- Bake your brownies in a square pan.
- Let them cool completely.
- Cut the brownies into small squares or rectangles.
- Tint your frosting with Halloween colors.
- Spread or pipe frosting over each brownie bite.
- Add one, two, or several candy eyes.
- Add chocolate chips or sprinkles for extra texture.
- Chill briefly before serving if the frosting feels soft.
Why You’ll Love It
These brownie bites combine fudgy chocolate with creamy frosting, so you get plenty of flavor in every little bite.
Some guests may grab three “because they’re tiny.” We both know what’s happening there.
6. Ghost-Shaped Vanilla Sugar Cookies
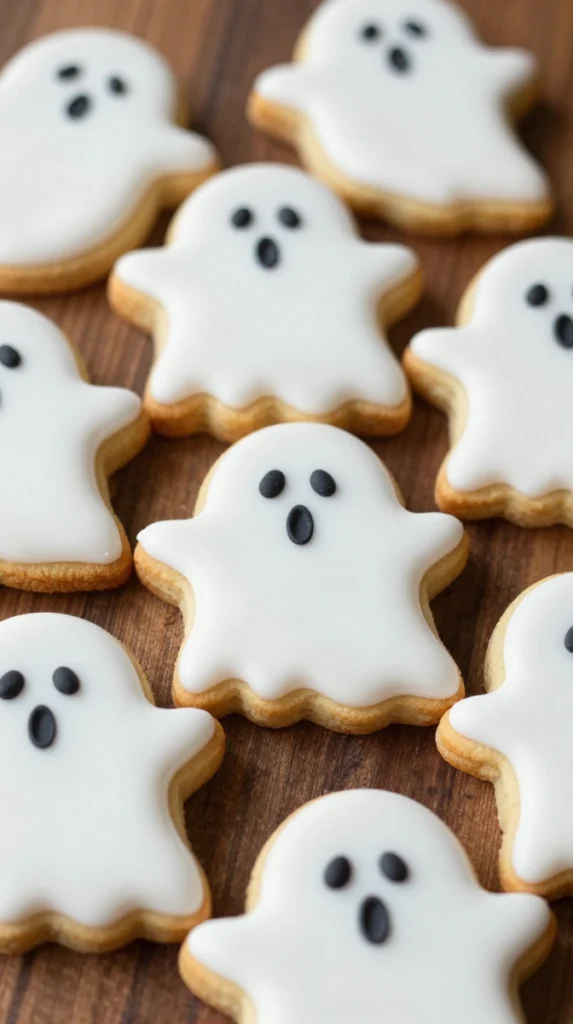
Nothing says Halloween quite like a plate of tiny edible ghosts.
These cookies use a simple vanilla sugar-cookie base and white icing. Keep the decorations minimal, and you’ll get that classic spooky look without spending hours with a piping bag.
Ingredients
- 2½ cups all-purpose flour
- 1 cup unsalted butter, softened
- ¾ cup granulated sugar
- 1 large egg
- 2 teaspoons vanilla extract
- 1 teaspoon baking powder
- ½ teaspoon salt
- Royal icing or vanilla glaze
- Black decorating gel
Step-by-Step Instructions
- Cream the butter and sugar until smooth.
- Add the egg and vanilla.
- Mix the flour, baking powder, and salt in another bowl.
- Gradually combine the dry ingredients with the wet ingredients.
- Chill the dough for about 30 minutes.
- Roll the dough on a lightly floured surface.
- Cut out ghost shapes with a cookie cutter.
- Bake at 350°F (175°C) for about 9–11 minutes.
- Cool the cookies completely.
- Cover each cookie with white icing.
- Add two black eyes and a tiny mouth.
Why You’ll Love It
These cookies look festive without overwhelming the dessert table. They also pair beautifully with hot chocolate, coffee, or apple cider.
For an extra cute look, give each ghost a slightly different expression. One happy ghost, one surprised ghost, one grumpy ghost—because apparently even ghosts have personalities.
7. Chocolate Halloween Bat Cookies
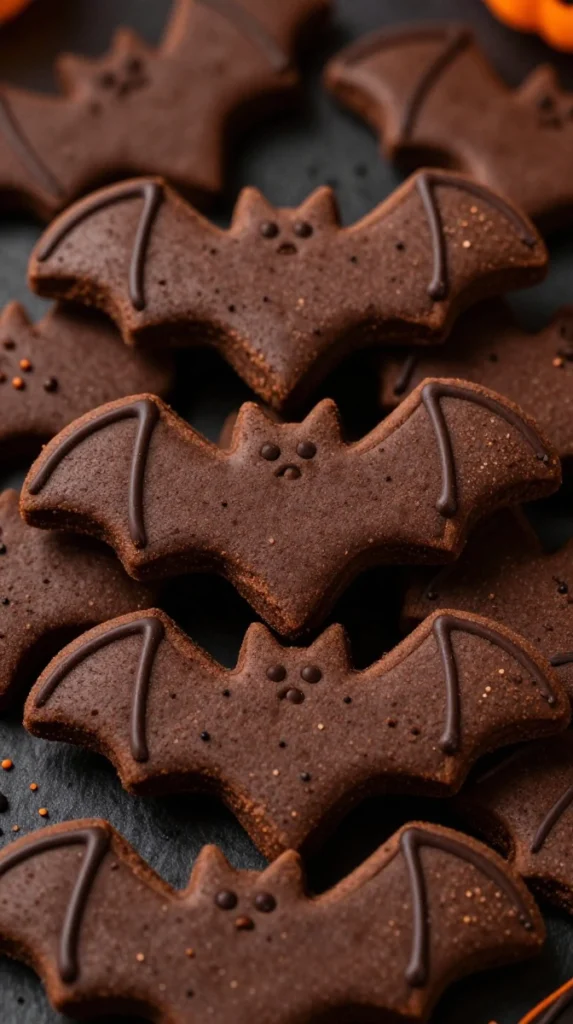
Chocolate lovers, this one has your name written all over it.
These dark, crisp-edged cookies use cocoa powder for a rich chocolate flavor and a bat-shaped cutter for the Halloween effect.
Ingredients
- 1¾ cups all-purpose flour
- ½ cup unsweetened cocoa powder
- ¾ cup unsalted butter, softened
- ¾ cup granulated sugar
- 1 large egg
- 1 teaspoon vanilla extract
- ½ teaspoon baking powder
- ¼ teaspoon salt
- Optional: Melted chocolate
- Optional: Halloween sprinkles
Step-by-Step Instructions
- Beat the butter and sugar until creamy.
- Add the egg and vanilla.
- Whisk together the flour, cocoa powder, baking powder, and salt.
- Slowly add the dry mixture to the butter mixture.
- Chill the dough for 30–45 minutes.
- Roll the dough evenly.
- Cut out bat shapes.
- Place the cookies on a lined baking sheet.
- Bake at 350°F (175°C) for about 9–12 minutes.
- Cool completely before decorating.
- Drizzle with melted chocolate or add a light dusting of powdered sugar.
Why You’ll Love It
The cocoa gives these cookies a deeper flavor than ordinary sugar cookies, and the bat shape makes them instantly recognizable.
My favorite trick: Don’t roll the dough too thin. Slightly thicker cookies give you a more satisfying bite and reduce the chance of crispy little bat crackers.
8. Halloween Cinnamon Roll Pumpkins
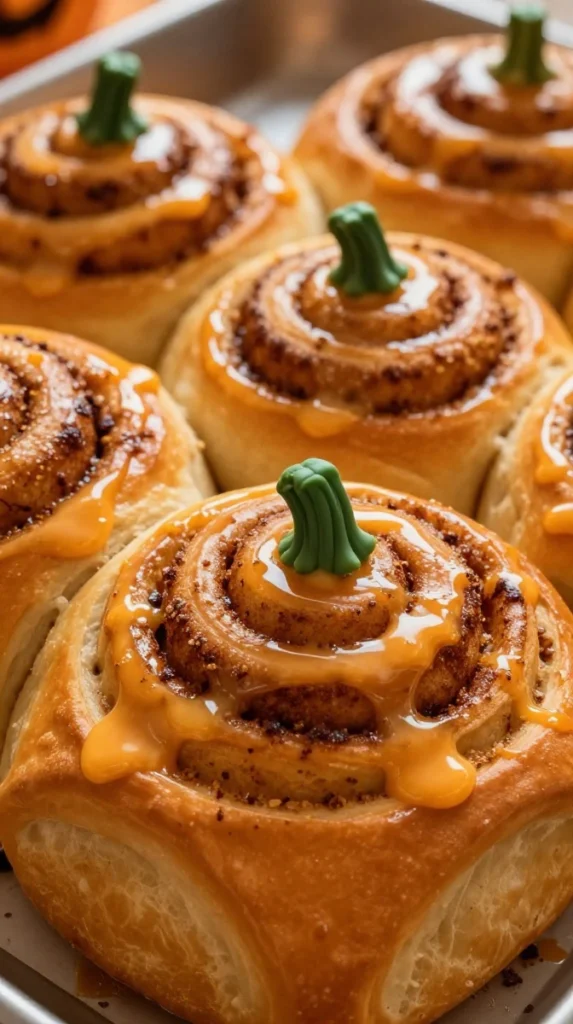
Why should Halloween desserts get all the attention? These pumpkin-shaped cinnamon rolls can turn breakfast, brunch, or a late-night snack into a Halloween event.
Soft dough, cinnamon sugar, creamy glaze, and pumpkin-inspired shaping make these seriously hard to resist.
Ingredients
- 1 package refrigerated cinnamon roll dough
- 2 tablespoons melted butter
- 2 tablespoons brown sugar
- 1 teaspoon cinnamon
- ½ cup powdered sugar
- 1–2 tablespoons milk
- Orange food coloring
- Optional: Green decorating icing
Step-by-Step Instructions
- Unroll the cinnamon roll dough carefully.
- Brush the dough with melted butter.
- Sprinkle brown sugar and cinnamon evenly over the surface.
- Roll the dough back up tightly.
- Slice it into individual rolls.
- Arrange each roll with slight indentations around the edges to create a pumpkin shape.
- Bake according to the dough package instructions.
- Mix powdered sugar with milk to create a glaze.
- Tint the glaze orange if desired.
- Drizzle the glaze over warm rolls.
- Add small green icing stems.
Why You’ll Love It
These rolls give you the comfort of classic cinnamon rolls with a fun Halloween twist.
They also save time because refrigerated dough does most of the heavy lifting. Sometimes shortcuts deserve applause, not guilt.
9. Black Velvet Halloween Cake
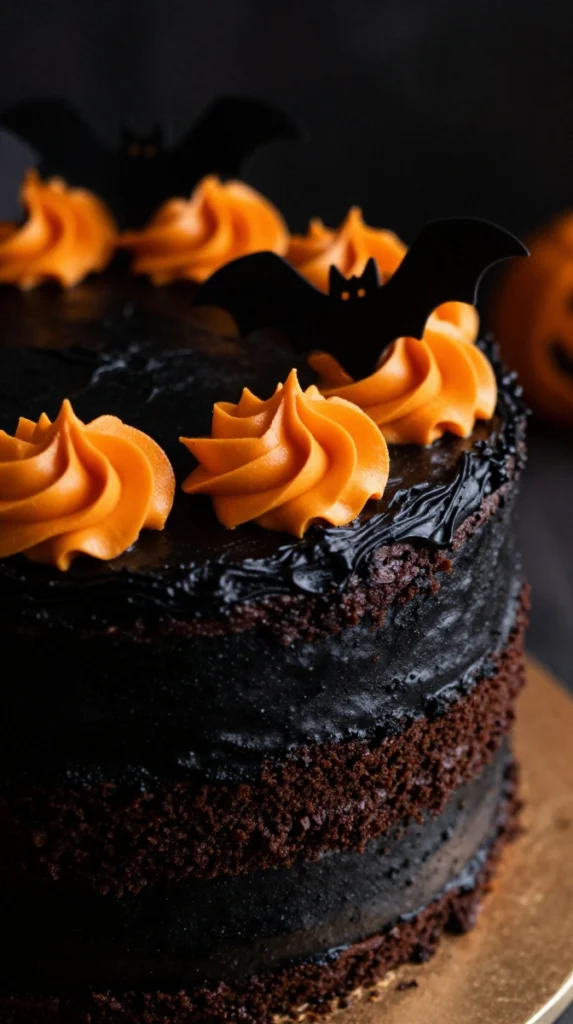
If you want one dramatic centerpiece for your Halloween dessert table, make this black velvet cake.
It has a deep cocoa flavor, a striking dark appearance, and plenty of room for spooky decorations. Pair it with orange frosting for maximum Halloween energy.
Ingredients
- 2 cups all-purpose flour
- 1¾ cups granulated sugar
- ¾ cup unsweetened cocoa powder
- 1½ teaspoons baking powder
- 1½ teaspoons baking soda
- 1 teaspoon salt
- 2 large eggs
- 1 cup buttermilk
- ½ cup vegetable oil
- 2 teaspoons vanilla extract
- 1 cup hot coffee
- Black gel food coloring
- Orange buttercream frosting
Step-by-Step Instructions
- Heat your oven to 350°F (175°C).
- Grease and line two round cake pans.
- Whisk together the flour, sugar, cocoa powder, baking powder, baking soda, and salt.
- Add the eggs, buttermilk, oil, and vanilla.
- Mix until the batter looks smooth.
- Add the hot coffee gradually while mixing carefully.
- Add black gel food coloring until you reach a deep black shade.
- Divide the batter between the prepared pans.
- Bake for about 28–32 minutes.
- Cool the cakes completely.
- Place one layer on a cake stand and spread orange buttercream over it.
- Add the second layer and frost the cake.
- Decorate with chocolate bats, candy eyes, sprinkles, or a simple black-and-orange design.
Why You’ll Love It
This cake looks dramatic enough for a centerpiece but tastes like a rich chocolate cake underneath all that Halloween magic.
The hot coffee won’t make the cake taste like coffee. Instead, it boosts the chocolate flavor. IMO, that little trick makes a surprisingly big difference.
Easy Tips for Better Halloween Baked Goods
Before you start baking all nine recipes, a few simple tricks can save you from unnecessary kitchen drama.
Bake Ahead When You Can
Cookies and brownies usually hold up well when you make them ahead. Store them in airtight containers and decorate them closer to your party.
Use Gel Food Coloring
Gel coloring gives frosting stronger Halloween shades without adding too much liquid. Orange, black, purple, and green create an easy spooky palette.
Don’t Overdecorate Everything
Not every dessert needs twenty sprinkles, six candy eyes, and a miniature haunted house sitting on top.
Pick one strong visual idea and let it shine.
Let Baked Goods Cool Before Decorating
This sounds obvious, but we’ve all made the mistake of frosting warm cupcakes. The frosting melts, slides away, and suddenly your cute ghost looks like it had a rough night.
Give your cakes and cookies time to cool.
Create a Dessert Table With Different Textures
A great Halloween dessert spread feels more exciting when you mix:
- Fudgy brownies
- Soft cupcakes
- Crisp cookies
- Fluffy cake
- Sticky cinnamon rolls
That variety keeps guests reaching for “just one more.”
How to Make Your Halloween Dessert Table Look Amazing
You don’t need expensive decorations to make homemade Halloween baked goods look impressive.
Place your largest dessert, such as the black velvet cake, in the center. Surround it with smaller brownies and cookies. Then add cupcakes and cinnamon rolls around the edges.
Use simple black, orange, white, and purple decorations to keep everything visually connected.
A few fake spiderwebs around the table can add atmosphere too—just keep them away from the actual food unless you enjoy explaining why your brownie has lint on it.
Which Halloween Baked Goods Should You Make First?
If you want something quick, choose the mummy cookies or monster brownie bites.
If you want a kid-friendly activity, make the monster sugar cookies and let everyone decorate their own.
For a serious Halloween centerpiece, go with the black velvet cake.
And if you’re hosting a cozy autumn gathering, pumpkin spice cupcakes and cinnamon roll pumpkins make excellent choices.
You really can’t go wrong with chocolate brownies either. Chocolate rarely causes complaints. Funny how that works.
Final Thoughts
These 9 Halloween baked goods prove that spooky baking doesn’t need complicated techniques or professional decorating skills.
From fudgy spiderweb brownies and adorable mummy cookies to pumpkin spice cupcakes and dramatic black velvet cake, each recipe brings something different to the table. More importantly, you can customize almost every one with your favorite Halloween colors, candies, and decorations.
So whether you’re throwing a big Halloween party or simply baking something fun for your family, pick a recipe, turn on your favorite spooky playlist, and get baking.
And if the first batch looks a little wonky? Eat it anyway.
Halloween has officially permitted you. 🎃