
Fall is knocking, and your front door is looking a little blah. Let’s fix that with a wreath that screams autumn without screaming your budget. You don’t need craft-store magic powers — just a glue gun, some dollar-store finds, and maybe a trash bag or two. Ready to make the neighbors jealous? Let’s get wrapping.
Why Make a DIY Fall Wreath Anyway?
Store-bought wreaths cost a fortune and look exactly like everyone else’s. Making your own means you pick the colors, the texture, and the vibe. Rustic? Glam? Slightly chaotic? All valid.
Plus, DIY wreaths are stupidly forgiving. If a leaf falls off, you glue it back. If the whole thing looks weird, you add more pumpkins. There is no wrong answer here, IMO.
Materials and Tools You’ll Need
Grab these basics before you start. Most are cheap, and you probably own half of them already.
- Grapevine wreath base — 12 to 18 inches works for most doors. A wire or foam base works too.
- Faux fall leaves and flowers — sunflowers, mums, maple leaves, eucalyptus.
- Mini pumpkins — real or faux. Faux lasts longer outdoors.
- Ribbon — burlap, plaid, or satin, about 2 inches wide.
- Hot glue gun and glue sticks — your new best friend.
- Floral wire or twine — for securing bigger pieces.
- Scissors or wire cutters — sharp ones, please.
- Optional: berry sprigs, pinecones, wooden letters, small chalkboard signs.
Budget-Friendly Substitutes
No grapevine base? Use a wire hanger bent into a circle and wrapped in burlap. No faux pumpkins? Paint small rocks orange. No glue gun? Floral wire and patience.
Dollar stores are goldmines for fall florals. So is your own backyard — dried branches and pinecones cost nothing.
Step-by-Step: The Classic Rustic Fall Wreath
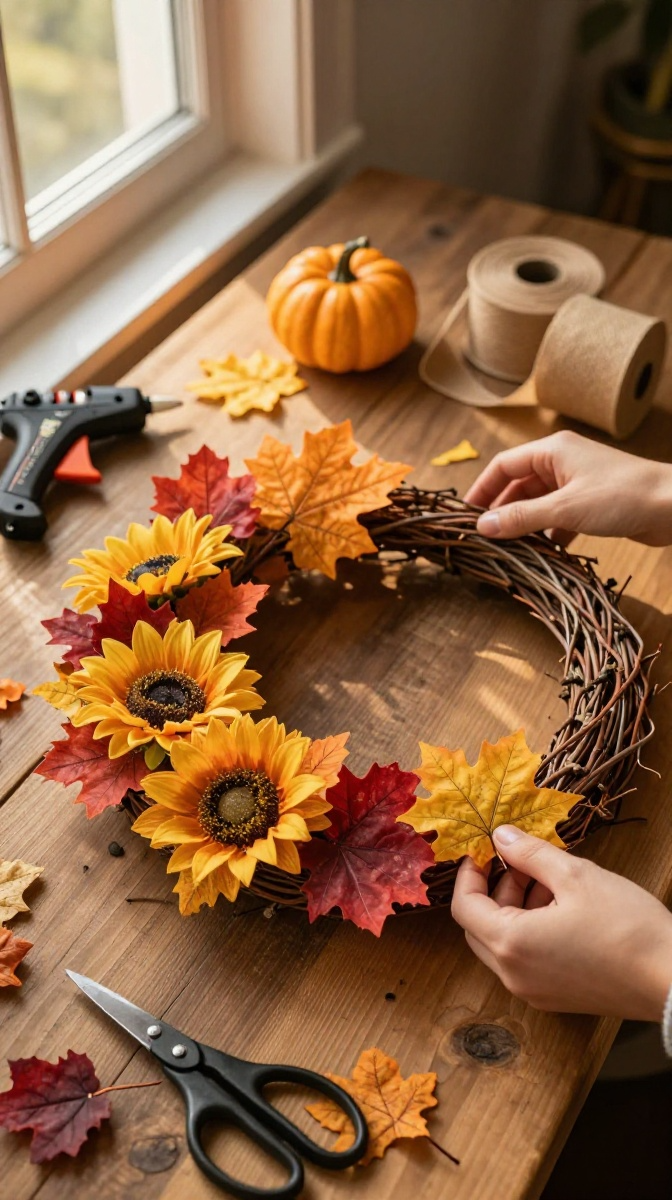
This is the beginner-friendly version. It looks fancy but takes about 30 minutes.
- Lay out your design first. Place leaves, flowers, and pumpkins on the wreath without gluing. Move things around until it feels balanced. Trust me, this saves regret later.
- Start with the biggest pieces. Glue or wire your pumpkins and large flowers first. These anchor the whole look.
- Fill in with leaves. Tuck smaller leaves around the big pieces. Overlap them for a fuller, natural feel.
- Add accents. Berry sprigs, pinecones, and small filler flowers go in the gaps. Don’t overthink it.
- Wrap the ribbon. Loop it around the top or tie a big bow on one side. Secure with glue or wire.
- Hang and fluff. Hold it up, step back, and adjust anything that looks off. Glue down loose bits.
Troubleshooting Common Wreath Disasters
Everything keeps falling off? Use floral wire for heavy items, not just glue. Glue alone hates gravity.
It looks lopsided? Step back and squint. Usually one side is too heavy. Move a pumpkin or add a filler piece to balance it.
Too much going on? Remove one type of flower or color. Simpler often looks better.
5 Fall Wreath Ideas to Steal Right Now
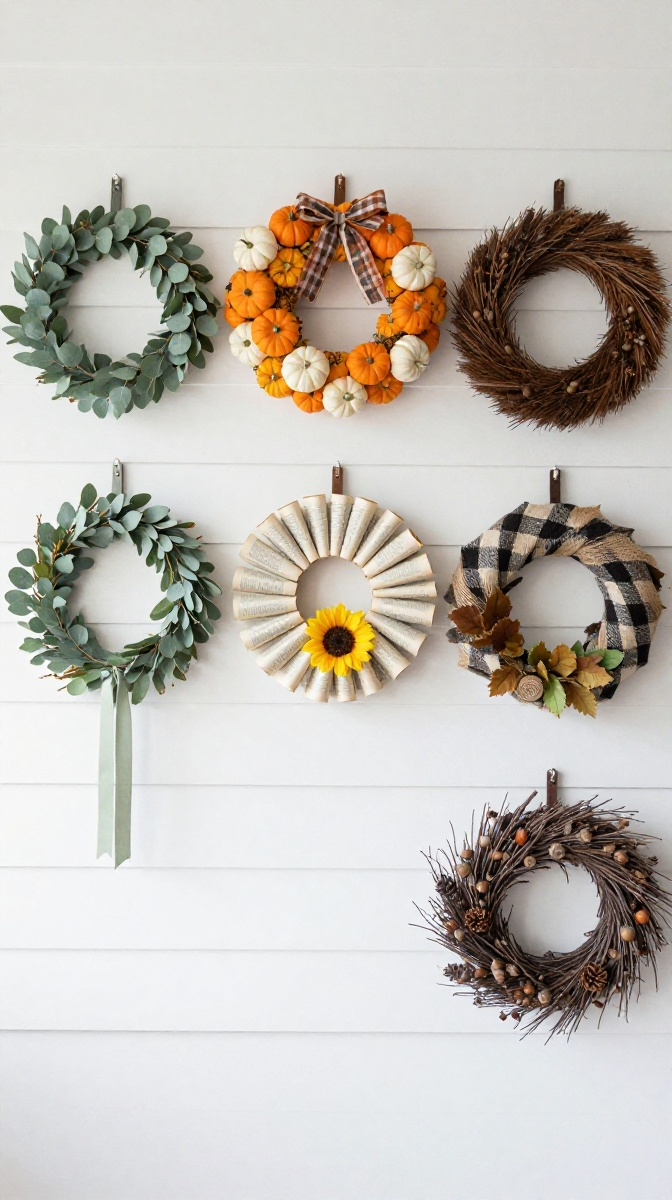
1. The Minimalist Eucalyptus Wreath
Just eucalyptus stems and a thin ribbon. That’s it. Clean, modern, and done in 15 minutes. Perfect for people who hate clutter.
2. The Pumpkin Explosion Wreath
Cover the entire base with mini pumpkins in orange, white, and green. Add a plaid bow. It’s extra, and that’s the point.
3. The Book Page Wreath
Roll old book pages into cones and glue them around a foam base. Add a single sunflower. Cozy, literary, and cheap.
4. The Buffalo Check and Burlap Wreath
Wrap the base in burlap, add a buffalo check bow, and tuck in faux leaves. Farmhouse vibes for days.
5. The Foraged Nature Wreath
Use twigs, dried leaves, acorns, and pinecones you found outside. Free, earthy, and unique.
Tips, Mistakes, and Customization Ideas
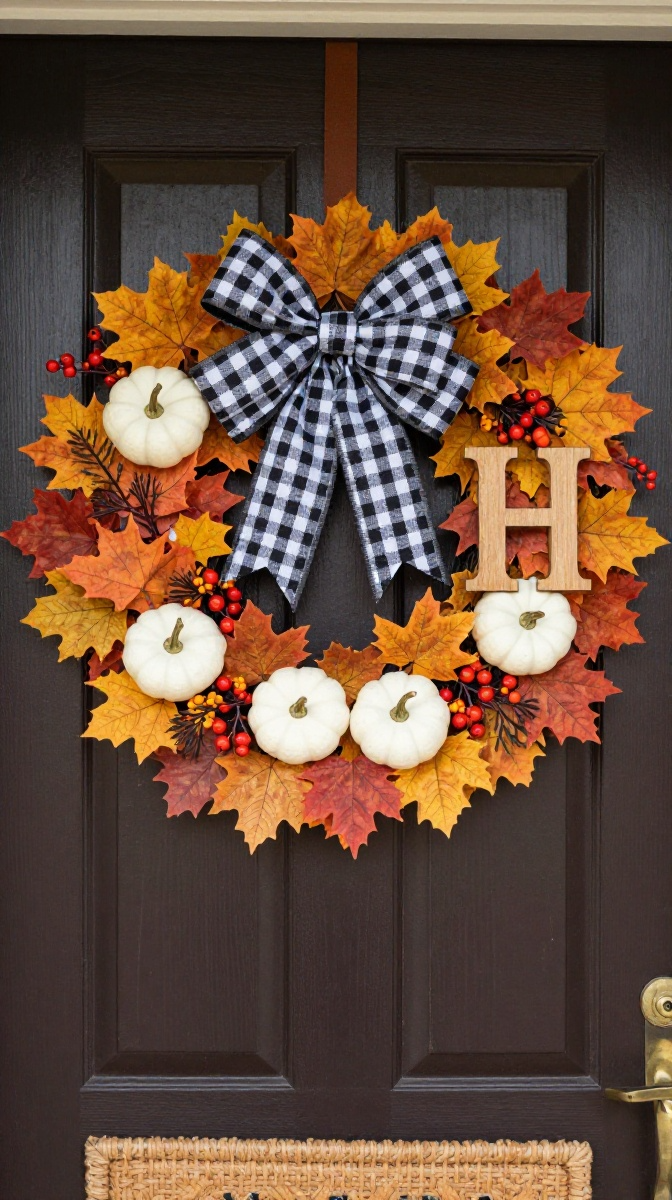
Tip: Use a mix of textures. Smooth ribbon plus rough burlap plus shiny berries equals visual magic.
Mistake to avoid: Gluing everything in one spot. Spread pieces evenly around the wreath, or cluster them in a triangle shape.
Customize it: Add a monogram letter, a small chalkboard, or a photo of your pet. Yes, really. Your door, your rules.
How to Display, Gift, or Store Your Wreath
Hang it with a sturdy over-the-door hook, not a flimsy nail. For gifts, tie a ribbon around it and add a handwritten tag. To store, wrap it in a plastic bag and keep it flat in a box.
If you’re giving it away, make sure the recipient actually likes fall decor. Otherwise, awkward.
FAQ’s
How long does a DIY fall wreath take?
Most take 30 to 60 minutes. The minimalist ones take 15. The pumpkin explosion might take 90 if you’re picky.
Can I use real pumpkins on a wreath?
You can, but they rot. Use them for a party or a short season. Faux is better for long-term.
Will my wreath survive rain?
Grapevine and faux florals handle light rain. Real leaves and paper will not. Bring it inside during storms.
What if I don’t have a glue gun?
Floral wire and twine work fine. It takes longer, but it’s just as sturdy. Bonus: no burned fingertips.
How do I make a wreath look full?
Layer, layer, layer. Overlap leaves, tuck filler flowers, and don’t be afraid to add more. Empty gaps are the enemy.
Can kids help make a fall wreath?
Yes, with supervision. Let them place leaves and pumpkins. You handle the hot glue. Everyone wins.
Go Make Something Cozy Already
Your front door is begging for a fall glow-up. Grab a base, raid the dollar store, and start gluing. It doesn’t have to be perfect — it just has to be yours. And hey, if it falls apart, that’s what next weekend is for. Happy crafting!