
Thanksgiving decorating does not have to mean spending half your paycheck on pumpkins, garlands, and table decor. With a few inexpensive supplies, you can make warm, rustic decorations that look surprisingly fancy. This DIY Thanksgiving decoration project is simple enough for beginners but pretty enough to become the star of your holiday setup. Grab some faux leaves, a little twine, and your crafting scissors—we’re making something festive.
Why You’ll Love These DIY Thanksgiving Decorations
There is something special about homemade Thanksgiving decor. It feels warmer, more personal, and honestly, a little more satisfying than grabbing everything from a store shelf. This project creates a charming Thanksgiving leaf garland with mini pumpkins and a rustic welcome sign. You can hang it across a mantel, drape it over a doorway, decorate a dining room wall, or use it as part of your Thanksgiving table display. And the best part? You can adjust almost everything. Want more pumpkins? Add them. Prefer neutral colors? Skip the bright orange. Accidentally glue your fingers together? Well, congratulations, you have officially entered the DIY community.
Choose Your Thanksgiving Style
For a classic Thanksgiving look, use burnt orange, mustard yellow, deep red, brown, and cream. These colors instantly give your space that cozy autumn feeling. For a modern farmhouse style, stick with ivory pumpkins, kraft paper, natural wood, beige leaves, and soft greenery. If you prefer something more elegant, add metallic gold accents sparingly.
Materials and Tools You’ll Need
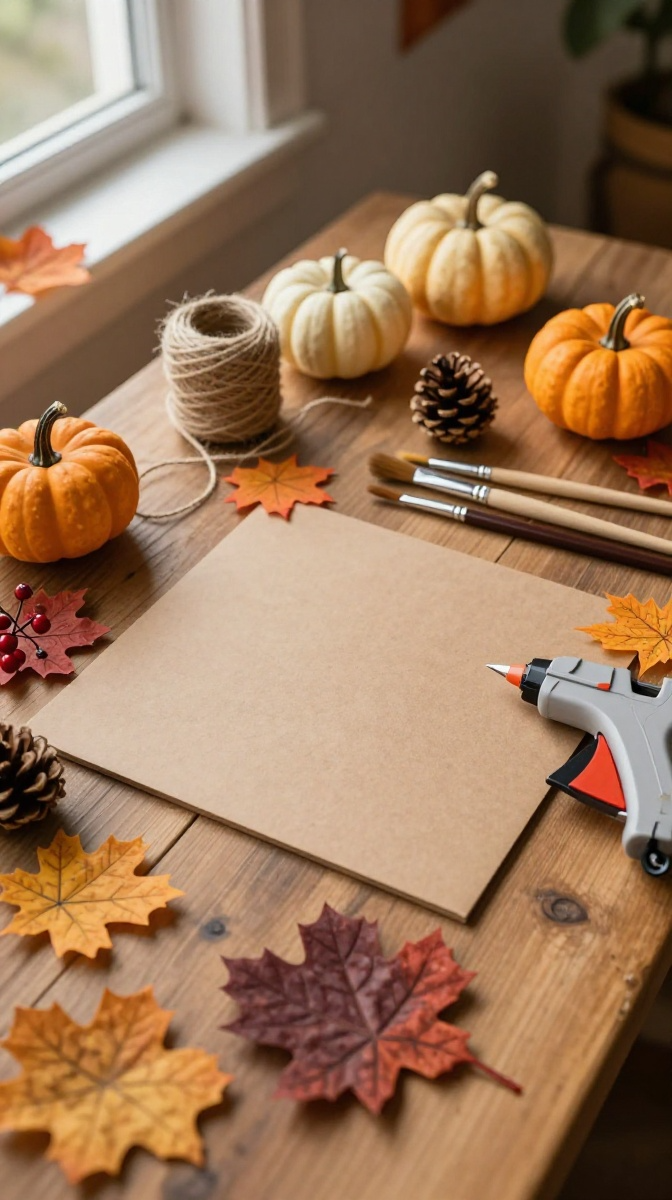
- Faux autumn leaves – Use individual leaves or an inexpensive artificial leaf garland.
- Mini faux pumpkins – Foam, plastic, or lightweight wooden pumpkins all work.
- Jute twine – Substitute with cotton cord, ribbon, or thin rope.
- Kraft cardstock – Use brown scrapbook paper if you already have it.
- Small wooden board – A craft plaque works beautifully, but thick cardboard can also work.
- Hot glue gun and glue sticks – Strong craft glue is a good alternative.
- Scissors – Sharp craft scissors make cutting easier.
- Paint – Choose cream, brown, orange, or another Thanksgiving-friendly shade.
- Paintbrushes – Small brushes work best for details.
- Black or dark brown marker – Use it for lettering on the sign.
- Artificial berries or small pinecones – Optional, but great for adding texture.
- Wooden clothespins – Optional for attaching leaves without glue.
Budget-friendly tip: Check your local dollar store or reuse decorations from previous years. Thanksgiving crafts are excellent at turning forgotten supplies into something that suddenly looks intentional.
Prepare the Thanksgiving Sign
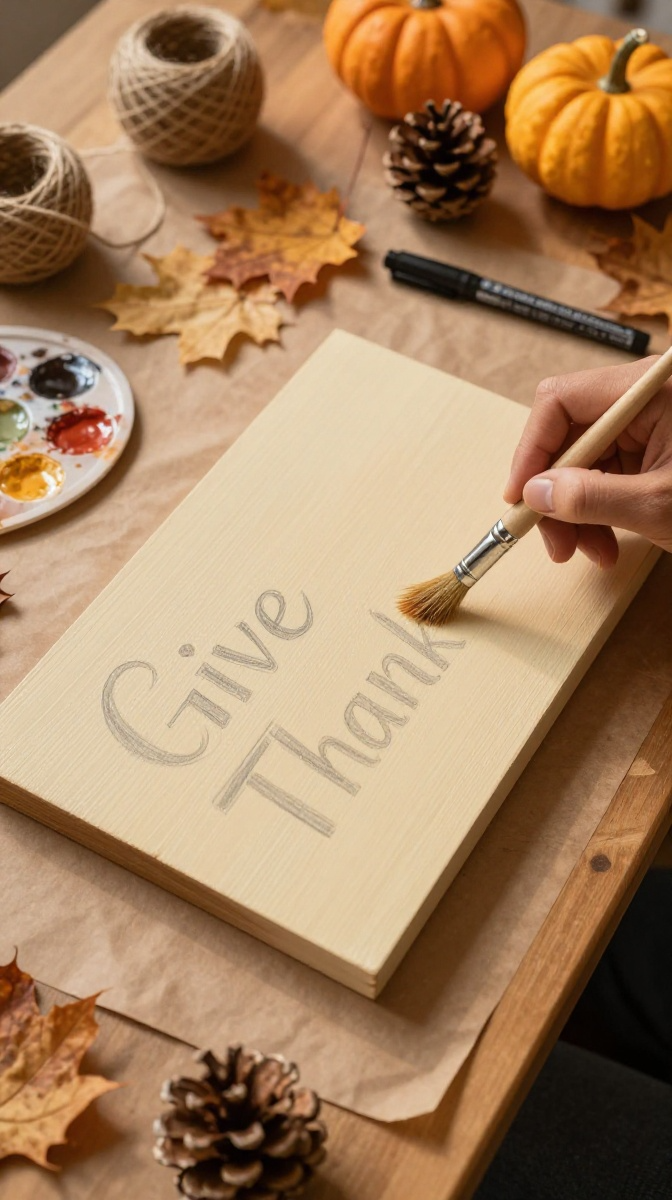
The sign gives the garland a focal point, so start here. You can write “Give Thanks,” “Thankful,” “Gather,” or simply “Happy Thanksgiving.”
Pick the Right Base
A small wooden plaque gives the most polished result, but you absolutely do not need one. A piece of thick cardboard covered with kraft paper can work surprisingly well. Choose a size that will not overpower your leaves and pumpkins. Something around 8 to 12 inches wide works nicely for a small wall or mantel display.
Paint and Letter the Sign
Paint the wooden board with one or two thin coats rather than one giant gloopy coat. Let each layer dry before adding another. Once the background dries, sketch your lettering lightly with a pencil. Trace over it with a dark marker or paint pen. Do not worry about perfect lettering. A slightly imperfect handwritten style often looks more charming than something that appears printed by a machine.
Make the Thanksgiving Leaf Garland
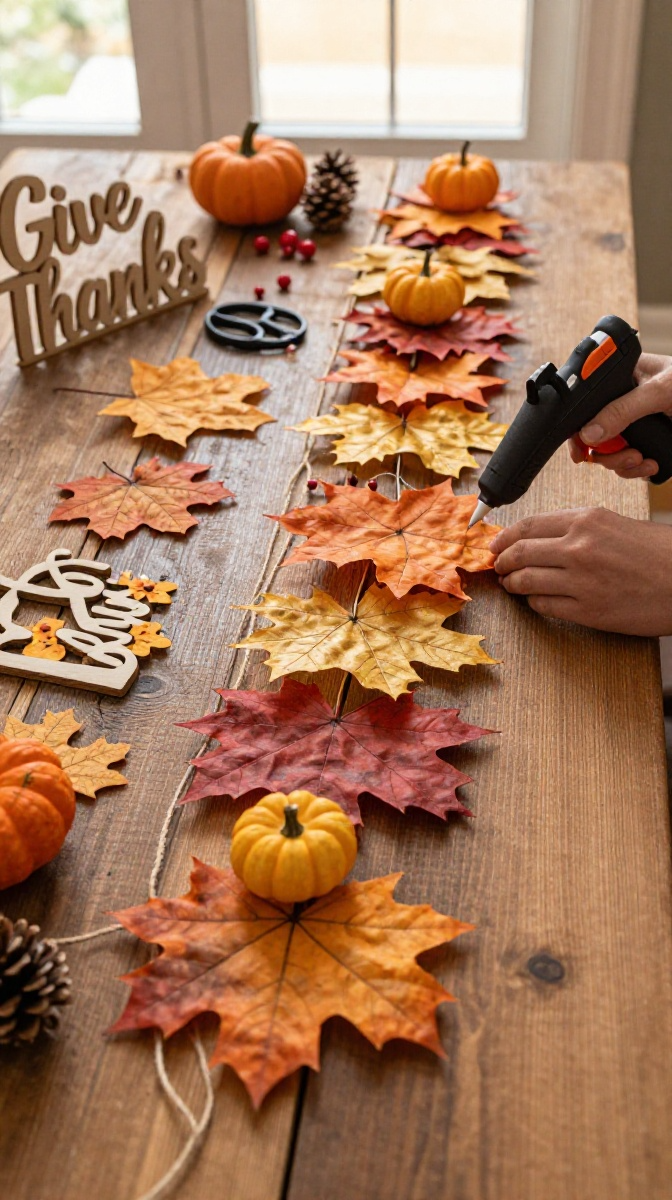
Now comes the fun part. The garland looks complicated when finished, but the construction is ridiculously simple.
Arrange Before You Glue
Lay your twine across your workspace and arrange the leaves along it before attaching anything. Mix different leaf shapes and colors instead of placing identical leaves in a perfectly predictable row. Add a few mini pumpkins between groups of leaves. Then tuck in berries or tiny pinecones wherever the arrangement looks a little empty. Why arrange everything first? Because hot glue dries fast, and rearranging glued decorations usually turns into a tiny Thanksgiving wrestling match.
Attach the Decorations
- Cut the twine about 12 to 18 inches longer than the area you want to decorate so you have extra room for hanging.
- Place the largest leaves first and space them evenly along the twine.
- Layer smaller leaves over the larger ones to create depth and a natural, scattered look.
- Glue the leaves to the twine using small dots of hot glue.
- Add mini pumpkins between the leaf clusters, keeping heavier decorations close to secure points.
- Tuck in berries and pinecones where you want extra texture.
- Attach the Thanksgiving sign near the center using twine, ribbon, or hot glue depending on the weight.
- Trim loose glue strings after everything cools completely.
- Fluff and adjust the leaves so the garland looks full without becoming overcrowded.
The trick is to avoid making both sides perfectly identical. Nature rarely does symmetry, and your garland does not need to either.
Customize Your Thanksgiving Decor
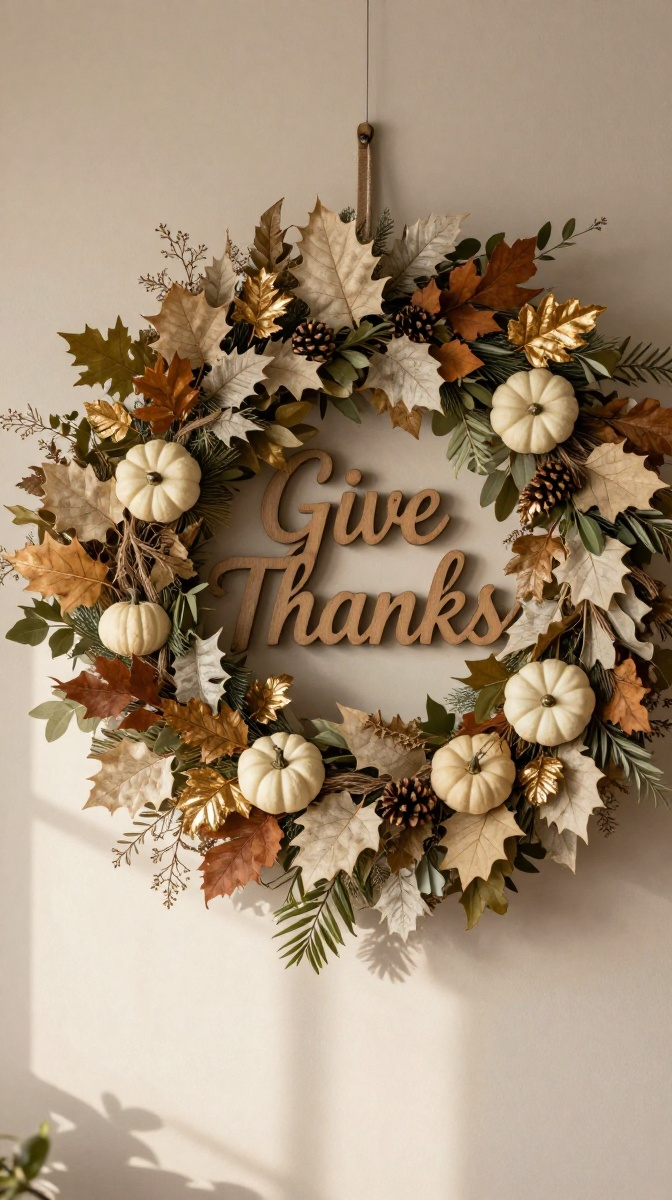
This is where you can make the project completely yours. The basic garland gives you the structure, but the little details create the personality.
Try a Neutral Thanksgiving Palette
Replace orange leaves with cream, tan, olive, and muted brown. Add white pumpkins and natural wood accents for a soft farmhouse appearance.
Add Metallic Details
A few gold-painted leaves can make the decoration feel more elegant without turning it into a glitter explosion. You can also paint pumpkin stems gold or add a thin gold border around the sign. Less is more here. Metallic accents should catch the eye, not scream for it.
Make It Kid-Friendly
If children want to help, swap the hot glue gun for double-sided tape, craft glue, or wooden clothespins. Let kids decorate paper leaves with crayons, markers, or washable paint. You can even write one thing each family member feels thankful for on a paper leaf and attach all the leaves to the garland. Now your decoration has a little story behind it, which is much better than another generic pumpkin sitting on a shelf.
Common Mistakes to Avoid
DIY decorations rarely go perfectly on the first try. That is normal. Here are a few mistakes I have learned to avoid.
Using Too Much Glue
You only need a small amount of hot glue. Large blobs can show through lightweight leaves and make the garland look messy. Use tiny dots and press the decoration firmly for several seconds.
Overloading the Garland
More decorations do not automatically make a better decoration. If you attach pumpkins, pinecones, berries, bows, signs, acorns, ribbons, and approximately every autumn object you own, the garland may start looking like it needs its own zip code. Leave a little breathing room between clusters.
Ignoring Weight
Heavy pumpkins or wooden pieces can pull the twine downward. Keep heavier decorations close to strong attachment points, or use thicker rope for a larger garland.
Skipping the Layout Test
Always arrange everything before gluing. This simple step saves a shocking amount of frustration.
Easy Ways to Display Your Finished Craft
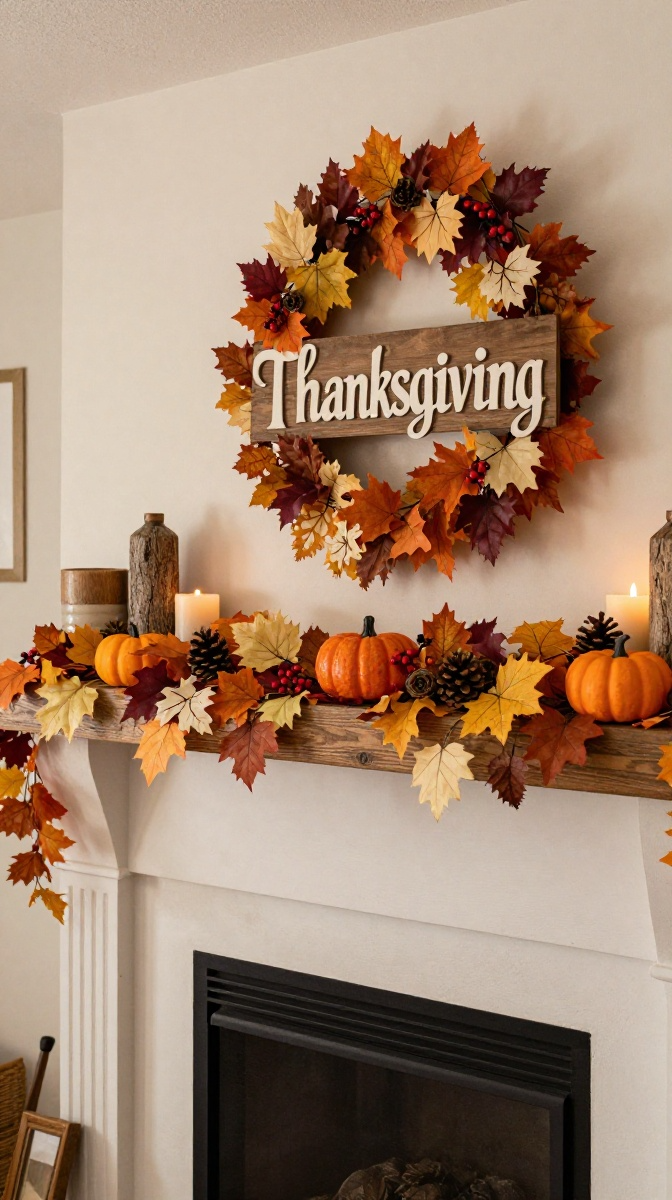
Your finished Thanksgiving decoration can go way beyond the front door. Across a mantel: Drape the garland loosely across the fireplace and add a few candles or small pumpkins underneath. Over a doorway: Use removable hooks so you can hang the decoration without damaging the wall. On a dining room wall: Hang the sign in the center and let the leaves extend outward on both sides. Above a buffet table: Pair the garland with neutral dishes, folded napkins, and a few natural accents. As a table decoration: Make a shorter version and lay it down the center of your Thanksgiving table. Keep it low enough that guests can still see each other across the table. You can also make smaller versions as Thanksgiving gifts. Add a handwritten note or family message to the sign, wrap it with kraft paper, and you have a thoughtful handmade present.
FAQ’s
Can I make this Thanksgiving decoration without a hot glue gun?
Yes. Use strong craft glue, double-sided adhesive, or small wooden clothespins. Craft glue takes longer to dry, so give it plenty of time before hanging the garland.
What can I use instead of faux leaves?
Try paper leaves, felt leaves, fabric scraps, dried leaves, or cardstock cut into leaf shapes. Paper is especially useful if you want children to help with the project.
How long does this DIY Thanksgiving decoration take?
You can usually finish a simple version in about 30 to 60 minutes, depending on how detailed you make it. A larger garland with painted decorations will take longer.
Can I use real pumpkins?
For a hanging garland, lightweight faux pumpkins work better. Real pumpkins can become too heavy and may cause the twine or attachment points to sag.
How can I make the decoration look more expensive?
Stick to a limited color palette, mix different textures, and avoid overcrowding. Natural twine, wood, muted leaves, and a few carefully placed metallic accents can create a much more polished look.
Can I reuse the decoration next year?
Absolutely. Store the garland flat or loosely coiled in a dry container. Keep it away from moisture and excessive heat, and it should be ready for another Thanksgiving decorating session.
Give Your Thanksgiving Decor a Handmade Touch
A beautiful Thanksgiving home does not require a giant decorating budget or professional crafting skills. A few simple supplies, a little creativity, and an hour of your time can create something warm and personal. Start with the basic leaf garland, then make it your own with colors, signs, pumpkins, and little details that fit your home. And if something goes slightly wrong? Fix it, laugh about it, and keep crafting. That is half the fun.