
There’s something about making dessert with kids that turns an ordinary afternoon into a tiny kitchen adventure.
I learned that the hard way the first time I let a little helper crack eggs into the mixing bowl. One egg landed perfectly. The second one somehow ended up with a tiny piece of shell swimming around like it had booked a vacation.
We fished it out, laughed about it, and carried on.
That’s exactly why I love making easy dessert recipes for kids. They don’t need complicated techniques, expensive ingredients, or a perfectly spotless kitchen. Kids can stir, scoop, sprinkle, decorate, and proudly announce that they “made dessert” while you quietly handle the hot oven.
Over the years, I’ve made plenty of kid-friendly sweets, and I’ve discovered that the best ones share a few things: simple ingredients, short steps, plenty of room for creativity, and very little opportunity for a kitchen meltdown.
These recipes fit that sweet spot.
Some need baking, while others only need a refrigerator or microwave. A few take barely 15 minutes to prepare. And yes, several involve chocolate, because apparently children have excellent dessert priorities.
Why You’ll Love These Recipes

- Easy for little helpers: Kids can handle plenty of the stirring, scooping, decorating, and assembling.
- Simple ingredients: You can make most of these with pantry and refrigerator staples.
- Quick preparation: Several desserts take less than 20 minutes to put together.
- Perfect for parties: These treats work beautifully for birthdays, playdates, school celebrations, and family gatherings.
- Lots of room for creativity: Sprinkles, fruit, chocolate chips, and colorful toppings let kids make each dessert their own.
The biggest bonus? You don’t need to worry about making every dessert look bakery-perfect. When kids decorate them, a slightly crooked chocolate drizzle becomes part of the charm.
Ingredients List
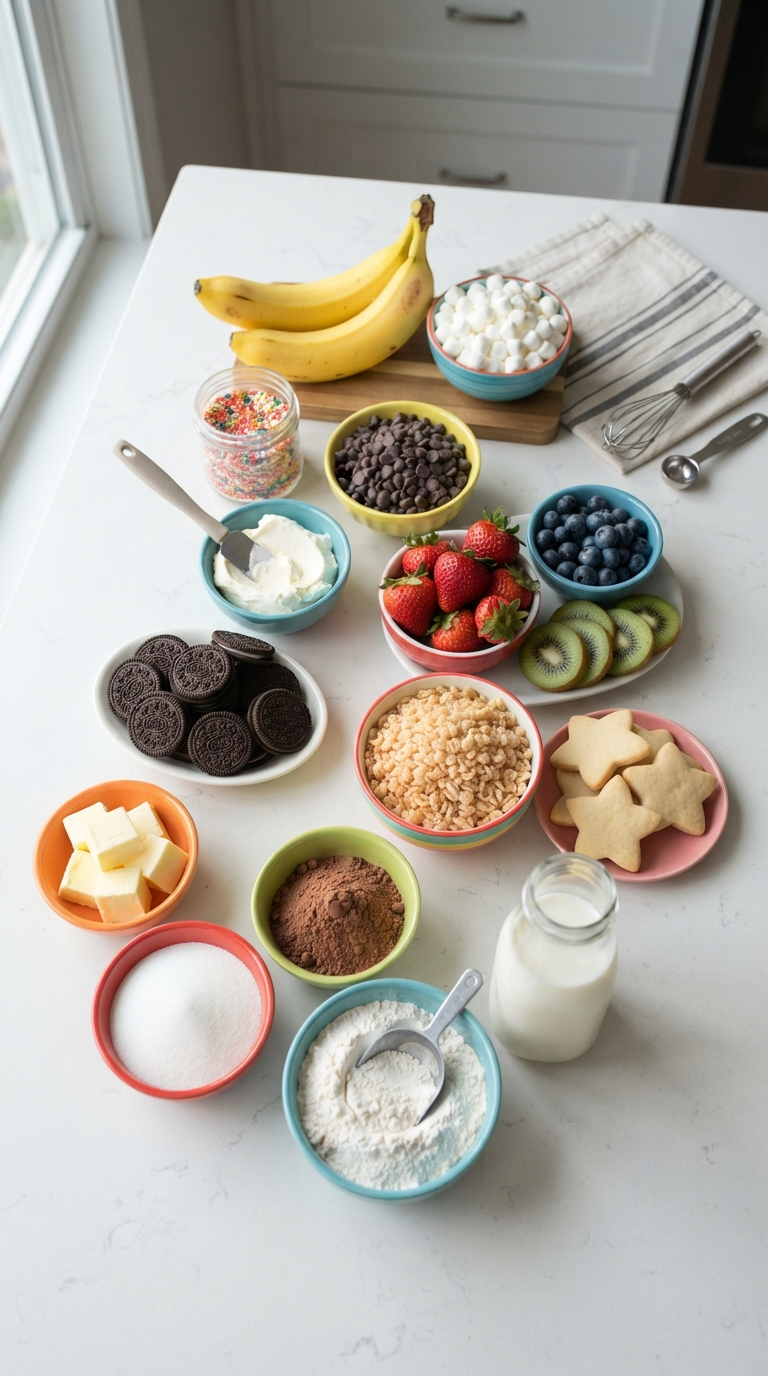
You don’t need to buy a mountain of specialty ingredients for these easy dessert recipes for kids. Here are the basic ingredients I like to keep around when I know little hands might want to help.
For Chocolate Banana Bites
- 2 ripe bananas
- 1 cup semi-sweet chocolate chips
- 1 teaspoon coconut oil
- 2 tablespoons colorful sprinkles
- 2 tablespoons mini chocolate chips
You can replace the semi-sweet chocolate with milk or dark chocolate.
For No-Bake Oreo Truffles
- 24 chocolate sandwich cookies
- 4 ounces cream cheese, softened
- 1 cup white or semi-sweet chocolate chips
- 1 teaspoon vegetable shortening or coconut oil, optional
- Sprinkles for decorating
For Easy Rice Krispie Treats
- 4 cups crispy rice cereal
- 4 cups mini marshmallows
- 3 tablespoons butter
- 1 teaspoon vanilla extract
- 2 tablespoons colorful sprinkles
For Mini Fruit Pizzas
- 6 small sugar cookies
- 4 ounces cream cheese, softened
- 2 tablespoons powdered sugar
- 1/2 teaspoon vanilla extract
- 1 cup sliced strawberries
- 1/2 cup blueberries
- 1/2 cup sliced kiwi or banana
For Simple Chocolate Mug Cakes
- 4 tablespoons all-purpose flour
- 2 tablespoons granulated sugar
- 2 tablespoons unsweetened cocoa powder
- 1/4 teaspoon baking powder
- 3 tablespoons milk
- 2 tablespoons vegetable oil
- 1/4 teaspoon vanilla extract
- 1 tablespoon chocolate chips
For a gluten-free version, use a reliable 1-to-1 gluten-free flour blend.
Step-by-Step Instructions

1. Chocolate Banana Bites
These little bites became a favorite in my kitchen because they require almost no baking skills.
Step 1: Slice the bananas — 5 minutes
Peel two bananas and slice them into rounds about 1/2 inch thick. Place the slices on a parchment-lined plate or baking sheet.
Step 2: Melt the chocolate — 2 to 3 minutes
Place the chocolate chips and coconut oil in a microwave-safe bowl. Heat in 20-second bursts, stirring after each one.
Stop when the chocolate looks almost completely melted. Stir until smooth rather than continuing to microwave it.
That little trick prevents scorched chocolate.
Step 3: Dip the banana slices — 5 minutes
Let kids use a fork to dip each banana piece into the melted chocolate. Place the coated pieces on parchment.
Step 4: Decorate — 5 minutes
Sprinkle each bite with mini chocolate chips, sprinkles, or crushed cookies while the chocolate remains soft.
Refrigerate for about 20 minutes until the chocolate firms up.
2. No-Bake Oreo Truffles
These feel fancy despite being ridiculously easy.
Step 1: Crush the cookies — 3 minutes
Place the sandwich cookies in a food processor and pulse until they become fine crumbs.
No food processor? Put the cookies inside a zip-top bag and let the kids crush them with a rolling pin.
Supervision helps here unless you want cookie crumbs decorating the entire kitchen.
Step 2: Mix with cream cheese — 3 minutes
Add softened cream cheese and mix until you get a thick, sticky dough.
Step 3: Roll the balls — 10 minutes
Scoop about 1 tablespoon of mixture at a time and roll it between your palms.
Place each ball on parchment.
Step 4: Add chocolate — 5 minutes
Melt the chocolate and dip each truffle into it.
Let kids add sprinkles before the chocolate sets.
Refrigerate for at least 30 minutes.
3. Easy Rice Krispie Treats
This classic never gets old.
Step 1: Melt butter and marshmallows — 5 minutes
Melt the butter in a large saucepan over low heat. Add the marshmallows and stir until smooth.
Remove the pan from the heat and stir in vanilla.
Step 2: Add cereal — 2 minutes
Pour in the crispy rice cereal and stir gently until everything gets coated.
Step 3: Press into the pan — 5 minutes
Transfer the mixture to a greased 8-inch square pan.
Use a lightly buttered spatula or parchment paper to press the mixture evenly.
Don’t pack it down too firmly. That makes the treats dense and hard.
Step 4: Decorate — 5 minutes
Add sprinkles while the surface still feels slightly sticky.
Let the treats cool for about 30 minutes before cutting them into squares.
4. Mini Fruit Pizzas
These are especially fun when kids want to decorate their own desserts.
Step 1: Make the topping — 3 minutes
Beat cream cheese, powdered sugar, and vanilla until smooth.
Step 2: Prepare the cookies — 2 minutes
Place the sugar cookies on a tray.
Step 3: Spread and decorate — 10 minutes
Let each child spread a little cream cheese mixture over a cookie.
Then provide bowls of sliced strawberries, blueberries, kiwi, bananas, or other soft fruit.
Kids can create their own designs.
Step 4: Chill — 15 minutes
Refrigerate the finished fruit pizzas until ready to serve.
5. Simple Chocolate Mug Cakes
This dessert feels like magic because a few ingredients turn into a warm chocolate cake in minutes.
Step 1: Mix dry ingredients — 2 minutes
Add flour, sugar, cocoa powder, and baking powder to a microwave-safe mug.
Stir well.
Step 2: Add wet ingredients — 2 minutes
Add milk, oil, and vanilla. Stir until you no longer see dry flour.
Fold in chocolate chips.
Step 3: Microwave — 60 to 90 seconds
Microwave on high for about 60 seconds.
Check the center. If it still looks very wet, cook for another 10 to 20 seconds.
Avoid overcooking it because the cake continues cooking for a moment after you remove it.
Let it cool for a few minutes before serving.
Pro Tips & Tricks

Let Kids Do the Safe Jobs
Children can stir, measure, decorate, crush cookies, arrange fruit, and roll truffles.
Keep hot pans, boiling mixtures, sharp knives, and appliances that require extra care with the adult.
The goal involves creating happy memories, not giving everyone a crash course in kitchen first aid.
Measure Ingredients Before You Start
I learned this one after attempting to measure flour while a child enthusiastically dumped sprinkles into another bowl.
Set everything out first.
Small bowls make the process smoother, especially when several kids want to participate.
Don’t Overmix
For cakes and muffins, mix only until the ingredients come together.
Overmixing can create a dense texture.
For no-bake treats, simply mix until everything looks evenly combined.
Use Parchment Paper
Parchment makes cleanup much easier and keeps chocolate-covered treats from sticking.
It also gives kids a clear workspace for decorating.
Store Desserts Properly
Keep cream cheese desserts, fruit-topped cookies, and chocolate-covered banana bites refrigerated.
Store crispy cereal treats in an airtight container at room temperature.
For best texture, enjoy most homemade kid-friendly desserts within two to three days.
Variations & Substitutions
The beauty of easy dessert recipes for kids comes from how easily you can change them.
For a nut-free option, simply skip nuts and choose toppings such as sprinkles, crushed cookies, coconut, or mini chocolate chips. Always check packaged ingredients if you need to avoid traces of nuts.
For a dairy-free version, choose dairy-free chocolate and plant-based alternatives that work well for baking. Use a dairy-free cream cheese substitute for recipes that need cream cheese.
You can also turn almost any of these desserts into a holiday treat. Add orange and black sprinkles for Halloween, red and green decorations for Christmas, or pastel candies for Easter.
And if you have a child who thinks fruit automatically ruins dessert, let them choose the toppings. Somehow, fruit becomes much more exciting when they get to arrange it themselves.
Serving Suggestions
These desserts work especially well for birthday parties, weekend baking sessions, playdates, family movie nights, and school celebrations.
For a birthday party, set up a mini dessert station with cookies, frosting, sprinkles, chocolate chips, and fruit. Give each child a plate and let them decorate their own treat.
For movie night, make chocolate banana bites or Rice Krispie treats earlier in the day and keep them ready in the kitchen.
For an afternoon activity, Oreo truffles and fruit pizzas work beautifully because kids can spend time assembling and decorating them instead of waiting around for something to bake.
I also love serving mug cakes after dinner when everyone wants something sweet but nobody wants to wait an hour.
Just remember that hot desserts need a little cooling time before kids dig in.
FAQ’S

Can kids make these desserts by themselves?
Older children can prepare some no-bake recipes with appropriate supervision, but younger children should have an adult nearby.
Adults should handle ovens, stovetops, hot melted ingredients, and sharp tools.
How far ahead can I make these desserts?
Most of these desserts work well when prepared a day ahead.
Oreo truffles and Rice Krispie treats can sit ready in advance, while fruit pizzas taste best when you assemble them closer to serving time.
Can I freeze kid-friendly desserts?
Yes, some work better than others.
Oreo truffles freeze well in an airtight container. You can also freeze unassembled cookie dough when a recipe allows it.
I don’t recommend freezing fresh fruit pizzas because the fruit can lose its pleasant texture after thawing.
Why did my Rice Krispie treats turn hard?
You probably pressed the mixture too firmly or cooked the marshmallows for too long.
Use low heat, remove the marshmallow mixture as soon as it becomes smooth, and press the cereal mixture gently into the pan.
Can I replace chocolate with white chocolate?
Absolutely.
White chocolate works particularly well for Oreo truffles, banana bites, and decorated treats. Just melt it slowly because white chocolate can scorch more easily than regular chocolate.
How should I store leftover desserts?
Use airtight containers for most desserts.
Keep cream cheese, fresh fruit, and other perishable toppings refrigerated. Let refrigerated chocolate treats sit at room temperature for a few minutes before serving if you prefer a softer texture.
Closing / Final Thoughts
The best part about making easy dessert recipes for kids isn’t actually the dessert.
It’s watching a child carefully sprinkle chocolate chips over something they helped create. It’s the proud little smile when they announce, “I made this!” It’s licking the mixing spoon, making a ridiculous mess with sprinkles, and discovering that cookies somehow taste better when everyone helped make them.
And yes, sometimes the kitchen looks like a sugar-powered tornado passed through it.
That’s okay.
Pick one recipe, gather a few simple ingredients, and let the kids get involved. Don’t worry if the decorations aren’t perfect or every cookie looks a little different. Homemade desserts don’t need to look identical to taste wonderful.
Start with the chocolate banana bites if you want something ridiculously easy. Try the Oreo truffles when you want a no-bake project. Or make mini fruit pizzas when you want to give everyone their own little decorating canvas.
Whatever you choose, keep the expectations low, keep the sprinkles within reach, and enjoy the mess.
Those are usually the moments kids remember.