
Let’s be honest for a second: Halloween party planning can turn into an absolute nightmare fast. You start with grand visions of a multi-tiered pumpkin spice cake with spun-sugar spiderwebs, and three hours later you’re crying over a collapsed pile of grey buttercream, wondering where your life went off track.
Who actually has six hours to bake intricate pastries on a Tuesday night? Not you, and definitely not me.
If you need fast, show-stopping spooky treats that taste as good as they look, I’ve got your back. We are skipping the culinary degree requirements and focusing on absolute party wins. I’ve put together a lineup of easy Halloween cookies that will steal the show at your dessert table without making you lose your sanity in the process. Grab your favorite mug of coffee (or a giant glass of Pinot Noir 😉), and let’s get baking!
1. No-Bake White Chocolate Mummy Cookies
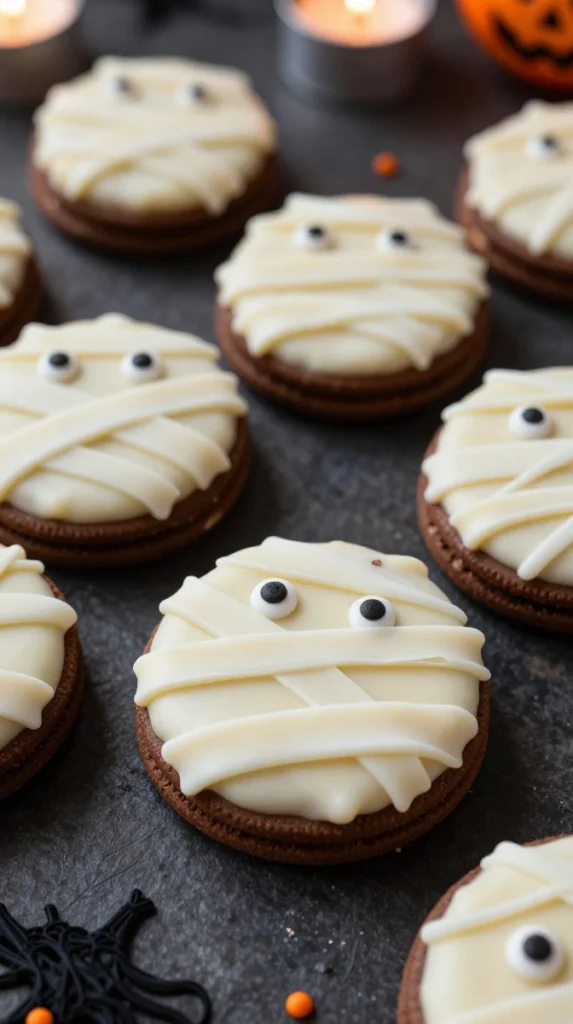
If you can melt chocolate and scribble uneven lines, congratulations—you are fully qualified to make these adorable mummy cookies! They look ridiculously cute on a platter, and you don’t even have to turn on your oven.
Ingredients
- 1 package Milano cookies (or double-stuffed Oreos)
- 12 oz white chocolate melting wafers (or almond bark)
- 1/2 cup dark chocolate chips (for drizzle contrast)
- 1 package mini candy eyes
- 1 tsp coconut oil (makes the melted chocolate silky smooth)
Step-by-Step Instructions
- Melt your white chocolate melting wafers with the coconut oil in a microwave-safe bowl in 30-second bursts, stirring between each burst until completely melted.
- Dip each Milano cookie entirely into the melted white chocolate using a fork, letting the excess drip off, then lay them flat on a parchment-lined baking sheet.
- Immediately press two mini candy eyes onto the upper third of each coated cookie before the chocolate sets.
- Pour the remaining melted white chocolate into a small ziplock bag, snip off a tiny corner, and zig-zag icing lines back and forth across the cookie to create mummy bandages.
- Pop the baking sheet into the fridge for 10 minutes to set completely.
Why You’ll Love It
These bad boys take literally 15 minutes of hands-on effort, making them the ultimate last-minute rescue treat. The crispy, buttery cookie combined with creamy white chocolate gives you that perfect bakery crunch without any actual baking. IMO, using store-bought base cookies is the single greatest holiday shortcut ever invented.
2. Gooey Peanut Butter Spider Cookies
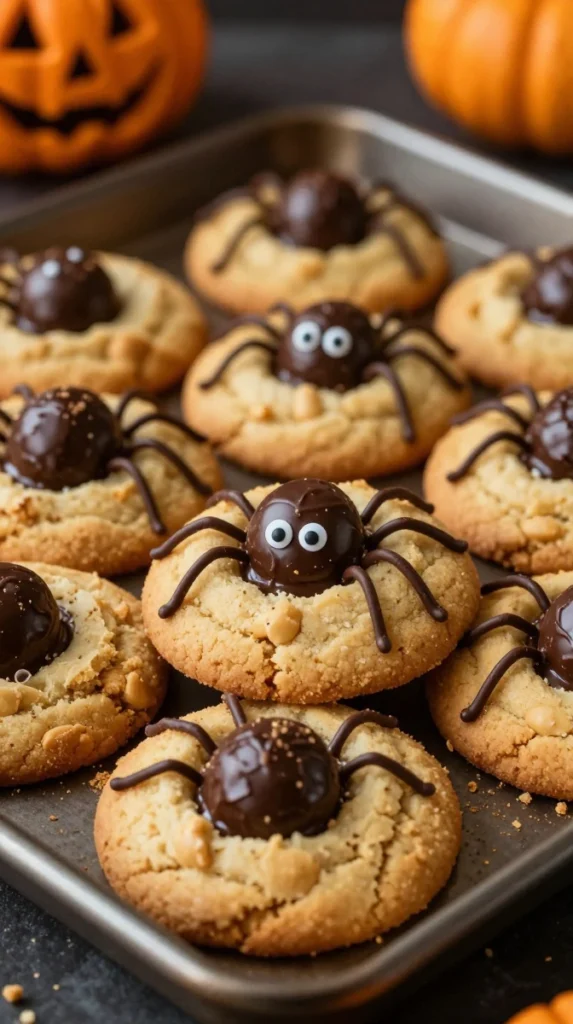
What happens when classic peanut butter blossom cookies get a creepy-crawly makeover? You get soft, chewy spider cookies that disappear from the snack table in about thirty seconds flat.
Ingredients
- 1 cup creamy peanut butter (stick to standard brands like Jif; natural peanut butter separates and makes cookies greasy)
- 1 cup granulated sugar
- 1 large egg
- 24 round chocolate truffles (like Lindt) or milk chocolate unwrapped candy cups
- 1/2 cup dark chocolate chips (melted, for legs)
- 48 mini candy eyes
Step-by-Step Instructions
- Preheat your oven to 350°F (175°C) and line two large baking sheets with parchment paper.
- Mix the creamy peanut butter, granulated sugar, and egg in a bowl until a soft dough forms.
- Roll the dough into 1-inch balls, place them on the baking sheet, and press down lightly with a fork.
- Bake for 10 to 12 minutes until the edges are golden, then immediately press a chocolate truffle lightly into the center of each warm cookie.
- Let the cookies cool completely so the chocolate doesn’t melt off, then pipe eight melted dark chocolate legs onto each cookie and attach two mini candy eyes using a dab of chocolate.
Why You’ll Love It
The 3-ingredient peanut butter base is naturally gluten-free and ridiculously soft. Plus, who doesn’t love the combination of salty peanut butter and rich milk chocolate? They look super impressive, but piping the legs is so easy a toddler could do it.
3. Ghost S’mores Fudge Cookies

Bring the cozy campfire vibes indoors with a spooky twist. Rich chocolate fudge cookies topped with gooey, melted marshmallow ghosts that look like they’re screaming in delicious agony.
Ingredients
- 1 box devil’s food cake mix
- 1/2 cup vegetable oil
- 2 large eggs
- 12 large marshmallows (halved horizontally)
- 1/2 cup black decorating gel or melted dark chocolate
Step-by-Step Instructions
- Preheat your oven to 350°F (175°C) and line your baking sheets.
- Stir the devil’s food cake mix, vegetable oil, and eggs together in a medium bowl until a thick, glossy dough forms.
- Scoop tablespoon-sized dough balls onto the baking sheet and bake for 8 minutes.
- Pull the tray out, top each warm cookie with a marshmallow half (cut side down), and return to the oven for another 2 minutes until the marshmallows puff up.
- Remove from the oven, gently press down on each marshmallow with the back of a spoon to create a flat ghost shape, let cool, and draw spooked ghost faces with black decorating gel.
Why You’ll Love It
Cake mix cookies are my absolute favorite secret weapon because they guarantee a soft, fudgy center every single time. The contrast between the jet-black chocolate cookie and the bright white gooey marshmallow looks killer on Pinterest. I once tried making marshmallow fluff from scratch for these—never again; stick to the jet-puffed marshmallows!
4. Gooey Eyeball Monster Crinkle Cookies
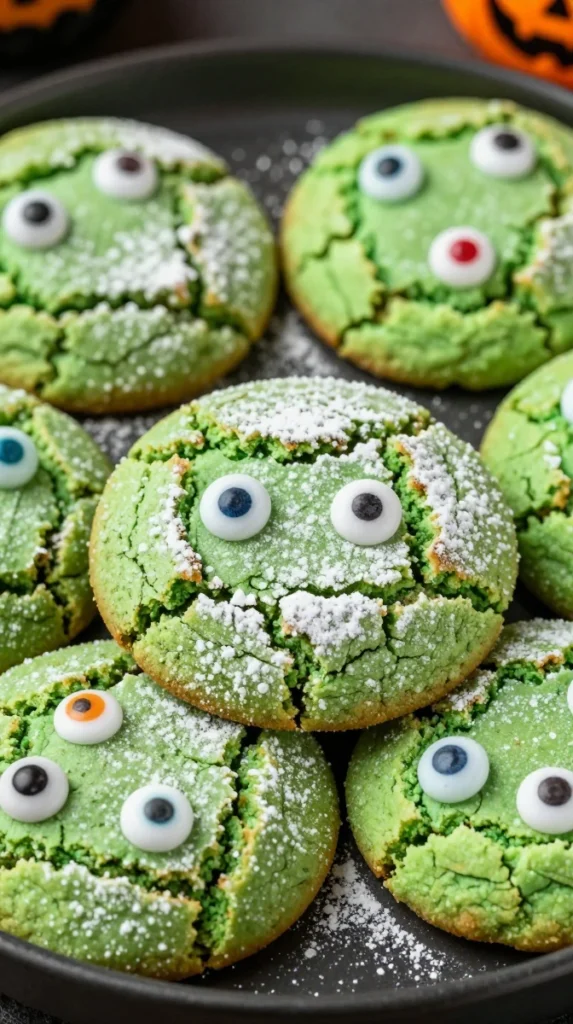
Vibrant, neon-green crinkle cookies packed with dozens of staring candy eyes! These are playful, colorful, and guaranteed to spark big smiles from kids and adults alike.
Ingredients
- 1/2 cup unsalted butter (softened)
- 1 cup granulated sugar
- 2 large eggs
- 2 cups all-purpose flour
- 1 tsp baking powder
- 1/2 tsp neon green gel food coloring
- 1 cup powdered sugar (for rolling)
- 1 cup assorted candy eyes (large, medium, and small)
Step-by-Step Instructions
- Cream the softened butter and granulated sugar together until fluffy, then beat in the eggs and green gel food coloring.
- Whisk the all-purpose flour and baking powder together in a separate bowl, then fold into the wet mixture to form a soft dough.
- Chill the dough in the fridge for at least 1 hour (do not skip this, or your cookies will flatten into green pancakes).
- Roll dough into 1-inch balls, coat them heavily in powdered sugar, and place them 2 inches apart on a baking sheet.
- Bake at 350°F (175°C) for 10–12 minutes; as soon as they come out of the oven, press 3 to 5 assorted candy eyes into each warm cookie.
Why You’ll Love It
The powdered sugar cracks apart as the cookies rise, creating an awesome textured crinkle effect. Adding mismatched sizes of candy eyes gives every monster its own weirdly adorable personality. They’re chewy in the center with nice crispy edges—pure cookie perfection!
5. Black Cat & Witch Hat Sugar Cookies

Looking for a treat that looks straight out of a boutique bakery window? These witch hat cookies use rich purple royal icing and chocolate candy cones to deliver major visual drama.
Ingredients
- 1 roll refrigerated sugar cookie dough (or your favorite homemade recipe)
- 1 container purple canned frosting (or royal icing)
- 24 Hershey’s Kisses (unwrapped)
- 24 round chocolate wafer cookies (or thin Oreos)
- 1 tube orange decorating icing
- Halloween star sprinkles
Step-by-Step Instructions
- Bake the sugar cookie dough according to package instructions into round cookies and let cool completely.
- Spread a smooth, thick layer of purple frosting over the top of each cooled sugar cookie and scatter Halloween star sprinkles over the edges.
- Attach an unwrapped Hershey’s Kiss to the center of a round chocolate wafer cookie using a blob of frosting to form a witch’s hat.
- Pipe a small ribbon of orange decorating icing around the base of the Kiss to create the hat band.
- Place the completed chocolate witch hat right into the center of the purple frosted sugar cookie.
Why You’ll Love It
You get a two-in-one dessert deal here: a soft sugar cookie base topped with a chocolate witch hat bite! They are visually striking, endlessly customizable with different icing colors, and take almost zero actual decorating skill.
6. Jack-O’-Lantern Slice-and-Bake Cookies

If you love crisp, buttery shortbread that melts in your mouth, these jack-o’-lantern slice cookies are your match made in heaven. They are spiced with pumpkin pie spice and feature dark chocolate carved faces.
Ingredients
- 1 cup unsalted butter (softened)
- 3/4 cup powdered sugar
- 1 tsp vanilla extract
- 1 tsp pumpkin pie spice
- 2 cups all-purpose flour
- Orange food coloring
- 1/2 cup dark chocolate melting wafers
Step-by-Step Instructions
- Beat the softened butter, powdered sugar, vanilla extract, and pumpkin pie spice together until smooth and creamy.
- Stir in the all-purpose flour and orange food coloring until a vibrant orange dough forms.
- Shape the dough into a 2-inch-wide log, wrap tightly in plastic wrap, and chill in the freezer for 45 minutes until firm.
- Slice the log into 1/4-inch thick rounds, place on a baking sheet, and bake at 350°F (175°C) for 12–14 minutes.
- Once cooled, melt the dark chocolate melting wafers and pipe scary or funny Jack-O’-Lantern faces onto each orange cookie.
Why You’ll Love It
Slice-and-bake cookies are the king of convenience because you can make the log of dough three days in advance and just slice it when guests walk through the door. The subtle pumpkin spice flavor brings serious autumn cozy vibes to your party spread.
7. Vampire Bat Oreo Sandwich Cookies
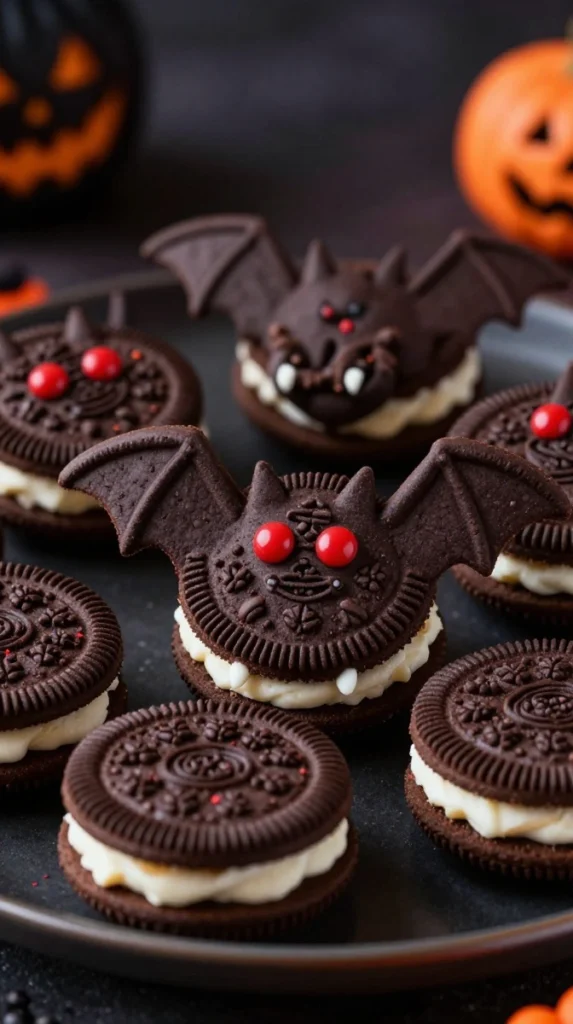
These spooky little bats feature crunchy chocolate wing spans, bright red vampire eyes, and cute little white fangs. Best part? Zero baking required!
Ingredients
- 1 package Double Stuf Oreos
- 12 regular Oreos (split in half and scraped clean of cream, cut into wing triangles)
- 1/2 cup dark chocolate chips (melted)
- 48 red candy eyes (or white eyes dyed red with edible marker)
- 1/2 cup white royal icing (for fangs)
Step-by-Step Instructions
- Carefully twist open your regular Oreos, scrape away the cream filling, and cut the cookie halves into triangular quarters to make bat wings.
- Insert two cookie wing triangles into the cream center of each Double Stuf Oreo, pressing down gently to secure them.
- Use a drop of melted dark chocolate to attach two red candy eyes to the front of each bat body.
- Pipe two small triangular white royal icing fangs onto the bottom edge of the top cookie.
- Let set for 15 minutes until the chocolate hardens and holds the wings firmly in place.
Why You’ll Love It
Are these not the absolute cutest things you’ve ever seen? They cost practically nothing to make, require zero oven time, and deliver that classic Oreo crunch everybody craves. FYI, buy an extra pack of Oreos because half of them will break while you’re cutting the wings—just consider it chef’s tax!
8. Skeleton Gingerbread Man Cookies

Who says gingerbread men are reserved for Christmas? Grab your gingerbread cutter, mix up a dark chocolate spiced dough, and pipe clean white skeleton bones across the surface!
Ingredients
- 2 1/2 cups all-purpose flour
- 1/3 cup dark cocoa powder
- 1 tbsp ground ginger
- 1 tsp ground cinnamon
- 1/2 cup unsalted butter (softened)
- 1/2 cup dark brown sugar
- 1 large egg
- 1/3 cup dark molasses
- 1 cup white royal icing (in a piping bag with a small round tip)
Step-by-Step Instructions
- Whisk together the all-purpose flour, dark cocoa powder, ground ginger, and ground cinnamon in a bowl.
- Cream the softened butter and dark brown sugar, then beat in the egg and dark molasses.
- Mix the dry ingredients into the wet mixture, wrap the dough in plastic, and chill in the fridge for 2 hours.
- Roll dough out to 1/4-inch thickness, cut out human shapes using a gingerbread cutter, and bake at 350°F (175°C) for 8–10 minutes.
- Once cooled completely, pipe white royal icing bones (skulls, rib cages, arms, and leg bones) onto each dark chocolate gingerbread man.
Why You’ll Love It
The combination of rich cocoa and spicy ginger gives these cookies an incredibly deep, sophisticated flavor profile. Piping the skeleton bones is shockingly therapeutic, and you don’t need perfect lines—wonky bones just make them look more authentic!
Spooky Cookie Baking Tips & Tricks
Before you head into the kitchen, keep these simple rules in mind to make your baking spree smooth sailing:
- Use Gel Food Colors: Liquid food coloring from the grocery store adds too much moisture to cookie dough and washes out the colors. Always use gel colors for deep blacks, bright purples, and neon greens.
- Chill Your Dough: If a recipe calls for chilling, don’t skip it! Cold dough prevents cookies from spreading out into flat greasy puddles while baking.
- Toothpicks Are Your Friend: When applying candy eyes or detailed icing lines, use a wooden toothpick for ultra-precise placement.
Wrapping Up the Ultimate Halloween Cookie Spread
There you have it—eight easy, incredible, eye-popping Halloween cookies that will make your party table look like a professional bakery display. Whether you’re throwing a giant bash or just cozying up on the couch for a horror movie marathon, these treats bring all the festive fun with none of the stress.
Which one are you going to tackle first? The 3-ingredient spider cookies or those gooey ghost s’mores? Pick a recipe, crank up your favorite playlist, and go get your bake on! Happy Halloween!