
Let’s be honest for a second: nobody actually attends a Halloween party for the lukewarm punch or the store-bought potato chips. We are all secretly (or openly) stalking the dessert table, waiting to see if someone brought something absurdly cute, wildly spooky, or utterly delicious.
If you are hosting this year, the pressure to deliver can feel real. You want Halloween sweets ideas for a fun and festive dessert table that make your guests pull out their phones before taking a bite, but you definitely don’t want to spend six hours slaving away over intricate fondant sculptures. Who has time for that?
I’ve rounded up 9 insanely fun, festive, and delicious Halloween sweet ideas for a fun and festive dessert table. They are low on fuss, huge on visual impact, and guaranteed to satisfy every sweet tooth in the room. Grab your apron, put on your favorite spooky playlist, and let’s get baking!
1. Wicked Witch Finger Shortbread Cookies
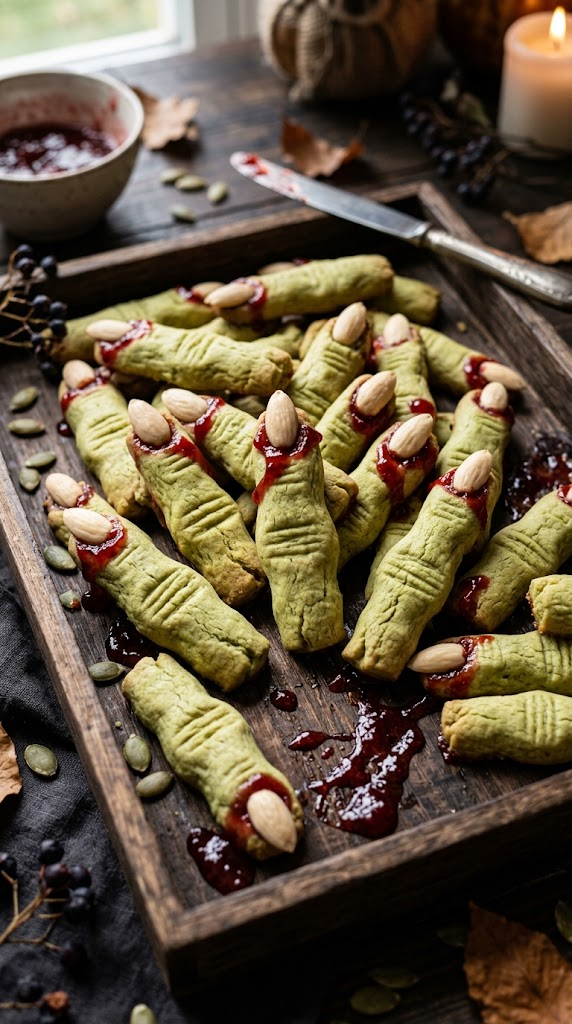
These cookies look unsettlingly realistic, but one bite of the buttery, melt-in-your-mouth shortbread and all your fears will instantly melt away.
Ingredients
- 1 cup unsalted butter, softened
- 3/4 cup powdered sugar
- 1 large egg
- 1 tsp vanilla extract
- 1 tsp almond extract
- 2 2/3 cups all-purpose flour
- 1/2 tsp salt
- 1/2 cup sliced almonds
- 1/3 cup strawberry or raspberry jam
- Green gel food coloring
Step-by-Step Instructions
- Beat the softened butter, powdered sugar, egg, vanilla extract, and almond extract together in a large bowl until smooth and creamy.
- Add a few drops of green gel food coloring to give the dough a subtle, eerie witch-skin hue.
- Gradually stir in the flour and salt until a firm dough forms. Wrap the dough tightly in plastic wrap and chill in the fridge for 30 minutes.
- Preheat your oven to 350°F (175°C) and line two baking sheets with parchment paper.
- Roll tablespoon-sized portions of dough into finger-like logs. Pinch the dough in two spots on each log to create realistic knuckles, and use a paring knife to lightly score lines across the knuckles.
- Press a sliced almond firmly into the tip of each finger to create the “fingernail.”
- Bake for 12 to 14 minutes until the bottoms are lightly golden. Allow them to cool completely.
- Gently lift off each almond, dab a tiny spoonful of red jam underneath, and press the almond back down so the “blood” oozes out around the nail.
Why You’ll Love It
The combination of buttery shortbread and tart raspberry jam is an absolute classic. Plus, the more imperfect and crooked you shape the fingers, the scarier they look—so zero baking perfectionism required here!
2. Frightfully Easy Brownie Mummies
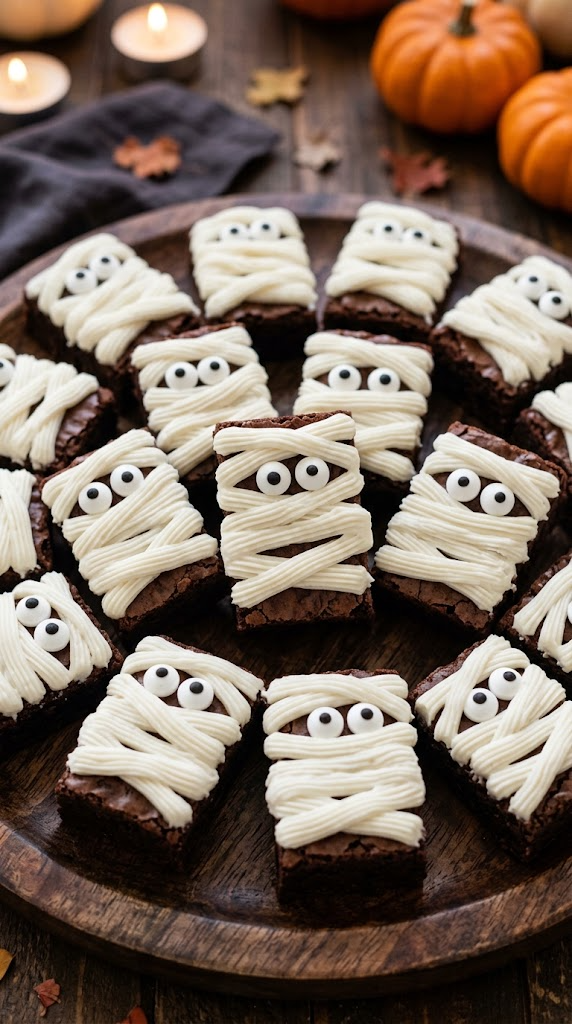
Transform basic pan brownies into adorable, spooky mummies with just a quick zig-zag of white frosting and some candy eyes.
Ingredients
- 1 box fudgy brownie mix (plus required oil, eggs, and water)
- 1 cup vanilla buttercream frosting
- 1 package candy eyeball toppers
- 1/2 cup dark chocolate chips (melted)
Step-by-Step Instructions
- Bake the brownie mix in a 9×13-inch baking pan according to the package instructions. Let the brownies cool completely.
- Slice the cooled brownies into neat rectangular bars.
- Scoop the vanilla buttercream frosting into a piping bag fitted with a flat basketweave or small ribbon tip.
- Pipe overlapping diagonal stripes of white frosting back and forth across each brownie bar to mimic mummy bandages. Leave a small gap near the top for the face.
- Use a small dot of melted dark chocolate on the back of each candy eyeball to attach two eyes inside the face opening.
- Let the frosting set for 15 minutes before arranging them on your serving platter.
Why You’ll Love It
This is the ultimate shortcut dessert for busy hosts. IMO, fudgy box brownies taste just as good as homemade when you dress them up like this, and kids love helping pipe the bandages.
3. Spooky Mini Spiderweb Cheesecakes
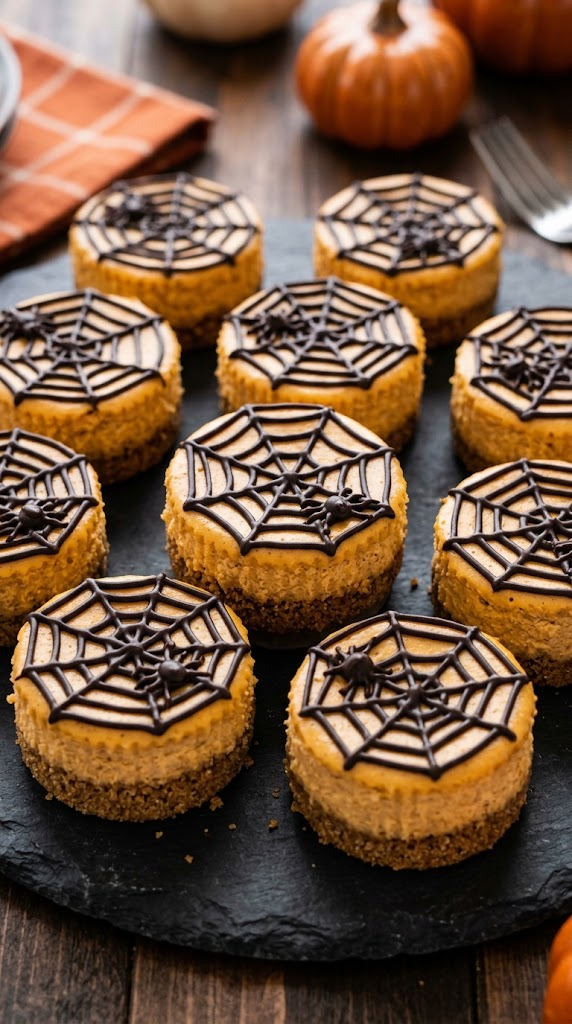
Velvety mini pumpkin cheesecakes topped with an elegant, piped chocolate spiderweb pattern that looks like it came straight out of a high-end bakery.
Ingredients
- 1 1/2 cups graham cracker crumbs
- 3 tbsp unsalted butter, melted
- 16 oz cream cheese, softened
- 1/2 cup canned pumpkin puree
- 1/2 cup granulated sugar
- 1 tsp pumpkin pie spice
- 2 large eggs
- 1/3 cup semi-sweet chocolate chips, melted
Step-by-Step Instructions
- Preheat your oven to 325°F (165°C) and line a standard 12-cup muffin tin with paper liners.
- Mix the graham cracker crumbs and melted butter in a bowl. Press a tablespoon of the mixture firmly into the bottom of each muffin cup.
- Beat the softened cream cheese, pumpkin puree, sugar, and pumpkin pie spice until silky smooth. Beat in the eggs one at a time on low speed just until combined.
- Divide the cheesecake batter evenly among the muffin cups.
- Transfer the melted chocolate chips into a Ziploc bag and snip off a tiny corner.
- Pipe three concentric circles of chocolate onto the top of each unbaked cheesecake. Drag a toothpick outward from the center circle to the outer edge to create a spiderweb effect.
- Bake for 18 to 20 minutes until the edges are set. Cool at room temperature, then chill in the fridge for at least 2 hours before serving.
Why You’ll Love It
Individual portions make serving on a dessert table completely hassle-free. The warm pumpkin spices pair beautifully with the rich dark chocolate topping.
4. Candy Corn Rice Krispie Pops
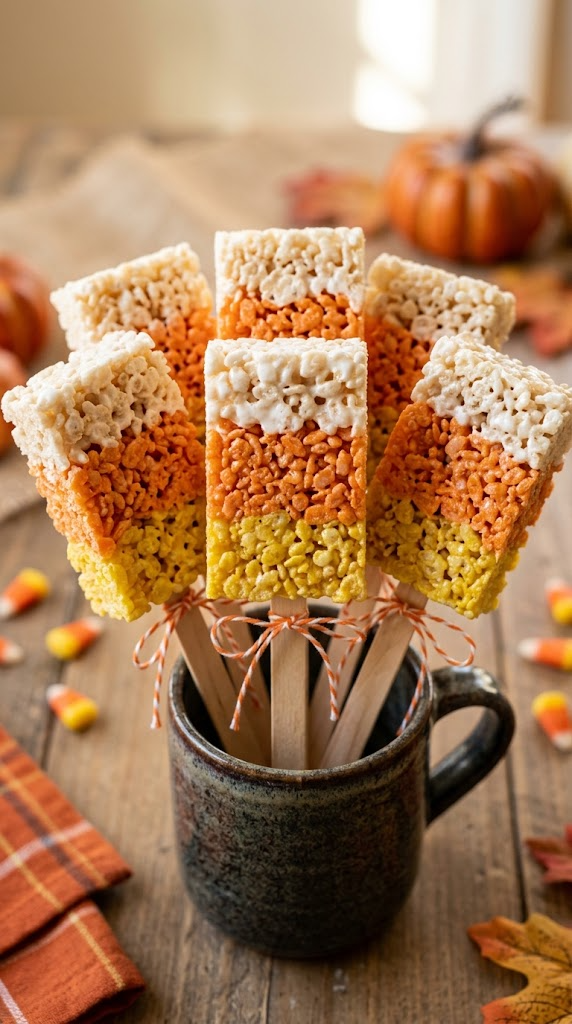
A cheerful, nostalgic classic reinvented in vibrant candy corn colors and served on a stick for easy party snacking.
Ingredients
- 6 cups crispy rice cereal
- 6 cups mini marshmallows
- 4 tbsp unsalted butter
- Yellow and orange gel food coloring
- Wooden popsicle sticks
- 1/2 cup white chocolate melting wafers
Step-by-Step Instructions
- Grease a round 9-inch cake pan thoroughly with non-stick cooking spray.
- In a large pot, melt 4 tablespoons of butter and 6 cups of mini marshmallows over low heat, stirring constantly until smooth.
- Divide the warm marshmallow mixture equally into three separate bowls.
- Tint one bowl orange, tint the second bowl yellow, and leave the third bowl white. Stir 2 cups of crispy rice cereal into each bowl until fully coated.
- Press the white mixture into the center of the cake pan to form a circle. Press the orange mixture around the white center in a ring. Press the yellow mixture around the outer edge to form the final outer ring.
- Allow the treat wheel to cool completely for 20 minutes, then invert the pan and slice into wedges.
- Insert a wooden popsicle stick into the crust end of each wedge. Dip the pointed tip into melted white chocolate for extra flair.
Why You’ll Love It
It brings all the fun visual colors of candy corn without the overly waxy texture that people usually complain about. It’s light, crunchy, and a huge hit with guests of all ages.
5. Gooey Goo-Goo Monster Eye Krispie Treats
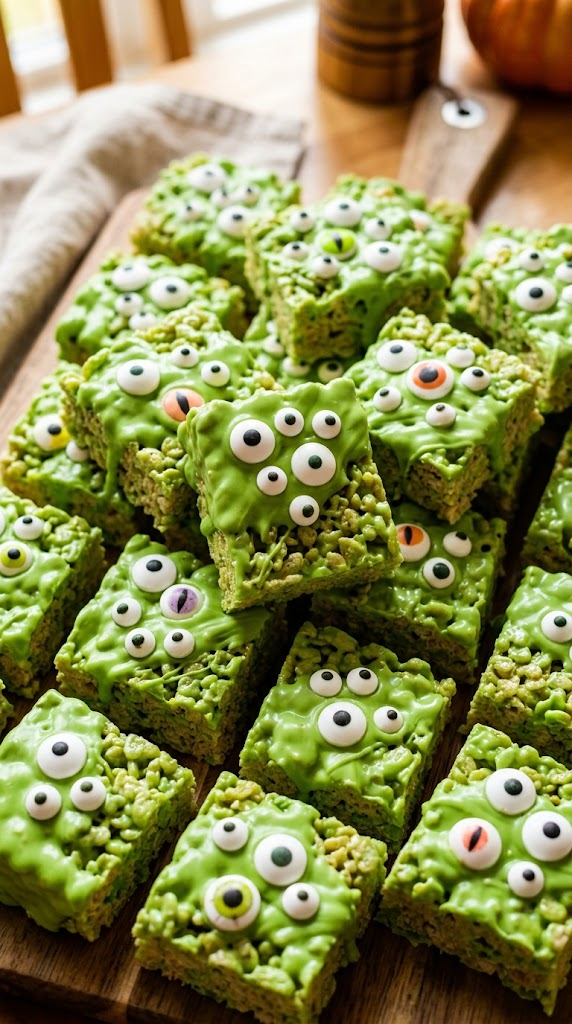
Vibrant lime-green marshmallow treats covered in a swarm of goofy, oversized candy eyeballs.
Ingredients
- 5 cups crispy rice cereal
- 5 cups mini marshmallows
- 4 tbsp unsalted butter
- Electric green gel food coloring
- 1 1/2 cups green candy melts
- Assorted sizes of candy eyeballs
Step-by-Step Instructions
- Melt the butter and marshmallows in a large saucepan over low heat until completely smooth.
- Add a generous squirt of electric green gel food coloring to turn the marshmallow mixture bright neon green.
- Fold in the crispy rice cereal until every piece is coated. Press firmly into a greased 9×9-inch baking dish and allow to cool.
- Cut the treats into neat square blocks.
- Melt the green candy melts in the microwave in 30-second intervals until smooth.
- Dip the top half of each square into the melted green chocolate, then immediately press 3 to 5 candy eyes into the coating before it sets.
Why You’ll Love It
Who doesn’t love a treat that comes together in under 15 minutes? The bright neon green color pops ridiculously well on any dessert platter, making it an instant photo favorite.
6. Bloody Red Velvet Brain Cupcakes
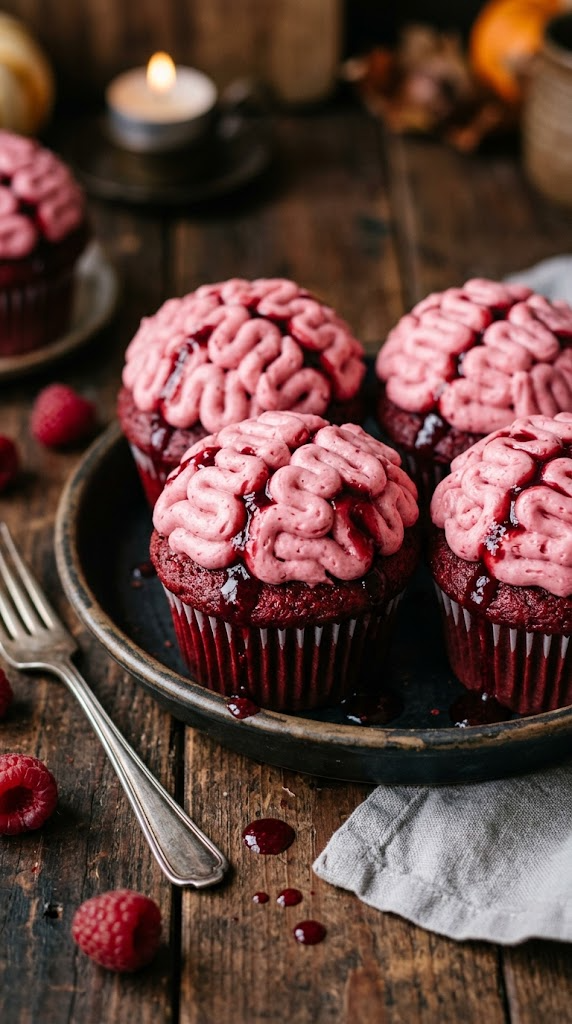
Moist red velvet cupcakes piled high with squiggly pink cream cheese frosting and a drizzle of glossy raspberry blood.
Ingredients
- 1 box red velvet cake mix (plus required ingredients)
- 8 oz cream cheese, softened
- 1/2 cup unsalted butter, softened
- 3 cups powdered sugar
- Pink or flesh-tone food coloring
- 1/2 cup seedless raspberry jam
Step-by-Step Instructions
- Prepare and bake the red velvet cake mix in a 12-cup lined muffin pan according to box directions. Let cool completely.
- Beat the cream cheese, butter, and powdered sugar until smooth and fluffy. Add a single drop of pink food coloring to achieve a brain-pink hue.
- Spoon the frosting into a piping bag fitted with a medium round piping tip.
- Pipe a straight thick line down the center of each cupcake to form the hemisphere line of the brain.
- Pipe squiggly, folded ribbons on both sides of the center line to create realistic brain convolutions.
- Warm the raspberry jam in the microwave for 10 seconds, then lightly drizzle it over the piped brain frosting.
Why You’ll Love It
It strikes the absolute perfect balance between delightfully grotesque and mouthwatering. The tangy cream cheese frosting offsets the rich red velvet cake flawlessly.
7. Ghostly White Chocolate Strawberry Spooks
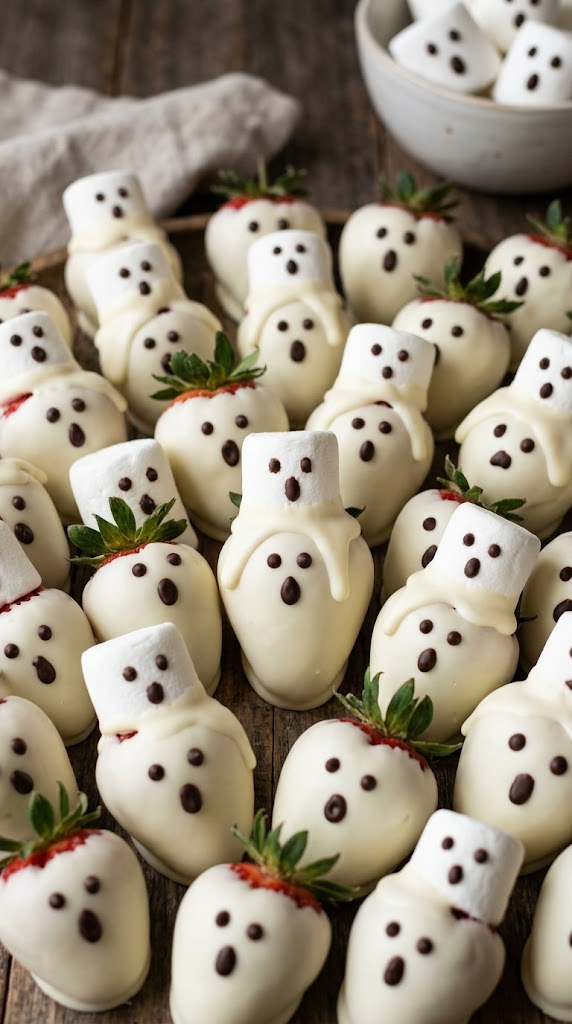
Fresh, juicy strawberries coated in smooth white chocolate with dramatic, dripping ghost tails and dark chocolate faces.
Ingredients
- 1 lb fresh long-stemmed strawberries, washed and dried
- 12 oz white chocolate melting wafers
- 1/4 cup dark chocolate chips
- 1 tsp coconut oil
Step-by-Step Instructions
- Line a baking sheet with wax paper or parchment paper. Make sure your strawberries are 100% dry before dipping.
- Melt the white chocolate in a deep microwavable bowl in 30-second bursts, stirring in between until silky.
- Hold a strawberry by the stem, dip it fully into the white chocolate, and drag it across the parchment paper as you lay it down to pull out a long ghostly tail.
- Repeat for all strawberries and let them cool in the fridge for 10 minutes until hard.
- Melt the dark chocolate chips with 1 tsp of coconut oil. Use a toothpick to draw elongated oval eyes and open screaming mouths onto each white chocolate berry.
Why You’ll Love It
I once tried using regular milk chocolate for ghost bases—never again; white chocolate is the only way to get that bright ghostly contrast! It adds a refreshing, fruity touch to a dessert table otherwise dominated by heavy baked goods.
8. Poisonous Dark Apple Cake Pops
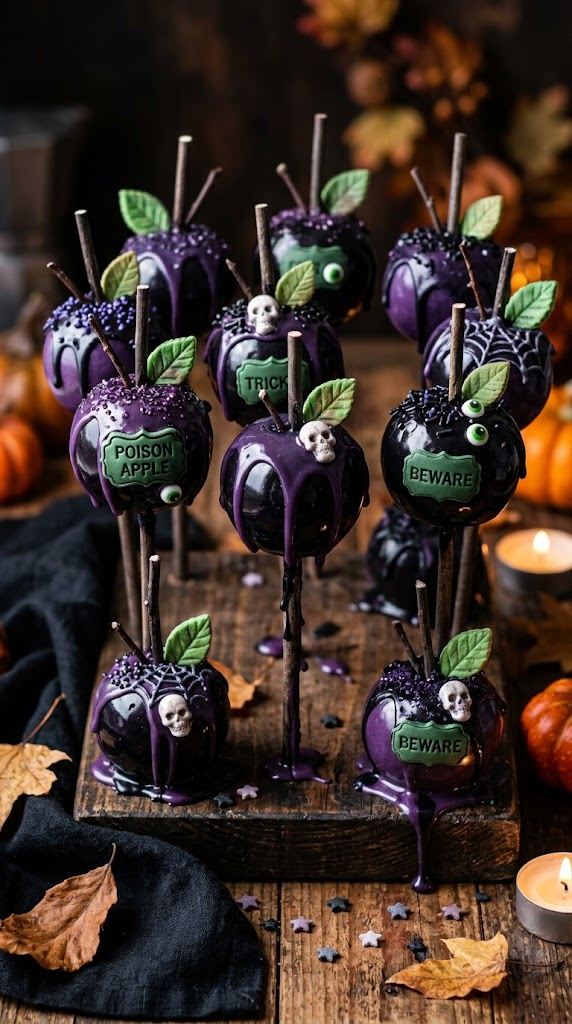
Glossy, deep purple and black cake pops reminiscent of the evil queen’s legendary poisoned apple.
Ingredients
- 1 baked chocolate cake (9×13 pan, cooled)
- 1/2 cup chocolate frosting
- 16 oz black or deep purple candy melts
- Lollipop sticks or clean wooden twigs
- Edible black or purple glitter dust
Step-by-Step Instructions
- Crumble the baked chocolate cake into fine crumbs in a large mixing bowl.
- Add the chocolate frosting and knead with your hands until the mixture holds together like dough.
- Roll the cake dough into firm, apple-sized balls. Insert a stick into each ball. Freeze for 20 minutes.
- Melt the dark candy melts according to package instructions until fluid.
- Dip each cake pop into the dark glaze, rotating gently to coat evenly. Allow the excess glaze to drip off.
- Dust immediately with edible glitter before the candy shell sets completely.
Why You’ll Love It
They look moody, magical, and sophisticated! The rich chocolate interior combined with a crunchy candy shell delivers that perfect cake-pop crunch in every bite.
9. Graveyard Chocolate Pudding Cups
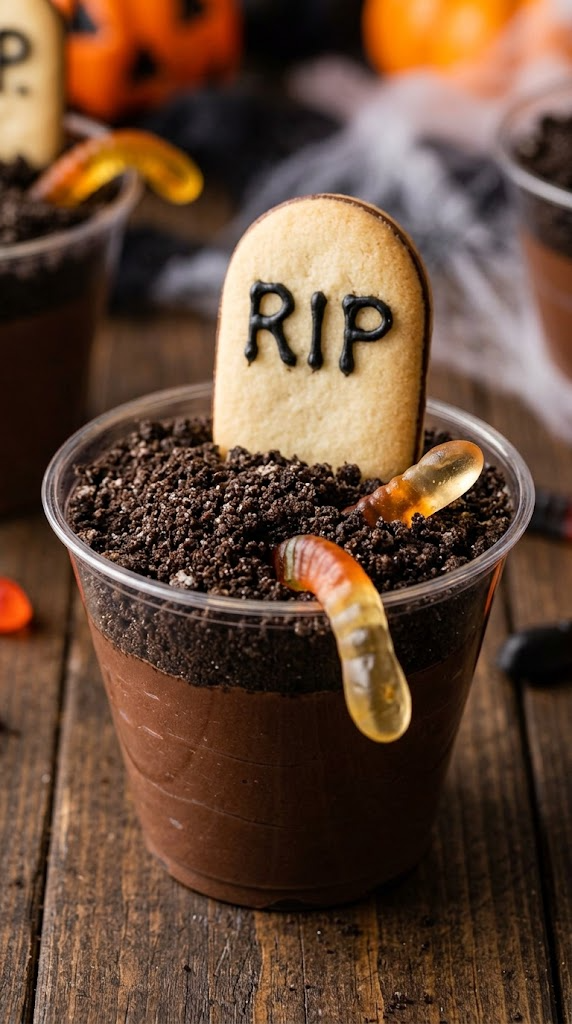
Layered chocolate mousse and crushed cookies topped with a Milano cookie “tombstone” and gummy worms crawling out of the edible dirt.
Ingredients
- 1 package (3.9 oz) instant chocolate pudding mix
- 2 cups cold milk
- 1 cup whipped topping
- 15 Oreo cookies, finely crushed
- 12 Milano cookies
- 1/4 cup black piping icing
- 12 gummy worms
Step-by-Step Instructions
- Whisk the instant chocolate pudding mix and cold milk together for 2 minutes. Fold in the whipped topping to make it extra fluffy.
- Divide the pudding evenly among 6 clear plastic party cups, filling them about three-quarters full.
- Top each cup with a thick layer of crushed Oreo cookie “dirt.”
- Use the black piping icing to write “RIP” on the upper half of each Milano cookie.
- Press a decorated Milano cookie tombstone vertically into the back of each pudding cup.
- Tuck two gummy worms into the crushed cookie dirt around each tombstone so they hang over the rim.
Why You’ll Love It
You don’t even need to turn on the oven for this one. It takes less than 10 minutes of prep, making it the ultimate stress-free dessert for last-minute party planning.
Final Thoughts for Your Festive Table
Creating an unforgettable Halloween dessert table doesn’t require a professional culinary degree or endless hours in the kitchen. By focusing on simple recipes with bold, high-impact visual decorations, you can build a display that delights kids and adults alike.
Which of these Halloween sweets ideas for a fun and festive dessert table are you going to try first? Pick two or three of your favorite recipes from this list, mix in some fun ambient lighting and faux spiderwebs, and watch your guests devour every single bite! 🙂