
Halloween hits different when the cookies start looking like they might crawl off the plate. You want a dessert table that makes people stop, stare, and maybe jump a little. These eight Halloween cookie recipes deliver exactly that: spooky, delicious, and actually doable even if you’re not a professional baker.
I’ve made every single one of these at least twice (some of them more times than I’ll admit). They’re the cookies that disappear first, the ones kids fight over, and the ones adults pretend they’re “just sampling.” No fancy equipment required. Just good ingredients, a little creativity, and zero fear of food coloring.
Ready to turn your kitchen into a haunted bakery? Let’s get baking.
1. Ghostly Vanilla Sugar Cookies

These little ghosts look like they floated straight out of a cartoon. Soft, buttery, and just the right amount of sweet, they disappear faster than actual ghosts.
Ingredients
- 2 ¾ cups all-purpose flour
- 1 teaspoon baking powder
- ½ teaspoon salt
- 1 cup unsalted butter, softened
- 1 ½ cups granulated sugar
- 1 large egg
- 2 teaspoons pure vanilla extract
- White royal icing or melted white chocolate
- Mini chocolate chips or black icing for eyes
Step-by-Step Instructions
- Whisk the flour, baking powder, and salt together in a medium bowl.
- Cream the butter and sugar in a large bowl until light and fluffy. Beat in the egg and vanilla.
- Gradually mix the dry ingredients into the wet until a soft dough forms.
- Divide the dough in half, wrap each piece, and chill for 30 minutes.
- Roll the dough to ¼-inch thickness and cut out ghost shapes with a cookie cutter.
- Bake at 350°F for 9–11 minutes until the edges just start to turn golden. Cool completely.
- Flood the cooled cookies with white icing or melted white chocolate. Add two mini chocolate chips for eyes while the icing is still wet.
Why You’ll Love It
These cookies taste like classic sugar cookies but look way more impressive. I once made a double batch for a party and found three of them in my coat pocket the next morning. No regrets.
2. Witch Finger Cookies
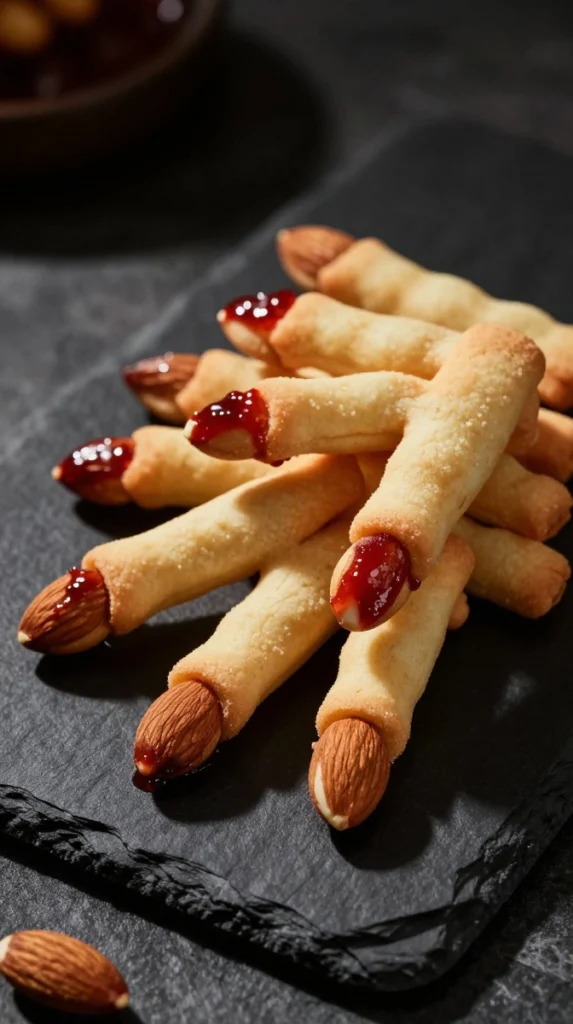
Crunchy almond cookies shaped like long, knobby witch fingers with a bloody almond “fingernail.” They’re creepy in the best way and taste like something you’d actually want to eat.
Ingredients
- 1 cup unsalted butter, softened
- 1 cup powdered sugar
- 1 large egg
- 1 teaspoon almond extract
- 2 ¾ cups all-purpose flour
- 1 teaspoon baking powder
- ¾ cup whole blanched almonds
- Red gel food coloring or raspberry jam for the “blood”
Step-by-Step Instructions
- Cream the butter and powdered sugar until smooth. Beat in the egg and almond extract.
- Mix in the flour and baking powder until the dough comes together.
- Shape tablespoon-sized pieces into long finger shapes, pressing a blanched almond into one end for the nail.
- Use a knife to gently score knuckle lines across each finger.
- Bake at 350°F for 20–22 minutes until lightly golden. Cool slightly.
- Paint a little red food coloring or jam around the almond “nail” so it looks like it’s bleeding.
Why You’ll Love It
The almond flavor pairs perfectly with the slight crunch. I tried using sliced almonds once instead of whole ones. Big mistake. Whole almonds look way more sinister.
3. Jack-o’-Lantern Pumpkin Spice Cookies
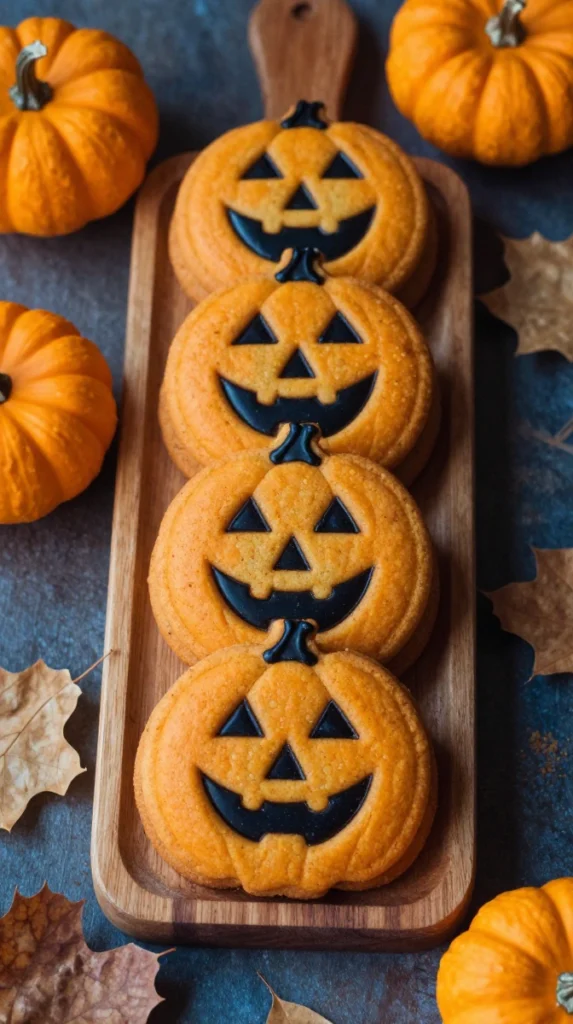
Soft, chewy pumpkin spice cookies decorated like classic jack-o’-lanterns. They smell like fall and look ready to smile (or scream) at your guests.
Ingredients
- 2 ½ cups all-purpose flour
- 1 teaspoon baking soda
- 1 teaspoon ground cinnamon
- ½ teaspoon ground ginger
- ¼ teaspoon ground nutmeg
- ½ teaspoon salt
- ¾ cup unsalted butter, softened
- 1 cup packed brown sugar
- ½ cup pumpkin puree
- 1 large egg
- 1 teaspoon vanilla extract
- Orange and black royal icing or gel food coloring
Step-by-Step Instructions
- Whisk the flour, baking soda, spices, and salt in a bowl.
- Cream the butter and brown sugar. Beat in the pumpkin, egg, and vanilla.
- Mix the dry ingredients into the wet until combined. Chill the dough for 1 hour.
- Scoop tablespoon-sized balls onto a baking sheet and slightly flatten.
- Bake at 350°F for 11–13 minutes. Cool completely.
- Tint icing orange and flood the cookies. Once set, pipe black faces with triangular eyes and jagged smiles.
Why You’ll Love It
These stay soft for days thanks to the pumpkin. I once forgot the nutmeg and they still tasted great, but the full spice mix makes them smell like actual autumn.
4. Black Cat Chocolate Cookies
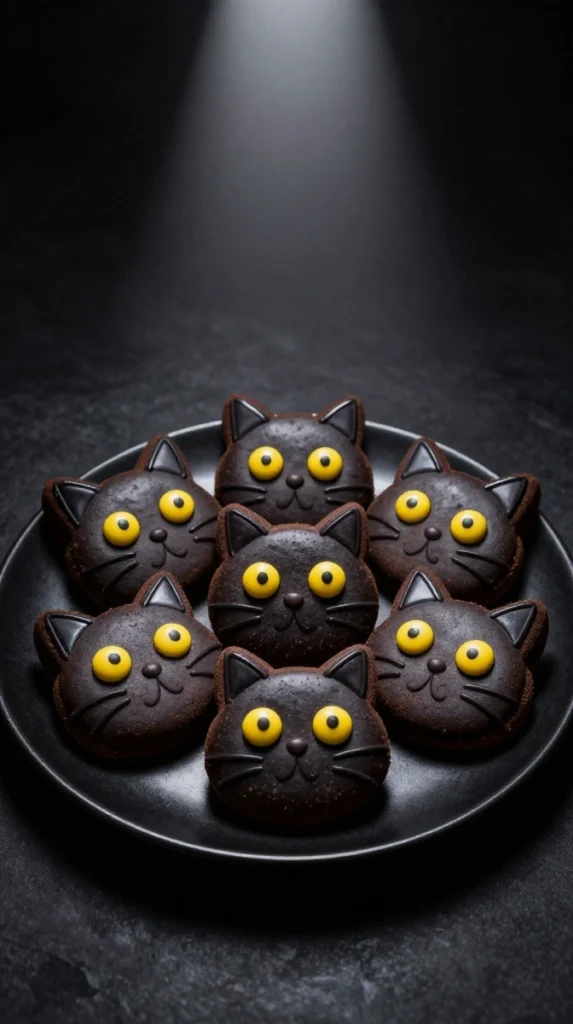
Rich, dark chocolate cookies shaped like cats with glowing yellow eyes. They’re fudgy in the center and perfect if you want something that feels a little more sophisticated.
Ingredients
- 1 ½ cups all-purpose flour
- ¾ cup unsweetened cocoa powder
- 1 teaspoon baking powder
- ½ teaspoon salt
- ¾ cup unsalted butter, softened
- 1 cup granulated sugar
- 1 large egg
- 1 teaspoon vanilla extract
- Yellow and black icing or candy eyes
Step-by-Step Instructions
- Whisk the flour, cocoa, baking powder, and salt together.
- Cream the butter and sugar until fluffy. Beat in the egg and vanilla.
- Gradually add the dry ingredients until a dough forms.
- Roll out the dough and cut cat shapes, or shape freehand if you’re feeling brave.
- Bake at 350°F for 10–12 minutes. Cool completely.
- Outline and fill the cats with black icing. Add yellow eyes and a tiny nose.
Why You’ll Love It
These taste like brownie cookies in disguise. The darker the cocoa, the better they look against the yellow eyes. FYI, they also make excellent late-night snacks when everyone else has gone home.
5. Monster Eye Peanut Butter Cookies
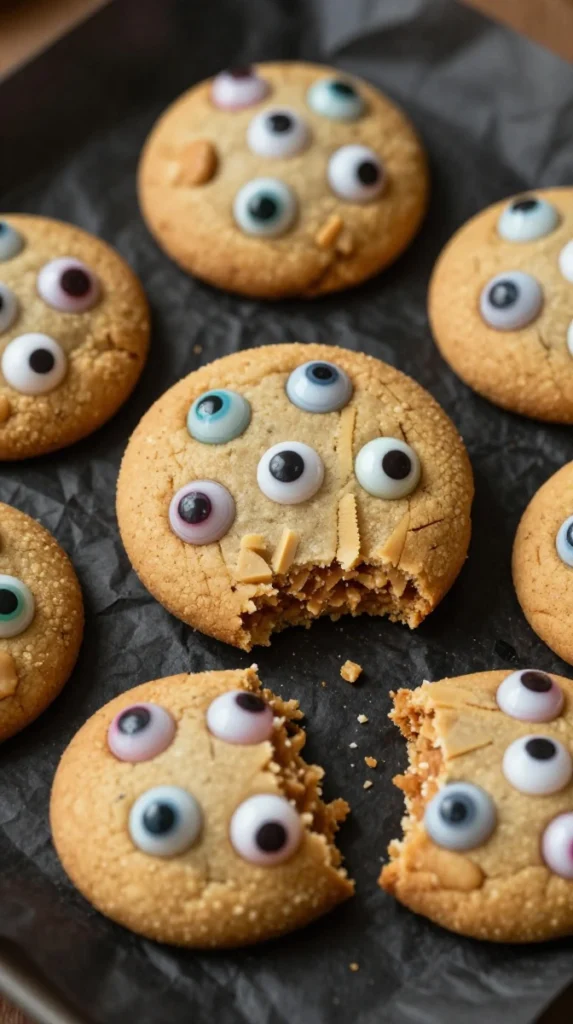
Classic peanut butter cookies topped with candy eyeballs so they stare back at you. Soft, chewy, and slightly ridiculous in the best possible way.
Ingredients
- 1 cup creamy peanut butter
- ½ cup unsalted butter, softened
- ½ cup granulated sugar
- ½ cup packed brown sugar
- 1 large egg
- 1 ¼ cups all-purpose flour
- ¾ teaspoon baking soda
- ½ teaspoon salt
- Candy eyeballs (various sizes)
Step-by-Step Instructions
- Cream the peanut butter, butter, and both sugars until smooth. Beat in the egg.
- Mix in the flour, baking soda, and salt until just combined.
- Scoop dough into balls and place on a baking sheet. Flatten slightly with a fork in a crisscross pattern.
- Bake at 350°F for 10–12 minutes. Immediately press 1–3 candy eyeballs onto each warm cookie.
- Let them cool so the eyes set in place.
Why You’ll Love It
Who doesn’t love a cookie that looks like it’s watching you eat it? The peanut butter keeps them soft, and the eyes make kids (and adults) giggle every time.
6. Bloody Red Velvet Cookies
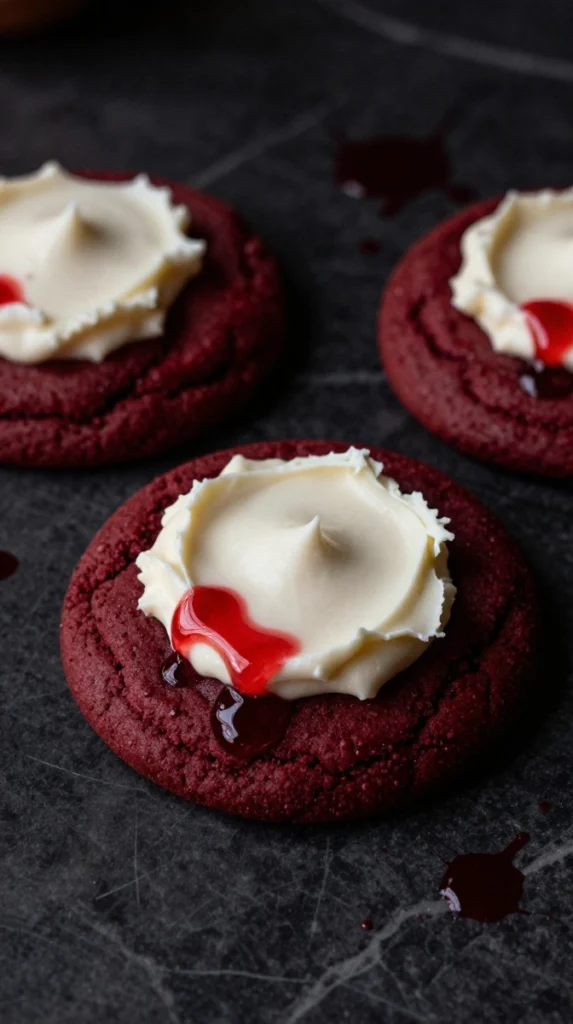
Deep red cookies with a cream cheese frosting “wound” and a drizzle of red gel that looks like blood. They’re dramatic and taste like a soft red velvet cake in cookie form.
Ingredients
- 2 ¼ cups all-purpose flour
- ¼ cup unsweetened cocoa powder
- 1 teaspoon baking soda
- ½ teaspoon salt
- ¾ cup unsalted butter, softened
- 1 ½ cups granulated sugar
- 1 large egg
- 1 tablespoon red gel food coloring
- 1 teaspoon vanilla extract
- 4 oz cream cheese, softened
- 1 cup powdered sugar
- Red gel or corn syrup mixed with red food coloring for blood effect
Step-by-Step Instructions
- Whisk the flour, cocoa, baking soda, and salt.
- Cream the butter and sugar. Beat in the egg, food coloring, and vanilla.
- Mix in the dry ingredients. Scoop dough onto a baking sheet.
- Bake at 350°F for 10–12 minutes. Cool completely.
- Beat the cream cheese and powdered sugar into a thick frosting. Pipe a small amount onto each cookie and swirl it to look like a gash.
- Drizzle red gel over the frosting so it drips like blood.
Why You’ll Love It
These look intense but taste sweet and mild. I once used liquid food coloring instead of gel, and the color washed out. Stick with gel if you want that true bloody red.
7. Skeleton Bone Sugar Cookies
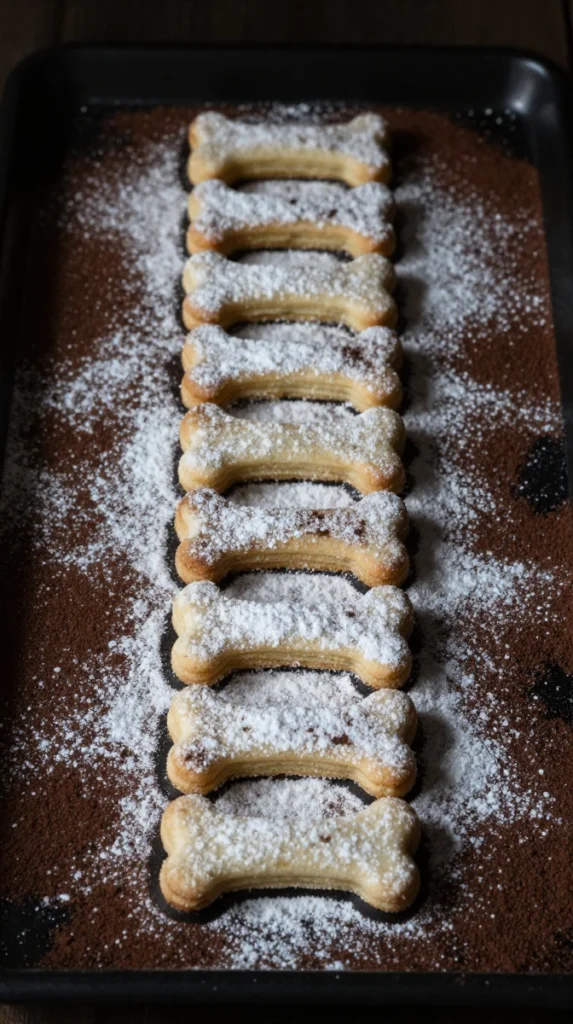
Simple vanilla cookies shaped like bones and dusted with powdered sugar so they look like they just crawled out of the dirt. Perfect for lining the edges of your dessert table.
Ingredients
- 2 ¾ cups all-purpose flour
- 1 teaspoon baking powder
- ½ teaspoon salt
- 1 cup unsalted butter, softened
- 1 ½ cups granulated sugar
- 1 large egg
- 2 teaspoons vanilla extract
- Powdered sugar for dusting
Step-by-Step Instructions
- Combine the flour, baking powder, and salt.
- Cream the butter and sugar. Beat in the egg and vanilla.
- Mix in the dry ingredients until a dough forms. Chill for 30 minutes.
- Roll out the dough and cut bone shapes (or shape them by hand if you don’t have a cutter).
- Bake at 350°F for 9–11 minutes until the edges are just set. Cool completely.
- Generously dust with powdered sugar right before serving.
Why You’ll Love It
They’re basic sugar cookies with maximum spooky payoff. I like making a few extra and “burying” them in a pile of powdered sugar on the serving tray. Guests dig them out like treasure.
8. Spider Web Chocolate Chip Cookies
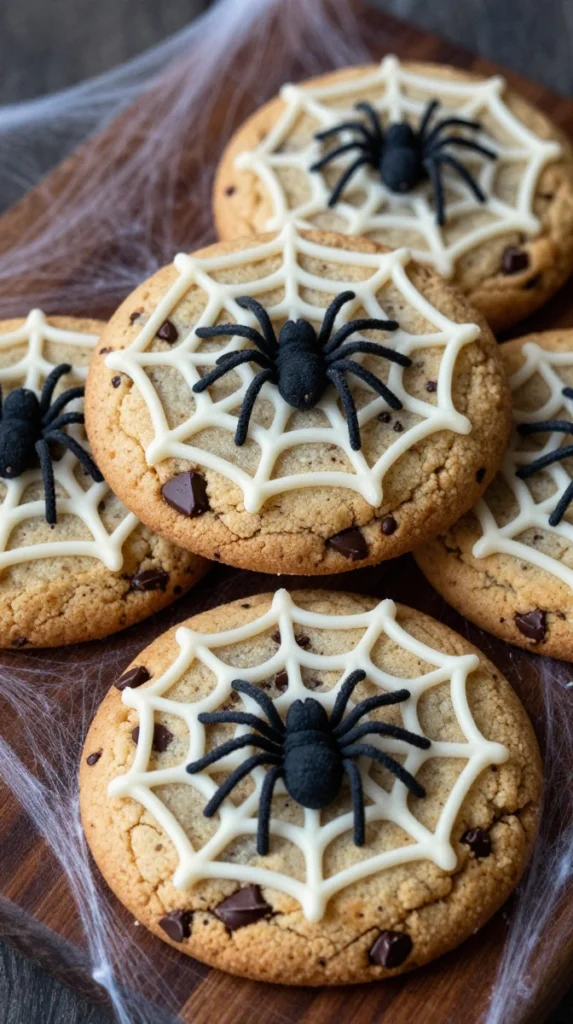
Chewy chocolate chip cookies topped with melted white chocolate webs and a candy spider. They look fancy but take almost no extra effort.
Ingredients
- 2 ¼ cups all-purpose flour
- 1 teaspoon baking soda
- 1 teaspoon salt
- 1 cup unsalted butter, softened
- ¾ cup granulated sugar
- ¾ cup packed brown sugar
- 2 large eggs
- 2 teaspoons vanilla extract
- 2 cups semisweet chocolate chips
- White chocolate melts for the web
- Plastic spiders or candy spiders
Step-by-Step Instructions
- Whisk the flour, baking soda, and salt.
- Cream the butter and both sugars. Beat in the eggs and vanilla.
- Mix in the dry ingredients, then fold in the chocolate chips.
- Scoop dough onto a baking sheet and bake at 375°F for 9–11 minutes. Cool completely.
- Melt the white chocolate and pipe thin concentric circles on each cookie. Drag a toothpick from the center outward to create the web effect.
- Place a plastic or candy spider in the center of each web before the chocolate sets.
Why You’ll Love It
These are the crowd-pleasers that feel special without requiring artistic talent. The web design looks impressive even if your piping skills are average at best. IMO, they’re the ones people photograph first.
Halloween cookies should feel fun, a little messy, and completely worth the sugar high. These eight recipes cover soft and chewy, crisp and crunchy, chocolate-heavy, and classic vanilla. Mix and match a few or go all in and cover the entire table.
Your dessert table will look like it belongs in a Halloween movie, and the cookies will actually taste better than anything store-bought. Now go turn on some spooky music, preheat that oven, and make something that stares back at your guests.