
Want your Halloween party to look spooky without spending a fortune? These DIY Halloween party decorations turn simple, inexpensive supplies into creepy, fun, and surprisingly impressive decorations. You can make most of them in an afternoon, even if your crafting skills are more “glue everywhere” than “Pinterest expert.” Ready to make your party look haunted?
Why DIY Halloween Decorations Are Worth It
Store-bought Halloween decorations can get expensive fast, especially when you are decorating an entire room. DIY projects let you create a bigger visual impact with cardboard, paper, balloons, fabric, jars, and other supplies you may already have at home.
The best part? You can match everything to your party theme. Go classic black and orange, creepy black and purple, cute Halloween, or full haunted-house mode.
IMO, the secret is not making dozens of decorations. A few large, dramatic pieces usually look better than a room packed with tiny plastic spiders.
Materials and Tools You’ll Need
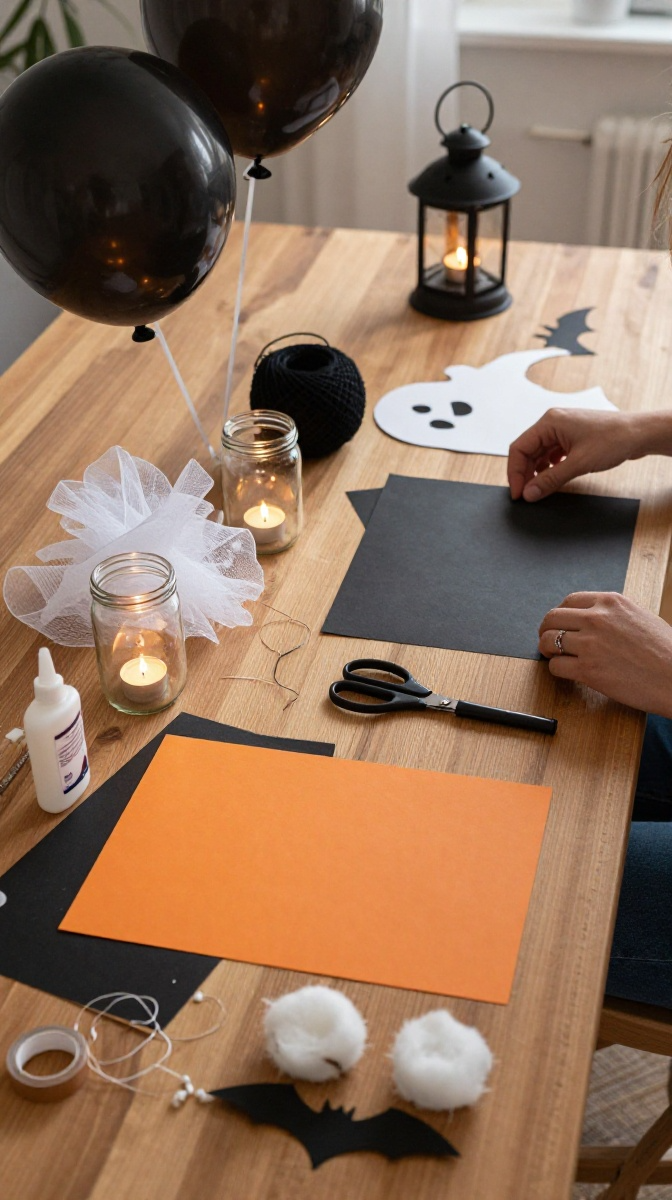
Before starting, gather your supplies. You do not need expensive craft equipment for this project.
- Black and orange cardstock or construction paper — old paper bags can work as an affordable substitute.
- Black balloons — orange, purple, or white balloons also work.
- Black crepe paper or tissue paper — thin black fabric can be substituted.
- Glass jars or clear plastic cups — recycled food jars are perfect.
- LED tea lights — safer than real candles for indoor decorations.
- White cotton or gauze fabric — useful for creating a ghostly effect.
- White paper and black marker — for ghost faces and spooky signs.
- Scissors — sharp craft scissors make cutting much easier.
- Glue or double-sided tape — removable adhesive is useful for walls.
- Black marker or paint — for adding faces and details.
- String or clear fishing line — for hanging decorations.
- Optional: hot glue gun — helpful for sturdier decorations.
Cheap Substitutes That Actually Work
Do not rush out to buy everything. Empty delivery boxes can become spooky signs, old white sheets can become ghosts, and toilet-paper rolls can become tiny bats or pumpkins.
FYI, recycled materials often look better once you deliberately make them imperfect. Halloween is one of the few occasions where crooked edges and fake cobwebs are basically part of the design.
Make a Spooky Halloween Balloon Wall
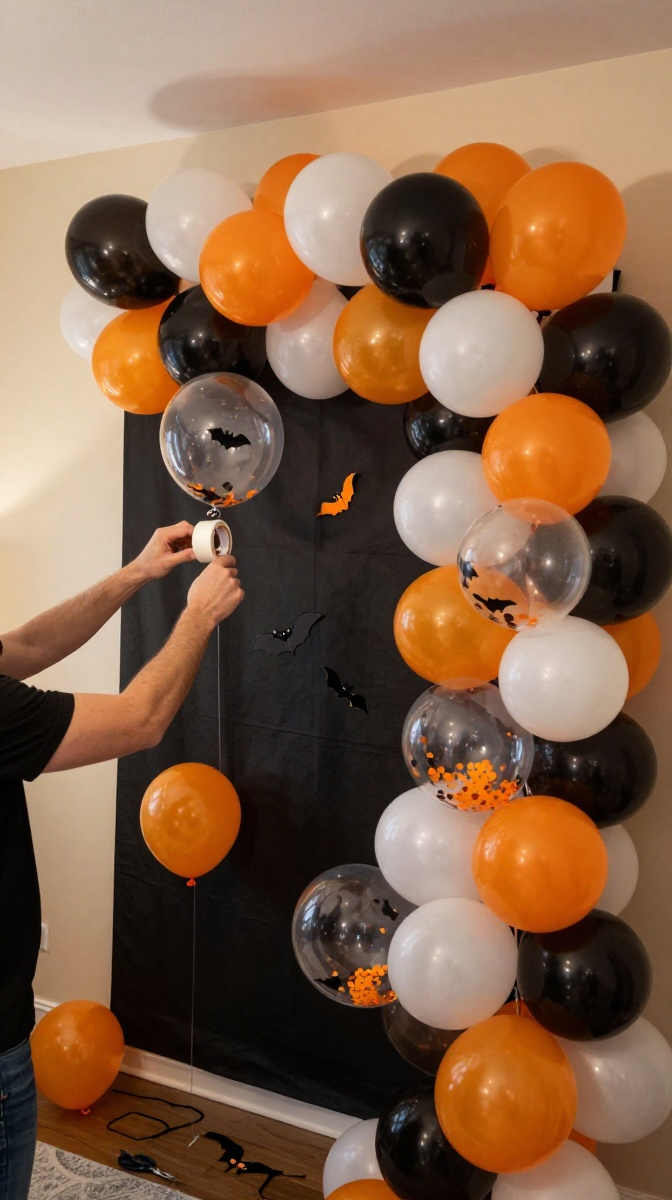
A balloon wall is one of the easiest ways to create a dramatic party backdrop. It works behind a dessert table, photo area, entrance, or gift table.
Choose Your Color Combination
For a traditional Halloween look, combine black, orange, and white balloons. For something moodier, try black, deep purple, metallic silver, and dark gray.
You can also add a few transparent balloons filled with small black paper bats or orange confetti.
Step-by-Step Balloon Wall
- Inflate your balloons. Use different sizes rather than making every balloon identical. A mixture of small, medium, and large balloons gives the wall a fuller appearance.
- Prepare your backdrop. Hang a large black fabric sheet, paper backdrop, or plain wall decoration behind the balloons.
- Group the balloons. Tie balloons together in small clusters of three or four.
- Attach the clusters. Use balloon tape, string, or removable adhesive hooks to build your arrangement from the bottom upward.
- Fill empty spaces. Add smaller balloons between larger clusters so the backdrop looks dense instead of patchy.
- Add Halloween details. Attach paper bats, small spiders, ghost cutouts, or a handmade “BOO!” sign.
Do not worry about making it perfectly symmetrical. A slightly uneven arrangement creates a more natural party backdrop.
Create Hanging Ghost Decorations
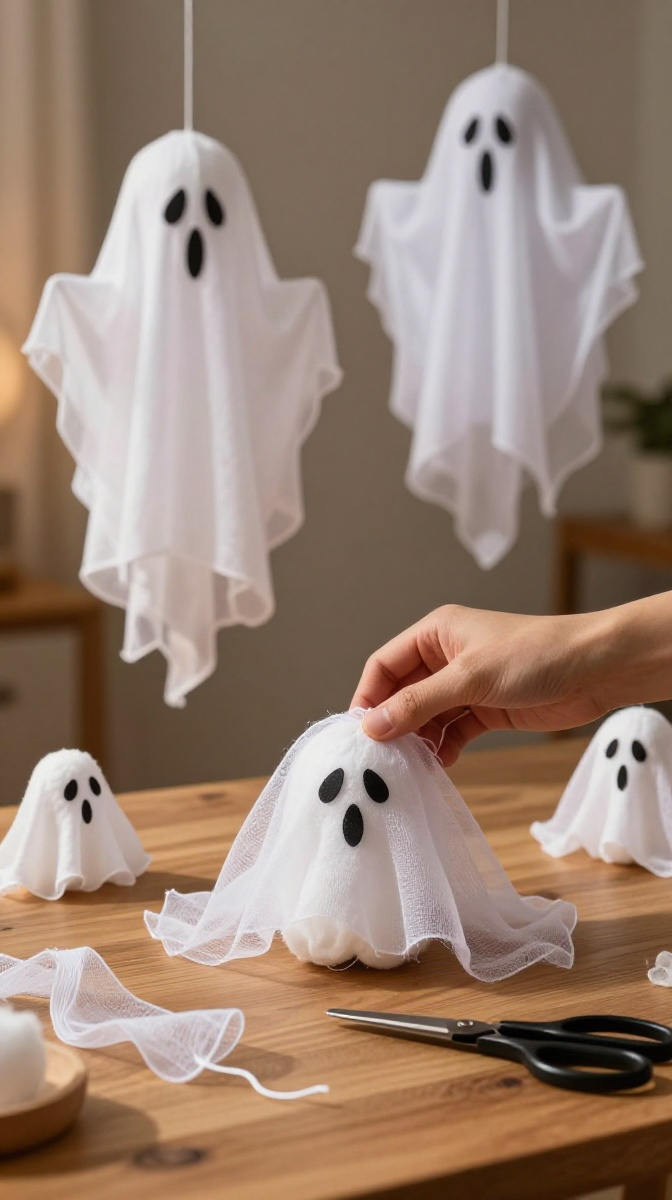
Nothing says Halloween quite like a group of little ghosts floating around the room. This project is especially easy and makes a great decoration for ceilings, doorways, windows, or above a party table.
How to Make the Ghosts
- Prepare the head. Crumple a small piece of white tissue paper or use a cotton ball to create a rounded center.
- Cover it with fabric. Place a square piece of white gauze or thin white fabric over the rounded center.
- Tie the neck. Use white thread or thin string to secure the fabric underneath the head.
- Add the face. Draw two dark eyes and a small mouth with a black marker.
- Create movement. Tear or cut the bottom of the fabric into uneven strips so it looks like the ghost is floating.
- Attach fishing line. Tie clear fishing line around the top and hang the ghost from the ceiling.
Make several ghosts in different sizes. Hang them at different heights and slightly different angles to make them appear as though they are drifting through the room.
Make Them Cute Instead of Creepy
If you are decorating for children, give the ghosts friendly expressions. Add tiny paper bows, rosy cheeks, or little Halloween hats.
For an adult party, keep the faces simple and use longer strips of fabric. Dim lighting will make them look much creepier.
Turn Glass Jars Into Spooky Halloween Lanterns
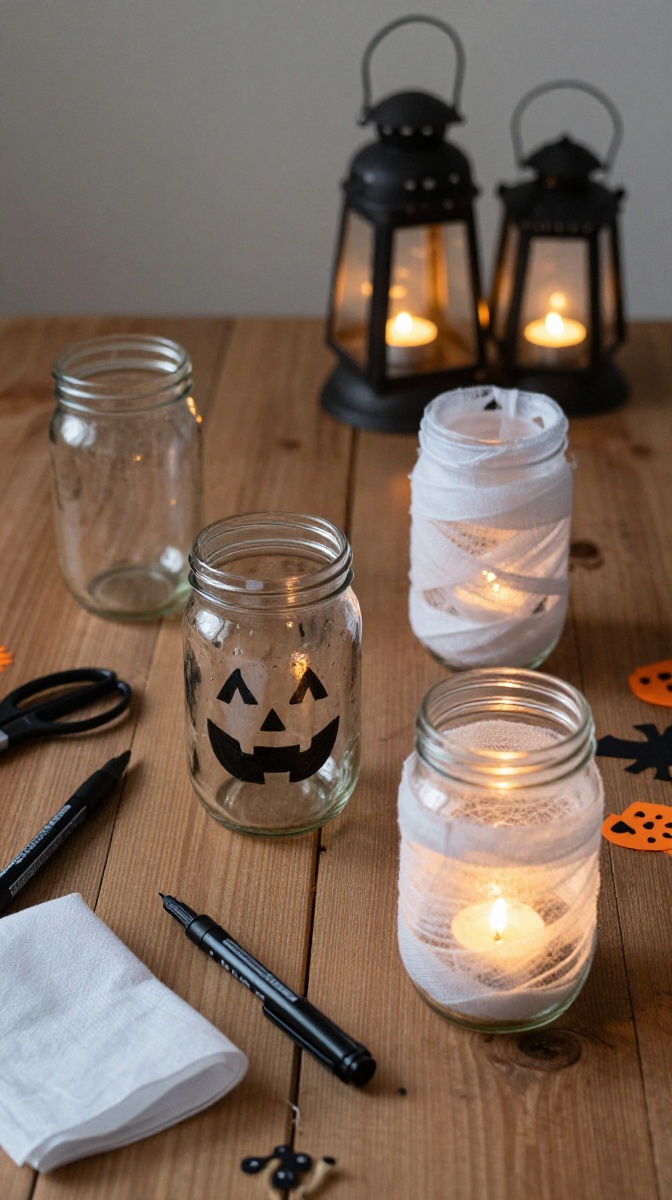
Have empty jars sitting around the kitchen? Perfect. With a little paint and an LED tea light, they can become eerie little lanterns for tables, shelves, and windowsills.
Step-by-Step Halloween Lanterns
- Clean the jars. Remove labels and wash the jars thoroughly. Let them dry completely.
- Choose a design. Try pumpkins, ghosts, skulls, spiders, or simple Halloween faces.
- Draw the face. Use a black marker or paint pen on the outside of the jar.
- Add extra texture. Wrap a small amount of gauze around the jar for a mummy-inspired design.
- Place an LED tea light inside. Turn it on and check how the face looks through the glass.
- Arrange the lanterns. Group three or five jars together for a stronger visual effect.
Use LED lights rather than open flames. They are safer around children, fabric, paper, and crowded party tables.
Make a Giant Hanging Spider Web
If you want one decoration that instantly changes the atmosphere of a room, make an oversized spider web. It is cheap, fast, and looks fantastic behind a snack table or across a doorway.
Simple Spider Web Method
- Choose your location. Pick a wall, corner, doorway, or ceiling area where the web can spread out.
- Create the center. Tie several pieces of black yarn together at one central point.
- Stretch the yarn outward. Attach each piece toward different corners to create a star-like framework.
- Add the web rings. Starting near the center, connect the strands with shorter pieces of yarn.
- Keep the spacing uneven. Real spider webs are not perfectly geometric, so a little irregularity makes your decoration more convincing.
- Add a spider. Use a plastic spider or make one from black paper, pom-poms, or cardboard.
For a more dramatic look, lightly stretch white cotton batting over parts of the yarn. Pull it apart until it becomes thin and wispy rather than thick and fluffy.
Build a DIY Halloween Party Table Display
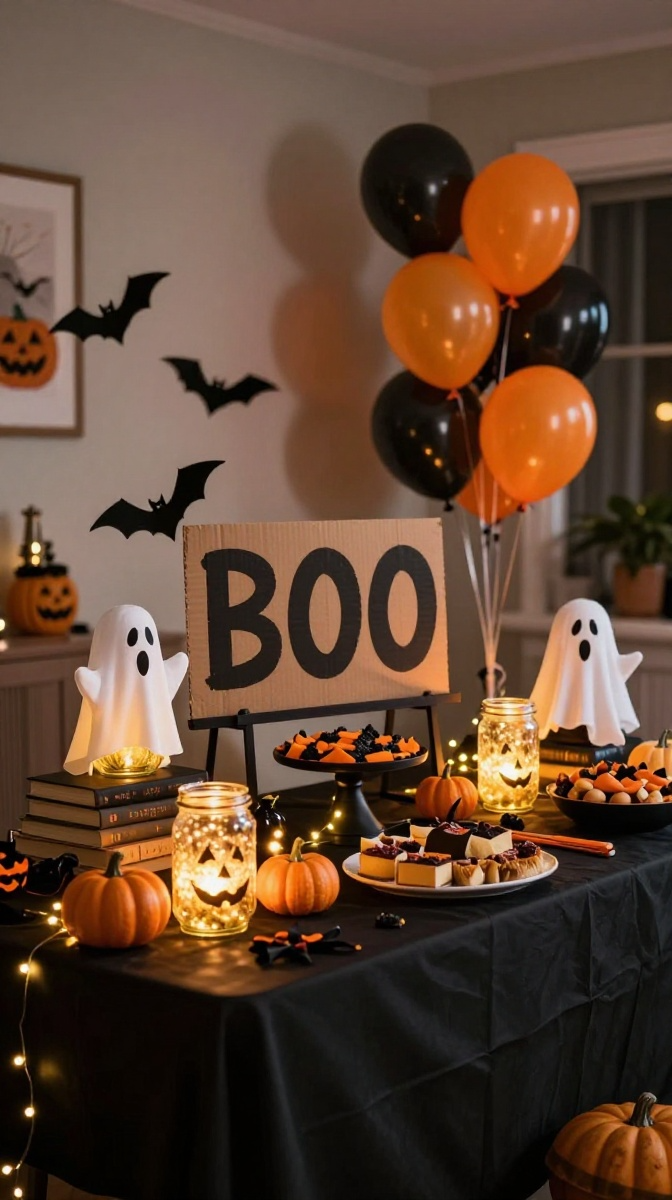
Now bring everything together. A decorated table gives your party a clear focal point and makes even simple snacks look much more festive.
Layer the Decorations
Start with a black, orange, or dark-colored tablecloth. Add your homemade lanterns first, then place small pumpkins, paper bats, ghosts, and spooky signs around them.
Use different heights to keep the display interesting. A stack of books covered with black fabric can raise a decoration without anyone realizing what is underneath.
Add a Simple Halloween Sign
Cut a piece of cardboard into a rectangle and paint it black. Add words such as “BOO,” “TRICK OR TREAT,” “ENTER IF YOU DARE,” or “WITCHES’ BREW.”
Leave some space around the sign. When every inch of the table is covered, individual decorations can disappear into visual clutter.
Use Lighting to Finish the Look
Lighting can completely change inexpensive decorations. Use warm LED fairy lights around the table, inside jars, or behind the backdrop.
For a spooky atmosphere, keep the main room lighting slightly lower and let your DIY decorations provide small pools of light. Suddenly that recycled jar looks like it cost twenty dollars. Crafting victory.
Common DIY Halloween Decorating Mistakes
Even simple crafts can go sideways. Luckily, Halloween decorations are extremely forgiving.
Making Everything Too Perfect
Perfectly identical ghosts and perfectly spaced spider webs can look more like a classroom display than a Halloween party. Mix sizes, shapes, and heights.
Using Too Many Colors
Choose two to four main colors and repeat them throughout the room. Black and orange are classic, while black, white, and purple create a darker modern look.
Ignoring the Party Layout
Do not put hanging decorations where tall guests will constantly hit them. Keep walkways clear and make sure decorations cannot fall onto food or drinks.
Using Real Candles Carelessly
Open flames and hanging paper decorations are a terrible combination. Choose battery-powered LED candles whenever possible.
Easy Ways to Customize Your Decorations
The same basic crafts can work for completely different Halloween themes.
- Cute Halloween: Use pastel orange, pink, white, and purple with smiling ghosts.
- Classic Halloween: Stick with black, orange, white, pumpkins, bats, and spiders.
- Haunted house: Use black fabric, gray gauze, dim lighting, and distressed signs.
- Elegant Halloween: Choose black, white, gold, and minimal decorations.
- Kids’ party: Use friendly ghosts, cartoon-style pumpkins, bright colors, and larger decorations.
You can also personalize the decorations with names. A handmade “Hassan’s Halloween Party” sign or custom food labels can make the setup feel much more intentional.
How to Display and Reuse Your DIY Decorations
Think beyond the party table. Hang ghosts along a staircase, place lanterns on windowsills, or use the spider web as a photo booth background.
Paper bats can be reused next year if you store them flat. Fabric ghosts and gauze can also be packed away and reused with a slightly different arrangement.
These decorations can even become party favors. Give guests a small Halloween lantern, mini paper craft, or decorated jar to take home.
FAQ’s
What are the easiest DIY Halloween decorations?
Paper bats, hanging ghosts, balloon backdrops, spooky jars, and yarn spider webs are some of the easiest options. They require basic materials and do not need advanced crafting skills.
How can I decorate for Halloween on a small budget?
Use recycled cardboard, old fabric, paper bags, empty jars, and inexpensive balloons. Focus on one large backdrop and a few smaller decorations rather than trying to decorate every surface.
What colors work best for Halloween decorations?
Black and orange are the classic combination. Black and white creates a cleaner look, while black and purple feels darker and more dramatic.
Are DIY Halloween decorations safe for kids?
Yes, but supervise children when using scissors, hot glue, small pieces, or string. For lighting, battery-powered LED candles are a safer choice than real flames.
How early should I make Halloween decorations?
Most paper, fabric, and jar decorations can be made several days or even weeks ahead. Store finished pieces in a dry box so they are ready when the party arrives.
How can I make homemade decorations look expensive?
Stick to a limited color palette, use different heights, avoid overcrowding, and pay attention to lighting. Good placement usually matters more than expensive materials.
Give Your Halloween Party a DIY Makeover
You do not need a huge budget or professional crafting skills to create a memorable Halloween party. Start with one dramatic decoration, such as a balloon wall or giant spider web, then add handmade ghosts, lanterns, and small details around it.
The goal is not perfection. Have fun, experiment, and let a few crooked ghosts survive the process. After all, a Halloween party should look a little spooky—and your craft table can look like a tiny disaster zone while you get there.