
Grab some paper, glue, and a few things from the recycling bin because Halloween crafting is about to get delightfully messy. These easy Halloween crafts for kids turn simple supplies into spooky decorations, silly creatures, and cute little monsters. No fancy craft room or expert skills required—just curious kids and a willingness to accept that glue may end up in places glue has no business being.
Why Kids Will Love These Easy Halloween Crafts
Halloween crafts give kids a chance to create something they can actually use or display. They can choose silly faces, spooky colors, funny monsters, or their own completely random creature that somehow has seven eyes.
The best part? Most of these projects use inexpensive supplies you probably already have at home. Paper plates, cardboard tubes, construction paper, cotton balls, yarn, and washable paint can become surprisingly impressive Halloween decorations.
These crafts also work well for different ages. Younger children can focus on gluing, painting, and sticking pieces together, while older kids can handle cutting, drawing details, and creating their own designs.
Materials and Tools You’ll Need
You do not need to empty the craft store shelf to make these projects. Keep it simple and use what you have.
- Construction paper: Black, orange, white, purple, green, and red are especially useful.
- Paper plates: Great for pumpkins, ghosts, spiders, and masks.
- Cardboard toilet paper tubes: Save a few before recycling them.
- Washable paint: Acrylic or tempera paint works well for older children.
- Child-safe scissors: Use safety scissors for younger crafters.
- Glue: School glue or glue sticks are both useful.
- Googly eyes: Optional, but honestly, everything looks funnier with googly eyes.
- Cotton balls: Perfect for fluffy ghosts and clouds of spooky cobwebs.
- Markers or crayons: Use these for faces, patterns, and tiny details.
- Yarn or string: Helpful for hanging decorations.
- Recycled cardboard: Cereal boxes and shipping boxes make excellent craft material.
Affordable Substitutes
Missing something? Don’t panic. Use newspaper instead of construction paper, old magazines instead of colored sheets, and cardboard packaging instead of craft foam.
If you do not have googly eyes, simply draw eyes with a marker. DIY crafts are supposed to work with what you have, not send you on a midnight shopping trip for one tiny bag of plastic eyeballs.
Paper Plate Halloween Ghost
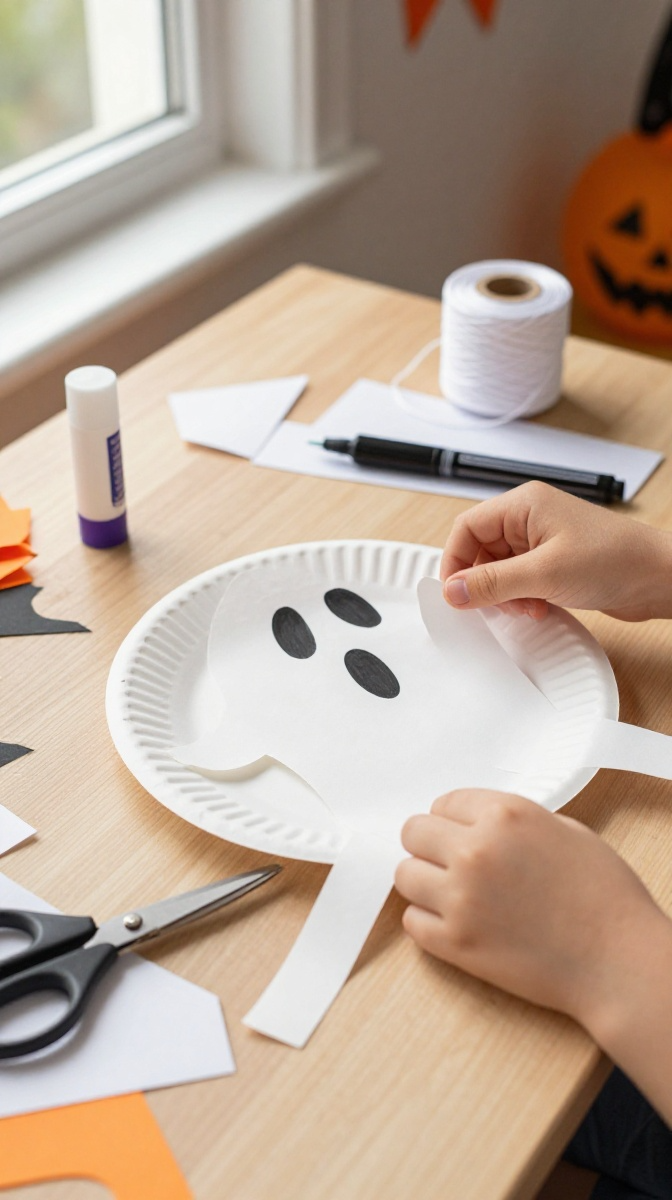
This little ghost makes an adorable hanging decoration and takes only a few basic supplies. It is especially good for younger kids because most of the fun involves painting, gluing, and decorating.
What Makes This Craft Easy?
The paper plate already provides the ghost’s round head. Kids only need to add a face and a flowing paper body underneath it.
Step-by-Step Instructions
- Place a white paper plate on your work surface with the front facing upward.
- Use a black marker to draw two large oval eyes and a surprised or silly mouth.
- Cut several long strips from white construction paper to create the ghost’s flowing body.
- Glue the paper strips around the bottom edge of the plate.
- Add small paper hands or arms if you want the ghost to look like it is flying.
- Attach a loop of yarn or string to the back of the plate with tape or glue.
- Hang your ghost near a doorway, window, bedroom wall, or Halloween party table.
Kid-friendly variation: Let each child create a different expression. Make one ghost sleepy, one shocked, one grumpy, and one ridiculously happy.
Spooky Toilet Paper Roll Monsters
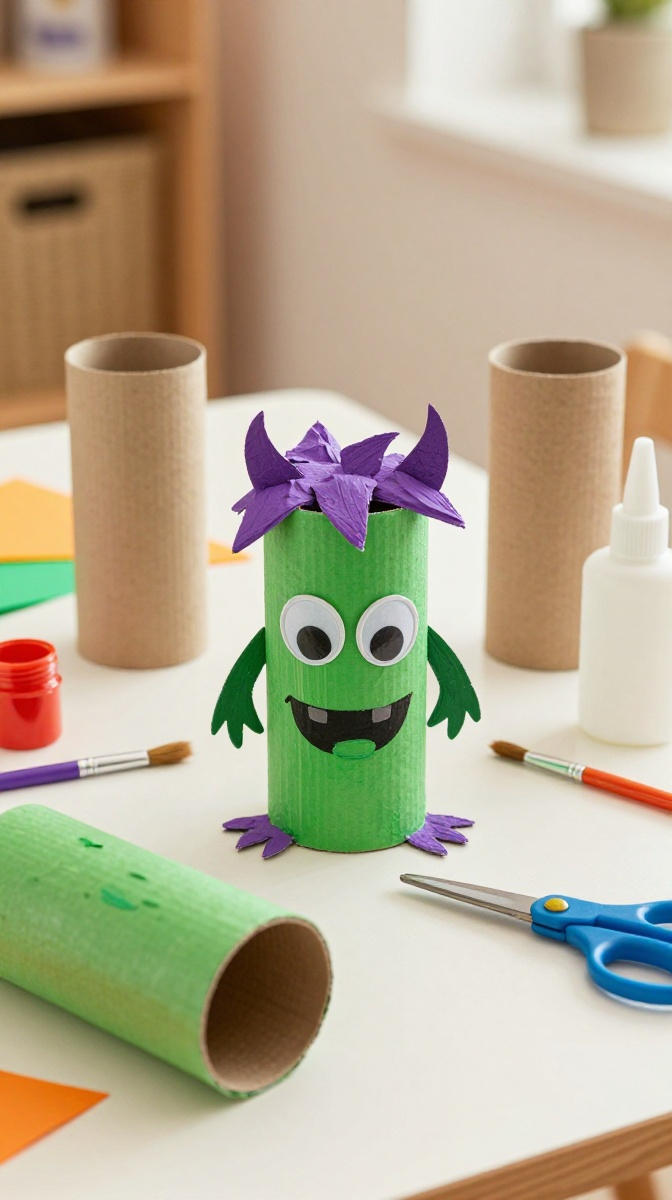
Before you toss those cardboard tubes into recycling, give them a Halloween makeover. These tiny monsters are inexpensive, colorful, and perfect for decorating shelves or desks.
How to Customize Them
There is no single correct monster here. Use purple paint for a vampire, green for Frankenstein, orange for a pumpkin monster, or black for a mysterious little creature.
Step-by-Step Instructions
- Clean and dry a cardboard toilet paper tube.
- Paint the tube in your chosen Halloween color and allow it to dry completely.
- Cut two small paper shapes for the monster’s arms and glue them onto the sides.
- Glue on two or more googly eyes, or draw eyes with a marker.
- Add a mouth using black marker or small pieces of construction paper.
- Create hair, horns, ears, teeth, or a tiny hat from leftover paper scraps.
- Place your finished monster on a shelf, windowsill, desk, or Halloween display.
Pro tip: Do not worry if the paint looks uneven. Monsters are not famous for their flawless skin-care routines.
Paper Pumpkin Garland
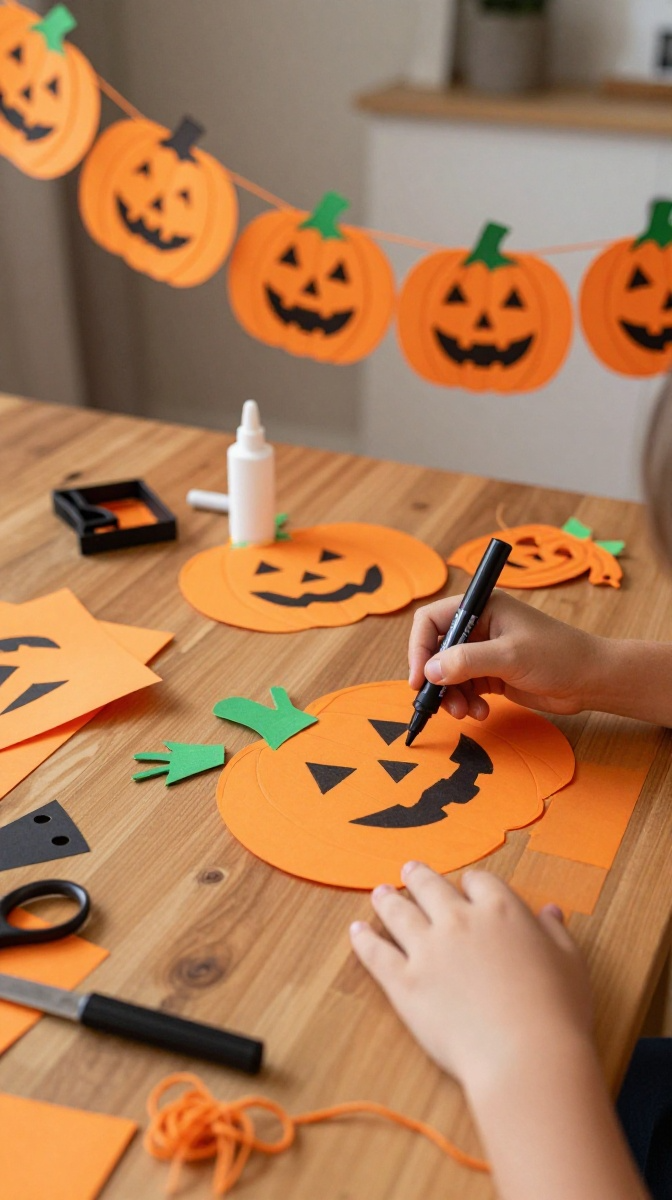
If you want something that instantly makes a room feel more festive, try a simple pumpkin garland. Kids can make several pumpkins and connect them into one colorful Halloween decoration.
Materials and Design Ideas
Use orange construction paper for classic pumpkins, or mix orange with purple, black, and green for a more playful look. White pumpkins can also create a cute farmhouse-style Halloween display.
Step-by-Step Instructions
- Fold an orange sheet of construction paper in half.
- Draw half of a pumpkin shape along the folded edge.
- Cut along the outline and unfold the paper to reveal a symmetrical pumpkin.
- Repeat the process until you have several pumpkins.
- Draw different faces on each pumpkin using black marker.
- Cut small green rectangles or leaf shapes for the pumpkin stems.
- Glue the stems onto the pumpkins.
- Punch a small hole near the top of each pumpkin.
- Thread yarn or string through the holes and space the pumpkins evenly.
- Hang the finished garland across a wall, window, mantel, or party table.
Want extra personality? Add eyelashes, silly eyebrows, tiny hats, or funny teeth. Let the kids design the faces themselves instead of trying to make every pumpkin look Pinterest-perfect.
Friendly Halloween Spider Craft
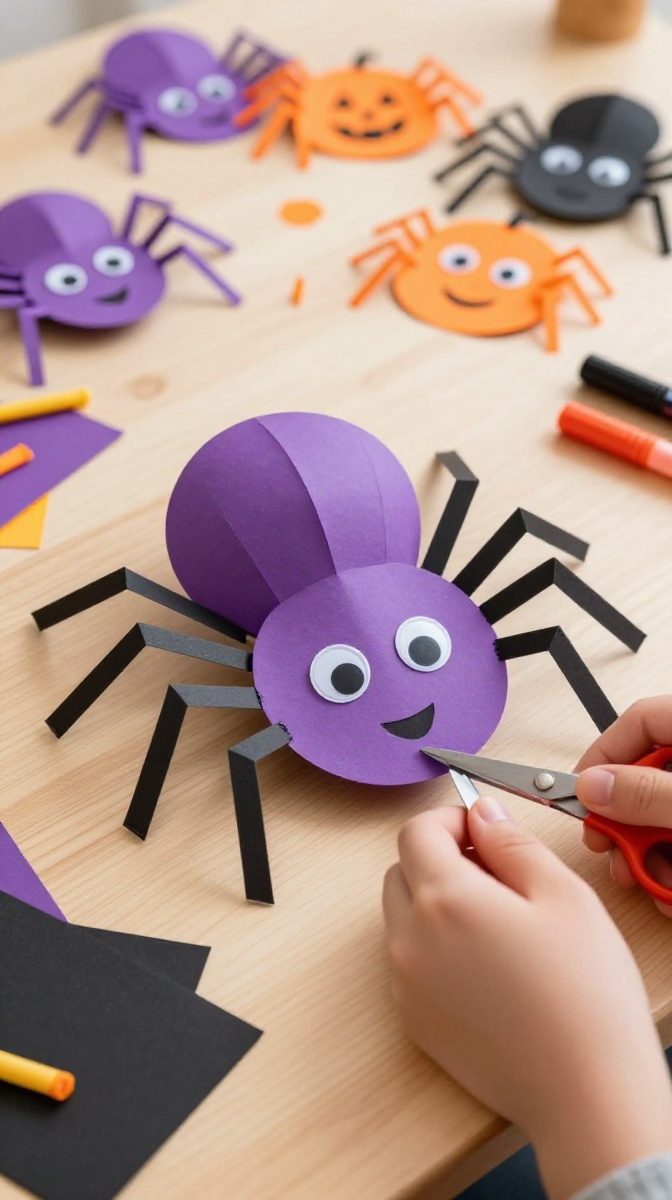
Spiders might make some kids nervous, but these paper spiders are more goofy than creepy. This project is a great choice when you want a Halloween craft that uses simple shapes and lots of creativity.
Make It Cute Instead of Creepy
Use bright colors and oversized eyes to make the spider friendly. Purple, orange, pink, green, and even rainbow combinations can work beautifully.
Step-by-Step Instructions
- Cut a large circle from black, purple, or another dark-colored piece of construction paper.
- Cut eight long, narrow strips for the spider’s legs.
- Fold each leg strip gently back and forth to create a little bend.
- Glue four legs onto each side of the paper body.
- Add two large googly eyes to the top of the body.
- Draw a funny smile or add tiny paper fangs.
- Attach a piece of string to the back if you want to hang the spider.
- Display your spider on a wall, door, window, or classroom-style craft board.
Variation: Make several spiders in different colors and arrange them like a little Halloween family. Give each one a different expression.
Easy Halloween Crafting Tips for Kids
Crafting with children rarely goes exactly according to plan. That’s part of the fun. A pumpkin might end up looking like a potato, a ghost might have three eyes, and someone will almost certainly glue something upside down.
Let Kids Make Their Own Choices
Give children a basic idea but let them decide the colors, faces, patterns, and decorations. The finished craft does not need to look exactly like an example.
Prepare the Workspace
Cover the table with newspaper, an old tablecloth, or scrap cardboard. Keep glue, paint, and scissors in separate areas so little hands do not accidentally create a craft-supply avalanche.
Keep Safety Simple
Always supervise young children when using scissors, glue, paint, or small decorative pieces. Use child-safe scissors and non-toxic washable supplies whenever possible.
Small pieces such as googly eyes can become choking hazards for toddlers, so keep them away from children who may put craft materials in their mouths.
Common Mistakes to Avoid
- Using too much glue: A little usually works better than a giant puddle.
- Painting before planning: Decide where faces and decorations go before covering everything in paint.
- Skipping drying time: Wet paint plus curious fingers equals fingerprints everywhere.
- Making every craft identical: Kids enjoy creating their own versions, so embrace the differences.
- Trying to make it perfect: A slightly crooked monster is still a monster.
Fun Ways to Display and Use the Finished Crafts
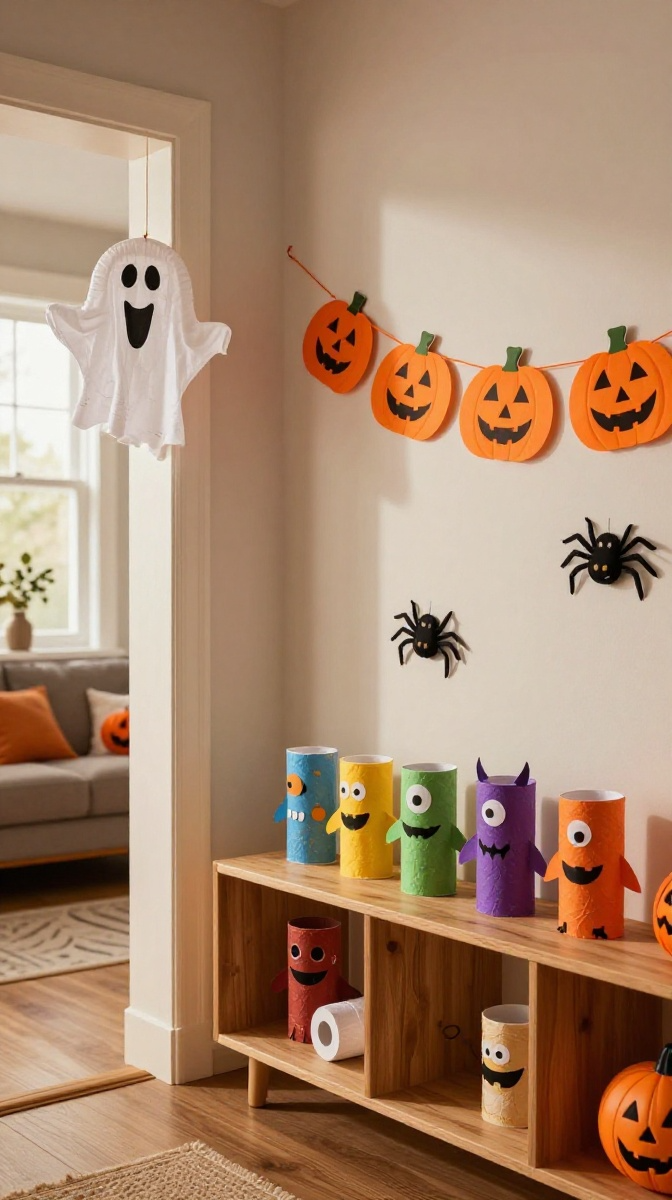
Once the crafts are finished, don’t hide them in a drawer. Turn them into part of your Halloween decorations.
Hang paper ghosts from the ceiling or doorway. Place cardboard monsters along bookshelves. Run the pumpkin garland across a bedroom wall, mantel, or party table.
You can also turn the crafts into little Halloween gifts. Kids can give a handmade spider, monster, or pumpkin to grandparents, teachers, friends, or neighbors.
For a Halloween party, create a dedicated kids’ craft display. Add each child’s name underneath their creation so everyone gets a little moment of glory.
FYI, handmade decorations do not need to look expensive to look fantastic. A wall covered with colorful crafts made by kids often feels much more special than a perfectly matched store-bought display.
FAQ’s
What are the easiest Halloween crafts for young kids?
Paper plate ghosts, paper pumpkins, and simple cardboard monsters are excellent choices. They mostly involve coloring, gluing, painting, and adding decorations.
What Halloween crafts can kids make with recycled materials?
Cardboard tubes, cereal boxes, paper bags, egg cartons, and cardboard packaging can all become Halloween decorations. Cardboard tubes work especially well for little monsters and characters.
How can I make Halloween crafts less messy?
Cover the work surface before starting, use washable paint, give each child a small amount of glue, and keep wipes nearby. Working on a tray can also keep tiny craft pieces from migrating across the entire house.
Can preschoolers make these Halloween crafts?
Yes. Choose projects involving coloring, painting, gluing, and large paper shapes. Adults should handle cutting when needed and supervise the use of small decorations.
How can kids personalize Halloween crafts?
Let them choose colors, facial expressions, patterns, hair, accessories, and funny names for their creations. There is no reason every ghost needs the same face.
How long do homemade Halloween decorations last?
Paper and cardboard decorations can last for years when stored somewhere dry and flat. Keep them in a box after Halloween and reuse them next year for an even bigger display.
Let the Halloween Crafting Begin
These easy Halloween crafts for kids prove that you do not need expensive supplies or complicated instructions to make something fun. Start with paper, cardboard, paint, and a little imagination, then let the kids take over.
Don’t worry about crooked eyes, messy glue, or strangely shaped pumpkins. Those little imperfections are often what make homemade Halloween decorations memorable. Pick one project, clear the table, and get crafting—your tiny monsters are waiting.