
A Little Chocolate Dessert That Always Saves the Day
There are days when I want dessert, but I absolutely do not want to turn my kitchen into a baking laboratory.
You know the feeling. Dinner is almost done, someone asks, “Do we have anything sweet?” and suddenly everyone looks at you like you secretly run a pastry shop.
That is exactly how these Quick and Easy Sweet Dessert Cups became a regular in my kitchen.
I first made them on one of those evenings when I had chocolate biscuits, a little cream, and a nearly forgotten chocolate bar sitting in the cupboard. I layered everything into small glasses, popped them into the fridge, and hoped for the best.
The result was much better than expected.
The biscuit layer softened just enough, the chocolate cream became wonderfully rich, and every spoonful had that creamy-crunchy combination I love in a good dessert.
Since then, I have made these more times than I can count. I have served them after family dinners, taken them to casual gatherings, and even made a batch when unexpected guests showed up.
The best part? You don’t need fancy pastry skills. If you can crush biscuits and stir chocolate into cream, you’re already halfway there.
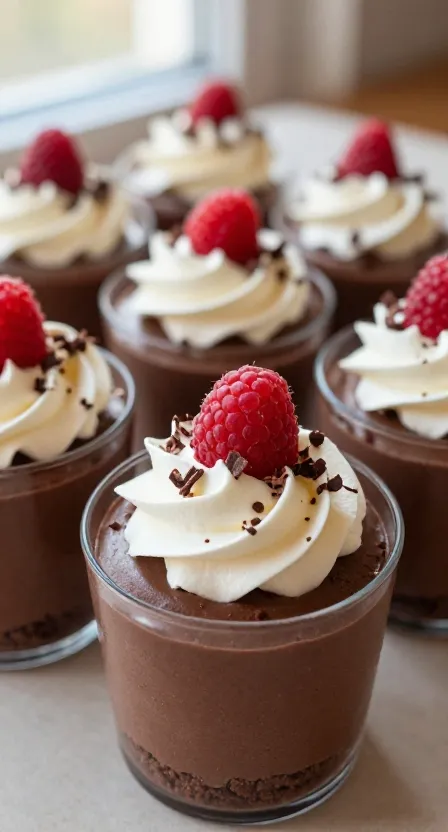
Why You’ll Love This Recipe
- No oven required: Your refrigerator does most of the work.
- Fast preparation: You can assemble these in about 20 minutes.
- Simple ingredients: Most items come from an ordinary grocery trip.
- Perfect for guests: Individual dessert cups look much fancier than the effort they require.
- Easy to customize: Change the biscuits, chocolate, toppings, or flavorings depending on what you have.
I especially love this recipe because it gives you plenty of room to improvise. I have made it with dark chocolate, milk chocolate, crushed cookies, strawberries, bananas, and even a little peanut butter.
Some versions worked better than others. That’s part of the fun.
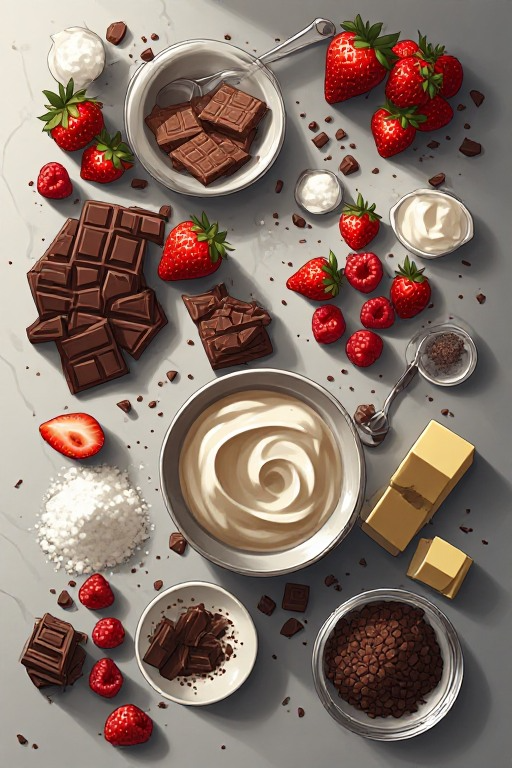
Ingredients
This recipe makes 6 individual dessert cups.
For the Biscuit Base
- 200 g chocolate biscuits or chocolate sandwich cookies
- 3 tablespoons melted unsalted butter
- 1 tablespoon granulated sugar, optional
You can use plain digestive biscuits if you don’t have chocolate cookies. Add an extra tablespoon of cocoa powder if you want a deeper chocolate flavor.
For the Chocolate Cream Layer
- 150 g semi-sweet or milk chocolate, finely chopped
- 240 ml heavy cream, divided
- 2 tablespoons powdered sugar
- 1 teaspoon vanilla extract
- Pinch of salt
I usually reach for semi-sweet chocolate because it gives the dessert a rich chocolate flavor without making it overly sweet.
If you prefer a sweeter dessert, milk chocolate works beautifully.
For the Topping
- 100 ml heavy cream
- 1 tablespoon powdered sugar
- ½ teaspoon vanilla extract
- 30 g grated chocolate
- Fresh strawberries, raspberries, or chocolate curls, optional
You can also sprinkle crushed biscuits over the top if you want a little extra texture.
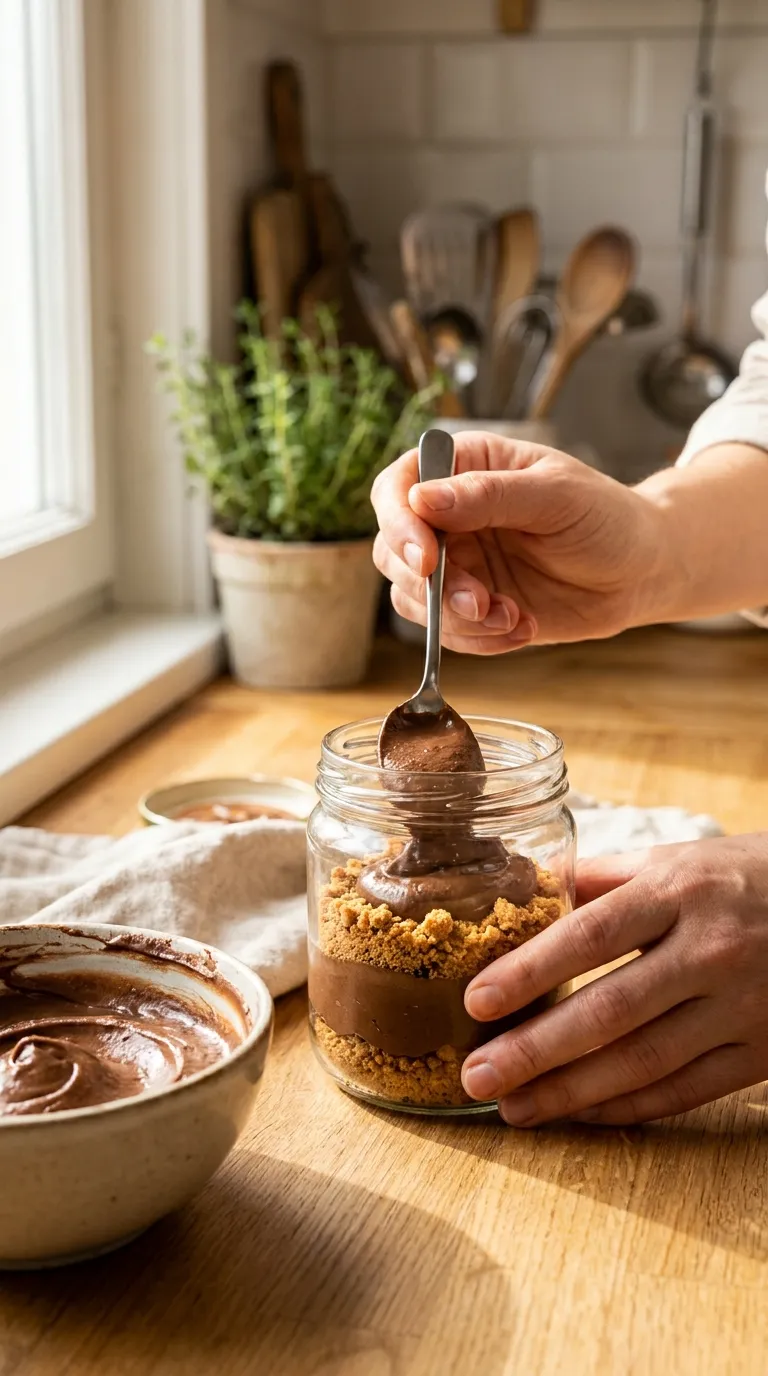
Step-by-Step Instructions
1. Crush the Biscuits — 5 Minutes
Place the chocolate biscuits in a food processor and pulse until they resemble fine crumbs.
Don’t have a food processor? No problem.
Put the biscuits into a sturdy zip-top bag, seal it well, and crush them with a rolling pin. I actually use this method quite often because it gives me a mixture of fine crumbs and slightly larger pieces.
That little bit of texture makes the dessert more interesting.
Transfer the crumbs to a bowl.
2. Add the Melted Butter — 2 Minutes
Pour the melted butter over the crushed biscuits.
Mix everything until the crumbs look evenly coated and resemble damp sand.
If the mixture looks extremely dry, add another teaspoon of melted butter. Don’t add too much, though. You want the crumbs to hold together slightly without turning into a greasy paste.
3. Build the Biscuit Layer — 3 Minutes
Spoon about 2 tablespoons of the biscuit mixture into the bottom of each serving glass.
Use the back of a small spoon to gently press the crumbs down.
Don’t pack them too tightly.
I learned this after making an early batch with a base so compact that every spoonful required actual determination. Delicious, yes. Easy to eat, not so much.
A light press gives you a softer, more pleasant layer.
4. Make the Chocolate Cream — 5 Minutes
Place the chopped chocolate in a heatproof bowl.
Warm 120 ml of the heavy cream in a small saucepan over medium-low heat.
Heat it until it becomes hot and steamy, but don’t let it boil aggressively.
Pour the hot cream over the chocolate.
Let it sit undisturbed for about 2 minutes.
Then stir slowly until the chocolate melts completely and the mixture becomes smooth and glossy.
Add the vanilla and a tiny pinch of salt.
The salt won’t make the dessert taste salty. Instead, it helps the chocolate taste deeper and more balanced.
Allow the chocolate mixture to cool for about 5 minutes.
5. Whip the Remaining Cream — 4 Minutes
Pour the remaining 120 ml heavy cream into a chilled mixing bowl.
Add the powdered sugar.
Using a hand mixer or stand mixer, beat the cream on medium speed until soft peaks form.
Stop as soon as the cream holds its shape.
You don’t want stiff, grainy whipped cream.
If you lift the beaters and the cream forms a soft peak that gently bends over, you’ve got it.
6. Fold the Chocolate and Cream Together — 3 Minutes
Add about one-third of the whipped cream to the cooled chocolate mixture.
Stir gently to lighten the chocolate.
Then add the remaining whipped cream.
Fold everything together with a silicone spatula.
Use gentle movements rather than vigorous stirring. You want to keep the mixture light and creamy.
At this stage, the chocolate mousse should look smooth, fluffy, and completely irresistible.
Yes, you can taste it.
I certainly do.
7. Add the Chocolate Layer — 3 Minutes
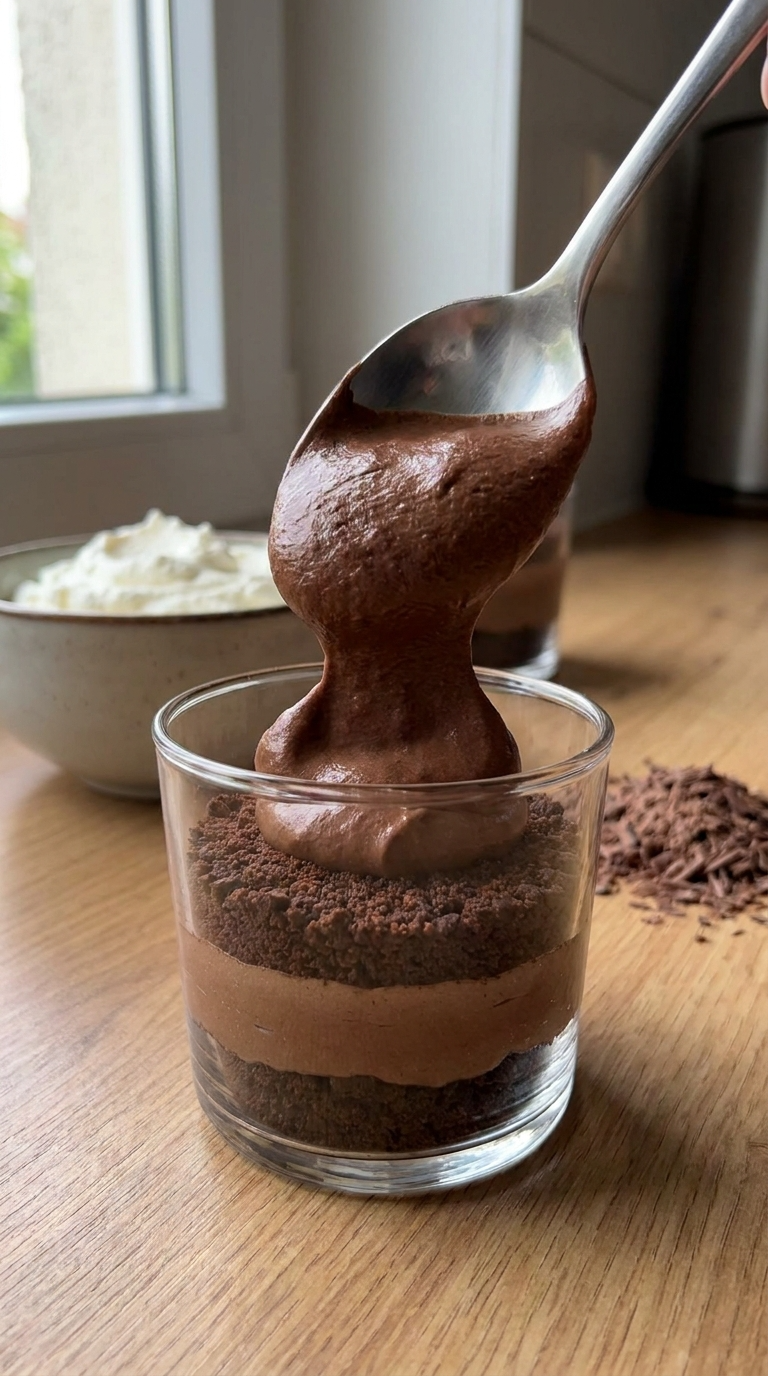
Spoon or pipe the chocolate mixture over the biscuit base.
If you want neat layers, use a piping bag.
If you don’t care about perfect presentation, grab a spoon and go for it. Nobody has ever complained about a slightly uneven chocolate layer.
Leave a little room at the top of each glass for whipped cream and toppings.
8. Chill the Dessert — At Least 1 Hour
Cover the glasses with plastic wrap and place them in the refrigerator.
Chill for at least 1 hour.
If you have time, let them chill for 2 to 3 hours.
The extra chilling time allows the biscuit layer to soften slightly while the chocolate filling firms up.
For the best texture, I prefer making these a few hours before serving.
9. Finish With Whipped Cream — 3 Minutes
Beat the remaining 100 ml heavy cream with powdered sugar and vanilla until soft peaks form.
Spoon or pipe a small amount onto each dessert cup.
Don’t go overboard.
The chocolate layer should remain the star.
10. Add the Final Toppings — 2 Minutes
Finish each cup with grated chocolate.
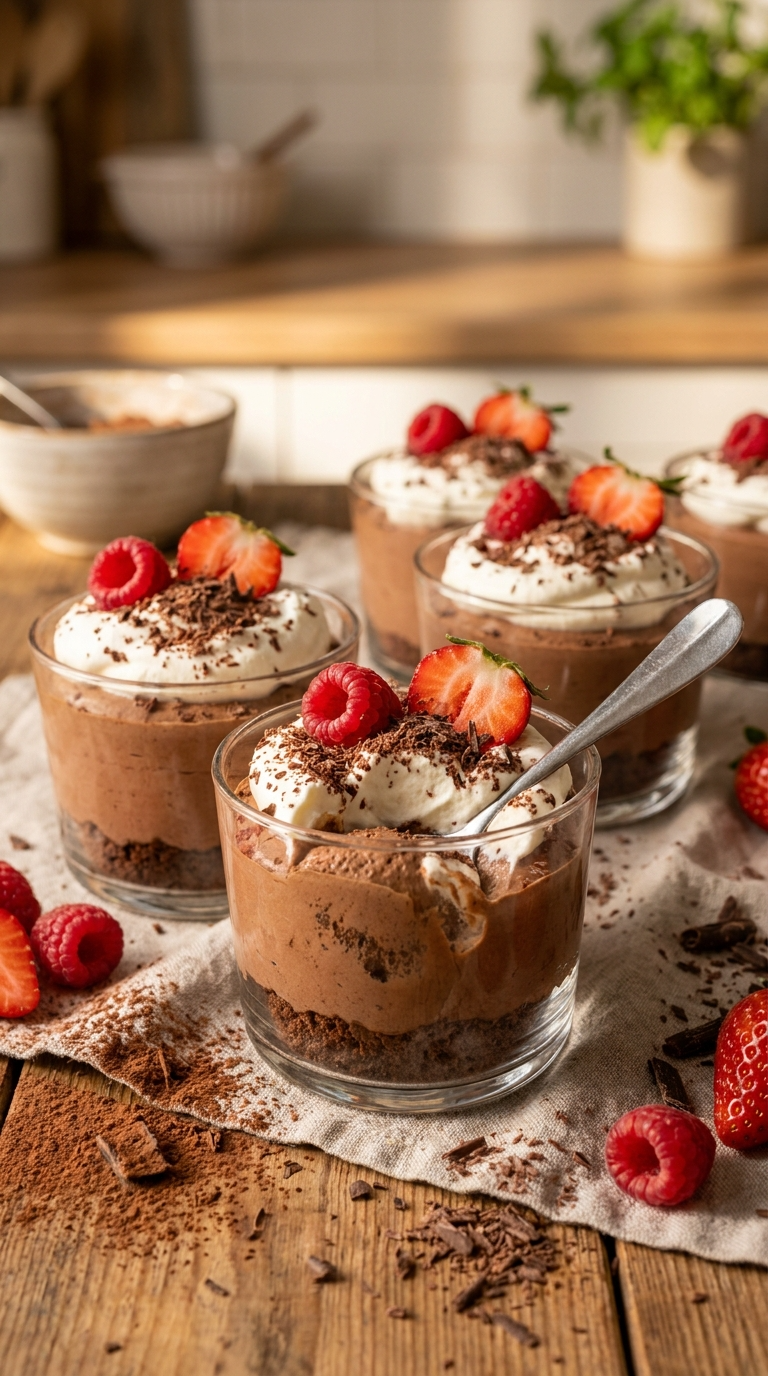
For a prettier presentation, add a strawberry, a few raspberries, or a small chocolate curl.
Serve chilled.
And try not to make the mistake I made the first time: grabbing one “just to check the texture” before dinner.
One quickly becomes two.
Pro Tips & Tricks
Let the Chocolate Cool Before Adding Whipped Cream
This is probably the most important tip.
If the melted chocolate mixture feels hot when you combine it with whipped cream, the heat can deflate the cream and leave you with a heavy filling.
Let it cool until it feels slightly warm or close to room temperature.
Don’t Overwhip the Cream
Stop beating as soon as you see soft peaks.
Overwhipped cream can become grainy and eventually turn into butter.
I’ve rescued plenty of cooking mistakes, but there’s no reason to create this one.
Don’t Compress the Biscuit Base Too Firmly
A lightly pressed biscuit layer gives the dessert a pleasant texture.
If you press it down aggressively, the base can become hard after chilling.
Think “gentle pat,” not “building a driveway.”
Make Them Ahead
You can prepare the dessert cups up to 24 hours ahead.
For the best appearance, add the whipped cream and fresh fruit shortly before serving.
The chocolate cups themselves actually taste even better after several hours in the refrigerator.
Store Them Properly
Cover the individual glasses tightly with plastic wrap or place them in an airtight container.
Keep them refrigerated.
They taste best within 2 days because the biscuit layer continues softening over time.
Variations & Substitutions
Try a Peanut Butter Chocolate Version
For a peanut butter twist, mix 3 tablespoons creamy peanut butter into the warm chocolate mixture.
Make sure the peanut butter blends completely before you fold in the whipped cream.
You can also sprinkle chopped roasted peanuts between the layers.
Chocolate and peanut butter rarely need an introduction.
Make It Fruity
Add a thin layer of sliced strawberries or raspberries between the biscuit and chocolate layers.
You can also spoon a little strawberry jam into the glasses.
The slight tartness from the fruit cuts through the richness of the chocolate and makes the dessert feel lighter.
Make a Coffee Chocolate Version
For a deeper flavor, dissolve 1 teaspoon instant espresso powder into the warm cream before pouring it over the chocolate.
The dessert won’t taste strongly like coffee.
Instead, the coffee boosts the chocolate flavor.
This trick has become one of my favorite ways to make chocolate desserts taste more intense without adding more chocolate.
Use Different Biscuits
Don’t feel locked into chocolate sandwich cookies.
Try:
- Digestive biscuits
- Graham crackers
- Chocolate wafer cookies
- Shortbread
- Ginger biscuits
Ginger biscuits give the dessert a surprisingly lovely warm flavor, especially during cooler months.
Serving Suggestions
These dessert cups work especially well after a casual family dinner because you can make them earlier and keep them chilled until everyone finishes eating.
They also fit beautifully on a dessert table for birthdays, dinner parties, potlucks, and holiday gatherings.
For a dinner party, serve them in small clear glasses. The visible layers make them look elegant without requiring any complicated decoration.
For children, use colorful sprinkles or mini chocolate chips instead of fresh fruit.
For adults, I love serving the cups with fresh berries and a strong cup of coffee.
You can also make smaller portions.
Because the chocolate filling tastes rich, a few spoonfuls can feel surprisingly satisfying. Small espresso glasses work wonderfully when you want a bite-sized dessert.
If you’re serving the cups outdoors or during warm weather, keep them refrigerated until the last possible moment.
The whipped cream softens quickly when it sits somewhere warm.
FAQ’s
Can I make these dessert cups the day before?
Yes.
You can assemble the biscuit and chocolate layers up to 24 hours before serving. Keep them covered and refrigerated.
For the freshest presentation, add the whipped cream and toppings shortly before serving.
How long do they last in the refrigerator?
They taste best within 2 days.
Keep them covered in the refrigerator to prevent them from absorbing other food odors.
The biscuit layer will soften more as the dessert sits, so expect a slightly different texture on the second day.
Can I use milk chocolate instead of semi-sweet chocolate?
Absolutely.
Milk chocolate creates a sweeter and creamier dessert.
If you use very sweet chocolate, reduce the powdered sugar slightly so the final dessert doesn’t become overwhelmingly sweet.
Can I freeze these chocolate dessert cups?
I don’t recommend freezing the fully assembled cups because the whipped cream and biscuit layers can change texture after thawing.
If you need to prepare ahead, make the chocolate mixture and biscuit crumbs separately, then assemble the dessert closer to serving time.
Why did my chocolate mixture become thick?
Your chocolate may have cooled too much before you folded in the whipped cream.
That’s usually easy to fix.
Let the chocolate mixture sit at room temperature for several minutes and gently stir it until it becomes smooth and workable again.
Avoid reheating it aggressively because high heat can affect the texture.
Can I make this recipe without a stand mixer?
Definitely.
A hand mixer works perfectly.
You can also whip the cream by hand with a balloon whisk, although your arm will get a much better workout.
For this small amount, a hand mixer makes the job quick and easy.
Closing Thoughts
Some desserts deserve a complicated recipe and an afternoon in the kitchen.
This one doesn’t.
These Quick and Easy Sweet Dessert Cups prove that you can create something creamy, chocolatey, and genuinely special without baking a cake, making pastry, or washing half the kitchen afterward.
That’s exactly why I keep coming back to them.
I love recipes that give you a little flexibility. If you have strawberries, use them. If you only have plain biscuits, use those. If you want extra chocolate, well, I certainly won’t stop you.
And if your first batch doesn’t look perfectly layered, don’t worry.
Dessert doesn’t need to pass a beauty contest.
Grab a spoon, dig into that creamy chocolate center, and enjoy the part that actually matters.
If you make these dessert cups, I’d love to hear what you added to yours. A little peanut butter? Fresh berries? Extra chocolate? Tell me what ended up in your version.
Just make sure you save one for yourself before everyone else discovers them.