
Want to turn your hot glue gun into a cash machine this holiday season? These five easy Christmas crafts to sell are beginner-friendly, cheap to make, and honestly kind of addictive. You don’t need a craft room full of fancy equipment — just a kitchen table, a little patience, and a willingness to embrace glitter everywhere for the next month. Let’s make some cute stuff and some extra cash.
Why These Christmas Crafts Actually Sell
Holiday shoppers buy on emotion, and nothing triggers emotion like handmade holiday decor. People want gifts that feel personal without paying boutique prices. That’s your sweet spot.
Here’s the thing: you don’t need to be an expert crafter. You need products that are cute, affordable, and gift-ready. Shoppers at craft fairs, farmers markets, and Facebook Marketplace snatch up anything that looks like it came from a cozy holiday movie.
These five projects cost under $5 each to make and sell for $10 to $25. Not bad for a few evenings of crafting, right?
1. Mason Jar Snow Globes That Look Store-Bought
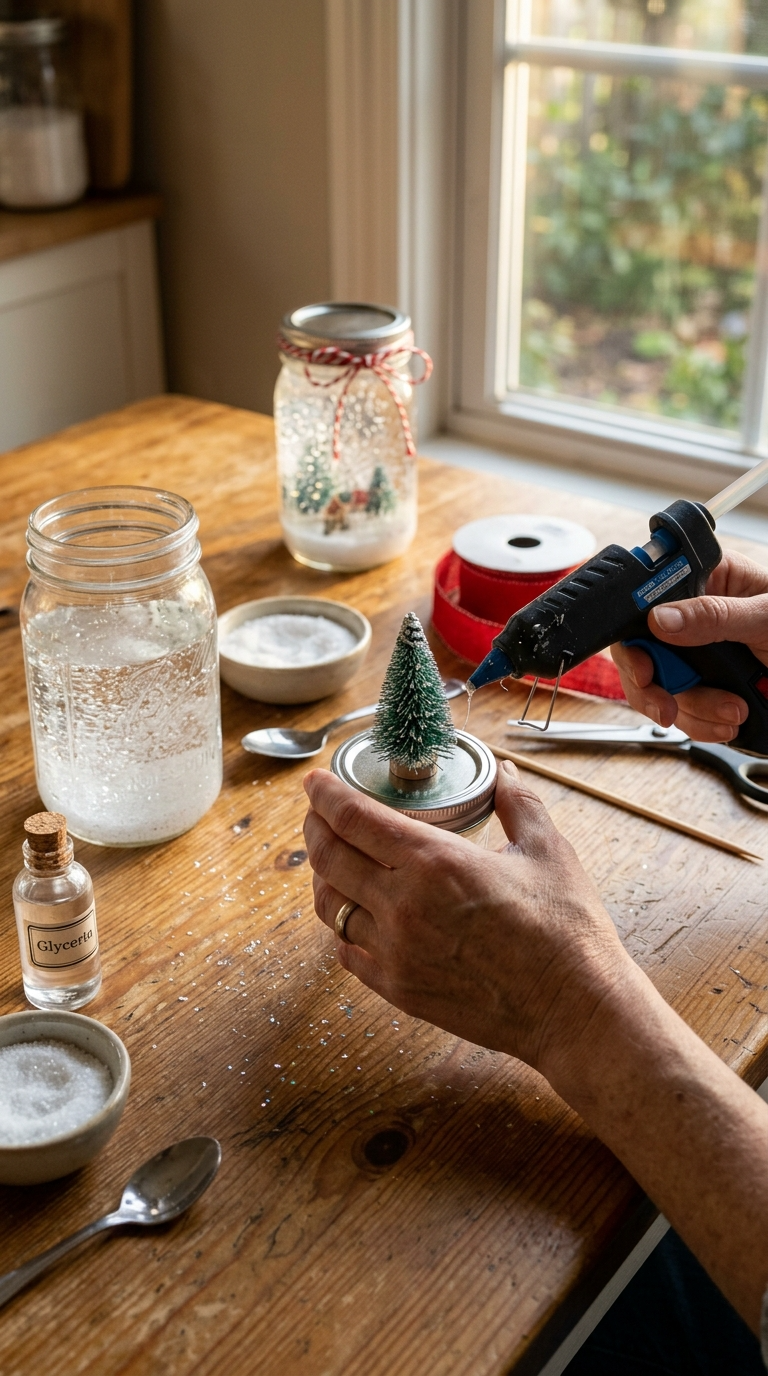
These are my number one seller every single year. They’re basically foolproof, and kids love shaking them. Adults love them too, FYI.
Materials and Tools
- Clean mason jars with lids (any size — thrift stores are gold mines)
- Distilled water (tap water gets cloudy, trust me)
- Clear glue or glycerin (glycerin makes snow fall slower and prettier)
- Fine white glitter and fake snow flakes
- Mini bottle brush trees or tiny figurines
- Waterproof glue (E6000 works great)
- Ribbon and twine for decorating the lid
Budget swap: Use old jam jars instead of buying new mason jars. Just scrub the labels off with warm soapy water.
Step-by-Step Instructions
- Glue your figurine or tree to the inside of the jar lid. Let it dry completely — at least a few hours.
- Fill the jar almost to the top with distilled water.
- Add a squeeze of glycerin and a spoonful of glitter. More glitter equals more magic.
- Run a bead of waterproof glue around the lid rim, then screw it on tight.
- Flip it over and give it a gentle shake. If it leaks, you skimped on the glue — add more.
- Tie ribbon around the lid and add a gift tag.
Common Mistakes to Avoid
Don’t use too much glitter or your snow scene looks like a blizzard in a bottle. Also, skip the hot glue for sealing — it breaks down in water and you’ll end up with a sad puddle on your table.
Selling and Display Ideas
Group them in threes on a tiered tray at your booth. Wrap each one in cellophane with a ribbon and a “Handmade with Love” tag to justify a higher price.
2. Rustic Wood Slice Ornaments That Sell Fast
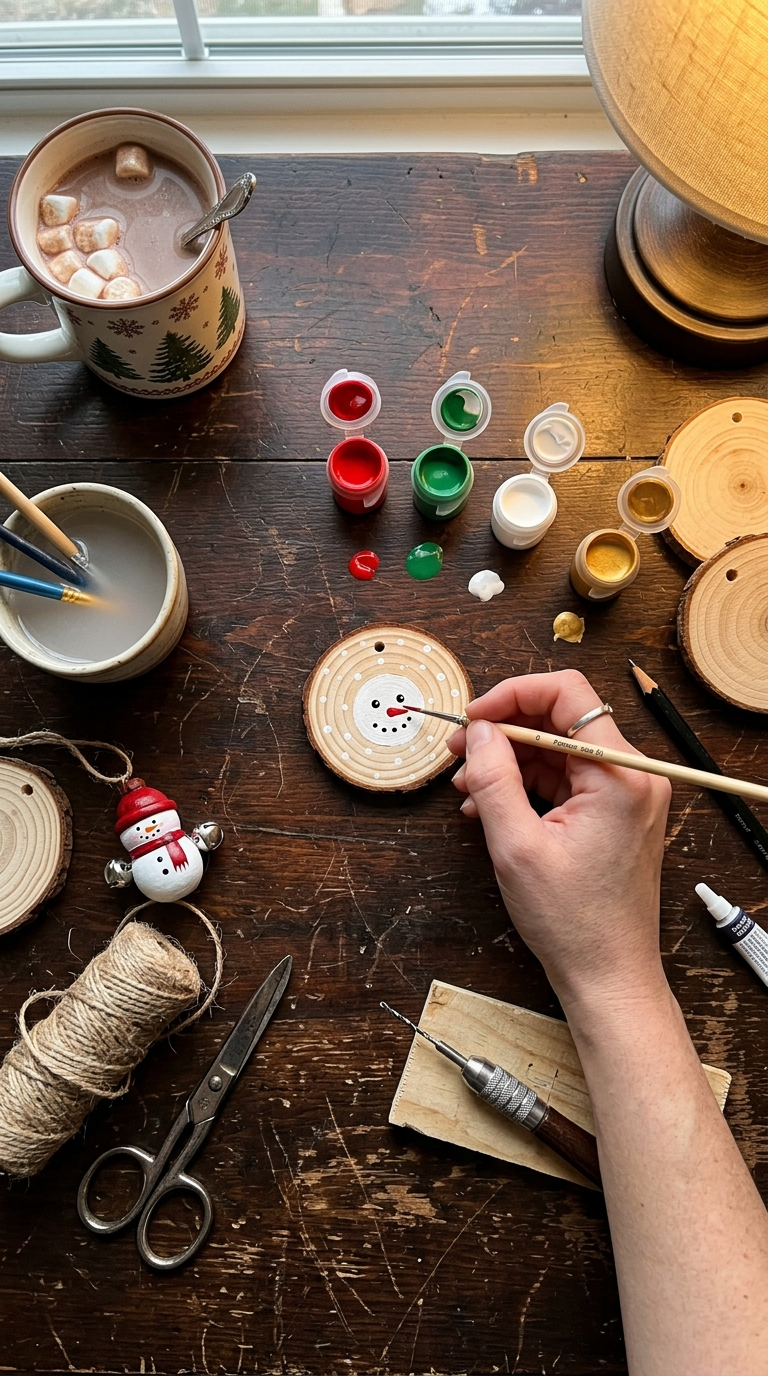
Wood slice ornaments are trendy, farmhouse-chic, and ridiculously easy. If you can paint a snowman, you can make these. If you can’t paint a snowman, well, stick to dots and stripes.
Materials and Tools
- Pre-cut wood slices (dollar stores and craft stores carry bags of them)
- Acrylic paint in red, green, white, and gold
- Fine-tip paintbrushes
- Twine or ribbon for hanging
- Mod Podge or clear sealant
- Drill with a small bit (or buy pre-drilled slices)
Shortcut: Buy pre-drilled slices online in bulk. Drilling 50 tiny holes is nobody’s idea of holiday fun.
Step-by-Step Instructions
- Drill a small hole near the top edge of each slice if it isn’t pre-drilled.
- Paint a simple design: snowmen, Christmas trees, reindeer silhouettes, or just stripes.
- Let the paint dry fully, then seal with Mod Podge.
- Thread twine through the hole and tie a loop.
- Add a small bead or bell to the twine for extra charm.
Design Variations to Try
Write names on them for personalized ornaments — those sell for double. Add a small photo on one side for a keepsake vibe. Wood-burned designs also look gorgeous if you own a pyrography pen.
Safety Tip
Always drill on a scrap piece of wood, not your kitchen counter. Your counters will thank you.
3. DIY Hot Cocoa Bombs in Cute Gift Jars

Hot cocoa bombs were everywhere a few years ago, and they still sell like crazy. People pay good money for a chocolate ball that explodes into marshmallow heaven. Wild, but true.
Materials and Tools
- Chocolate melting wafers (milk, dark, or white)
- Silicone sphere molds
- Hot cocoa mix
- Mini marshmallows
- Small mason jars or cellophane bags
- Ribbon and tags
Substitute: Crushed candy canes or sprinkles work as filler if you’re out of marshmallows.
Step-by-Step Instructions
- Melt the chocolate wafers in the microwave in 30-second bursts, stirring between each.
- Spoon melted chocolate into the mold and swirl it around to coat the sides.
- Chill for 10 minutes, then carefully pop the shells out.
- Fill half the shells with cocoa mix and marshmallows.
- Warm a plate and press the empty shells onto it to melt the edges, then seal the halves together.
- Package two bombs per jar with a tag explaining how to use them.
Troubleshooting
If your shells crack, your chocolate was too cold or too thick. Add a tiny bit of coconut oil to thin it out. If they melt while sealing, your kitchen is too warm — work in batches and keep the rest in the fridge.
4. Cinnamon Stick Candle Holders With Major Cozy Vibes
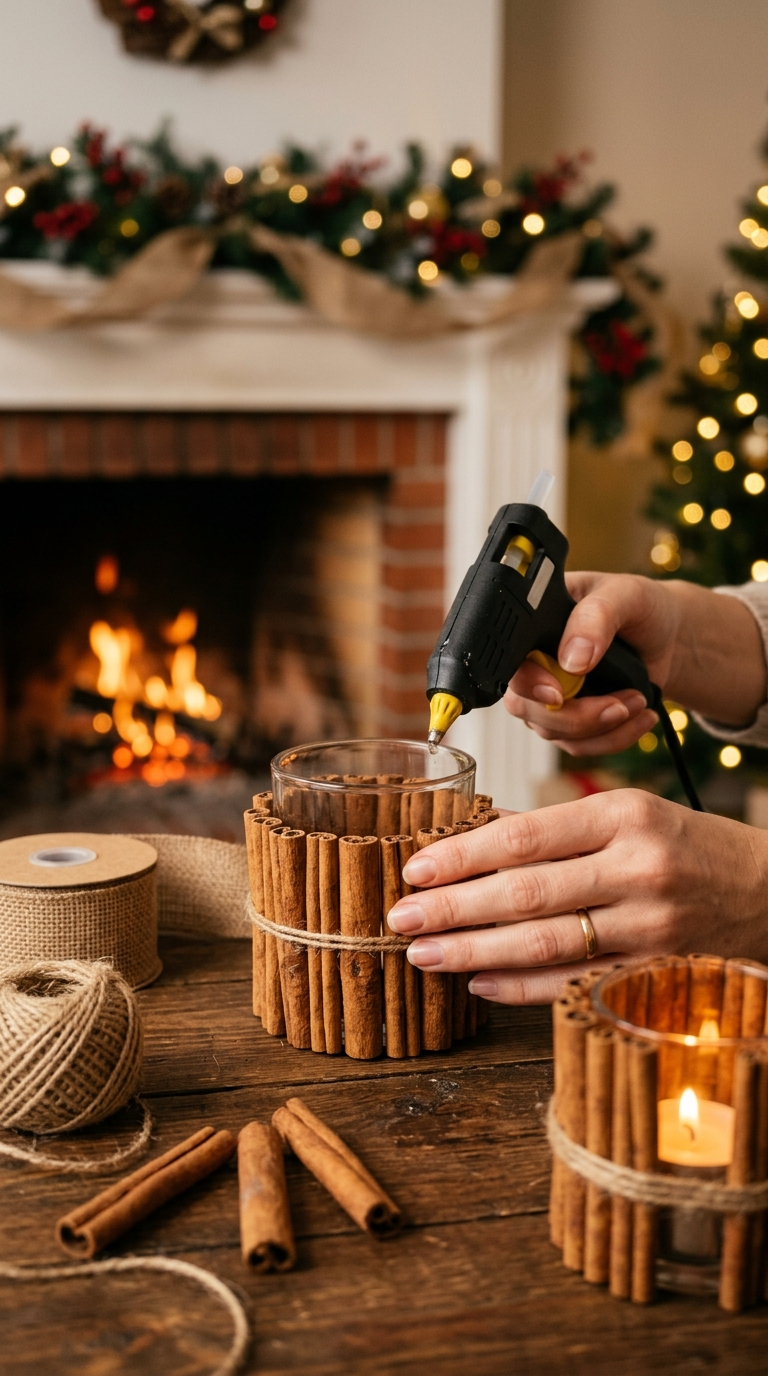
These smell amazing and look way more expensive than they are. Wrap a plain glass candle holder in cinnamon sticks and suddenly it’s a boutique item. Nobody needs to know it took ten minutes.
Materials and Tools
- Small glass candle holders or jars
- Cinnamon sticks (buy in bulk — you’ll need a lot)
- Hot glue gun
- Twine or burlap ribbon
- Tea light or votive candles
Cheaper option: Dollar store candles and thrifted glassware keep your cost under $3 per holder.
Step-by-Step Instructions
- Make sure your glass is clean and dry.
- Run a line of hot glue down one side of a cinnamon stick and press it onto the glass.
- Repeat all the way around until the glass is covered.
- Wrap twine around the middle and tie a bow.
- Drop in a candle and you’re done.
Selling Tips
Sell these in sets of two or three. Bundle them with a holiday-scented candle for a gift set that sells for $20 or more. Place one burning at your booth so people follow their noses to your table.
5. Personalized Photo Frame Ornaments That Pull at Heartstrings
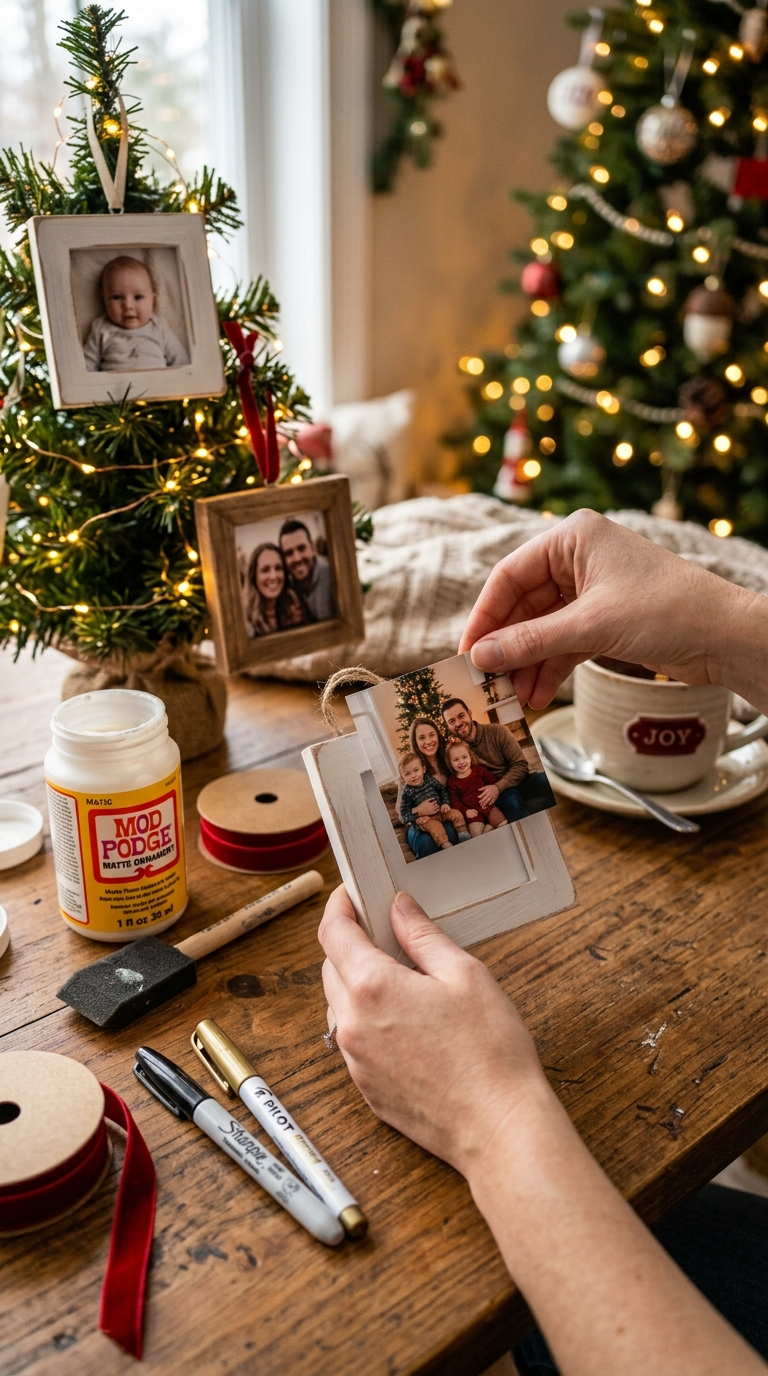
Grandparents buy these without blinking. Parents buy them. Even people buying for coworkers buy them. Personalized anything sells, and photo ornaments are the easiest personalized craft out there.
Materials and Tools
- Blank wooden or acrylic frame ornaments
- Small printed photos (wallet size works perfectly)
- Mod Podge
- Paint or stain
- Ribbon for hanging
- Fine-tip markers for names and dates
Step-by-Step Instructions
- Paint or stain the frame and let it dry.
- Trim the photo to fit the frame opening.
- Brush a thin layer of Mod Podge on the frame, press the photo down, then seal over the top.
- Let it dry completely — no peeking.
- Write the name and year on the frame with a fine-tip marker.
- Add a ribbon loop, and you’re ready to sell.
Customization Ideas
Offer a “made to order” option at craft fairs. Take orders with a photo drop-off and pick-up date. Charge extra for rush orders — people will pay it in December, trust me.
Pricing, Packaging, and Booth Tips
Price your crafts at three times your material cost, minimum. Your time matters, even if you enjoy the process.
Package everything like a gift. A cute tag and ribbon can bump your price up by $3 to $5 with zero extra effort. Shoppers judge with their eyes first.
Display items at different heights using boxes and crates. A flat table looks boring. And always have a few items out for people to touch — tactile shoppers are buyers.
FAQ’s
How much should I charge for handmade Christmas crafts?
At least triple your material costs. If a snow globe costs $4 in supplies, sell it for $12 or more. Don’t undervalue your time.
Where can I sell my Christmas crafts?
Craft fairs, farmers markets, Facebook Marketplace, Etsy, and local buy-and-sell groups. Church bazaars are also underrated and cheap to join.
What if my crafts don’t look perfect?
Handmade charm beats machine perfection. Slight imperfections make items feel authentic. Just make sure anything structural — like a leaking snow globe — gets fixed before selling.
How early should I start making crafts to sell?
Start in September or early October. Holiday shoppers begin browsing in November, and you don’t want to be gluing ornaments at 2 a.m. the night before a fair.
Do I need a business license to sell crafts?
It depends on your area. Small one-time craft fairs usually don’t require one, but check with your local government if you plan to sell regularly or online.
What’s the easiest craft for total beginners?
Cinnamon stick candle holders. No painting skills needed, no drying time, and they smell incredible. Start there.
Go Make Something People Will Actually Buy
You don’t need a fancy studio or years of experience to make money with Christmas crafts. Pick one project, make a small batch, and test it at a local market or online. If it sells, make more. If it flops, try a different one — no big deal.
Grab your glue gun, crank up the holiday playlist, and start crafting. Your future customers are already shopping.