
Making a gift with your own hands hits different. It says, “I thought about you,” not just “I clicked Add to Cart.” Plus, you get to skip the crowded mall and the boring gift cards. Below, I’ll walk you through five personalized gift projects that look impressive but won’t wreck your weekend.
Why DIY Personalized Gifts Win Every Time
Store-bought gifts are fine. But a handmade gift carries a little piece of you in it. That’s the magic.
People keep handmade things. They toss gift cards in a drawer and forget them. A custom photo frame or a hand-painted mug? That lives on a shelf for years.
And here’s the best part: you don’t need to be an artist. You need a free afternoon, a few supplies, and the willingness to embrace imperfection. Slightly crooked letters just add character, right?
Project 1: Custom Photo Coasters
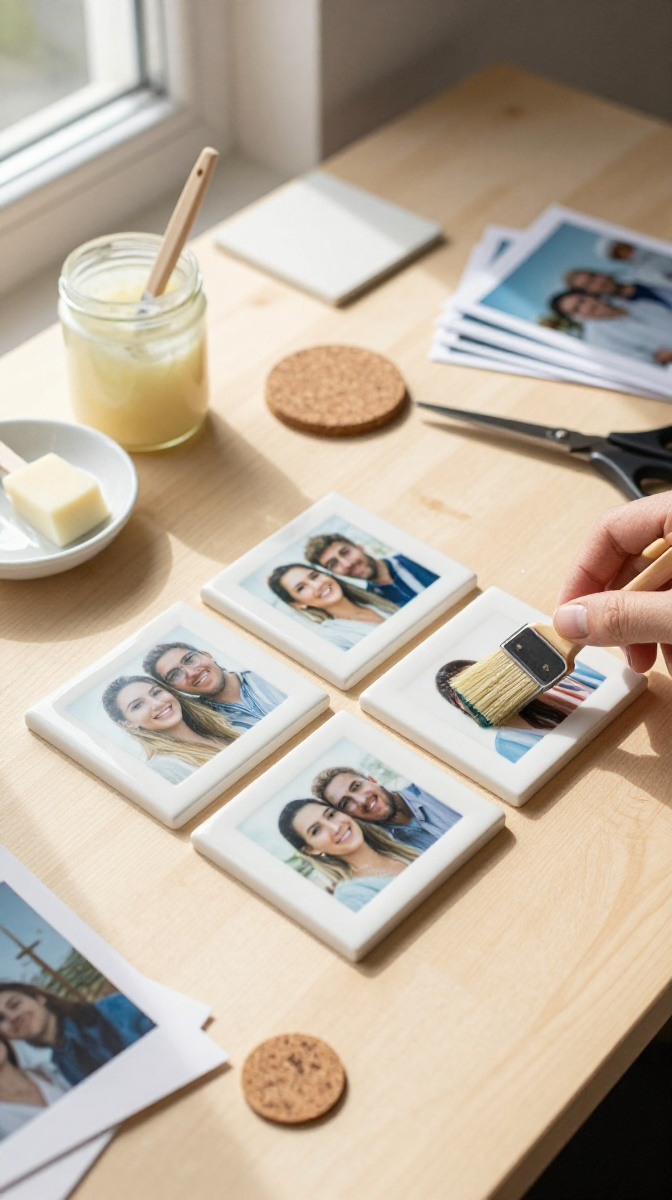
These are stupidly easy and look like you bought them at a boutique. They’re perfect for parents, grandparents, or that friend who never stops talking about their dog.
Materials and Tools
- 4×4-inch ceramic tiles (cheap at hardware stores)
- Mod Podge (matte or gloss, your call)
- Printed photos, trimmed to 3.5×3.5 inches
- Foam brush
- Clear acrylic sealer spray
- Self-adhesive cork pads (or felt circles)
- Scissors and a clean cloth
No Mod Podge? Mix equal parts white school glue and water. It works in a pinch.
Step-by-Step Instructions
- Wipe each tile clean and let it dry completely. Dust is the enemy here.
- Apply a thin layer of Mod Podge to the tile’s top surface using the foam brush.
- Press your photo onto the tile, starting from one edge to push out air bubbles.
- Smooth the photo down with your fingers or a credit card. Work out any lumps.
- Brush a generous coat of Mod Podge over the entire photo. Don’t panic when it looks milky; it dries clear.
- Let it dry for 20 minutes, then add a second coat. Repeat for a third coat if you want extra durability.
- Once fully dry (about an hour), spray with acrylic sealer in a well-ventilated area.
- Stick cork pads on the bottom corners so they don’t scratch tables.
Tips and Common Mistakes
Don’t skip the sealer. Mod Podge alone stays slightly tacky in humid weather. The spray sealer locks everything in.
If your photo wrinkles, you used too much glue underneath. Less is more. Also, laser-printed photos work better than inkjet because inkjet ink can smear. Test one first if you’re unsure.
Customization Ideas
Use maps of a favorite city, song lyrics, or a child’s artwork instead of photos. You can also add a monogram letter with vinyl stickers before sealing. Group four coasters with a ribbon for a wrapped gift that looks store-bought.
Project 2: Hand-Painted Personalized Mugs
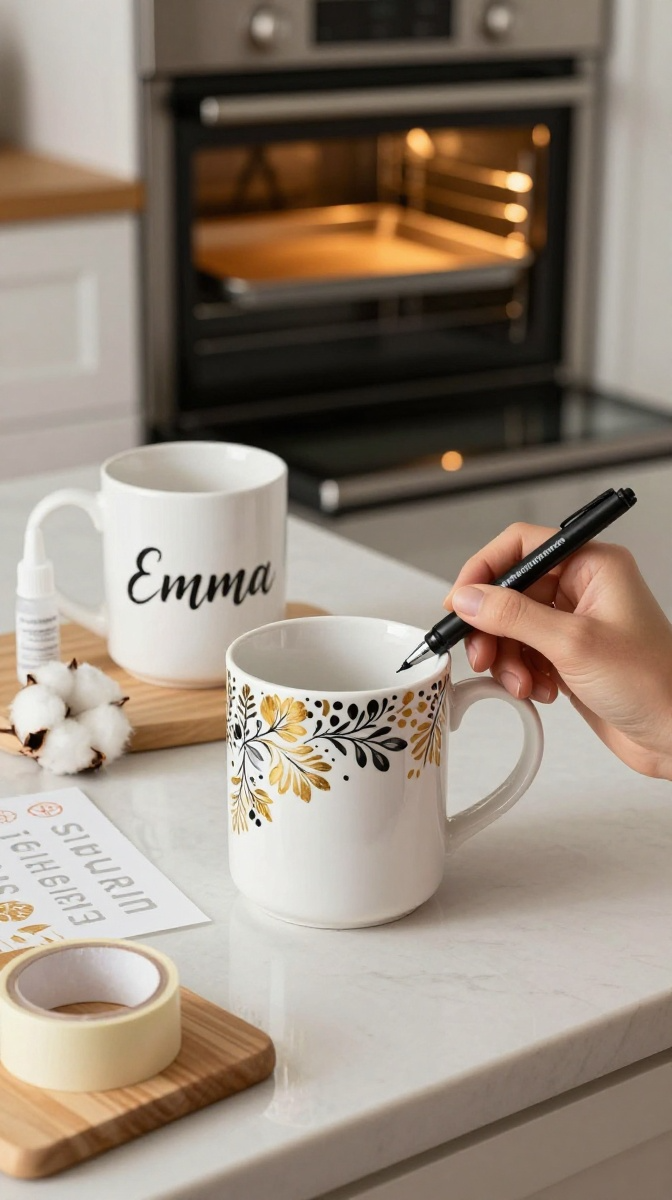
Mugs are the blank canvas of the DIY world. You drink coffee out of them, sure, but they also hold pens, propagate plants, and collect spare change. A custom mug says, “I know your caffeine addiction intimately.”
Materials and Tools
- Plain white ceramic mugs (dollar store finds work great)
- Oil-based paint pens (Sharpie Oil-Based Paint Markers are reliable)
- Rubbing alcohol and cotton balls
- Stencil letters or painter’s tape (optional)
- Oven for baking
Skip regular Sharpies. They wash off. You want oil-based paint pens, FYI.
Step-by-Step Instructions
- Clean the mug with rubbing alcohol. This removes oils and helps paint stick.
- Plan your design on paper first. Trust me, erasing mistakes on ceramic is not a thing.
- Draw your design or write your message using the paint pen. Use stencils for clean lettering.
- Let the mug air-dry for at least 24 hours. Do not touch it. I know it’s hard.
- Place the mug in a cold oven, then set it to 350°F (175°C).
- Bake for 30 minutes once the oven reaches temperature.
- Turn off the oven and let the mug cool inside. Sudden temperature changes can crack it.
- Hand-wash the mug to make the design last longer.
Troubleshooting
If your design fades after washing, you probably didn’t bake it long enough or you used the wrong pen. Also, avoid the dishwasher. Hand-washing keeps the paint intact for years.
Design Variations
Add a gold rim with a metallic paint pen. Doodle inside the handle. Write a private joke only the recipient gets. For a set, make a “his and hers” pair with coordinating designs.
Project 3: Memory Jar with Custom Labels
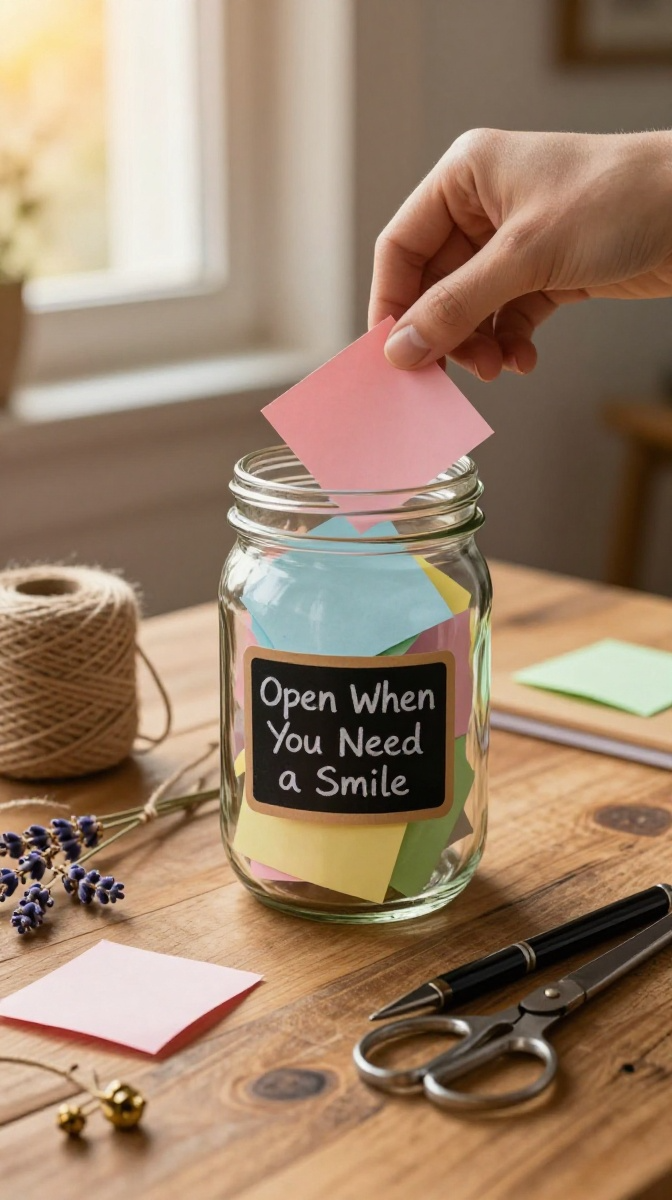
This one is part gift, part time capsule. You fill a jar with handwritten notes, then decorate it. Every time the recipient feels down, they pull out a memory. It’s basically therapy in a jar.
Materials and Tools
- Glass mason jar with a lid
- Colored paper or cardstock
- Fine-tip pens
- Chalkboard labels or sticker paper
- Twine, ribbon, or washi tape
- Small charms or dried flowers (optional)
No mason jar? A clean pasta sauce jar works after a good scrub. Just make sure the lid doesn’t smell like marinara.
Step-by-Step Instructions
- Write 20 to 50 short notes on strips of paper. Inside jokes, compliments, favorite memories.
- Fold each note and place it in the jar.
- Create a label for the front using sticker paper or a chalkboard label. Write “Open When You Need a Smile” or the recipient’s name.
- Decorate the lid with twine or ribbon. Glue on a small charm if you like.
- Tie a tag around the neck of the jar with instructions: “Pull one note whenever you need it.”
Personalization Ideas
Color-code the notes by mood. Yellow for funny memories, blue for encouragement, pink for love notes. Add a tiny packet of tea or candy inside for an extra surprise.
Project 4: Custom Keychain with Resin or Shrink Plastic
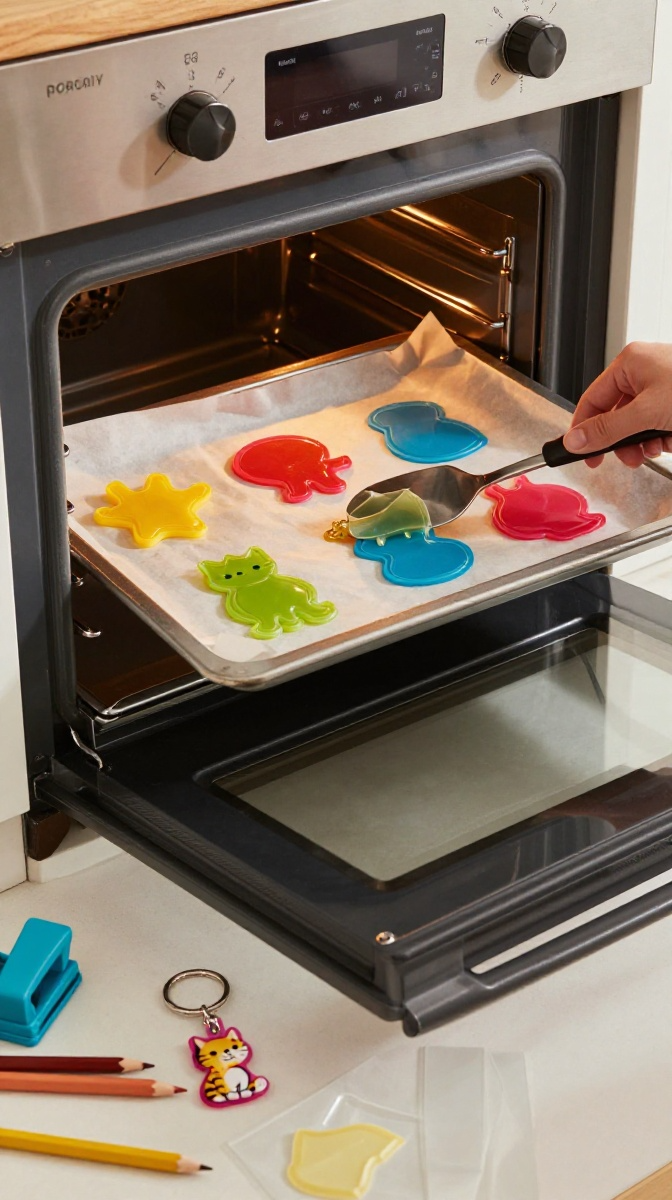
Shrink plastic is basically magic. You draw something big, bake it, and it turns into a tiny, hard charm. It’s like science class but with better results.
Materials and Tools
- Shrink plastic sheets (sold as Shrinky Dinks)
- Colored pencils or permanent markers
- Hole punch
- Keychain rings and jump rings
- Oven and baking sheet lined with parchment paper
Step-by-Step Instructions
- Draw your design on the rough side of the shrink plastic. Make it about three times larger than you want the final size.
- Color it in. Colors intensify after baking, so go lighter than you think.
- Cut out the shape, leaving a small border.
- Punch a hole near the edge for the keychain ring.
- Place the shapes on a parchment-lined baking sheet.
- Bake at 325°F (160°C) for 1 to 3 minutes. They’ll curl, then flatten. Don’t freak out.
- Remove from the oven and press flat with a spatula if needed.
- Attach the keychain ring once cooled.
Safety Notes
Ventilate your kitchen. Shrink plastic smells a bit when baking. Also, keep kids away from the oven during this step. The plastic is hot when it comes out.
Project 5: Fabric Photo Pillow
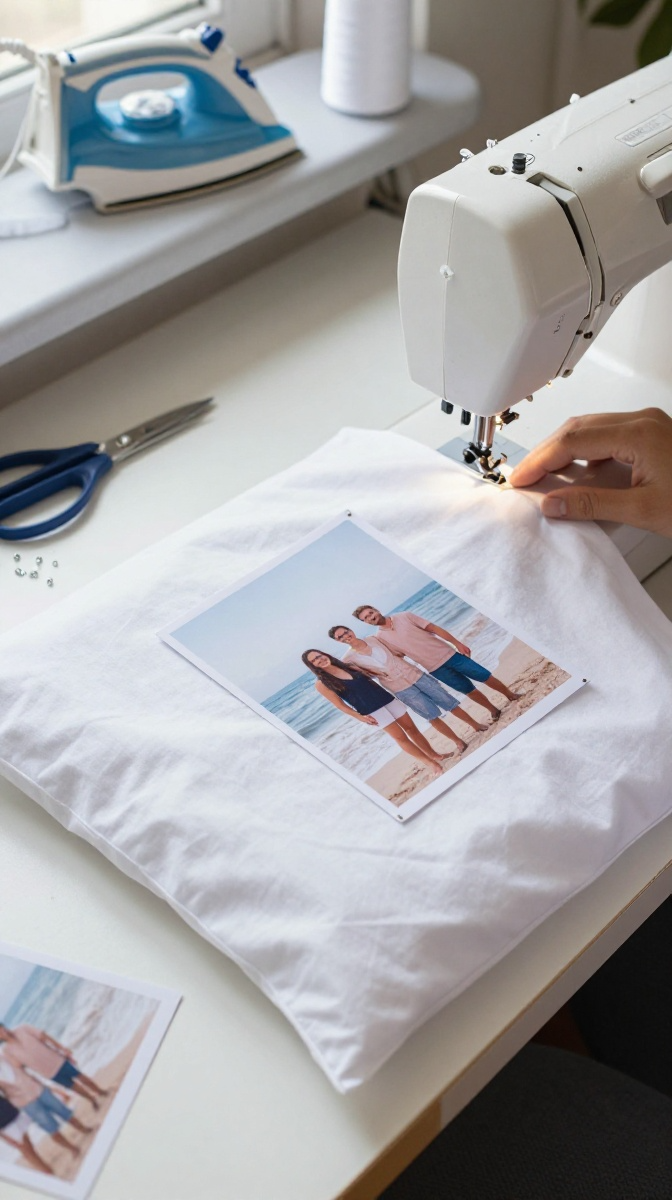
This project is for the person who wants to give something cozy. A pillow with a printed photo on it is both decorative and functional. Plus, it’s a great way to use up fabric scraps.
Materials and Tools
- Plain pillowcase or fabric square
- Printable fabric sheets (for inkjet printers)
- Iron and ironing board
- Sewing machine or fabric glue
- Scissors and pins
No sewing machine? Fabric glue works fine for no-sew versions. Just let it cure for 24 hours.
Step-by-Step Instructions
- Print your photo onto the printable fabric sheet following the package instructions.
- Let the ink dry completely, then peel off the backing.
- Iron the fabric photo to set the ink. Use a pressing cloth to protect it.
- Cut the photo to your desired size.
- Pin the photo onto the pillowcase and sew around the edges, or use fabric glue.
- Turn the pillowcase inside out and iron the seams flat.
- Insert a pillow form, and you’re done.
Decorating Ideas
Add embroidered details around the photo. Use fabric markers to write a date or message. For a nursery gift, print a photo of the parents and add the baby’s name.
FAQ’s
What if I’m not crafty at all?
Start with the photo coasters or the memory jar. Both require zero artistic skill. If you can use scissors and glue, you’re qualified.
How do I make sure my painted mug survives the dishwasher?
You don’t. Hand-wash it. Even “dishwasher-safe” paint pens eventually fade. Tell the recipient to treat it like a delicate flower.
Can I use regular printer paper for the coasters?
You can, but it wrinkles and yellows over time. Cardstock or photo paper holds up much better. Spend the extra few dollars.
What’s the cheapest personalized gift on this list?
The memory jar. A jar, paper, and a pen. You probably already own half the supplies. It’s also the most sentimental, so it punches way above its price tag.
How long do these projects take?
Most take under an hour of active work. Drying and baking times add extra hours, so plan ahead. Don’t start a mug at 9 PM and expect to gift it the next morning.
Can kids help with these projects?
Yes, with supervision. Kids can write memory jar notes, draw shrink plastic designs, and arrange photos. Keep them away from the oven and spray sealer.
Final Thoughts: Just Make the Thing
Personalized gifts don’t need to be perfect. They need to be from you. A wobbly handwritten mug beats a generic store-bought candle every single time.
Pick one project, gather your supplies, and give it a shot. If it turns out a little messy, that’s fine. Messy is memorable. Now go make something your people will actually keep.