
Spring is here, and that means it’s time to shake off the winter blues and get your hands dirty. I’m talking about crafting, not gardening—though both are great for your sanity. These easy spring DIY crafts will brighten up your home without draining your wallet or your patience. Grab a glue gun and let’s make something cute.
Why Spring Crafts Are the Perfect Mood Booster
There’s something about spring that makes you want to freshen everything up. The sun sticks around longer, the flowers start popping, and suddenly your living room feels a little… blah. Sound familiar?
Crafting is basically therapy with glitter. It keeps your hands busy, your mind focused, and you end up with something adorable to show off. Plus, you don’t need to be an artist. Trust me, if I can hot glue my fingers together and still make it work, so can you.
These projects use affordable materials you probably already have or can grab at any dollar store. No fancy equipment required. Let’s dive in.
Mason Jar Spring Centerpiece
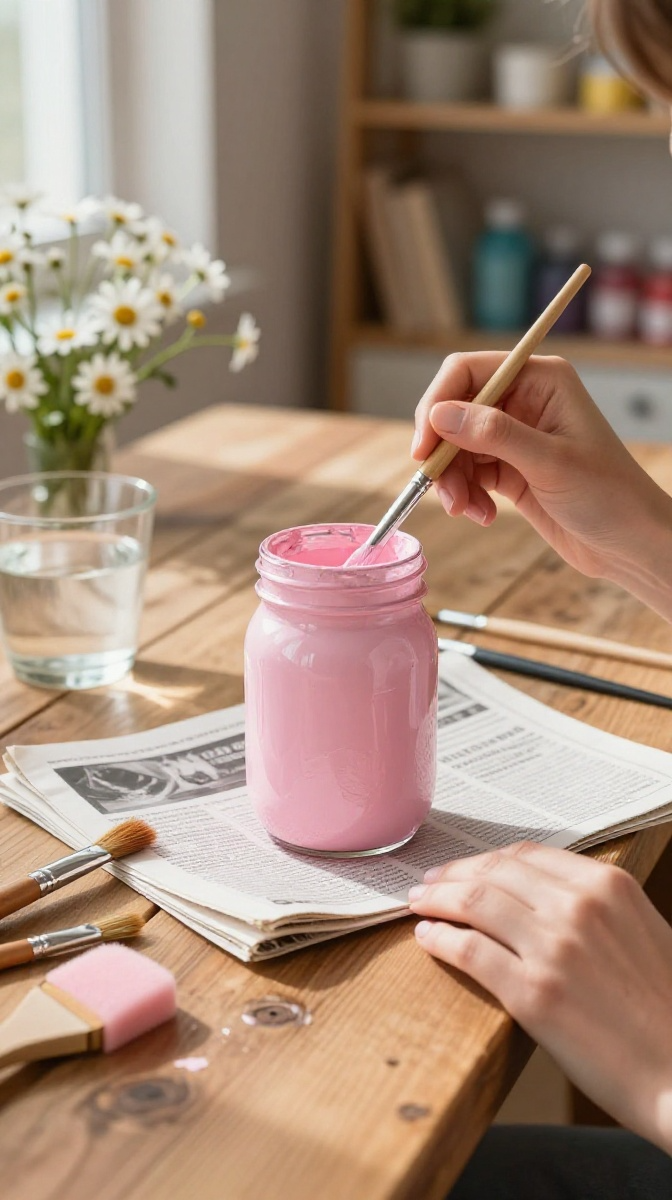
Mason jars are the Swiss Army knife of crafting. You can store stuff in them, drink from them, and apparently, turn them into gorgeous centerpieces. Who knew?
Materials and Tools
- Clean mason jars (any size works, but pint jars are easiest)
- Acrylic paint in pastel colors (pink, mint, lavender, baby blue)
- Paintbrush or foam brush
- Twine or ribbon
- Fresh or faux flowers
- Hot glue gun
- Scissors
Budget swap: Use old pasta sauce jars instead of buying mason jars. Just wash them really well unless you want your flowers smelling like marinara.
Step-by-Step Instructions
- Make sure your jar is clean and dry. Any grease will make the paint slide right off.
- Paint the outside of the jar with two thin coats of acrylic paint. Let each coat dry for about 20 minutes. Thick globs will crack, so keep it light.
- Once dry, wrap twine around the neck of the jar a few times and secure with hot glue.
- Fill with water and add your flowers. If you’re using faux flowers, skip the water and maybe add some decorative stones at the bottom.
- Place it on your dining table, windowsill, or anywhere that needs a pop of spring color.
Design Variations
Want a rustic vibe? Skip the paint and wrap the whole jar in burlap. Feeling fancy? Add a lace ribbon around the middle. You can also paint polka dots or stripes using a stencil. Go wild.
Common Mistakes to Avoid
Don’t paint the inside of the jar unless you want a cloudy mess. Also, avoid using too much water with real flowers if the paint isn’t fully cured—it can cause peeling. Patience is key here.
Pressed Flower Suncatchers
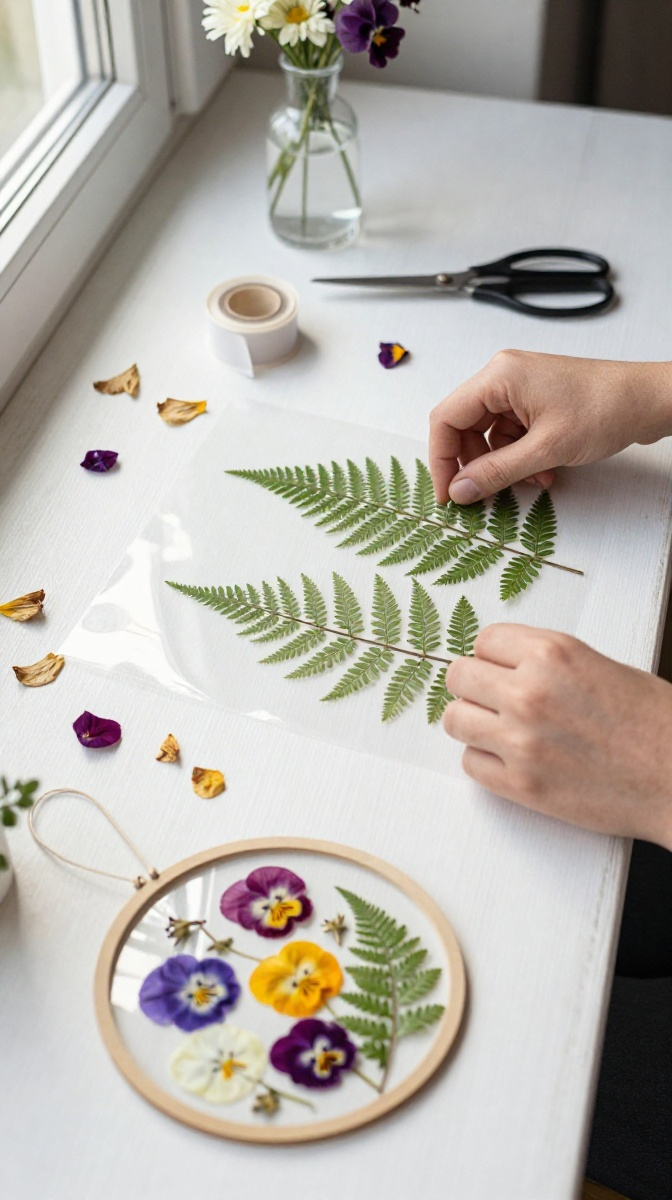
Remember pressing flowers in books as a kid? Well, now you can turn those flat little beauties into something that actually catches the light. These suncatchers look like stained glass but cost about five dollars to make.
Materials and Tools
- Pressed flowers (daisies, pansies, ferns work great)
- Clear contact paper or self-laminating sheets
- Cardstock or heavy paper
- Scissors
- Hole punch
- Ribbon or string
- Iron (optional, for pressing flowers faster)
Shortcut: If you don’t have time to press flowers, grab a bag of dried petals from a craft store. No shame in that game.
Step-by-Step Instructions
- Cut two matching circles or squares from your contact paper. Make them whatever size you want—just keep them the same.
- Peel the backing off one piece and lay it sticky side up. Arrange your pressed flowers in a pretty pattern.
- Carefully place the second piece of contact paper on top, sticky side down. Press firmly to seal.
- Cut a frame from cardstock that’s slightly larger than your suncatcher. Glue the contact paper to the frame.
- Punch a hole at the top and thread your ribbon through. Hang it in a sunny window and admire your handiwork.
Troubleshooting Tips
If your flowers are bulky, they might poke through the contact paper. Stick to flat, thin blooms. Also, avoid hanging these outside—rain will ruin them faster than you can say “oops.”
Spring Wreath from Dollar Store Finds
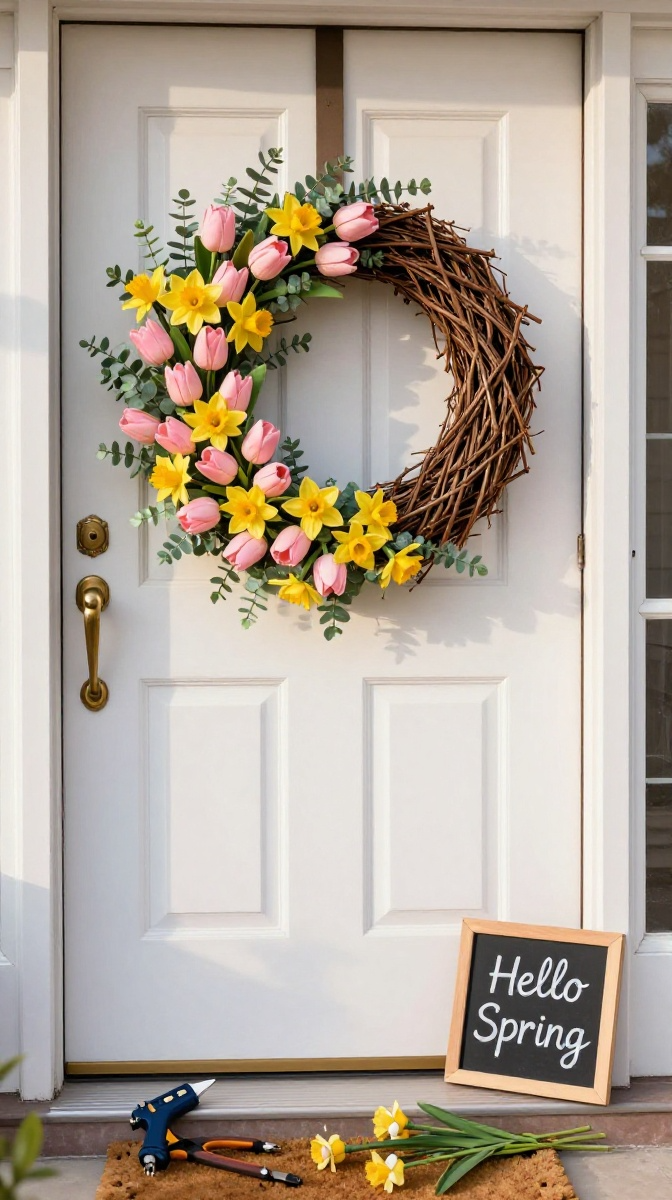
Wreaths aren’t just for Christmas. A spring wreath says “I have my life together” even if you definitely don’t. The best part? You can make one for under ten bucks.
Materials and Tools
- Grapevine wreath base (or a foam ring)
- Faux flowers in spring colors
- Greenery picks
- Hot glue gun
- Wire cutters
- Ribbon for a bow
Substitute: Use a pool noodle taped into a circle and covered in burlap if you’re in a pinch. It’s weird but it works.
Step-by-Step Instructions
- Cut the stems off your flowers and greenery, leaving about an inch of stem.
- Lay everything out on the wreath before gluing. This helps you see the design before committing.
- Glue the greenery first, tucking it into the wreath’s gaps.
- Add your flowers in clusters. Odd numbers look more natural than even ones—no idea why, but it’s true.
- Finish with a ribbon bow at the top or side. Hang it on your front door and wait for the compliments.
Decorating Ideas
Add a small chalkboard sign that says “Hello Spring” or “Welcome.” You can also weave in some fairy lights for a cozy evening glow. Just make sure they’re battery-operated unless you enjoy extension cord chaos.
DIY Bird Feeder from a Teacup
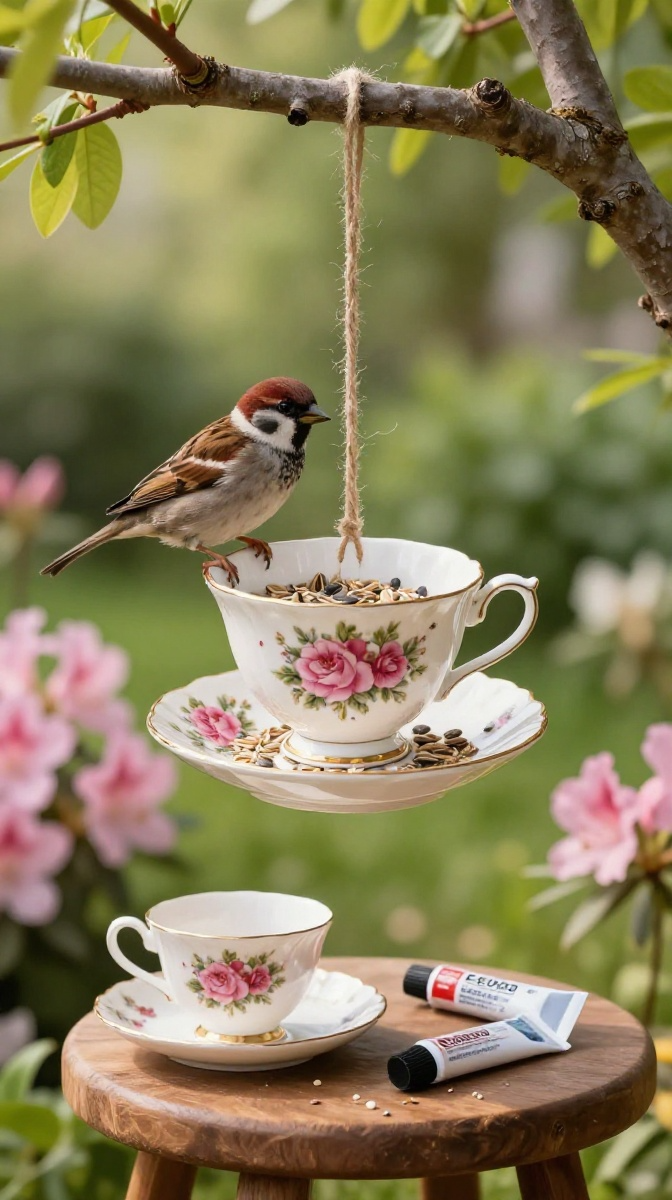
Spring means birds are back and they’re hungry. Help them out with a teacup bird feeder that’s almost too cute to handle. This project takes about ten minutes, which is my kind of commitment.
Materials and Tools
- Teacup and saucer (thrift stores are goldmines for these)
- Strong waterproof adhesive (like E6000)
- Birdseed
- Twine or chain for hanging
Safety note: Make sure the adhesive is fully cured before adding seed. Birds don’t need chemical fumes with their lunch.
Step-by-Step Instructions
- Glue the teacup to the saucer, positioning it so the cup is slightly tilted. This helps seed flow out.
- Let it cure for 24 hours. I know, waiting is the worst.
- Wrap twine around the handle and secure with a knot. Make it long enough to hang from a branch.
- Fill the saucer with birdseed and hang it outside. Refill as needed and enjoy your new feathered friends.
Common Mistakes to Avoid
Don’t use a teacup with a cracked handle—it’ll snap under the weight. Also, avoid hanging it near a window where birds might crash into the glass. Safety first, cuteness second.
Painted Rock Garden Markers
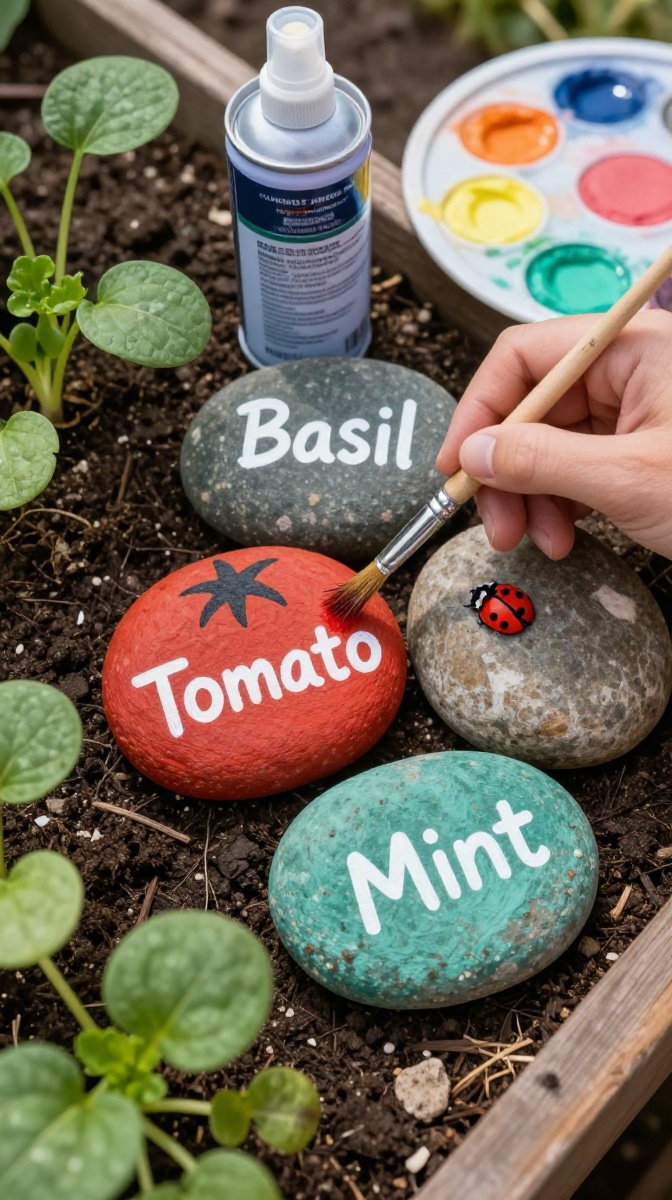
If you’re planting a garden this spring, you’ll forget what you planted within a week. Guilty. These painted rock markers solve that problem and look adorable doing it.
Materials and Tools
- Smooth river rocks
- Acrylic paint and paint pens
- Clear sealant spray
- Paintbrushes
Free option: Go for a walk and collect rocks. It’s exercise and crafting in one trip.
Step-by-Step Instructions
- Wash and dry your rocks. Dirt ruins paint.
- Paint a base color and let it dry completely.
- Use paint pens to write the name of your herbs or veggies. Add little drawings if you’re feeling artistic.
- Spray with clear sealant so they survive rain and watering.
- Place them next to your plants and pat yourself on the back.
Customization Ideas
Color-code by plant type—green for herbs, red for tomatoes, yellow for peppers. You can also paint decorative rocks with quotes or patterns just for fun.
FAQ’s
What if I’m not crafty at all?
Start with the mason jar centerpiece or painted rocks. Both are nearly foolproof. If you can paint a wall, you can handle these.
How do I keep real flowers fresh longer?
Change the water every two days and trim the stems at an angle. A drop of bleach or a crushed aspirin in the water also helps.
Can kids help with these projects?
Absolutely, except for the hot glue gun and sealant spray. Those are grown-up jobs. Kids can paint, arrange flowers, and press petals.
Where can I find cheap craft supplies?
Dollar stores, thrift shops, and your own junk drawer. Seriously, check before you buy. You probably already have half of what you need.
How do I store these crafts for next year?
Wrap delicate items in tissue paper and store in a labeled box. Keep them away from moisture and direct sunlight.
What if my project turns out ugly?
Call it “rustic” and move on. Crafting is about the process, not perfection. Plus, you can always paint over it.
Get Crafting This Spring
Spring is the perfect excuse to get creative and add some handmade charm to your home. Whether you make one project or all five, you’ll end up with something that makes you smile every time you see it. So grab your supplies, put on some music, and embrace the beautiful mess of DIY. Your home—and your sanity—will thank you.