
Want to make your space look like a million bucks without spending it? DIY candle holders are the answer. They are cheap, easy, and ridiculously satisfying to make. Grab your glue gun and let’s get crafty.
Why DIY Candle Holders Are Worth Your Time
Store-bought candle holders are fine, but they all look the same. Making your own means you get exactly what you want. Plus, nothing beats that smug feeling when guests ask where you bought it.
You also get to control the materials. Want a rustic vibe? Use wood. Feeling fancy? Grab some glass. The options are endless, and your wallet will thank you.
FYI, most of these projects take under an hour. Perfect for a lazy Sunday or a “I need a hobby” moment.
Materials and Tools You Will Need
Before you start, gather your supplies. Most of these are cheap or already sitting in your junk drawer. No need to buy fancy equipment.
- Glass jars (mason jars, old pasta sauce jars, whatever you have)
- Air-dry clay (or polymer clay if you want to bake it)
- Twine or jute rope
- Metallic spray paint (gold and rose gold are always winners)
- Mod Podge or white glue
- Decorative napkins for decoupage
- Tea lights or pillar candles
- Hot glue gun and glue sticks
- Scissors
- Paintbrush
- Sandpaper (medium grit)
- Old newspaper for protecting your table
No clay? Use salt dough instead. No twine? Ribbon works. Improvise, people.
Project 1: Rustic Twine-Wrapped Jar Holders
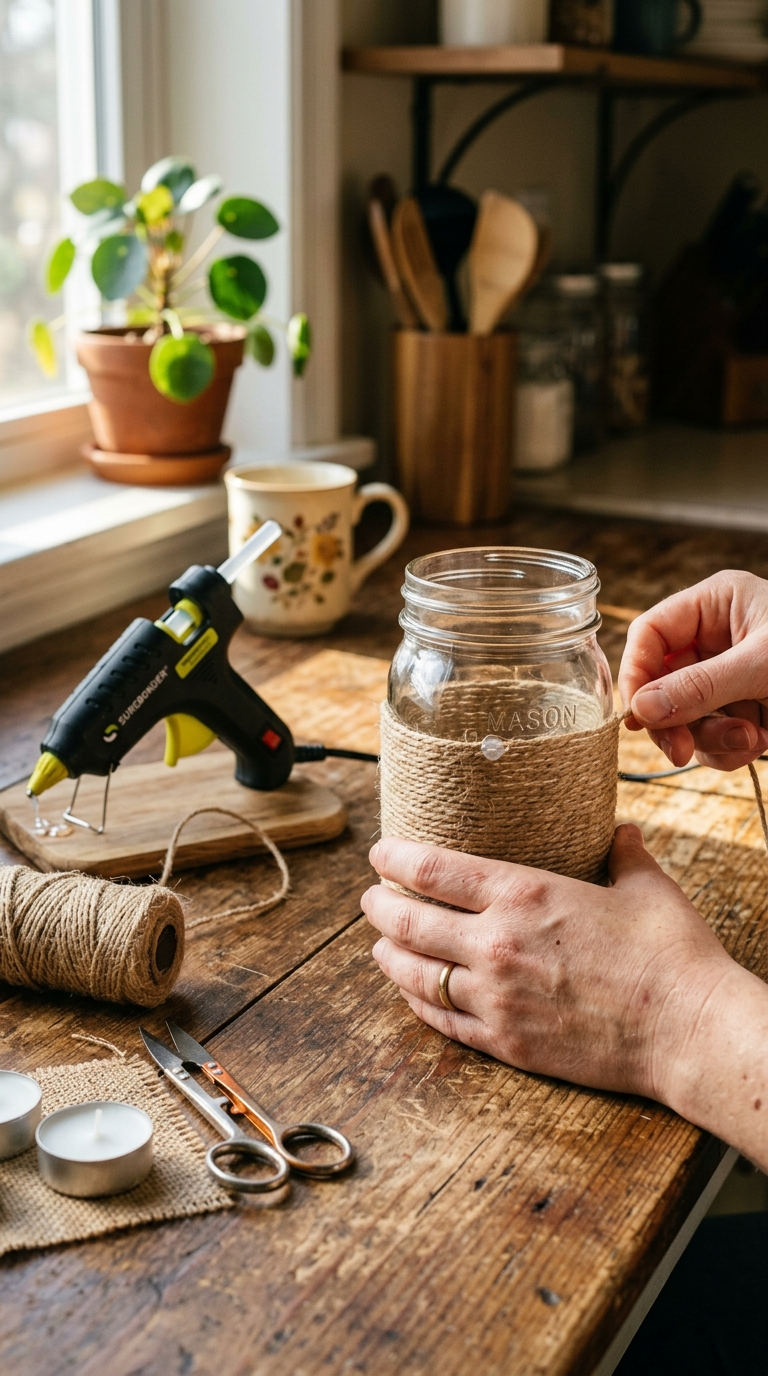
This is the easiest project on the list. If you can wrap a gift, you can do this. It looks cozy and farmhouse-chic, and it costs almost nothing.
Step-by-Step Instructions
- Clean your jar thoroughly and remove any labels. Goo Gone is your friend here.
- Apply a small dot of hot glue near the bottom of the jar.
- Press the end of your twine into the glue and hold for a few seconds.
- Wrap the twine tightly around the jar, pushing each row close to the last.
- Add a dot of glue every few rows to keep things secure.
- Stop wrapping about an inch from the top.
- Cut the twine and glue the end down neatly.
- Drop in a tea light and light it up.
That’s it. You just made a candle holder. Feel free to do a little victory dance.
Design Variations
Try wrapping only the middle of the jar for a striped look. Or use two colors of twine for a beachy vibe. You can also hot glue a small starfish or fake flower to the front.
Project 2: Air-Dry Clay Candle Holders
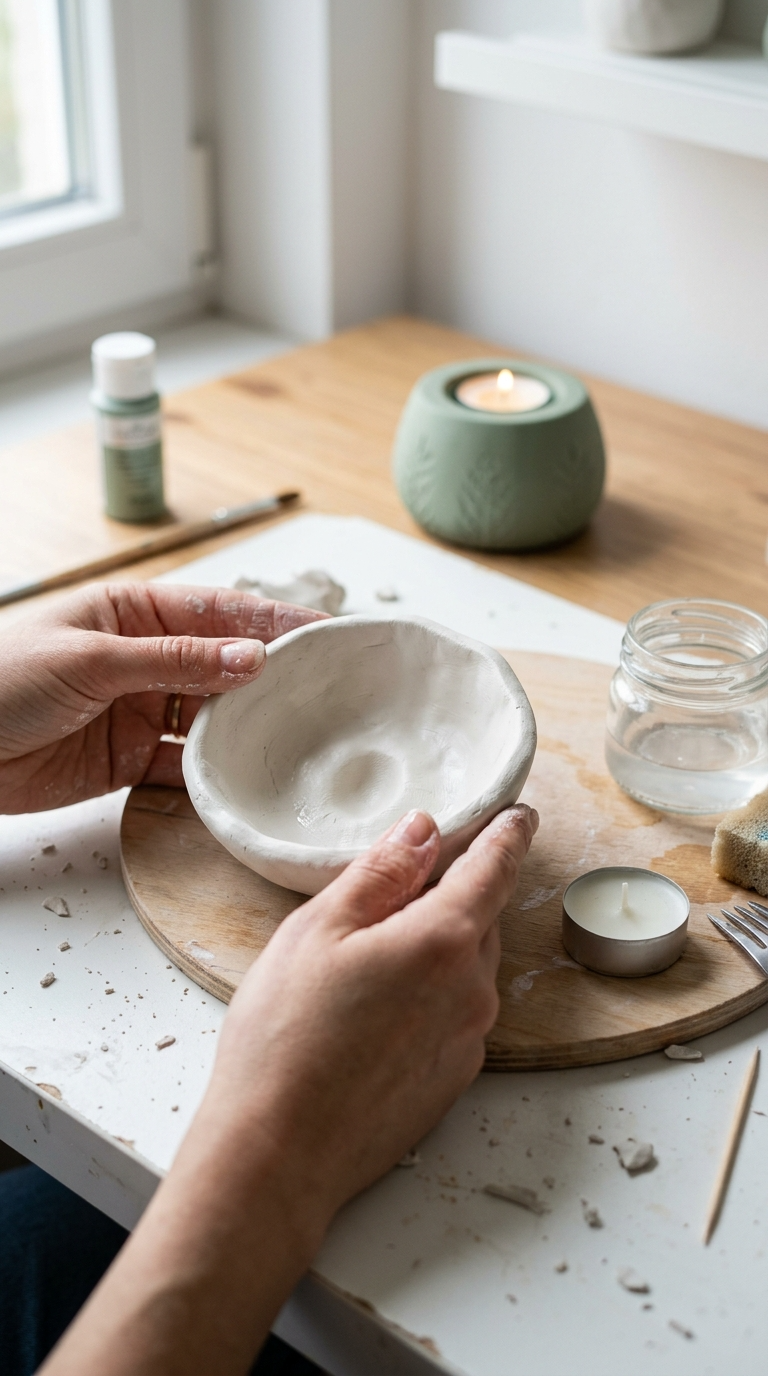
Clay makes everything look expensive. It is forgiving, fun to shape, and you do not need a kiln. Air-dry clay hardens on its own overnight.
Step-by-Step Instructions
- Knead a fist-sized ball of clay until it feels soft.
- Roll it into a smooth ball with your palms.
- Press your thumb into the center to create a bowl shape.
- Widen the hole until it fits your tea light snugly.
- Smooth the edges with a damp finger.
- Add texture with a fork, toothpick, or lace fabric.
- Let it dry for 24 hours, flipping halfway through.
- Paint it or leave it natural for a minimalist look.
Do not rush the drying. Cracks happen when you get impatient. Ask me how I know.
Common Mistakes to Avoid
Making the walls too thin is a big one. They will crack or break. Keep them at least a quarter-inch thick. Also, do not use a real flame if the clay is still damp. Safety first, friends.
Project 3: Metallic Painted Glass Holders
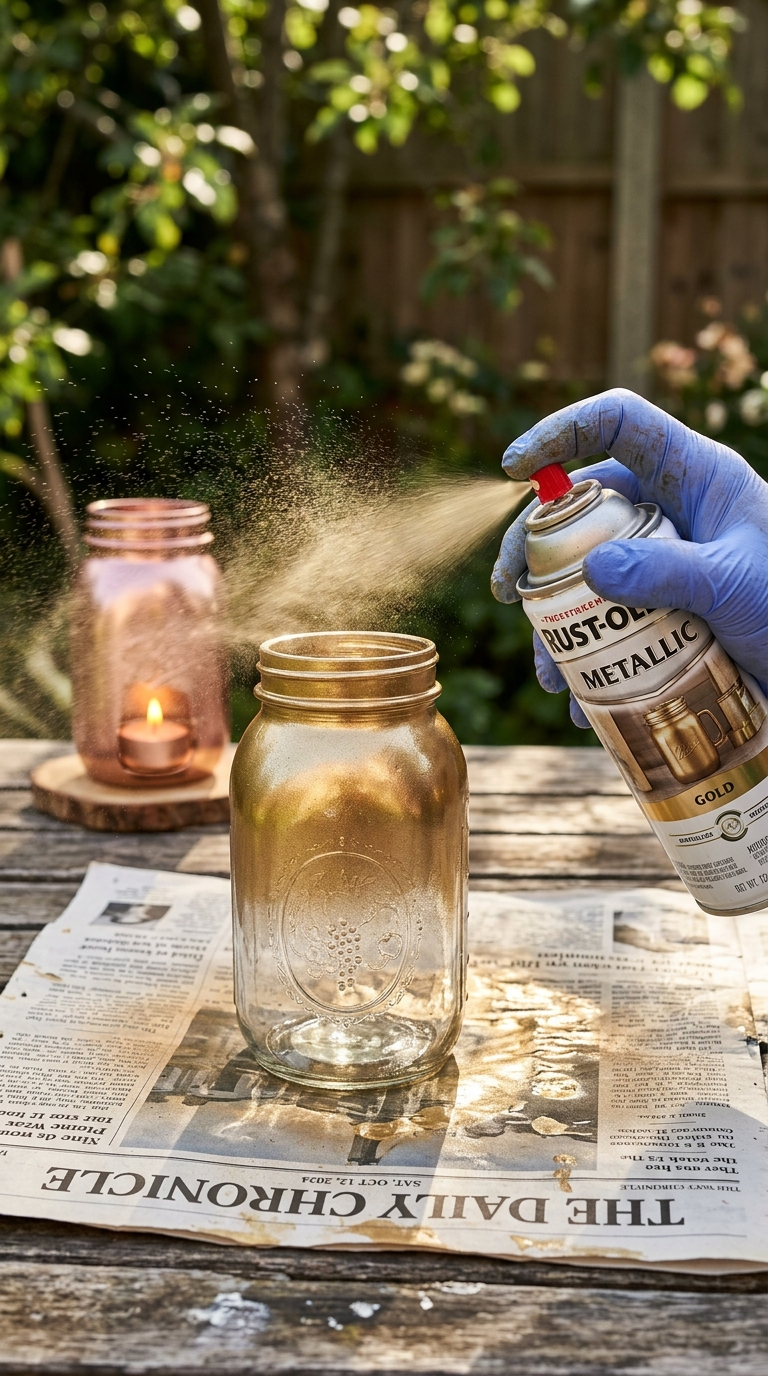
Want a glam look without the glam price tag? Spray paint is your secret weapon. This project takes ten minutes of actual work.
Step-by-Step Instructions
- Wash and dry your glass jars completely.
- Cover your workspace with newspaper.
- Spray the outside of the jar with metallic paint.
- Apply two thin coats instead of one thick one.
- Let it dry for an hour.
- Flip the jar and paint the bottom edge.
- Once fully dry, add a tea light inside.
The light reflects off the metallic finish and creates a gorgeous glow. It looks like something from a fancy boutique.
Decorating Ideas
Add a strip of lace around the middle using hot glue. Or wrap a thin ribbon around the neck. You can also use stencils to add patterns before painting.
Project 4: Decoupage Napkin Holders
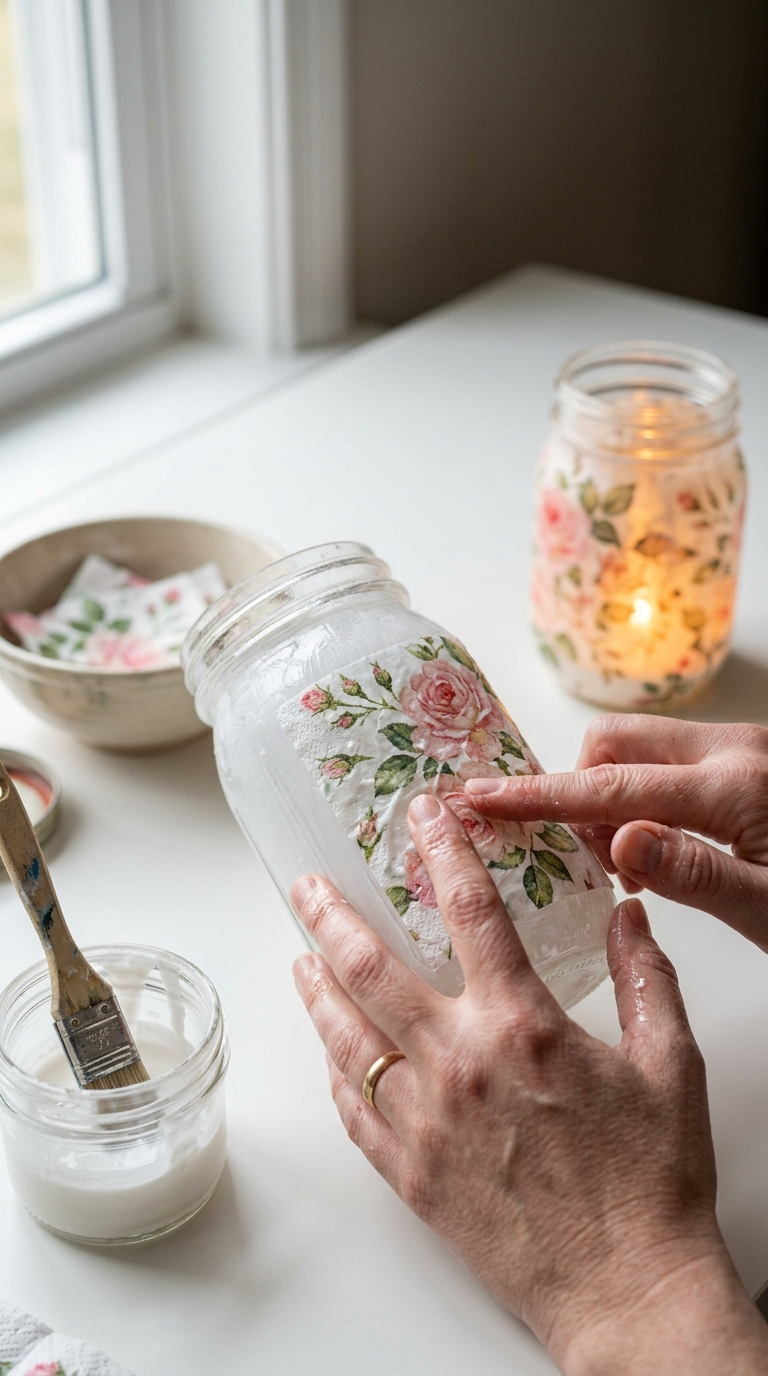
This one is for my crafty perfectionists. Decoupage looks intricate but is actually super forgiving. Wrinkles? Just call them texture.
Step-by-Step Instructions
- Separate the top layer of your decorative napkin.
- Cut out the designs you want to use.
- Apply a thin layer of Mod Podge to the jar.
- Press the napkin piece onto the jar gently.
- Smooth out bubbles with your fingers or a brush.
- Seal with another layer of Mod Podge on top.
- Let it dry completely before using.
Use a candle inside a glass cup to avoid direct contact with the paper. Safety wins again.
Tips for Displaying and Gifting Your Creations
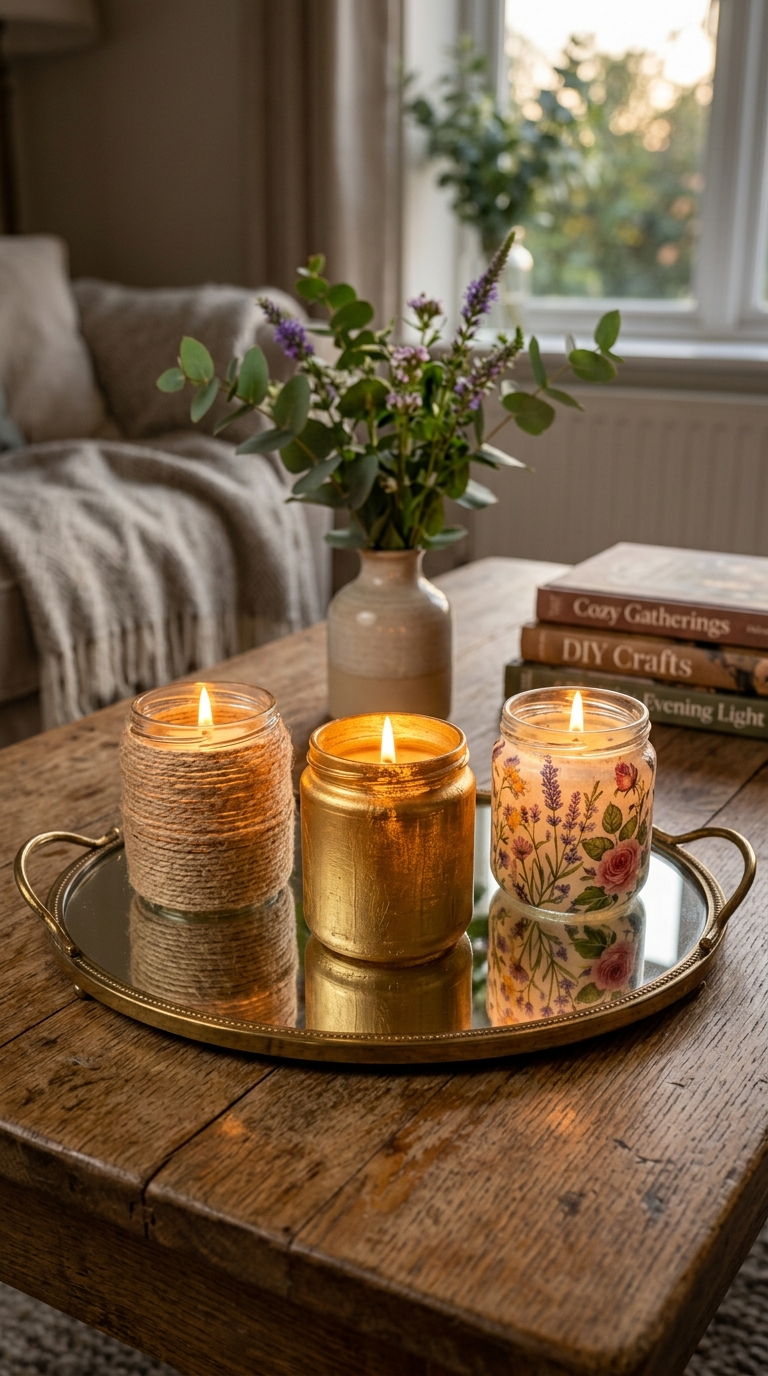
Group three different heights together for a stunning centerpiece. Place them on a mirror tray to double the glow. Line them up on a mantel or windowsill.
These also make amazing gifts. Add a scented candle inside and tie a ribbon around the top. Boom, instant present. Teachers, neighbors, and your candle-obsessed friend will love them.
IMO, handmade gifts always beat store-bought. They show you actually cared enough to make something.
FAQ’s
Are DIY candle holders safe to use with real candles?
Yes, if you use a glass or metal insert. Never put a flame directly on clay, twine, or paper. Use tea lights in small glass cups for the safest result.
What if I do not have Mod Podge?
Mix equal parts white glue and water. It works just as well for decoupage and costs less.
How do I keep twine from unraveling?
Always finish with a dot of hot glue. You can also tie a small knot and tuck it under a wrap.
Can I use these holders outside?
Yes, but keep them out of direct rain. Clay and twine do not love moisture. Bring them inside when the weather turns.
How long does air-dry clay take to harden?
Usually 24 hours for small projects. Thicker pieces may take 48 hours. Flip them once halfway through drying.
What is the cheapest material to start with?
Glass jars and twine. You probably already have both. Upcycle those pasta sauce jars instead of tossing them.
Final Thoughts:
You do not need fancy tools or a craft room. You need a jar, some glue, and ten minutes of courage. Pick one project from this list and try it tonight.
Your home will look cozier, your hands will be happily messy, and you will have bragging rights. So what are you waiting for? Go raid your recycling bin and make some magic.