
Want to give a gift that smells like a hug and looks way more expensive than it actually was? Homemade candles are the answer. You need about an hour, a handful of cheap supplies, and zero prior candle-making experience. Grab a coffee, clear the kitchen table, and let’s make something that’ll make your friends think you’ve secretly started a small business.
Why DIY Candles Make the Best Gifts
Store-bought candles are fine. But a candle you poured yourself? That hits different. You chose the scent, the color, and the jar. That’s personal.
They’re also shockingly cheap to make. A single jar candle can cost you two or three dollars in supplies. Compare that to the fifteen bucks you’d drop at a boutique. Your wallet will thank you.
Plus, candles work for basically anyone. Co-workers, neighbors, teachers, your mother-in-law who claims she doesn’t want anything. Everyone likes a nice-smelling candle. It’s the universal gift that never feels lazy.
Materials and Tools You’ll Need
Before you melt anything, gather your gear. Nothing here is fancy, and most of it you probably already own.
- Soy wax flakes – my top pick. Burns clean, holds scent well, and melts in the microwave. Beeswax and paraffin work too, but soy is beginner-friendly.
- Cotton wicks with metal tabs – get the pre-tabbed kind. Way less fuss.
- Heat-safe jars or tins – mason jars, old jelly jars, or cheap tin containers. Wash them well and dry completely.
- Fragrance oil – candle-safe, not the stuff for diffusers. About 1 ounce per pound of wax.
- A double boiler or a heat-safe pouring pitcher – a metal measuring cup in a pot of water works perfectly.
- A thermometer – candy thermometers are cheap and do the job.
- Wooden skewers or pencils – for holding wicks upright.
- Scissors and a hot glue gun – for securing wick tabs.
Budget substitutes: Skip the fancy pitcher and use a clean tin can. No thermometer? Test the wax by dripping a drop on your wrist. If it’s warm, not burning, you’re close enough.
Step-by-Step: How to Make a Basic Jar Candle
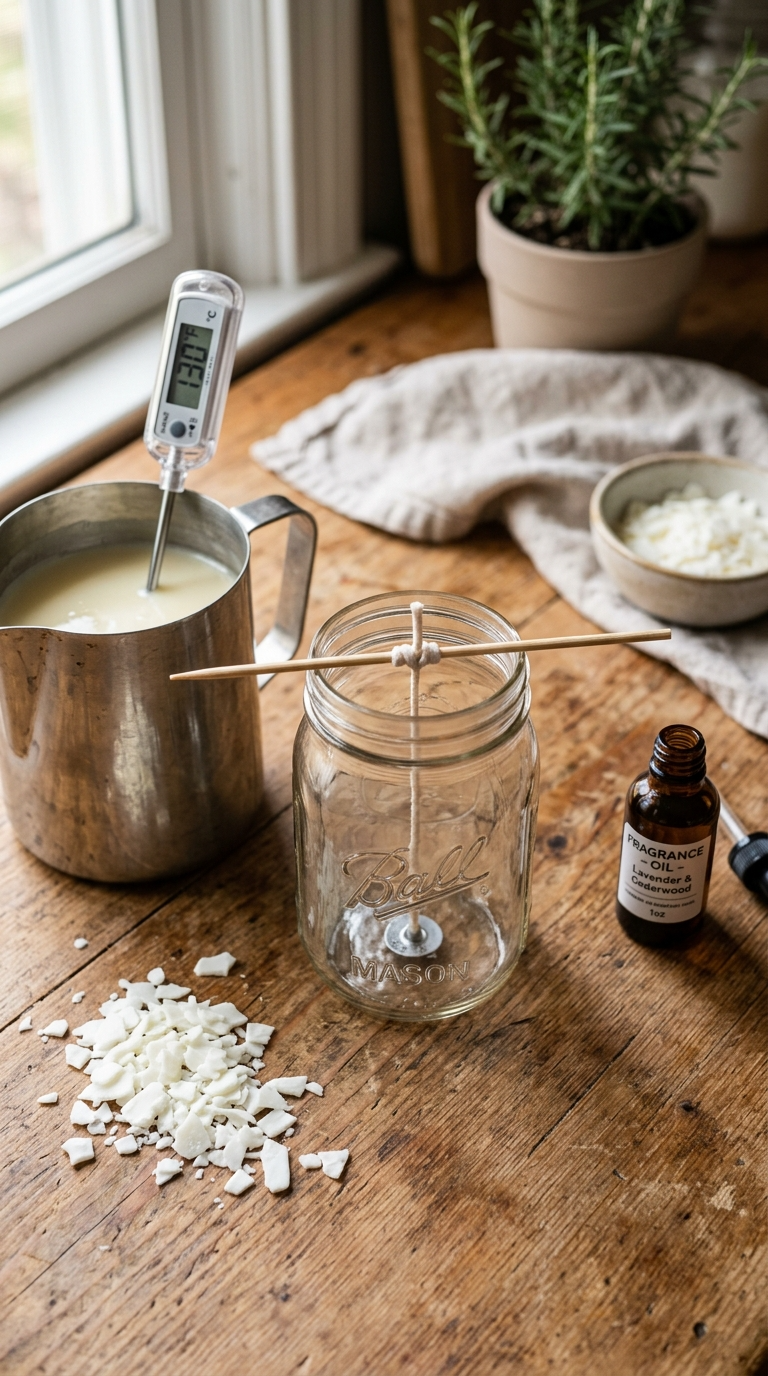
Here’s the whole process. Read it once before you start so you’re not scrambling with wax-covered hands.
- Prep your jar. Glue the wick tab to the center of the jar’s bottom. Press it down for a few seconds. Wrap the top of the wick around a skewer or pencil resting across the jar’s rim so it stays straight.
- Measure your wax. Fill your jar with wax flakes to the top, then pour them into your pitcher. That’s roughly how much you need. Melt a little extra for shrinkage.
- Melt the wax. Set your pitcher in a pot with an inch or two of simmering water. Stir gently. Soy wax melts around 120–130°F. Don’t rush it with high heat.
- Add fragrance. Once melted, let the wax cool to about 125°F. Pour in your fragrance oil and stir for a full two minutes. Yes, two minutes. It matters.
- Pour into the jar. Slowly pour the wax down the side of the jar to avoid bubbles. Leave about half an inch of space at the top.
- Let it cool. Don’t move the jar. Don’t poke it. Leave it alone for at least four hours, preferably overnight. You might see a little dip in the center — that’s normal.
- Trim the wick. Cut it to about a quarter inch. Screw on a lid, add a ribbon, and you’re done.
That’s it. You just made a candle. Feel free to act smug about it.
Fun Design Variations to Try
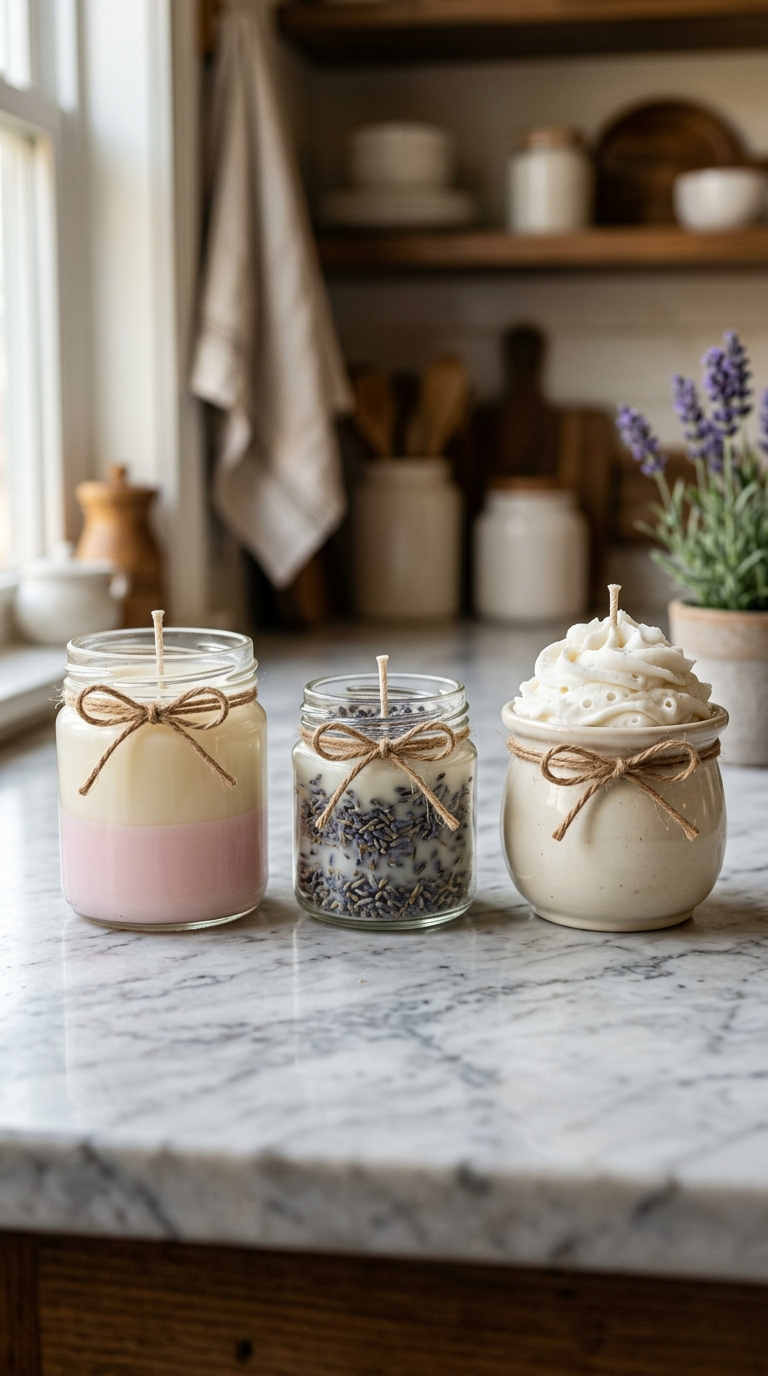
Once you’ve nailed the basic pour, mix it up. This is where your gifts stop looking homemade and start looking handmade.
Layered Candles
Pour one color, let it firm up slightly, then pour a second color on top. Use a fork to rough up the surface between layers so they stick. Vanilla on the bottom, lavender on top? Gorgeous.
Embedded Botanicals
Press dried lavender, rose petals, or citrus slices against the inside of the jar before pouring. The wax holds them in place. Keep them away from the wick — dried flowers near a flame are a no-go.
Scented Wax Melts in Molds
Not into wicks? Pour the same wax into silicone molds. Pop them out, bag them up, and you’ve got wax melts. Even easier than jar candles.
Two-Tone Whipped Wax Toppers
Whip cooled wax with a hand mixer until it looks like frosting, then spoon it on top of a set candle. It looks fancy. It takes five minutes. Nobody needs to know.
Tips, Mistakes, and How to Fix Them
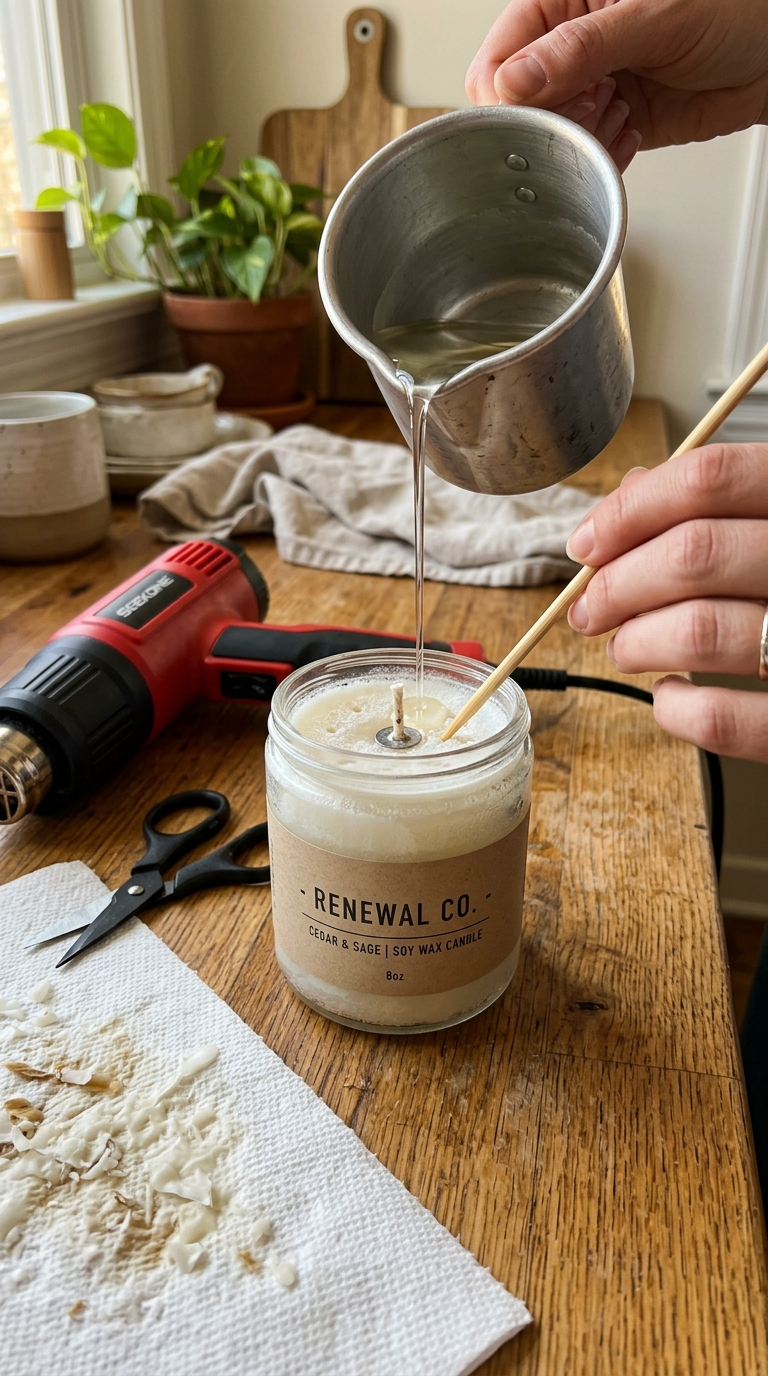
Candle making is forgiving, but a few things will trip you up. Here’s what I’ve learned the hard way so you don’t have to.
- Don’t skip the thermometer. Too-hot wax burns off the scent. Too-cool wax won’t bind with it.
- Frosting happens. That white film on soy candles is natural. A quick blast with a heat gun smooths the top.
- Sinkholes are normal. If the center caves in, poke a few holes with a skewer and pour a little more wax on top.
- Sweating means too much oil. If beads of fragrance appear on top, you used too much. Wipe it off and scale back next time.
- Never pour wax down the sink. Just don’t. Wipe your tools with paper towels while they’re still warm.
- Cure your candles. Let them sit for 3–7 days before gifting. The scent gets stronger with time.
Safety note: Always melt wax over indirect heat, never a direct flame. Keep a lid nearby in case of a flare-up. And remind your gift recipients to trim their wicks. FYI, that’s the number one reason candles tunnel.
How to Package and Gift Your Candles
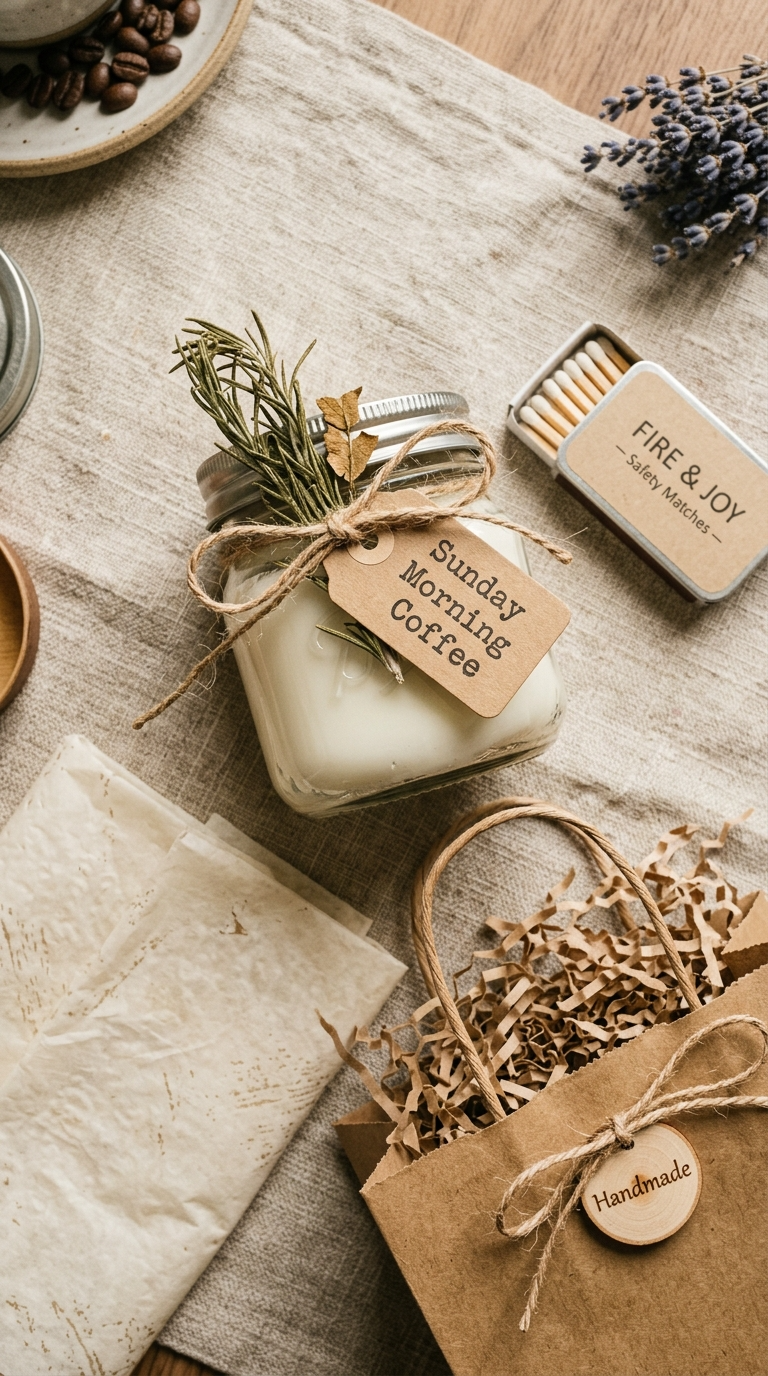
Presentation is half the gift. A plain jar with a ribbon looks cute, but you can push it further with almost no effort.
- Tie twine around the jar and tuck in a sprig of dried rosemary.
- Write the scent name on a kraft paper tag. “Sunday Morning Coffee” beats “Brown Sugar Vanilla.”
- Pair a candle with a box of matches in a cute tin.
- Bundle three mini candles in a basket for a spa-themed gift.
- Wrap the jar in tissue paper and drop it in a kraft gift bag with shredded paper.
IMO, the best part is the reaction. People genuinely light up when they find out you made it. Be ready to explain the process ten times.
FAQ’s
Can I use old candle stubs to make new candles?
Absolutely. Chop them up, remove any old wicks and debris, and melt them down. The scent might be weaker, so add a few drops of fresh fragrance oil.
What’s the best wax for beginners?
Soy wax, hands down. It melts easily, cleans up with soap and water, and holds fragrance nicely. Paraffin is cheaper but trickier to work with.
How much fragrance oil should I use?
About 1 ounce of oil per pound of wax. That’s roughly a 6% scent load. More isn’t better — it can clog the wick and cause the candle to burn poorly.
Why does my candle have a rough, bumpy top?
That’s just how soy wax cools. It’s cosmetic and totally fine. If it bothers you, hit the top with a heat gun or a hair dryer on low for a few seconds.
How long do homemade candles last?
Stored in a cool, dark place with a lid on, they’ll stay good for about a year. After that, the scent fades but the candle still burns fine.
Do I really need to cure candles before gifting them?
You don’t have to, but you should. Three to seven days lets the fragrance fully bind with the wax. The difference in scent throw is noticeable.
Ready to Pour Your First Candle?
Honestly, the hardest part of this project is waiting for the wax to cool. Everything else is stirring, pouring, and feeling weirdly proud of yourself.
Start with one simple jar candle. Pick a scent you love, raid your recycling bin for a jar, and give it a shot. Once you get the hang of it, you’ll be pouring batches for every birthday and holiday on your calendar.
So go melt some wax. Your gift list is about to get a whole lot easier — and a whole lot better smelling.