
Ready to make your place look like a holiday catalog without spending a fortune? These DIY Christmas decorations are simple, cheap, and genuinely fun to put together. You do not need a craft room full of fancy gadgets. Grab a few basic supplies, pour some cocoa, and let’s make your home feel merry and bright.
Why DIY Christmas Decorations Are Worth It
Store-bought decor looks nice, sure. But it all kind of blends together after a while, right? Making your own decorations gives your home a personal touch that guests actually notice.
Plus, DIY projects save money. A lot of them use stuff you already have lying around. And here’s the best part: crafting is weirdly relaxing. Turning a pile of twine and old jars into something beautiful feels like a small win.
Worried you are not crafty? You are. If you can tie a knot and use scissors, you are qualified.
Project 1: Mason Jar Snow Globes
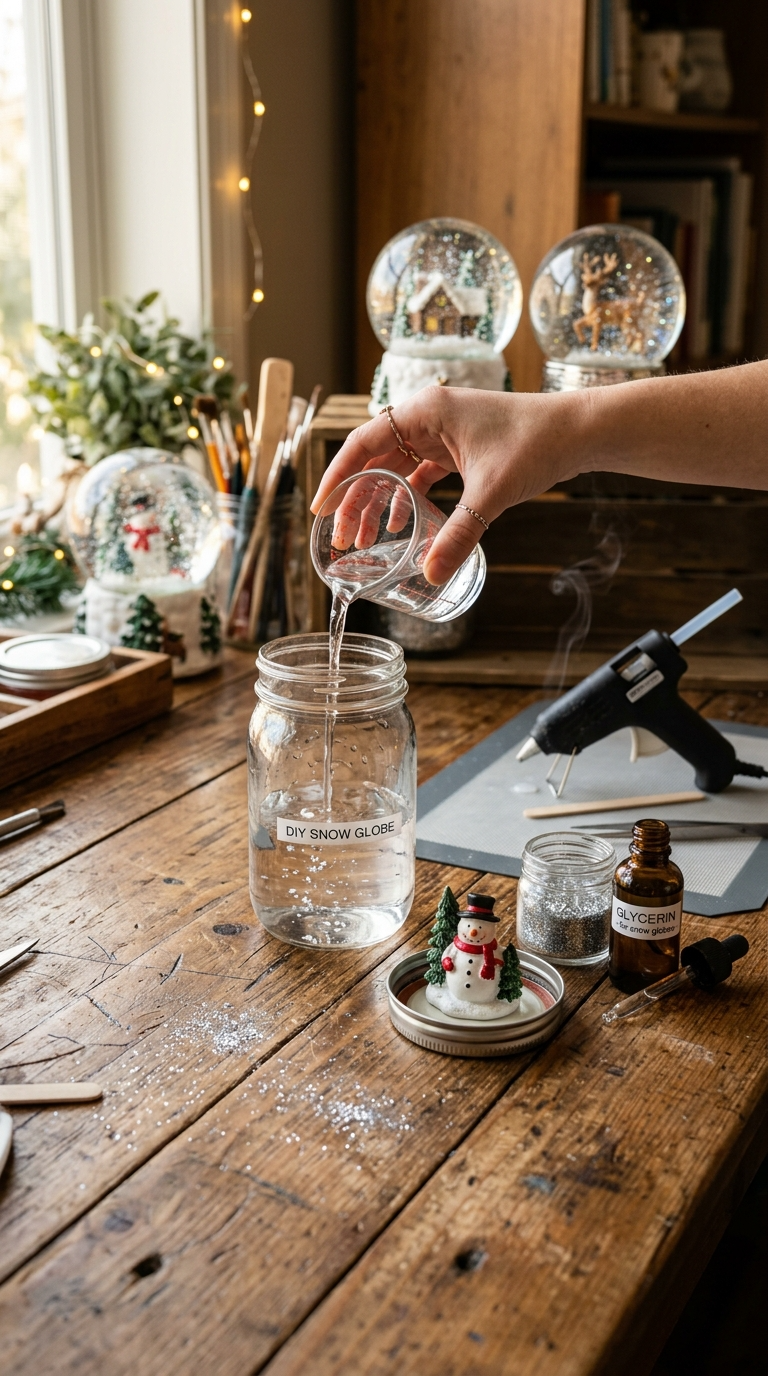
These little guys are my favorite. They look fancy, but they take about 15 minutes each. Kids love shaking them, and adults love that they did not cost $30 at a boutique.
Materials and Tools
- Clean mason jars with lids (any size works; thrift stores are gold mines)
- Distilled water (tap water gets cloudy over time)
- Glycerin (helps glitter fall slowly; corn syrup works as a substitute)
- Fine glitter in silver, gold, or white
- Small waterproof figurines or mini trees
- Waterproof glue or hot glue
- Optional: fake snowflakes for extra texture
Step-by-Step Instructions
- Glue your figurine to the inside of the jar lid. Let it dry completely. I mean it. If you skip this, your snowman will take a swim.
- Fill the jar almost to the top with distilled water.
- Add a squeeze of glycerin. About a teaspoon per cup of water. More glycerin means slower glitter.
- Drop in a pinch of glitter. Start small. You can always add more.
- Add a few snowflakes if you want a blizzard effect.
- Apply a ring of waterproof glue around the lid threads.
- Screw the lid on tightly and let it set for 24 hours before shaking.
Pro tip: Flip the jar upside down while the glue dries. Gravity helps seal it.
Common Mistakes to Avoid
Do not use too much glitter. It sounds fun until your globe looks like a glitter tornado. Also, skip cheap glue. You will regret it when your living room floor becomes a lake.
Project 2: Twine and Pinecone Garland
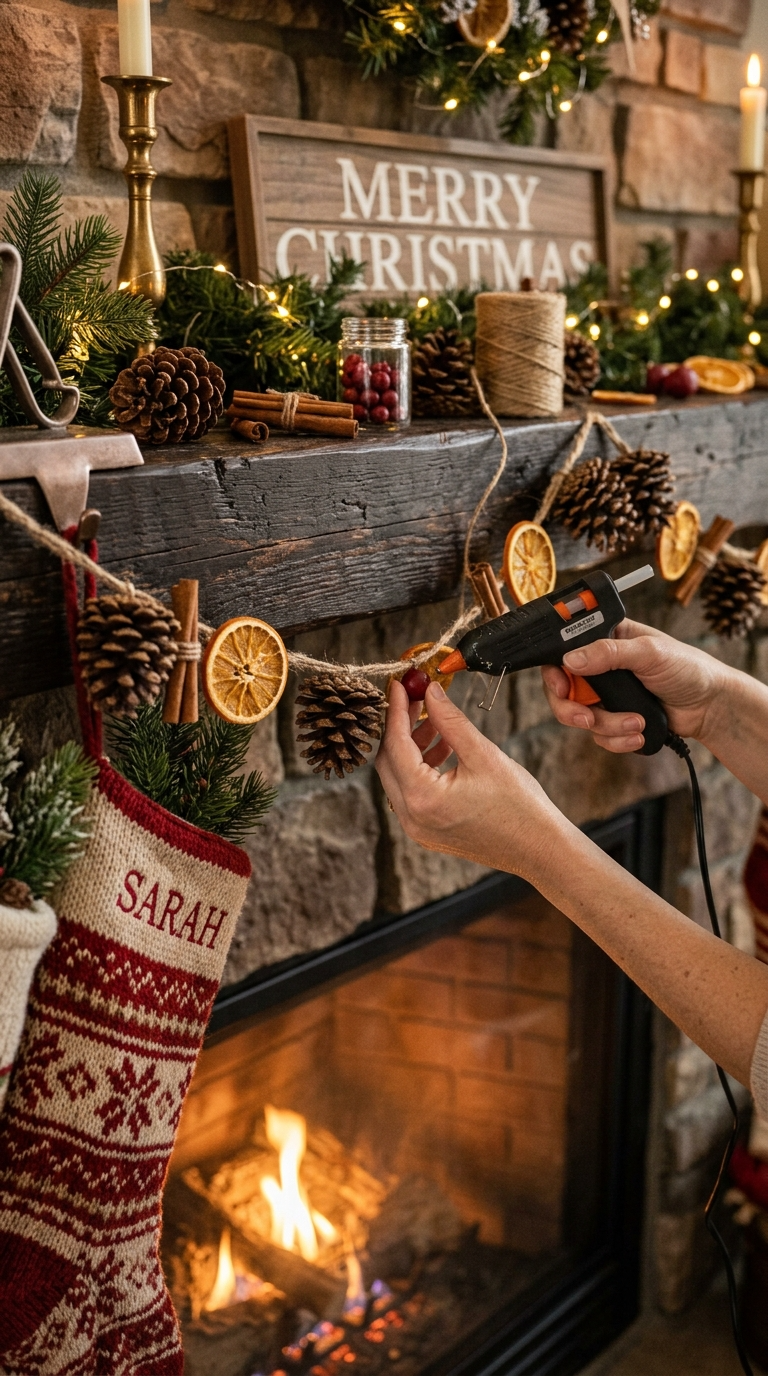
This garland screams cozy cabin Christmas. It is rustic, cheap, and looks great draped over a mantel or staircase. The best part? You can make it while watching a movie.
Materials and Tools
- Jute twine or hemp rope
- Pinecones (gather them outside or buy a bag)
- Cinnamon sticks
- Dried orange slices (slice oranges, bake at 200°F for 3 hours)
- Hot glue gun
- Scissors
- Optional: small red beads or berries
Step-by-Step Instructions
- Cut a long piece of twine. Make it longer than you think you need.
- Lay everything out in a pattern you like. Trust me, planning saves headaches.
- Hot glue a pinecone to the twine. Hold it for 10 seconds.
- Add a cinnamon stick next, then a dried orange slice.
- Repeat the pattern until the garland is full.
- Leave a few inches of twine at each end for hanging.
FYI: Dried oranges smell amazing and cover up that “hot glue” smell.
Design Variations
Want a pop of color? Tie small red ribbons between each item. Going for a modern look? Skip the pinecones and use wooden beads instead.
Project 3: Paper Snowflake Window Display
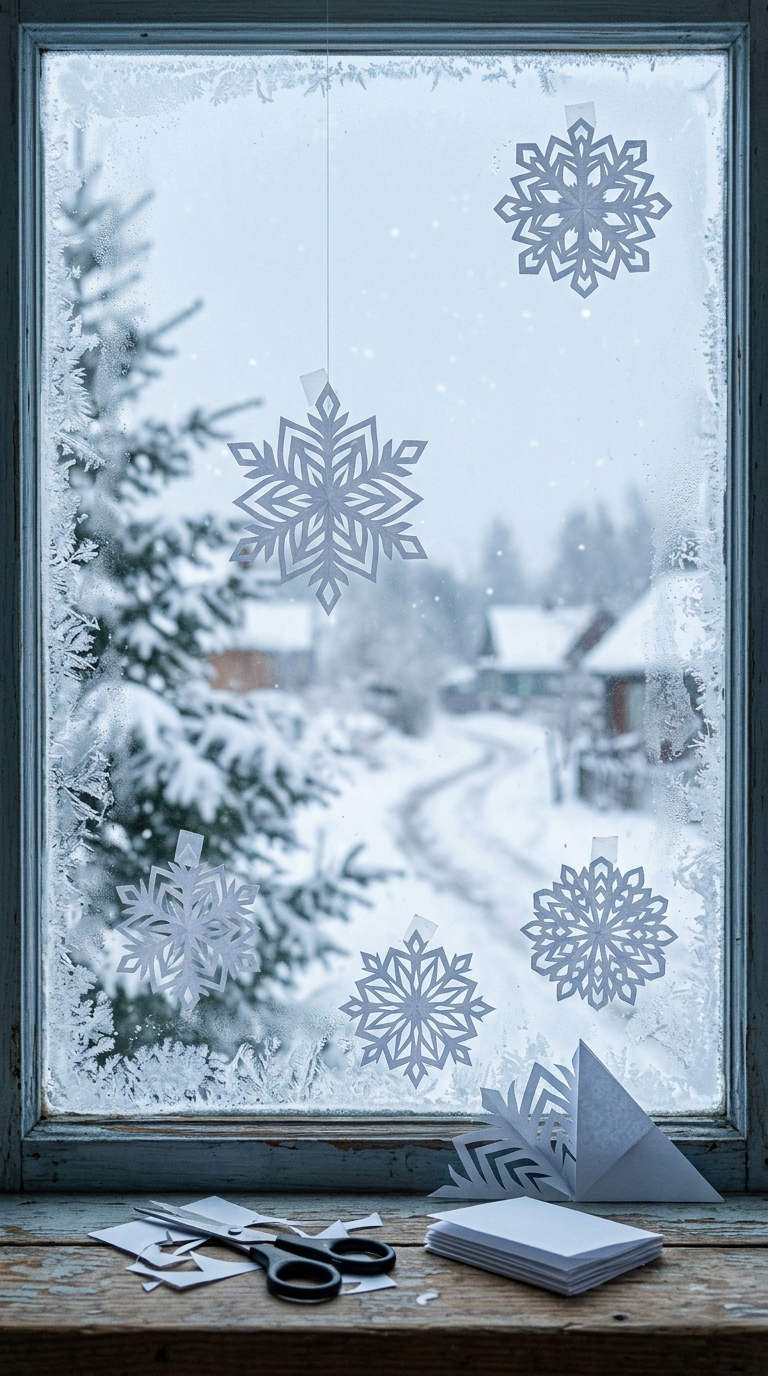
Remember making paper snowflakes as a kid? They are still awesome. This project turns a plain window into a winter wonderland for almost zero dollars.
Materials and Tools
- White printer paper or coffee filters
- Scissors
- Tape or double-sided sticky dots
- Optional: fake snow spray
- Optional: fishing line for hanging
Step-by-Step Instructions
- Fold a square piece of paper in half diagonally to make a triangle.
- Fold it in half again, then once more.
- Cut small shapes along the folded edges. Do not cut all the way through the center.
- Unfold carefully. Admire your work. Mess up? No worries, just fold another one.
- Tape snowflakes to your window in a scattered pattern.
- For a floating effect, hang them from the ceiling with fishing line at different heights.
Pro tip: Coffee filters are easier to cut and have a cool textured look.
Troubleshooting
If your snowflake rips, you cut too close to the folded edge. Leave a little margin. If it looks lopsided, fold it again and trim the edges evenly.
Project 4: Cinnamon Stick Candle Holders
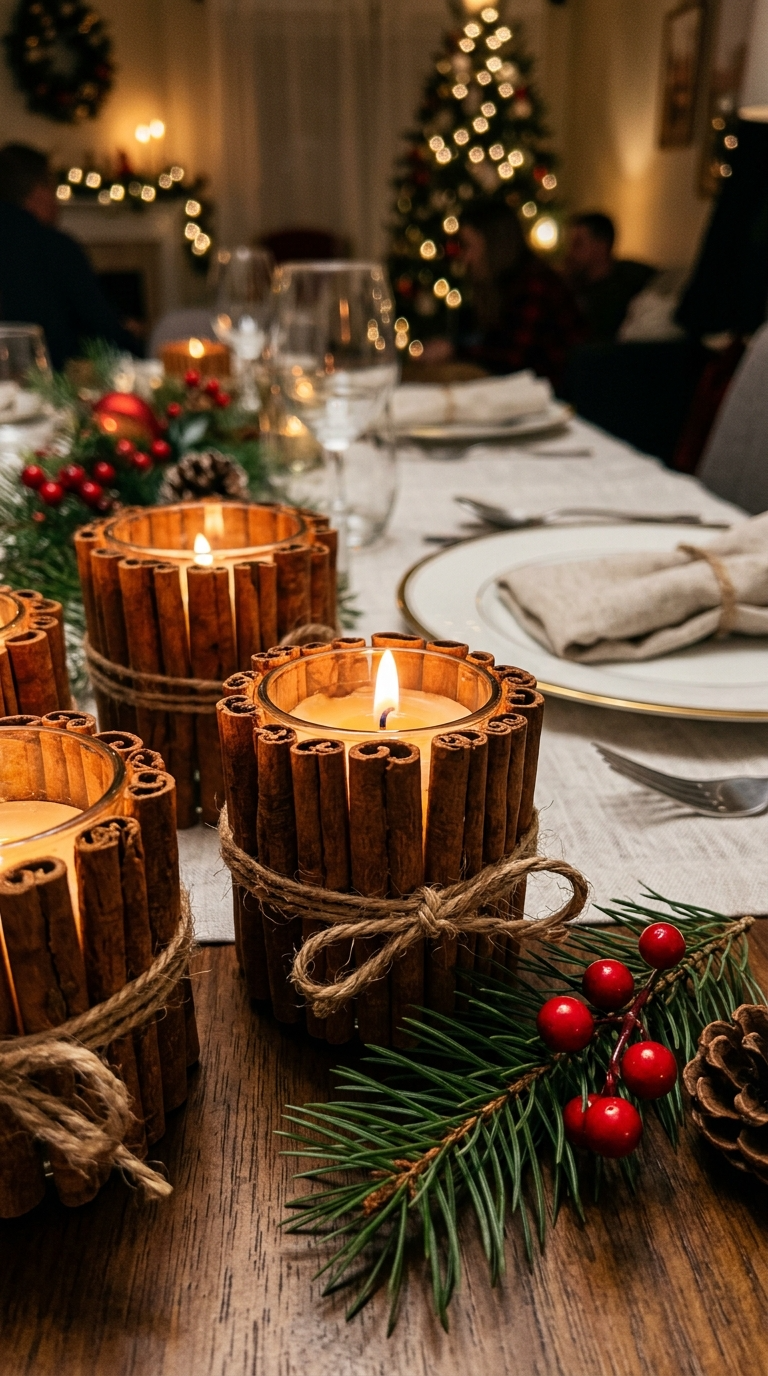
These smell like a holiday candle store, but without the headache-inducing perfume. They are quick, elegant, and make great gifts.
Materials and Tools
- Cinnamon sticks (about 20 per holder)
- Rubber band
- Twine or ribbon
- Glass votive or small jar
- Tea light candle
- Hot glue gun (optional for extra security)
Step-by-Step Instructions
- Wrap a rubber band around the glass jar.
- Slide cinnamon sticks under the rubber band, packing them tightly.
- Keep going until the jar is fully covered.
- Tie twine or ribbon over the rubber band to hide it.
- Slide the rubber band off.
- Drop in a tea light and light it.
IMO: These look best in groups of three on a dinner table.
Safety Tips
Never leave a burning candle unattended. Keep cinnamon sticks away from the flame itself. And do not use a real candle if you have curious pets or kids. Battery-operated tea lights work fine.
Project 5: Salt Dough Ornaments
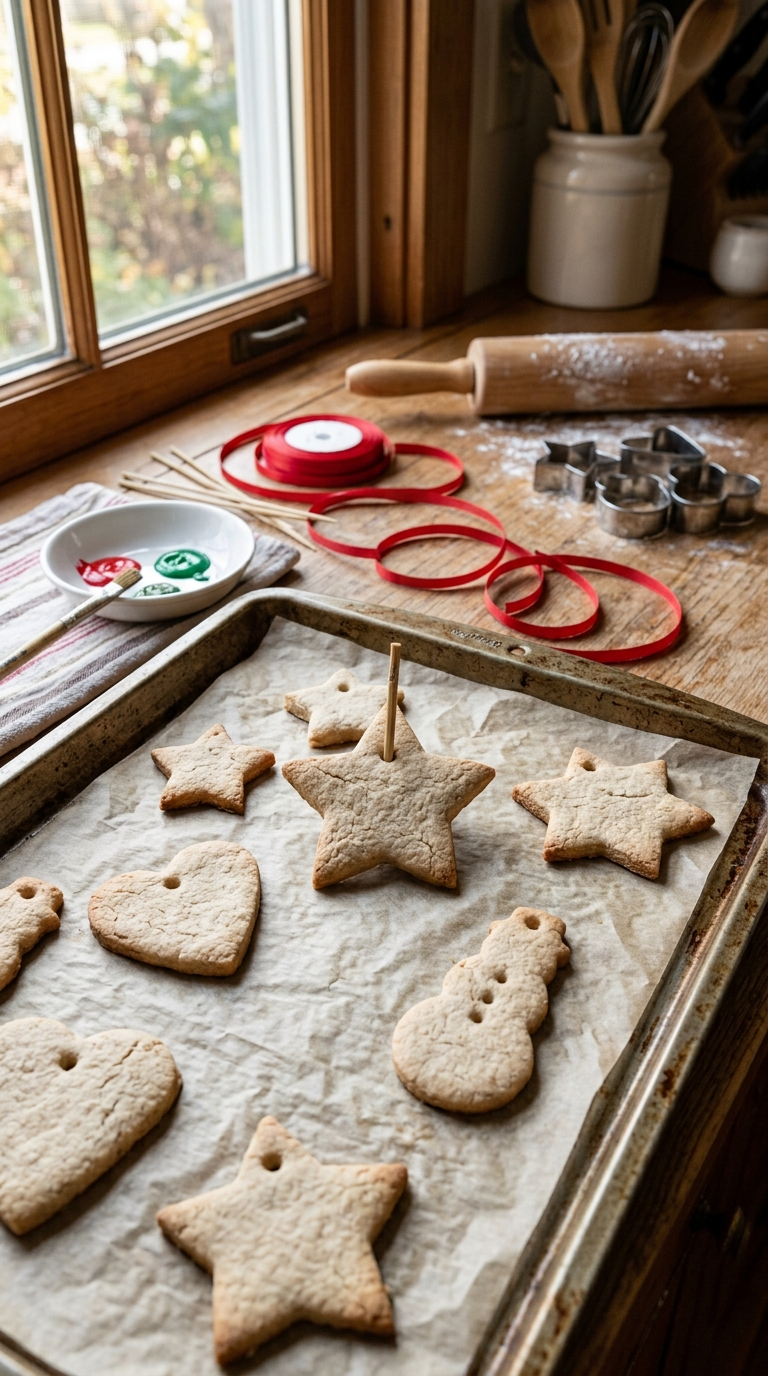
Salt dough ornaments are a classic for a reason. They are cheap, customizable, and you probably already have all the ingredients. Plus, they double as keepsakes.
Materials and Tools
- 1 cup all-purpose flour
- 1/2 cup salt
- 1/2 cup water
- Rolling pin
- Cookie cutters
- Straw or skewer for the hole
- Acrylic paint, markers, or glitter
- Ribbon or twine for hanging
Step-by-Step Instructions
- Mix flour and salt in a bowl.
- Add water slowly until a dough forms.
- Knead for 5 minutes until smooth.
- Roll dough to about 1/4 inch thick.
- Cut shapes with cookie cutters.
- Poke a hole near the top with a straw.
- Bake at 200°F for 2 to 3 hours, flipping halfway.
- Let cool, then paint and decorate.
- Thread ribbon through the hole and hang on your tree.
Pro tip: If the dough cracks, add a tiny bit of water. If it is sticky, add flour.
Customization Ideas
Write names on them for personalized gift tags. Press a leaf or fork pattern into the dough before baking. Use metallic paint for a fancy look.
How to Display and Gift Your DIY Decorations
You made all this stuff. Now what? Here are a few ideas.
- Fill a clear bowl with mason jar snow globes and use it as a centerpiece.
- Drape the pinecone garland across a mirror or headboard.
- Hang paper snowflakes from light fixtures.
- Group cinnamon candle holders on a tray with fake greenery.
- Pack salt dough ornaments in a small box with tissue paper for gifts.
Homemade decorations also make great hostess gifts. Tie a ribbon around a snow globe and you are done.
FAQ’s
How long do mason jar snow globes last?
They can last for years if you seal them well and use distilled water. If the water gets cloudy, dump it out, rinse the jar, and refill.
Can I use fresh oranges instead of dried ones?
No. Fresh oranges will rot and get moldy. Always dry them in the oven first.
What if my salt dough ornaments puff up in the oven?
That means your dough was too thick or the oven was too hot. Roll thinner next time and keep the temperature low.
Do I have to use glycerin in snow globes?
No, but without it the glitter sinks fast. Corn syrup or clear glue works as a substitute.
How do I store these decorations for next year?
Wrap fragile items in bubble wrap or tissue paper. Store in a cool, dry place. Salt dough ornaments should go in an airtight container.
Are these projects safe for kids?
Most of them, yes. Just handle the hot glue gun and oven parts yourself. Let kids do the cutting, mixing, and decorating.
Go Make Something Merry
You do not need a perfect craft room or a ton of money to make your home feel festive. Pick one project from this list and give it a shot. Worst case, you make a funny-looking snow globe. Best case, you start a new holiday tradition.
So grab those mason jars and cinnamon sticks. Your home is about to look amazing. Happy crafting!