
Want your home to feel festive without spending a fortune? Good news: you don’t need a craft room full of fancy supplies. With a few cheap materials and an afternoon, you can make decorations that look like you bought them at a boutique. Let’s dive into five seasonal projects that are genuinely beginner-friendly. Fair warning: your glue gun and I are about to become best friends.
Why Seasonal DIY Decor Beats Store-Bought Stuff
Store decorations are fine, but they all look the same. Your neighbor has the same pumpkin wreath. Your coworker has the same snowman doormat. Boring, right?
Making your own decor lets you match your home’s exact colors, reuse materials year after year, and impress guests who will absolutely ask where you bought it. You get to say, “I made it,” and watch their face change. That never gets old.
Plus, seasonal crafting is a great excuse to avoid folding laundry. IMO, that alone is worth the price of admission.
Project 1: Autumn Mason Jar Lanterns
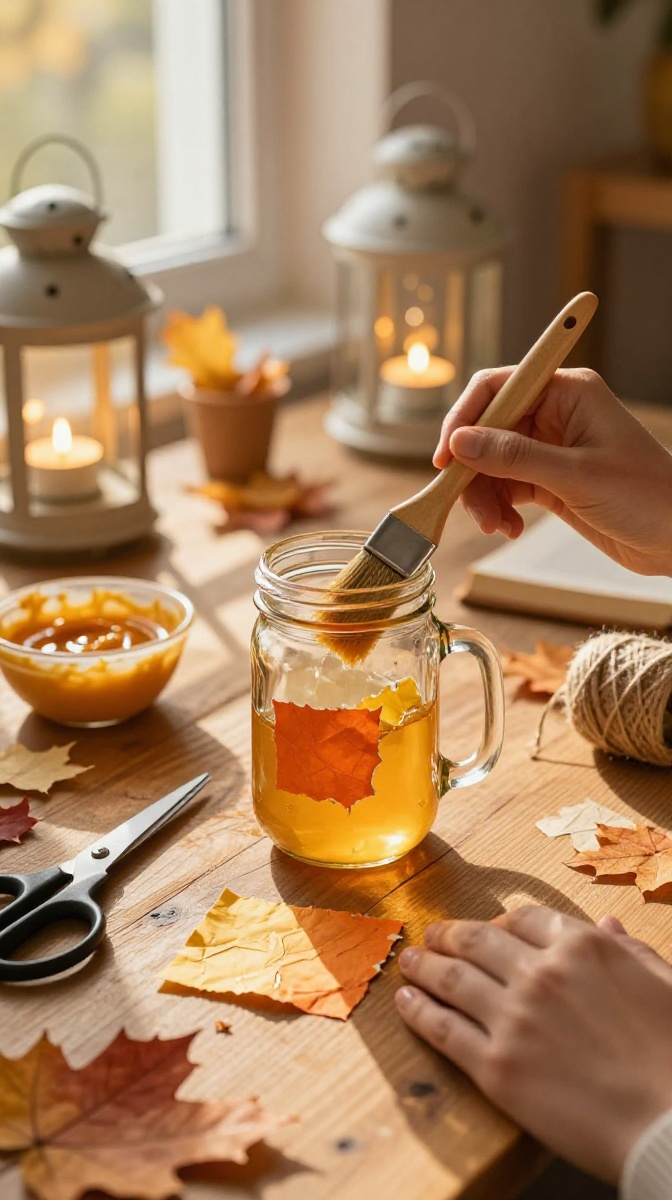
These little lanterns glow like tiny pumpkins and take about 20 minutes to make. They work for fall, Halloween, and Thanksgiving, so you get three holidays out of one craft. Efficiency, friends.
Materials and Tools
- Clean glass mason jars (any size; thrift stores sell them cheap)
- Mod Podge or white school glue mixed with water
- Paintbrush or foam brush
- Tissue paper in orange, yellow, and red (substitute: old newspaper for a rustic look)
- Twine or thin ribbon
- Small LED tea lights (never real candles with paper — trust me)
- Scissors
Step-by-Step Instructions
- Tear the tissue paper into small squares. Tearing looks better than cutting — jagged edges blend nicely.
- Brush a thin layer of Mod Podge onto a small section of the jar.
- Press a tissue square onto the glue and brush more Mod Podge over it. Keep going until the jar is covered, overlapping colors as you like.
- Let it dry for about an hour. Don’t poke it. I know you want to poke it.
- Wrap twine around the rim and tie a bow.
- Drop in an LED tea light and watch it glow.
Common Mistakes to Avoid
Too much glue makes the paper wrinkle and turn mushy. Thin layers win here. Also, don’t cover the jar’s threads if you want the lid to still screw on.
Display and Gift Ideas
Line three lanterns down your dinner table, or cluster them on a porch step. They also make lovely housewarming gifts — just add a tag that says “handle with care, I glued this myself.”
Project 2: Winter Evergreen Door Swag
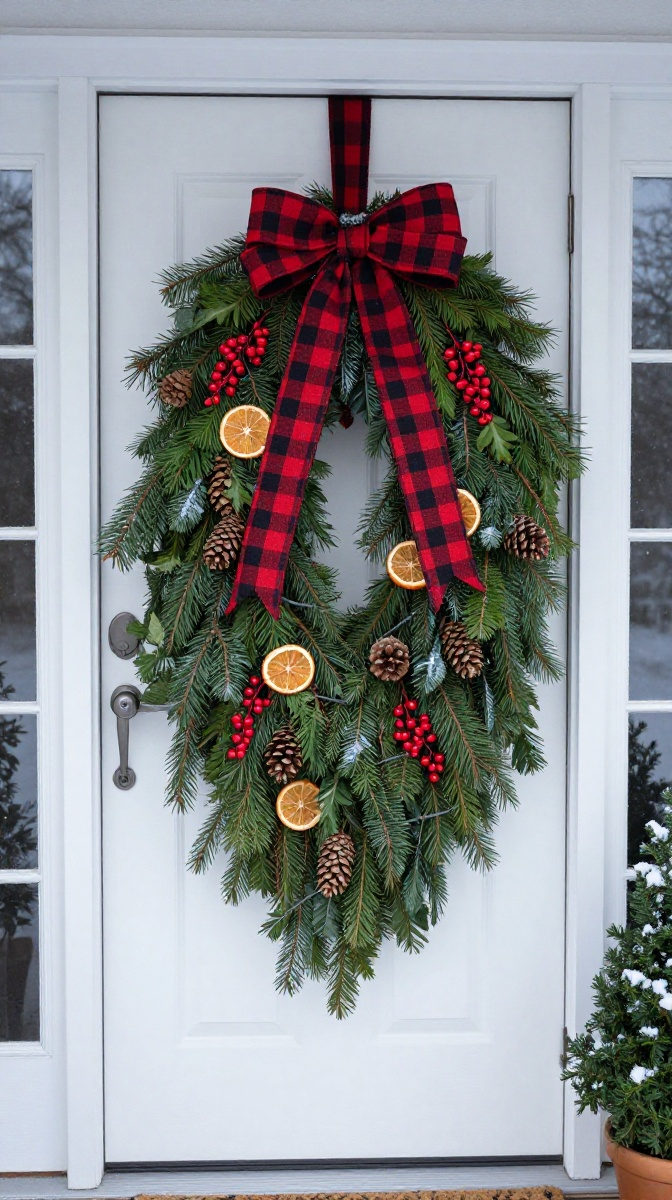
A full wreath can be intimidating. A swag is basically a lazy wreath, and honestly, it looks just as good. It hangs on one nail and drapes beautifully down a door or wall.
Materials and Tools
- Fresh or faux evergreen branches (ask a tree lot for free trimmings — they usually say yes)
- Floral wire or pipe cleaners
- Ribbon
- Pinecones, berries, or dried orange slices
- Hot glue gun
- Scissors or pruning shears
Step-by-Step Instructions
- Lay three or four branches together so the stems line up at the top.
- Wrap floral wire tightly around the stems to bind them.
- Add a second layer of branches slightly lower, and wire those in too.
- Keep layering downward, making each layer a bit wider. This creates the draping shape.
- Hot glue pinecones and berries onto the front.
- Tie a big ribbon bow at the top and hang it with a sturdy hook.
Material Substitutions
No fresh greens? Faux garland from a dollar store works fine and lasts for years. No floral wire? Pipe cleaners do the job in a pinch.
Project 3: Spring Floral Hoop Wreath
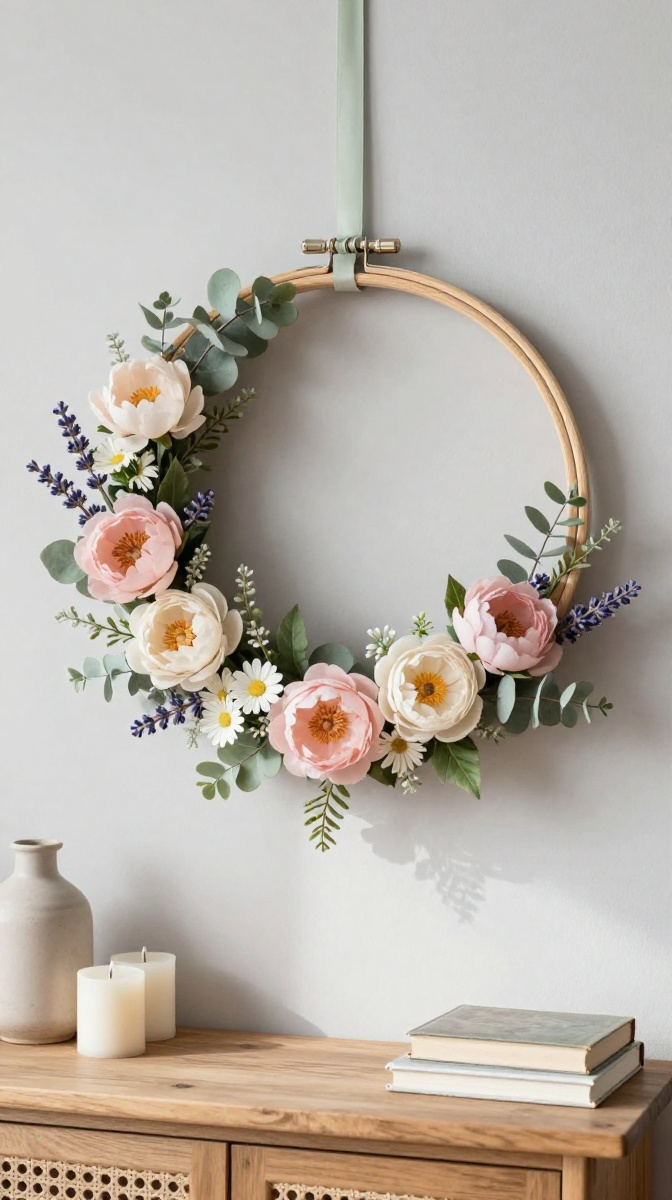
Embroidery hoops are the unsung heroes of DIY decor. They’re cheap, lightweight, and turn any bunch of fake flowers into something that looks intentional.
Materials and Tools
- Wooden embroidery hoop (8 to 12 inches)
- Faux flowers and greenery
- Hot glue gun
- Ribbon for hanging
- Wire cutters
Step-by-Step Instructions
- Cut the flower stems so each bloom has a short stub.
- Lay flowers around the hoop first to plan your design. Don’t skip this — it saves re-gluing later.
- Glue greenery around the bottom half of the hoop.
- Add flowers on top of the greenery, grouping them in odd numbers. Designers swear by threes and fives.
- Tie a ribbon loop at the top and hang it on a door, mirror, or gallery wall.
Design Variations
Go pastel for Easter, red and white for Valentine’s Day, or orange and rust for fall. One hoop, endless seasons. That’s what I call a good return on investment.
Project 4: Summer Coastal Rope Vase
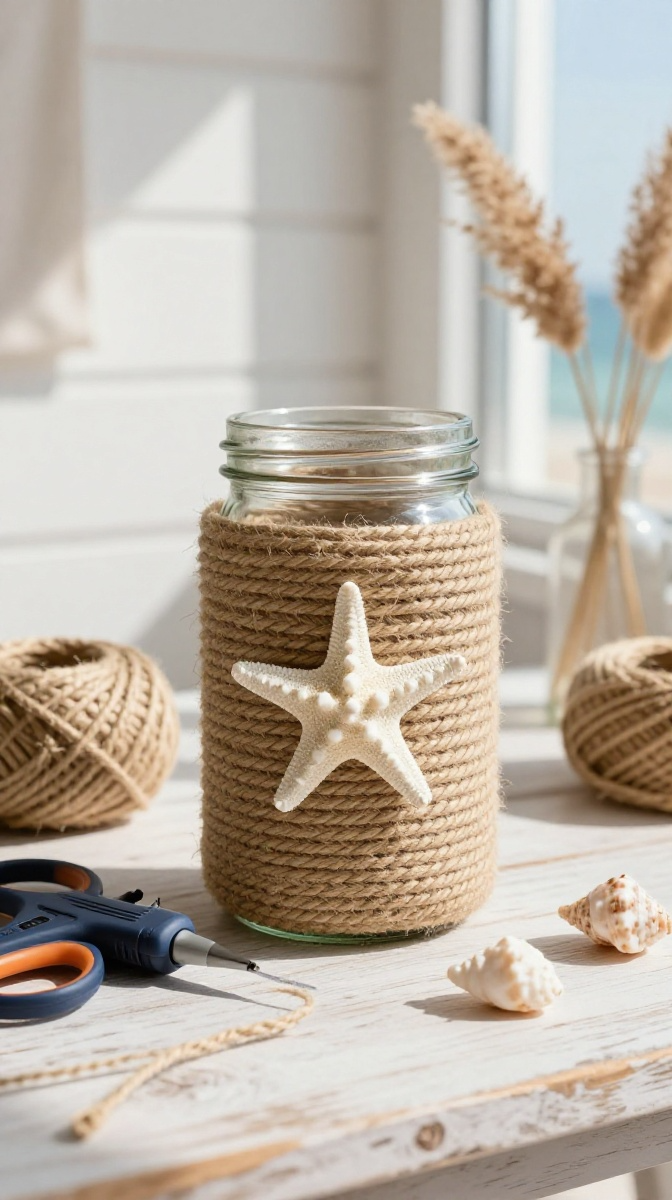
This one screams beach house, even if your house is nowhere near a beach. It’s basically wrapping a jar in rope. If you can wrap a burrito, you can do this.
Materials and Tools
- Glass jar or empty bottle
- Thick jute rope or cotton cord
- Hot glue gun
- Shells or starfish (optional)
- Scissors
Step-by-Step Instructions
- Start at the bottom of the jar and glue the rope’s end in place.
- Wrap the rope around the jar, adding a line of glue every few inches.
- Push each row snugly against the last one so no glass peeks through.
- Trim the rope at the top and tuck the end under the final row.
- Glue on a shell for a finishing touch.
Troubleshooting
If gaps appear, don’t panic. Just unwind that section, add more glue, and rewrap. Hot glue is forgiving. Your fingers, however, are not — keep a bowl of cold water nearby for minor burns.
Project 5: Holiday Pillow Covers You Can Swap All Year
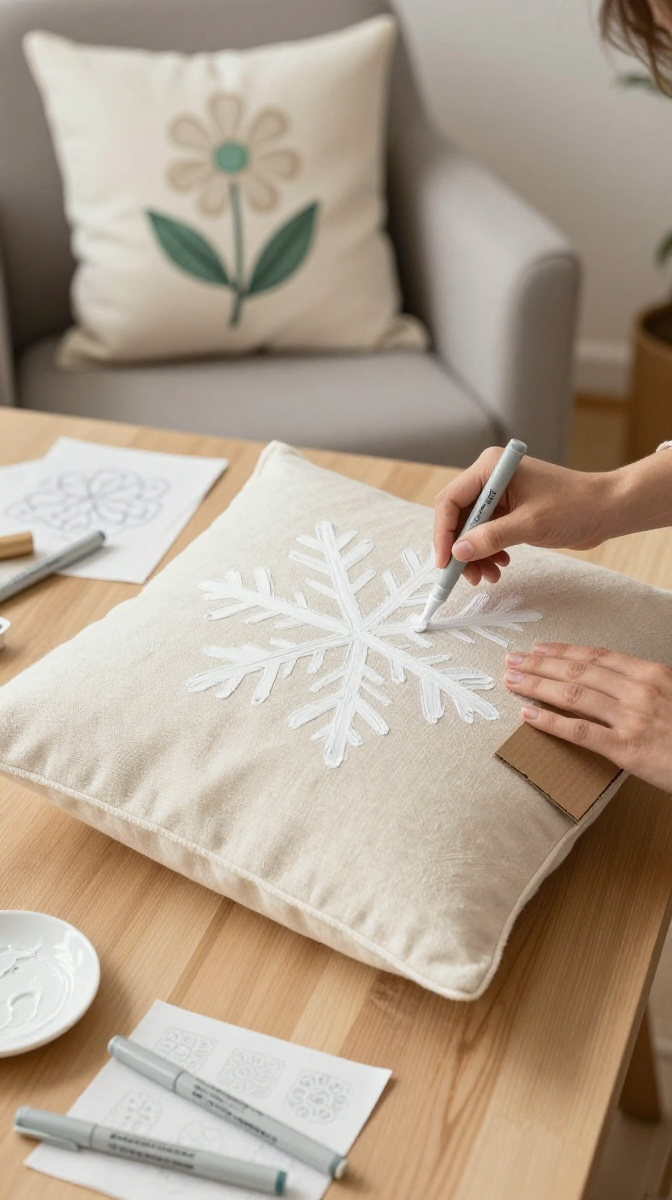
Here’s the smartest trick in seasonal decorating: make one set of plain pillow covers, then change the accents instead of buying new pillows every season.
Materials and Tools
- Plain canvas or cotton pillow covers (or sew your own from fabric)
- Fabric markers or acrylic paint with fabric medium
- Stencils, cookie cutters, or a steady hand
- Cardboard to slide inside the cover
- Iron for setting the paint
Step-by-Step Instructions
- Slide cardboard inside the cover so paint doesn’t bleed through.
- Trace your stencil lightly with a pencil.
- Paint or color inside the lines. Two thin coats beat one thick, gloppy coat.
- Let it dry completely, then iron the design to set it.
- Swap covers each season: snowflakes in winter, flowers in spring, suns in summer.
Practical Tips
Wash handmade covers inside out on cold and air dry them. Never toss painted fabric in a hot dryer unless you enjoy cracked designs.
FAQ’s
How much should I expect to spend?
Most of these projects cost under $10 if you shop dollar stores and thrift shops. Reusing jars, bottles, and branches brings the cost close to zero.
How long do these decorations last?
Faux and fabric projects last for years. Fresh evergreen swags last a few weeks, especially indoors near heat.
Can kids help with these crafts?
Yes, with supervision. Let kids handle tearing paper, wrapping rope, and placing flowers. Keep the hot glue gun for adults only.
What if I’m not crafty at all?
Start with the mason jar lanterns or the rope vase. Both are nearly impossible to mess up, and both look great.
Where do I store seasonal decor?
Label a plastic bin for each season and store items flat. FYI, put tissue paper lanterns on top so nothing crushes them.
Do I need a glue gun?
It helps, but strong craft glue or even clear tape can work for lightweight projects. A glue gun makes everything faster and sturdier.
Final Thoughts:
Seasonal decorating doesn’t require talent, money, or a perfect craft room. It requires an afternoon, a few cheap supplies, and the willingness to accept that your first attempt might look a little wonky. That’s fine. Wonky has charm.
Pick one project this weekend. Make it yours, tweak the colors, and show it off. Then come back and tell me how it went — I’ll be here, probably picking dried glue off my fingers.