
Ready to make your home smell like cinnamon and look like a pumpkin exploded in the best way possible? Good. We’re diving straight into five fall DIY crafts you can actually finish before the pumpkin spice latte gets cold. No fancy tools, no weird supplies you’ll never use again. Just cozy, affordable projects that make your space feel like autumn wrapped it in a blanket.
Pumpkin Yarn Wrapped Door Hanger
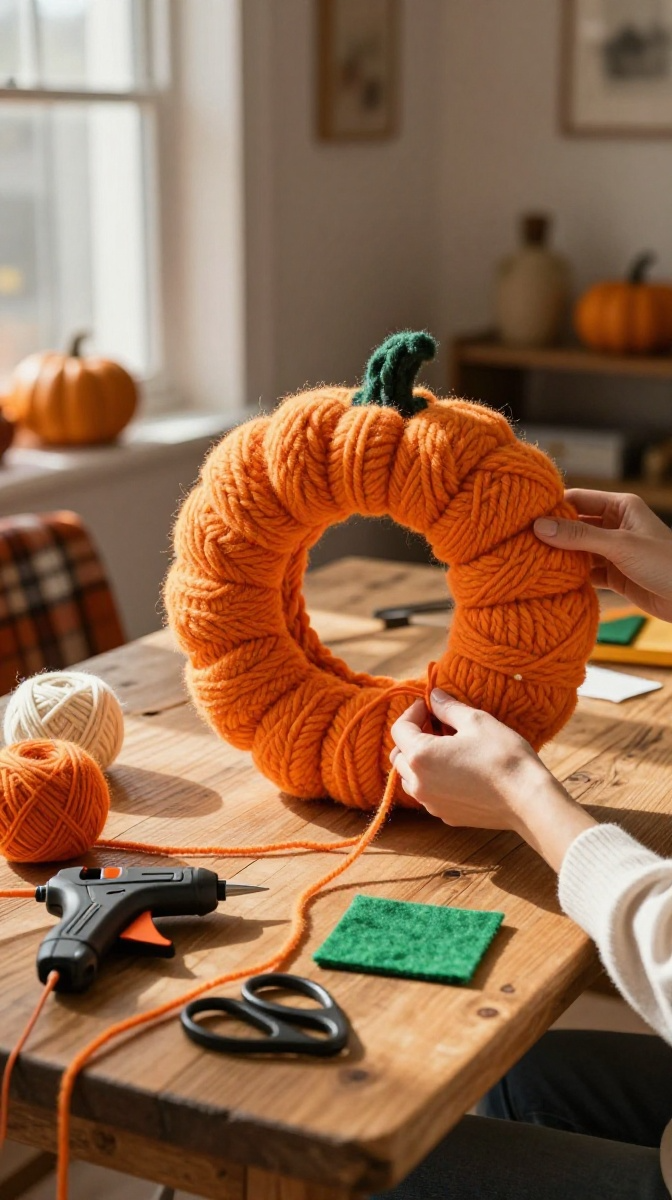
This is the project that makes people say, “Wait, you made that?” It looks boutique-level, but it’s basically wrapping yarn around a shape. If you can wind a ball of yarn, you can do this.
Materials and Tools
- Foam or straw wreath form (round or pumpkin-shaped, 10–12 inches)
- Orange chunky yarn (or any orange yarn you have; thicker is faster)
- Small green felt square for the stem
- Brown twine or ribbon for hanging
- Hot glue gun and glue sticks
- Scissors
Affordable substitute: Use an old cardboard cutout instead of a foam form. Just cut a pumpkin shape from a shipping box. FYI, it works surprisingly well.
Step-by-Step Instructions
- Start by tying the yarn to the wreath form with a tight knot. Leave a little tail you can glue down later.
- Wrap the yarn around the form, pushing each loop close to the last one. Don’t stress about perfect spacing. You’ll fill gaps as you go.
- Keep wrapping until the entire front and sides are covered. This takes 20–30 minutes, so put on a show or podcast.
- When you’re done, tie off the yarn on the back and glue the tail down. No one sees the back, so don’t obsess.
- Cut a small rectangle from the green felt and roll it into a stem shape. Glue it to the top center.
- Make a loop with the twine or ribbon and glue it to the back for hanging.
Design Variations
Try cream and white yarn for a neutral pumpkin. Add a fake leaf or a small bow next to the stem. You can also wrap a second smaller form and stack them for a double pumpkin look.
Common Mistakes to Avoid
Don’t pull the yarn too tight or the form will bend. Don’t use thin, slippery yarn unless you enjoy suffering. And please, don’t skip the glue on the back. That’s how door hangers end up on the ground.
Mason Jar Fall Lantern
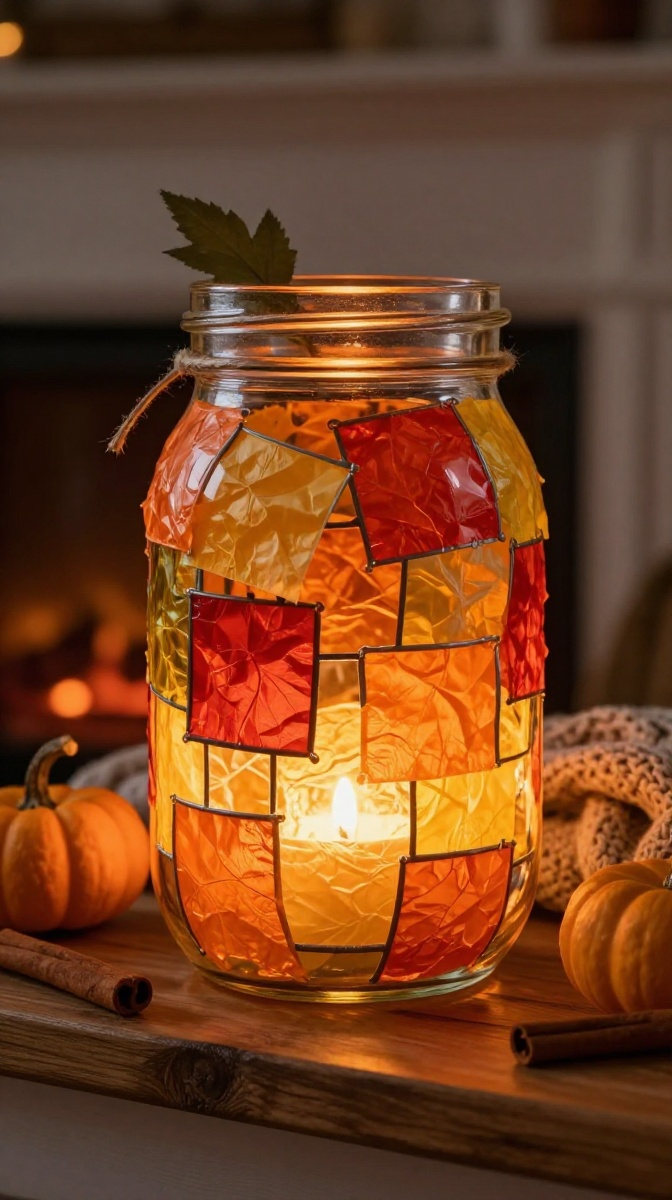
Mason jars are the Swiss Army knife of crafting. This lantern uses simple supplies and gives off a warm, cozy glow that makes any room feel like a fall movie scene.
Materials and Tools
- Clean mason jar (pint or quart size)
- Mod Podge or white school glue
- Fall-colored tissue paper (orange, red, yellow, brown)
- Paintbrush or foam brush
- Twine or jute rope
- Small faux leaves
- Tea light or battery-operated candle
- Scissors
Affordable substitute: Use watered-down school glue instead of Mod Podge. Mix one part glue with one part water.
Step-by-Step Instructions
- Tear the tissue paper into small squares. Tearing gives softer edges than cutting.
- Brush a thin layer of Mod Podge or glue mixture onto a small section of the jar.
- Press a tissue square onto the glued area. Smooth it down with your fingers or the brush.
- Repeat until the jar is covered, overlapping colors for a stained-glass effect.
- Let it dry completely, about 30–60 minutes. Don’t rush this. Wet Mod Podge is a mess.
- Wrap twine around the rim a few times and tie a bow. Glue a faux leaf to the bow.
- Drop in a battery-operated candle. Real candles work too, but only if you’re watching it.
Safety Tips
If you use a real tea light, never leave it unattended. The tissue paper is flammable once dry. Battery-operated candles are safer and still look cozy. IMO, the fake ones are the way to go here.
Decorating Ideas
Group three jars of different sizes on a mantel. Line them up on a dinner table for instant ambiance. You can also add a cinnamon stick inside for a subtle scent.
Fall Leaf Clay Trinket Dish
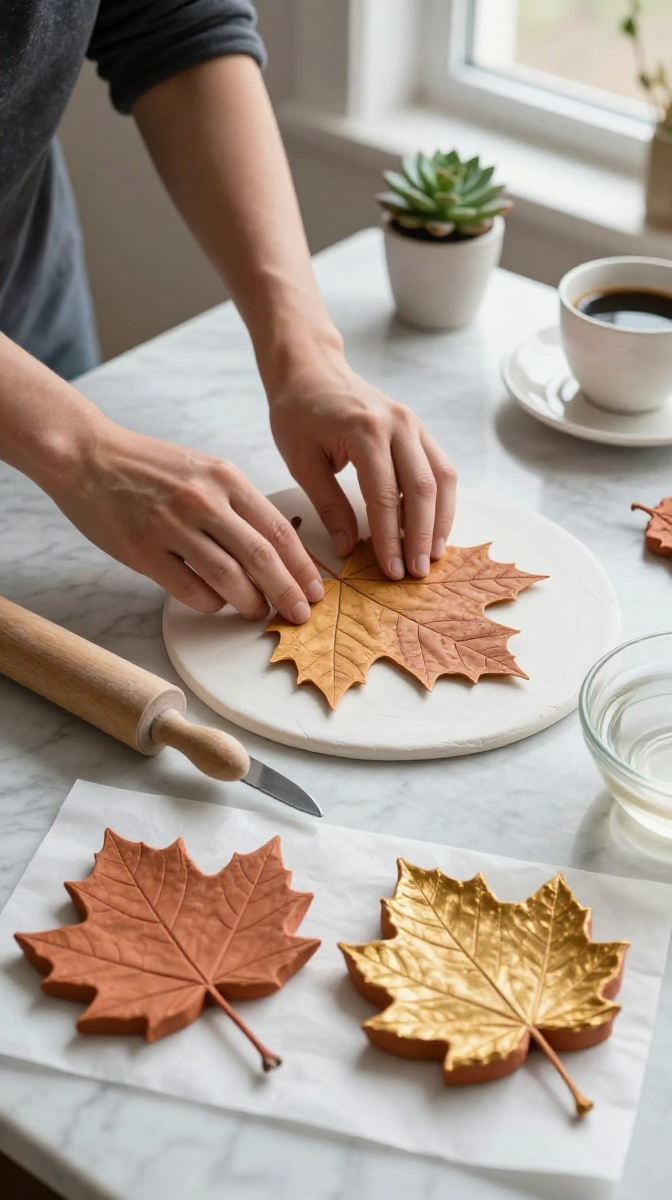
This craft is part decoration, part functional dish. Use it for rings, keys, or tiny candy stashes. The leaf imprint makes it look way more expensive than it is.
Materials and Tools
- Air-dry clay (white or terracotta)
- Large fresh leaves with strong veins (maple, oak, or hosta)
- Rolling pin or smooth bottle
- Knife or clay tool
- Acrylic paint in fall colors
- Paintbrush
- Clear sealant spray (optional)
Affordable substitute: Use a glass bottle as a rolling pin. Works fine.
Step-by-Step Instructions
- Roll the clay into a flat slab about 1/4 inch thick.
- Press a leaf firmly onto the clay, vein side down. Roll over it gently with the rolling pin.
- Peel the leaf off slowly. You should see a detailed imprint.
- Cut around the imprint with a knife, leaving a small border.
- Press the edges upward slightly to create a dish shape. You can use your fingers or a spoon.
- Let it dry for 24–48 hours, flipping halfway through.
- Paint the dish with thin layers of acrylic paint. Let each layer dry.
- Seal with clear spray if you want it to last longer.
Troubleshooting
If the clay cracks while drying, don’t panic. Small cracks can be filled with more clay or sanded after drying. If the imprint is too shallow, press harder next time. Fresh leaves work better than dried ones.
Gift Ideas
These make great teacher gifts or housewarming presents. Add a small candle or a few wrapped candies inside. Tie a ribbon around it and you’re done.
Pinecone Fire Starters
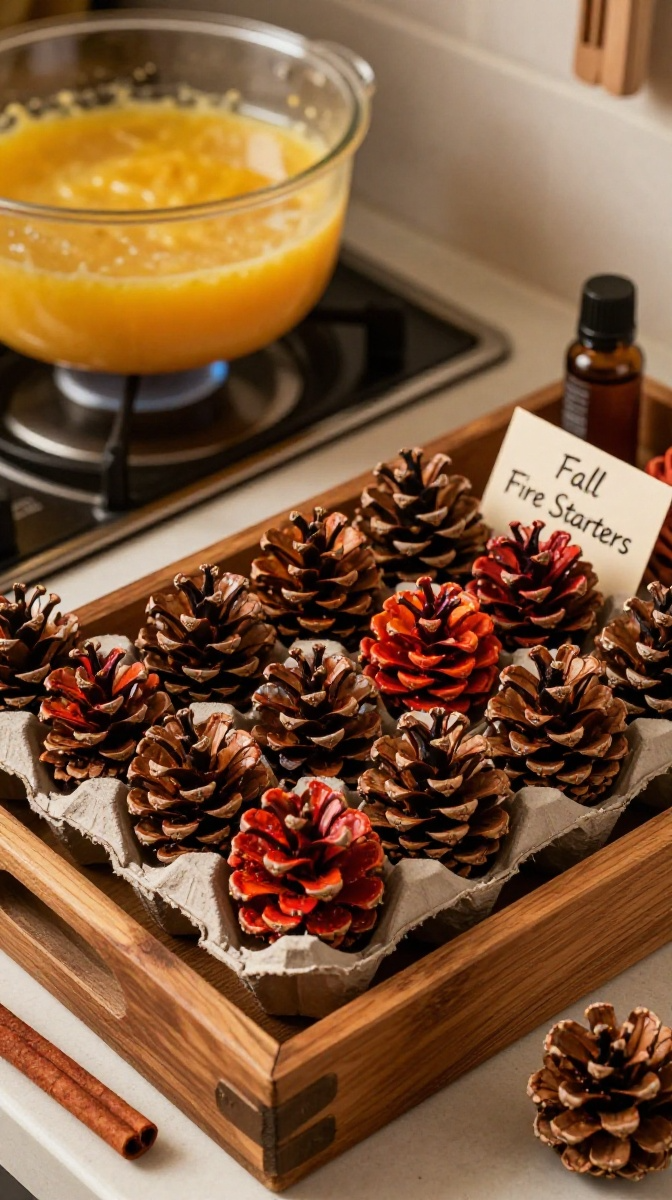
These are practical, cheap, and smell amazing. You can use them in your fireplace, fire pit, or give them as gifts. Plus, they use up old candle stubs, which feels very resourceful.
Materials and Tools
- Pinecones (dry, opened ones)
- Old candle wax or paraffin wax
- Double boiler or a heat-safe bowl over a pot
- Cinnamon or essential oils (optional)
- Muffin tin or cardboard egg carton
- Wax paper
Step-by-Step Instructions
- Melt the wax in a double boiler over medium heat. Never melt wax directly on the stove.
- Add a few drops of cinnamon oil or essential oil if you want a scent.
- Place pinecones in the muffin tin or egg carton.
- Pour melted wax over each pinecone until coated.
- Let them cool and harden completely, about 30 minutes.
- Pop them out and store in a cool, dry place.
Safety Tips
Wax is flammable. Never leave melting wax unattended. Use a dedicated double boiler or a metal bowl you don’t mind sacrificing. Keep kids and pets away from hot wax.
Customization Ideas
Add dried rosemary or lavender to the wax for a fancy touch. Use red and orange wax for fall vibes. You can also wrap finished starters in wax paper and tie with twine for gifts.
Fall-Themed Wreath with Felt Leaves
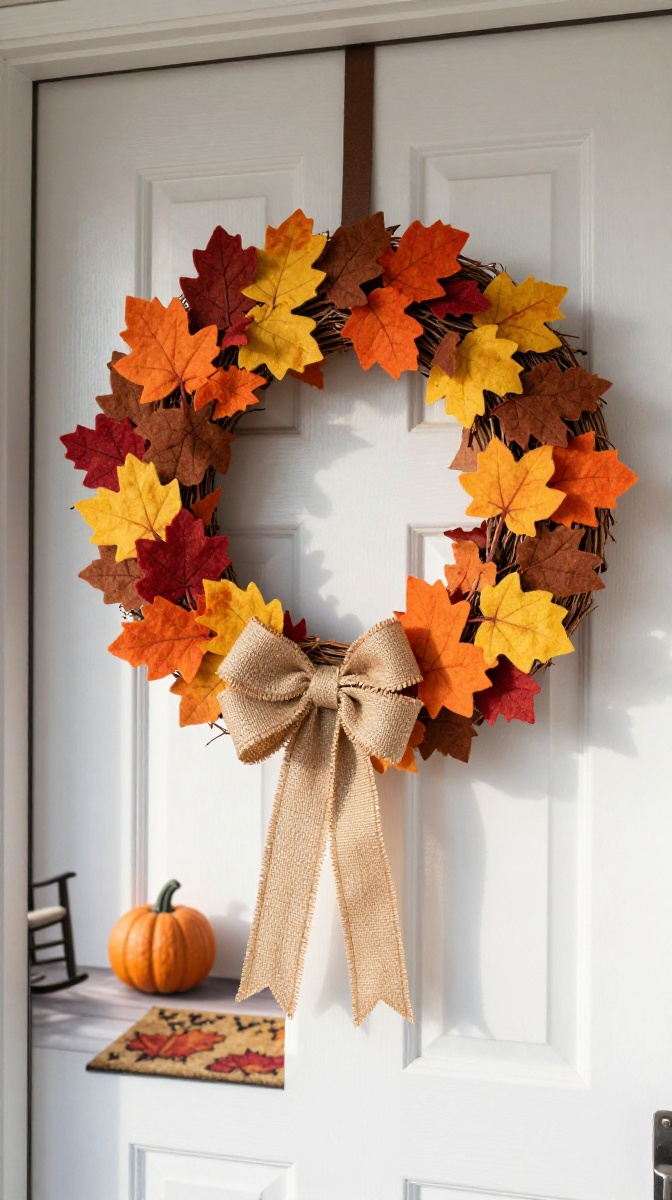
This wreath is soft, colorful, and way easier than it looks. Felt leaves are forgiving, so even wonky shapes look intentional.
Materials and Tools
- Grapevine wreath base (12–18 inches)
- Felt sheets in fall colors
- Leaf template (print one or draw your own)
- Scissors
- Hot glue gun
- Ribbon for a bow
Step-by-Step Instructions
- Trace leaf shapes onto felt and cut them out. Make 30–50 leaves depending on wreath size.
- Arrange leaves on the wreath base before gluing. This helps you balance colors.
- Glue leaves in small clusters, overlapping them slightly.
- Fill in gaps until the wreath looks full.
- Add a ribbon bow at the bottom or top.
- Hang and admire your work.
Display Ideas
Hang it on your front door, above a mantel, or on a gallery wall. You can also add battery-operated fairy lights for extra glow.
FAQ’s
How long do these fall crafts take?
Most take 30–60 minutes, not counting drying time. The wreath and yarn pumpkin are the quickest. Clay dishes need a day or two to dry.
Can I use supplies I already have?
Absolutely. Substitutions are listed in each section. Cardboard, old yarn, and candle stubs are all fair game.
Are these crafts kid-friendly?
Most are, with supervision. The pinecone fire starters and anything with hot glue or wax need adult help. Clay and felt crafts are great for kids.
How do I store these decorations for next year?
Wrap them in tissue paper or bubble wrap and store in a cool, dry place. Keep them away from moisture and direct sunlight.
What if my craft doesn’t look perfect?
Good. Imperfect crafts have character. If something looks off, add more leaves, paint, or ribbon. No one will know but you.
Conclusion
Fall crafting doesn’t need to be complicated or expensive. Grab a few supplies, put on a cozy playlist, and make something that makes you smile. These projects are forgiving, fun, and perfect for beginners. So pick one, dive in, and enjoy the cozy chaos. Your home will thank you.