
Fall decorating doesn’t need to drain your wallet. You can turn a few dollar-store finds and backyard scraps into cozy decorations that look like they came from a fancy boutique. Grab your glue gun and let’s make your place feel like autumn threw up in the best possible way. Seriously, by the end of this, your neighbors will be asking where you bought that stuff.
Gather Your Budget-Friendly Supplies First
Before you start any project, raid your junk drawer and your local dollar store. Most of these crafts use the same handful of cheap items. You probably already own half of them.
- Jute twine or yarn — about $2 a roll, and it lasts forever
- Mod Podge or white school glue — a cheap alternative to fancy craft sealers
- Cinnamon sticks — grab the big bags from discount grocery stores
- Fake pumpkins — dollar store ones work fine, or use real mini pumpkins
- Old mason jars or glass bottles — free if you save them from pasta sauce
- Burlap scraps — ask a fabric store for remnants, usually under $3
- Twine-wrapped floral wire — for wreath bases and hanging loops
- Acrylic paint in fall colors — orange, rust, mustard, brown
- Hot glue gun and sticks — the MVP of every budget craft
- Scissors, paintbrush, and a towel — you know, the basics
Affordable swaps: Use dried orange slices instead of store-bought potpourri. Swap expensive ribbon for torn fabric strips from an old plaid shirt. And IMO, a roll of twine beats any $12 decorative cord.
Make a Cozy Twine-Wrapped Pumpkin
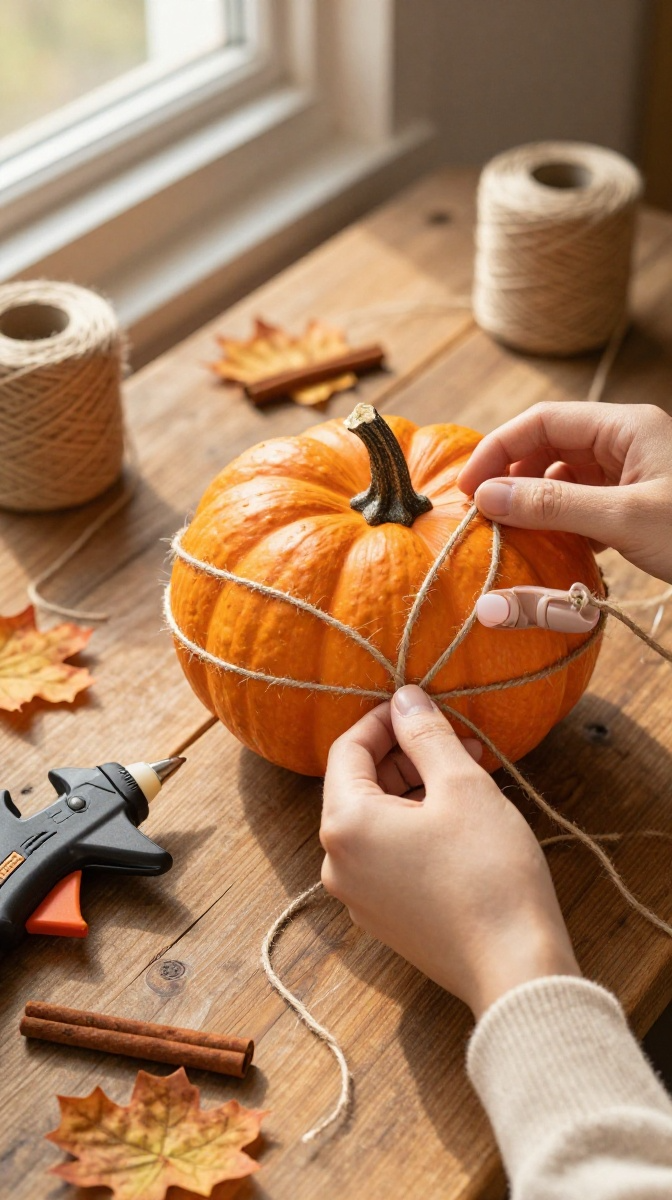
This one takes ten minutes and looks like it costs $25. It’s basically wrapping a pumpkin like a mummy, but make it fashion.
What You Need
- One medium fake pumpkin
- Jute twine
- Hot glue gun
- Small faux leaves or a cinnamon stick for the stem
Step-by-Step
- Put a small dot of hot glue on the top of your pumpkin near the stem.
- Press the end of your twine into the glue and hold for a few seconds.
- Start wrapping the twine around the pumpkin, working downward in circles.
- Add a tiny dot of glue every few wraps so nothing slides around.
- When you reach the bottom, glue the end down and tuck it under a wrap.
- Glue a small faux leaf or a cinnamon stick next to the stem for a rustic touch.
Common mistake: Wrapping too fast and letting the twine bunch up. Slow and steady wins this one. If you get a gap, just push the twine together with your finger before the glue cools.
DIY Fall Mason Jar Candle Holders
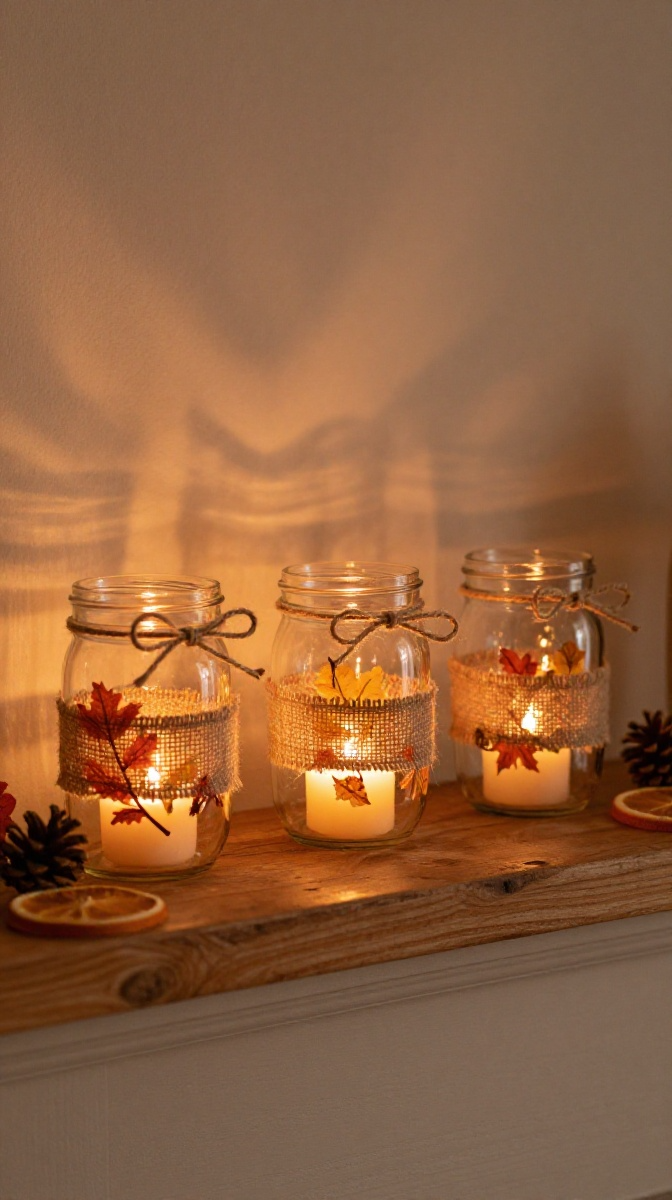
Mason jars are the Swiss Army knife of crafting. For fall, we’re turning them into glowing little lanterns that make any room feel like a cabin.
Material Choices
Use any clear glass jar you have. Pasta sauce jars work great. For the inside, a simple tea light or a battery-powered candle is perfect. Real candles give a warmer glow, but battery ones won’t burn your house down. Your call.
Step-by-Step
- Clean your jar and remove any labels. Rubbing alcohol takes off sticky residue fast.
- Cut a piece of burlap or twine long enough to wrap around the jar once.
- Hot glue the burlap strip around the middle of the jar.
- Wrap twine around the jar’s neck a few times and tie a small bow.
- Paint a few small leaves or dots on the glass with acrylic paint. Let dry.
- Drop in a tea light or battery candle. Light it up and bask in your genius.
Tip: If you use a real candle, add a thin layer of sand or rice at the bottom of the jar. It keeps the candle steady and looks fancy. FYI, rice is cheaper and you probably already have it.
Create a Rustic Cinnamon Stick Wreath
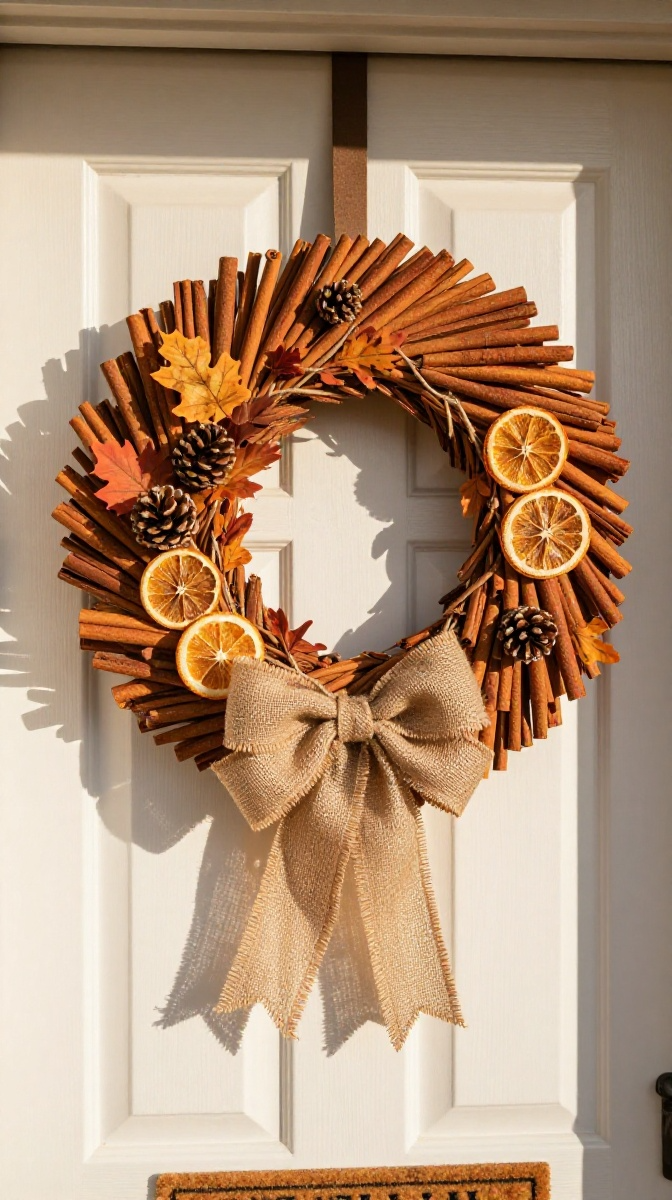
Want your front door to smell like a pumpkin spice latte? This wreath does exactly that. And it’s way easier than it looks.
Building the Base
You can buy a grapevine wreath base for a few bucks, or make your own by bending floral wire into a circle. The wire version is ugly, but you’ll cover it up. No one will know.
Step-by-Step
- Lay your wreath base on a flat surface.
- Hot glue cinnamon sticks in a fan pattern around the top half of the wreath.
- Fill gaps with small faux leaves, pinecones, or dried orange slices.
- Wrap twine around the whole wreath to tie the look together.
- Add a big burlap bow at the bottom or top.
- Hang it up and enjoy the smell every time you walk past.
Troubleshooting: If your cinnamon sticks keep popping off, rough up the surface with sandpaper before gluing. Smooth surfaces and hot glue are not best friends.
Upcycle Old Books into Fall Leaf Garlands
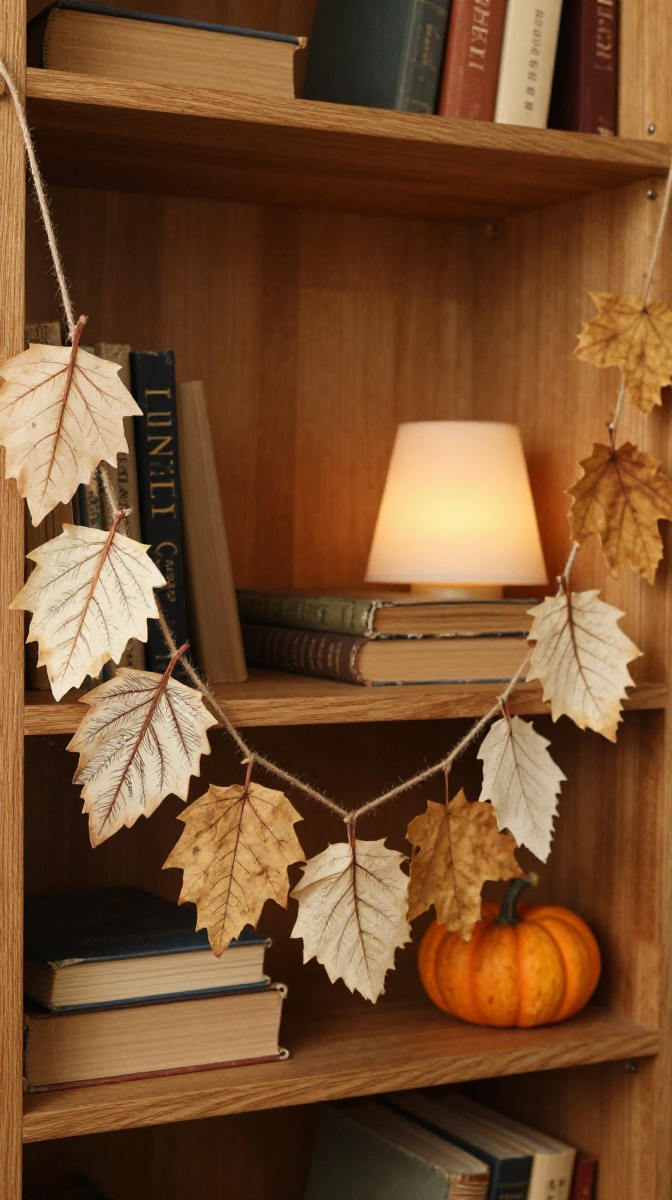
Got an old paperback nobody wants? Turn it into a garland that looks like falling leaves. This is a great project for a rainy afternoon and a podcast.
Design Variations
- Classic leaves: Cut simple oval shapes and fold them in half for a 3D effect
- Book page pumpkins: Cut circles, stack them, and staple the center
- Mixed media: Glue book leaves to real leaves for a layered look
Step-by-Step
- Tear pages out of an old book. Thin pages work better than thick ones.
- Fold a page in half and cut a leaf shape. You’ll get two leaves at once.
- Draw a simple vein pattern with a brown marker or paint.
- Fold each leaf slightly down the middle to give it dimension.
- Punch a small hole near the top of each leaf.
- Thread twine through the holes, spacing leaves a few inches apart.
- Hang across a mantel, doorway, or bookshelf.
Practical tip: Mix in a few real dried leaves for texture. They’ll crumble eventually, but by then you’ll be ready to make a winter garland anyway.
No-Sew Burlap Table Runner for Fall Feasts
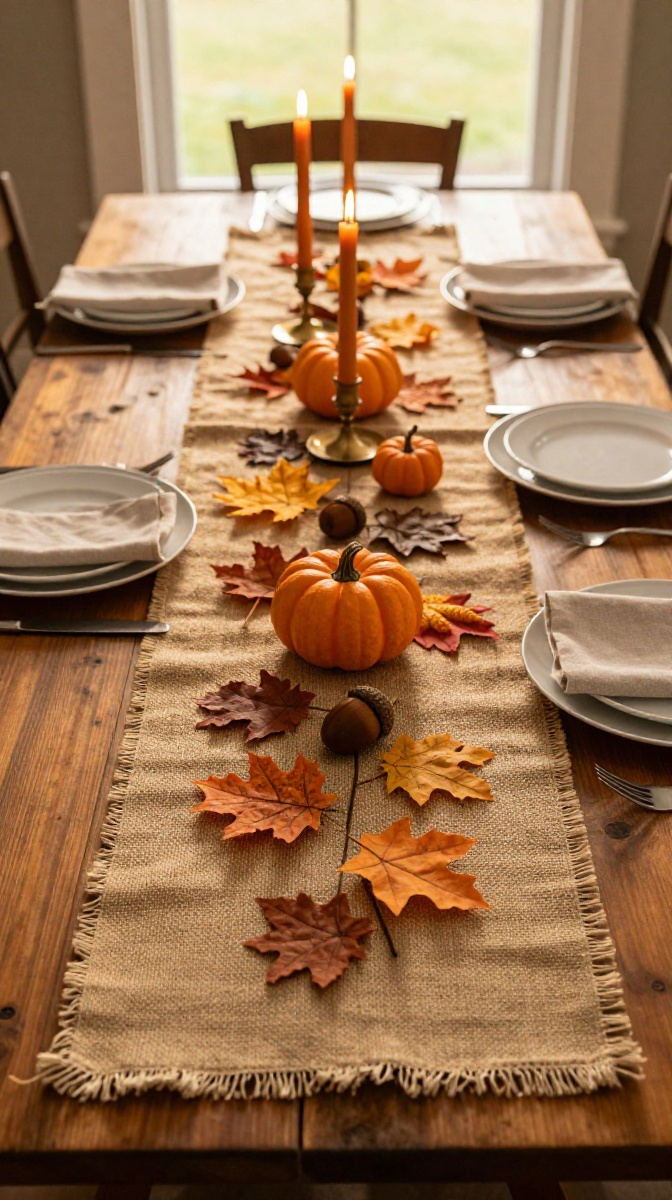
Hosting Thanksgiving? This runner takes 20 minutes and hides all the crumbs from your chaotic dinner. It’s the lazy host’s best friend.
Materials and Tools
- Burlap fabric — 1 yard is plenty for most tables
- Fabric scissors
- Iron-on hem tape
- Faux leaves, acorns, or small pumpkins
- Hot glue gun
Step-by-Step
- Measure your table length and add 12 inches for overhang.
- Cut your burlap to that length. Width should be about 12 to 14 inches.
- Fold the edges under by half an inch and press with an iron.
- Use iron-on hem tape to seal the edges. No sewing required.
- Glue a few faux leaves or acorns along the center of the runner.
- Lay it on your table and add candles or a centerpiece on top.
Common mistake: Cutting burlap without measuring twice. Burlap sheds like crazy, so measure, mark with chalk, then cut. Also, do this outside or over a trash bag unless you want your floor to look like a hay barn.
Display, Gift, and Show Off Your Fall Crafts
Now that you’ve made a pile of cozy decorations, where do they go? Here are some quick ideas.
- Mantel display: Mix twine pumpkins, mason jars, and the leaf garland together
- Front door: Hang the cinnamon wreath and add a welcome mat
- Dining table: Use the burlap runner with a few candles and mini pumpkins
- Gift idea: Put a mason jar candle and a small twine pumpkin in a basket for a neighbor
- Porch steps: Cluster pumpkins and jars on the steps with a few real gourds
Customization ideas: Paint your pumpkins in non-traditional colors like sage green or dusty rose. Add a monogram to the mason jar with a paint pen. Use plaid fabric instead of burlap for a different vibe.
FAQ’s
How long do these fall decorations last?
Fake pumpkins and mason jars last for years if you store them gently. Cinnamon stick wreaths hold up for a season or two. Dried leaves and real pumpkins will only last a few weeks before they get sad and mushy.
Can I use real pumpkins instead of fake ones?
Absolutely. Real mini pumpkins are cheap in October. Just know they’ll rot eventually. For twine-wrapped pumpkins, fake ones are easier because the glue sticks better and you can reuse them next year.
What if I don’t have a hot glue gun?
Use craft glue or a low-temp glue gun. Craft glue takes longer to dry, so you’ll need to hold pieces in place or use tape while it sets. Hot glue is faster, but not everyone has one. No shame in that.
Are these crafts safe for kids?
Most of them are great for kids with supervision. Skip the hot glue for little ones and use school glue instead. The leaf garland and no-sew runner are perfect for family crafting.
How do I stop burlap from shedding everywhere?
Cut it outside or over a trash bag. You can also spray the cut edges with hairspray to reduce shedding. Sounds weird, works great.
Where can I find cheap craft supplies?
Dollar stores, thrift shops, and clearance aisles after Halloween are goldmines. Save your glass jars and old books instead of tossing them. Your future self will thank you.
Go Make Something Cozy Already
You don’t need a big budget to make your home feel like fall. A little twine, a few cinnamon sticks, and some old jars can turn any space into a cozy autumn haven. Pick one project, raid your craft stash, and give it a shot. If it turns out messy, who cares? It’s rustic. That’s the beauty of fall decorating.