
Cold hands, short days, and way too much time indoors. Let’s turn that into something cute. These easy winter DIY crafts use stuff you probably already own, cost almost nothing, and don’t require a craft room full of fancy tools. Grab a mug of something warm and let’s make a mess together.
Why Winter Is the Best Time to Craft
Summer is for running around outside. Winter is for staying in and making things. It’s basic math.
The days are short, the nights are long, and there’s something genuinely nice about creating a little warmth with your own hands. Plus, handmade winter decor and gifts save you real money during the holidays. A store-bought candle costs ten bucks. A candle you made in your kitchen? Priceless, and slightly crooked, which is part of the charm.
Every project below is beginner-friendly. If you can follow a recipe for soup, you can handle these.
Project 1: Hot Cocoa Mason Jar Gift

This one takes about ten minutes and looks like you spent an hour. It’s my go-to gift when I forget someone’s present until the last second. Which happens more than I’d like to admit.
Materials and Tools
- 1 clean mason jar with a lid (any size works; 16 oz is the sweet spot)
- Cocoa powder (about 1/2 cup)
- Powdered milk (1/4 cup)
- Sugar (1/4 cup)
- Pinch of salt
- Mini marshmallows (1/3 cup)
- Chocolate chips or crushed candy canes (optional)
- Ribbon, twine, or a gift tag
No powdered milk? Skip it and tell the recipient to add milk when they mix it up. FYI, it still tastes great.
Step-by-Step Instructions
- Wash and dry your mason jar completely. Any moisture will make the powder clump.
- Mix the cocoa powder, powdered milk, sugar, and salt in a bowl.
- Pour the mixture into the jar. Tap it gently on the counter to settle it flat.
- Add a layer of mini marshmallows on top. Press them down slightly so the lid fits.
- Sprinkle chocolate chips or crushed candy canes over the marshmallows for color.
- Screw on the lid and tie a ribbon or twine around the neck.
- Attach a gift tag with instructions: “Mix 3 tablespoons with hot water or milk.”
Decorating Ideas
Layer the ingredients instead of mixing them for that pretty striped look. Cocoa first, then sugar, then milk powder, then marshmallows. It photographs way better.
You can also glue a small pom-pom or a tiny felt snowman to the lid. Cute, cheap, done.
Common Mistakes to Avoid
Don’t use instant cocoa mix that already contains sugar and milk. You’ll end up with a sickeningly sweet jar. Stick with plain unsweetened cocoa powder.
Also, don’t overfill. Leave about half an inch of space at the top so the lid seals properly.
Project 2: Salt Dough Ornaments

Salt dough is the craft that refuses to die, and for good reason. Three ingredients, endless shapes, and they last for years if you seal them right.
Materials and Tools
- 1 cup all-purpose flour
- 1/2 cup salt
- 1/2 cup warm water
- Rolling pin
- Cookie cutters (stars, trees, snowflakes)
- Straw or skewer for poking holes
- Acrylic paint and brushes
- Clear sealant or Mod Podge
- Ribbon or twine
Step-by-Step Instructions
- Mix the flour and salt in a large bowl.
- Add water a little at a time and stir until a dough forms.
- Knead the dough on a floured surface for about 5 minutes until smooth.
- Roll it out to about 1/4 inch thick. Thinner ornaments crack; thicker ones take forever to dry.
- Cut out shapes with cookie cutters.
- Poke a hole near the top of each ornament with a straw. Don’t skip this. You cannot drill it later without breaking it. Trust me.
- Place ornaments on a baking sheet lined with parchment paper.
- Bake at 200°F (95°C) for 2 to 3 hours, flipping halfway. They’re done when they feel hard and dry.
- Let them cool completely, then paint and decorate.
- Seal with a clear coat and thread ribbon through the holes.
Troubleshooting
Dough too crumbly? Add water one teaspoon at a time.
Dough too sticky? Add flour one tablespoon at a time.
Ornaments puffed up in the oven? Your oven runs hot. Drop the temperature to 180°F and bake longer.
Design Variations
Press a lace doily or a textured stamp into the dough before cutting for a fancy pattern. You can also make handprint ornaments with kids, which grandparents will absolutely lose their minds over.
Project 3: Fleece No-Sew Tie Blanket
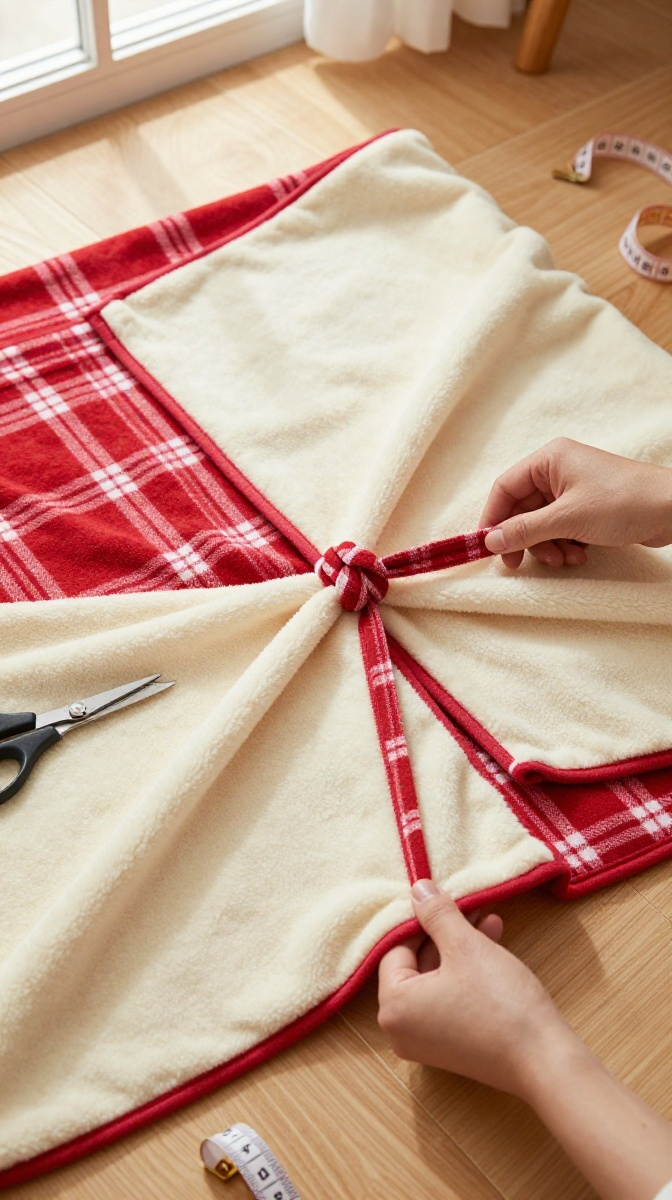
No sewing machine, no problem. This blanket is warm, soft, and takes an afternoon. It’s also the perfect Netflix-and-craft project.
Materials and Tools
- 2 pieces of fleece fabric, 2 yards each (one solid, one patterned)
- Fabric scissors (sharp ones make a huge difference)
- Ruler or measuring tape
- Masking tape (optional, for marking)
Fleece goes on sale constantly. Buy it in the fall and stash it. Your future self will thank you.
Step-by-Step Instructions
- Lay both pieces of fleece on the floor, one on top of the other, edges lined up.
- Trim the edges so they’re even. Don’t stress about perfection here.
- Cut a 4-inch square out of each corner through both layers.
- Cut 4-inch-long strips, about 1 inch wide, along all four sides. Cut through both layers at once.
- Tie the top and bottom strips of each pair together in a double knot.
- Work your way around the entire blanket, tying as you go.
- Fluff it out and admire your handiwork.
Tips for Better Results
Cut your strips a little longer than you think you need. You can always trim them shorter, but you can’t add length back.
Tie knots loosely at first, then tighten. Tight knots stretch the fabric and make the edges curl.
Customization Ideas
Match the fleece to someone’s favorite sports team, a nursery theme, or a holiday color scheme. You can also add a monogram patch in one corner with fabric glue.
Project 4: Winter Candle Centerpiece
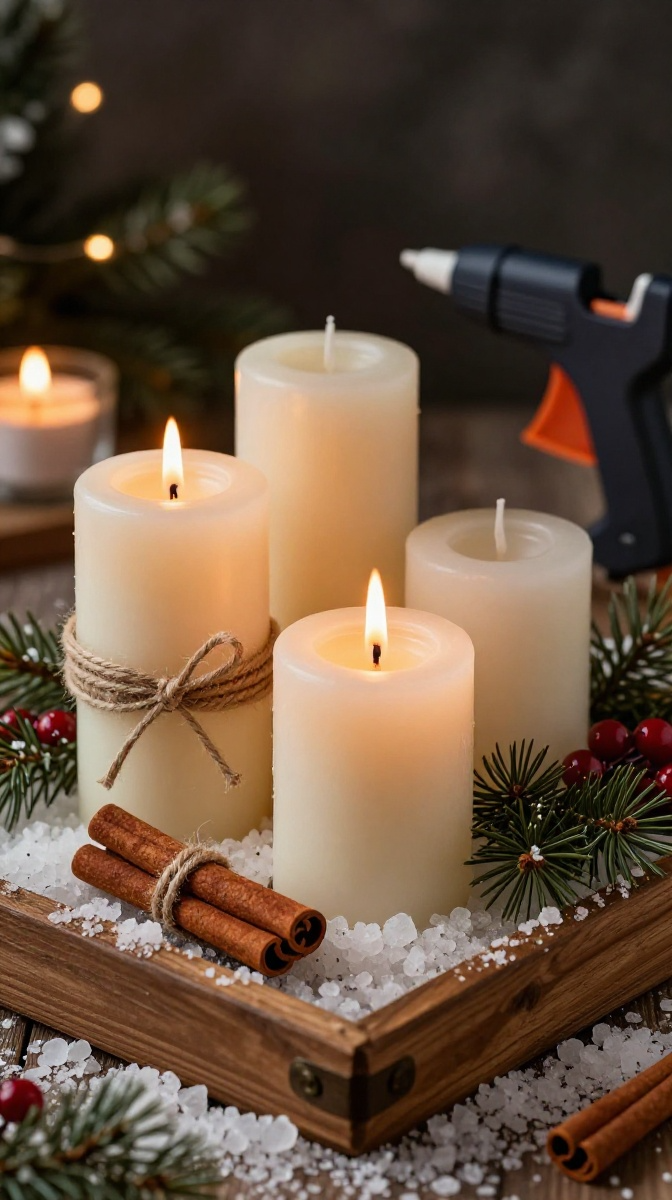
This is the project that makes people think you have your life together. You don’t. You just own a glue gun and some cinnamon sticks.
Materials and Tools
- Pillar candles in varying heights
- Cinnamon sticks (a big bag)
- Twine or jute string
- Hot glue gun and glue sticks
- Faux pine sprigs and berries
- A decorative tray or plate
- Epsom salt (for fake snow)
Step-by-Step Instructions
- Wrap twine around the middle of a candle and tie a knot.
- Glue cinnamon sticks vertically around the candle, covering the twine.
- Hold each stick for a few seconds until the glue sets.
- Repeat with the other candles, using different heights for visual interest.
- Spread Epsom salt on the tray to look like snow.
- Arrange the candles on the tray.
- Tuck faux pine sprigs and berries between the candles.
- Light the candles and enjoy. Never leave them burning unattended.
Safety Tips
Keep cinnamon sticks at least an inch below the flame. Glue and dried wood near an open flame is a bad combination.
If you’re nervous about real candles, use battery-operated LED pillar candles instead. They look surprisingly realistic these days.
Project 5: Paper Snowflake Garland
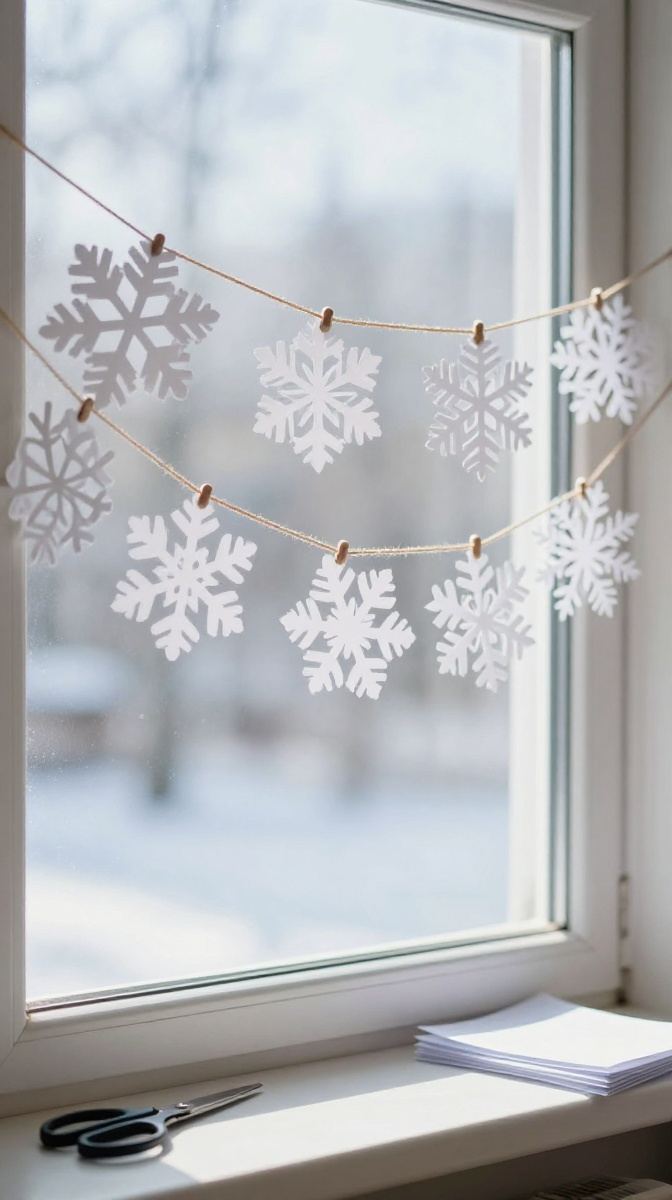
Remember making paper snowflakes in elementary school? Turns out it’s still fun as an adult. And it costs basically nothing.
Materials and Tools
- White printer paper or coffee filters
- Scissors
- Twine or string
- Tape or glue dots
- Iron (optional, for flattening)
Step-by-Step Instructions
- Fold a square piece of paper in half diagonally to make a triangle.
- Fold it in half again, then once more.
- Cut small shapes along the folded edges. Circles, triangles, and slits all work.
- Unfold carefully to reveal your snowflake.
- Press flat with an iron on low heat if it’s curled.
- Repeat until you have 10 to 15 snowflakes.
- Tape or glue each snowflake to a length of twine, spacing them evenly.
- Hang the garland across a window, mantel, or doorway.
Troubleshooting
If your snowflakes keep tearing, your folds are too thick. Use thinner paper or fewer folds.
If they look boring, cut more aggressively. The best snowflakes come from bold cuts.
Display Ideas
Hang the garland in a window so light shines through the cutouts. You can also glue snowflakes to a plain wreath form for an instant winter decoration.
FAQ’s
How long do salt dough ornaments last?
They last for years if you seal them properly. Keep them away from moisture and direct sunlight.
Can I use Mod Podge instead of sealant?
Yes. Mod Podge works great and comes in matte or glossy finishes.
What if I don’t have a glue gun?
Fabric glue or strong craft glue works for most of these projects. It just takes longer to dry.
Are these crafts safe for kids?
Yes, with supervision. Skip the hot glue and candle projects for younger kids, and handle the oven steps yourself.
How do I store these crafts after winter?
Wrap ornaments in tissue paper, fold blankets loosely, and store everything in a cool, dry place.
Final Thoughts: Go Make Something
None of these projects require talent, expensive supplies, or a perfectly organized craft room. They just need a little time and the willingness to try.
So pick one. Grab your supplies. Make a mess. If it turns out crooked, that’s fine. Crooked crafts have character, and nobody ever said winter had to be perfect.
Now go warm up those fingers and start crafting.