
Easy Christmas Crafts for Beginners
Want to make your home feel festive without spending a fortune or losing your mind? These easy Christmas crafts for beginners are here to save the day. You do not need a craft room full of fancy supplies or years of experience. Grab some basic materials, put on a holiday playlist, and let us make something cute together. Fair warning: glitter will find its way into every corner of your home, and that is just part of the deal.
Before You Start: Your Beginner Craft Kit
Let us get one thing straight: you do not need a $200 haul from the craft store to make adorable Christmas decorations. A few cheap basics will carry you through every project in this article. Think of this as your starter pack, not a shopping spree.
Materials and Tools You Will Need
- Hot glue gun and glue sticks — the workhorse of DIY. A low-temp gun is safer if kids are helping.
- Scissors and craft knife — sharp ones. Dull scissors are the enemy of clean cuts.
- Clear-drying craft glue — great for paper and felt when hot glue is overkill.
- Ribbon and twine — buy a mixed pack in red, green, and gold. Cheap and endlessly useful.
- Felt sheets — a few dollars for a stack. No sewing required.
- Cardstock or construction paper — for ornaments and cards.
- Popsicle sticks — yes, really. They are not just for kids.
- Clear plastic ornaments — the fillable kind from any dollar store.
- Fake snow or cotton balls — for that snowy look.
- Paint pens or acrylic markers — easier than brushes for beginners.
Smart Substitutes to Save Money
No hot glue gun? Use strong double-sided tape or craft glue, though it takes longer to dry. No felt? Old sweaters and fleece scraps work great. No fillable ornaments? Clean out a small glass jar or use a paper cone instead. IMO, the dollar store is your best friend here, so do not overthink it.
Quick Safety Tips
Hot glue is called “hot” for a reason, so keep a bowl of cold water nearby for minor burns. Ventilate the room if you are using spray paint or strong adhesives. And if you have pets, keep them away from small beads and ribbon scraps, because cats will absolutely eat things they should not.
Craft 1: Popsicle Stick Snowflake Ornaments
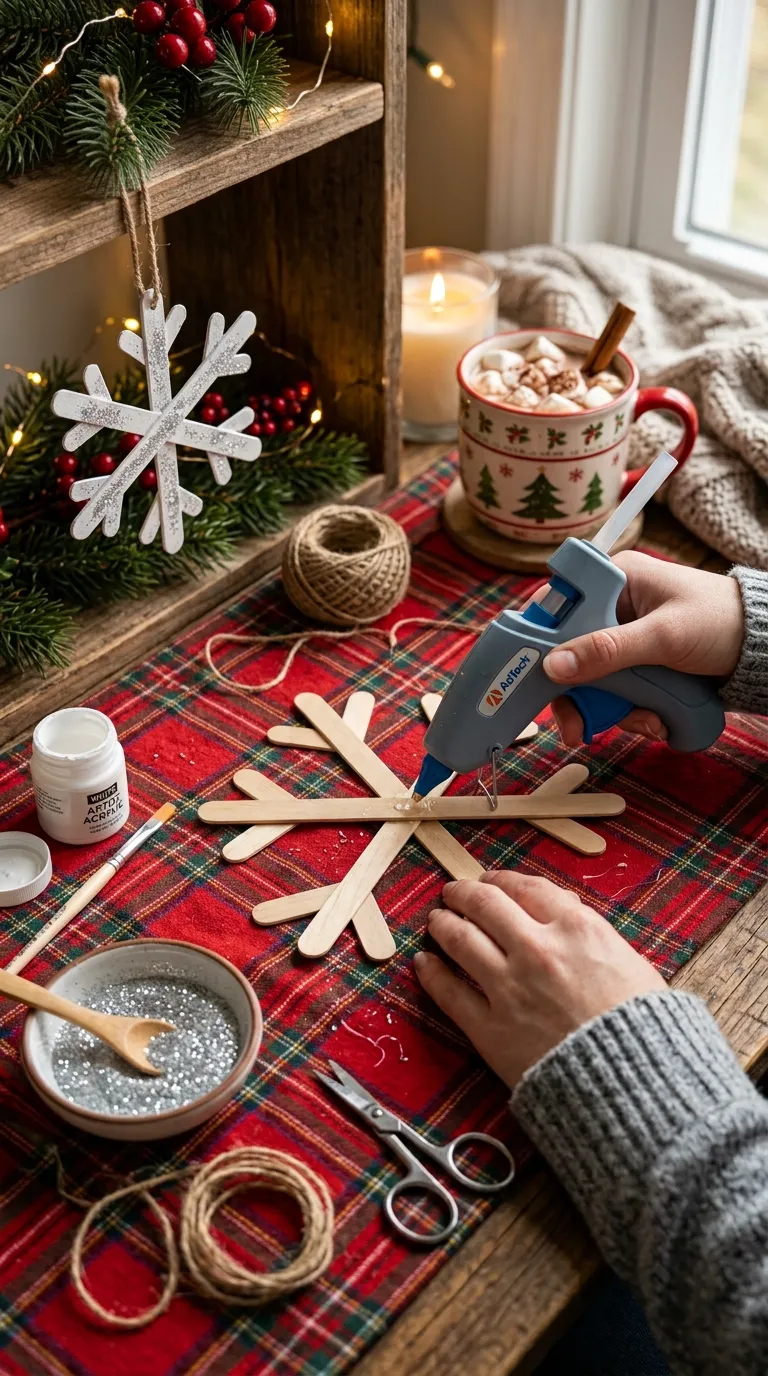
This is the perfect first project because it is nearly impossible to mess up. You are basically gluing sticks together and calling it art. Spoiler: it works every time.
Why This Craft Is Great for Beginners
It costs almost nothing, takes about 15 minutes per ornament, and looks way more impressive than the effort involved. That is the DIY sweet spot.
Step-by-Step Instructions
- Lay four popsicle sticks in a snowflake shape: one vertical, one horizontal, and two diagonal.
- Add a dot of hot glue where the sticks cross in the center, then press them together firmly.
- Let the glue set for a minute so the shape holds.
- Paint the whole snowflake with white acrylic paint or a white paint pen. Two thin coats look better than one thick one.
- While the paint is still slightly tacky, sprinkle on fine glitter. Tap off the excess over a trash can.
- Glue a loop of twine or ribbon to the back for hanging.
- Add a small gem or button in the center if you want extra sparkle.
Common Mistakes to Avoid
Do not use too much glue, or your snowflake will look lumpy. Do not skip the setting time between steps, even if you are impatient. And please, do not use chunky glitter unless you enjoy finding it in your hair for three weeks.
Craft 2: Fillable Ornament with Fake Snow
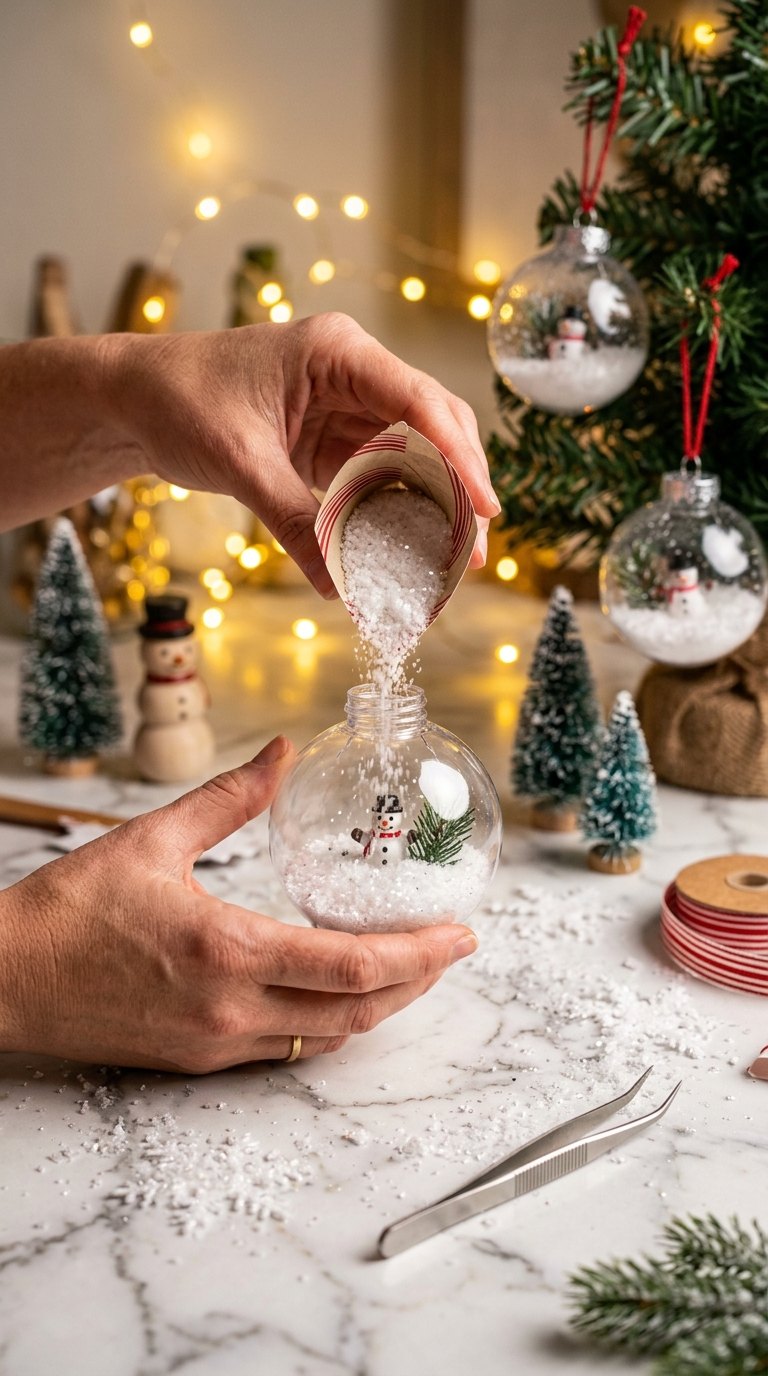
These look like something you would buy at a boutique, but they cost about a dollar each. Plus, you can customize them to match your tree colors. What is not to love?
Materials Checklist
- Clear fillable plastic ornaments
- Fake snow, shredded paper, or tiny beads
- Small miniatures like tiny trees, snowmen, or faux pine sprigs
- Ribbon for a bow on top
- Funnel or rolled paper for pouring
Step-by-Step Instructions
- Remove the metal cap from the ornament and set it aside.
- Pour a small amount of fake snow inside using a funnel or a rolled piece of paper. Fill it about one-quarter full.
- Drop in your miniatures. Use a pencil or tweezers to position them where you want.
- Add a little more snow to nestle the figures, but leave room for them to be visible.
- Replace the cap and tie a ribbon bow around the top loop.
- Shake gently to test the look, then adjust as needed.
Design Variations
Try a beach-themed ornament with tiny shells and sand-colored beads. Or make a hot cocoa theme with mini marshmallow beads and brown paper crinkles. You can also skip the snow and fill one with colorful confetti for a party look.
Craft 3: Felt Christmas Tree Wall Hanging
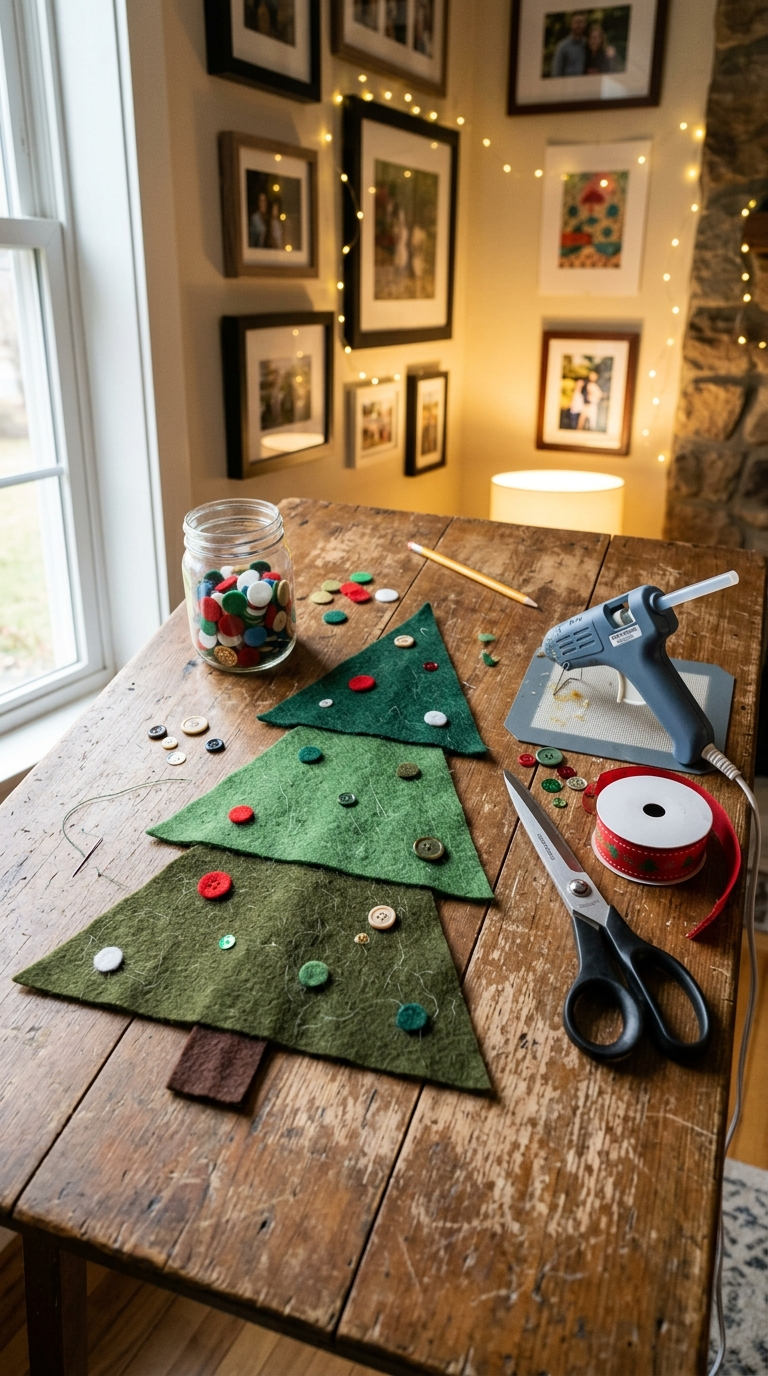
This one takes a bit more time, but it is still beginner-friendly. It is basically cutting triangles and gluing them in a stack. If you can use scissors, you can do this.
Step-by-Step Instructions
- Cut three green felt triangles in graduating sizes: large, medium, and small.
- Cut a small brown felt rectangle for the trunk.
- Glue the trunk to the back of the largest triangle.
- Layer the medium triangle above the large one, overlapping slightly, and glue in place.
- Add the smallest triangle on top the same way.
- Decorate with small felt circles, stars, or buttons as ornaments.
- Glue a loop of ribbon to the back for hanging.
Troubleshooting Tips
If your felt looks fuzzy at the edges, sharpen your scissors or use a rotary cutter. If the glue shows through, use less and press gently. Felt is forgiving, so do not stress about perfection.
Display and Gift Ideas
Hang it on a door, a gallery wall, or above a mantel. You can also size it down and turn it into a gift tag or a stocking stuffer. Tie it to a bottle of wine for a hostess gift that people actually keep.
Craft 4: Christmas Card Display Ribbon
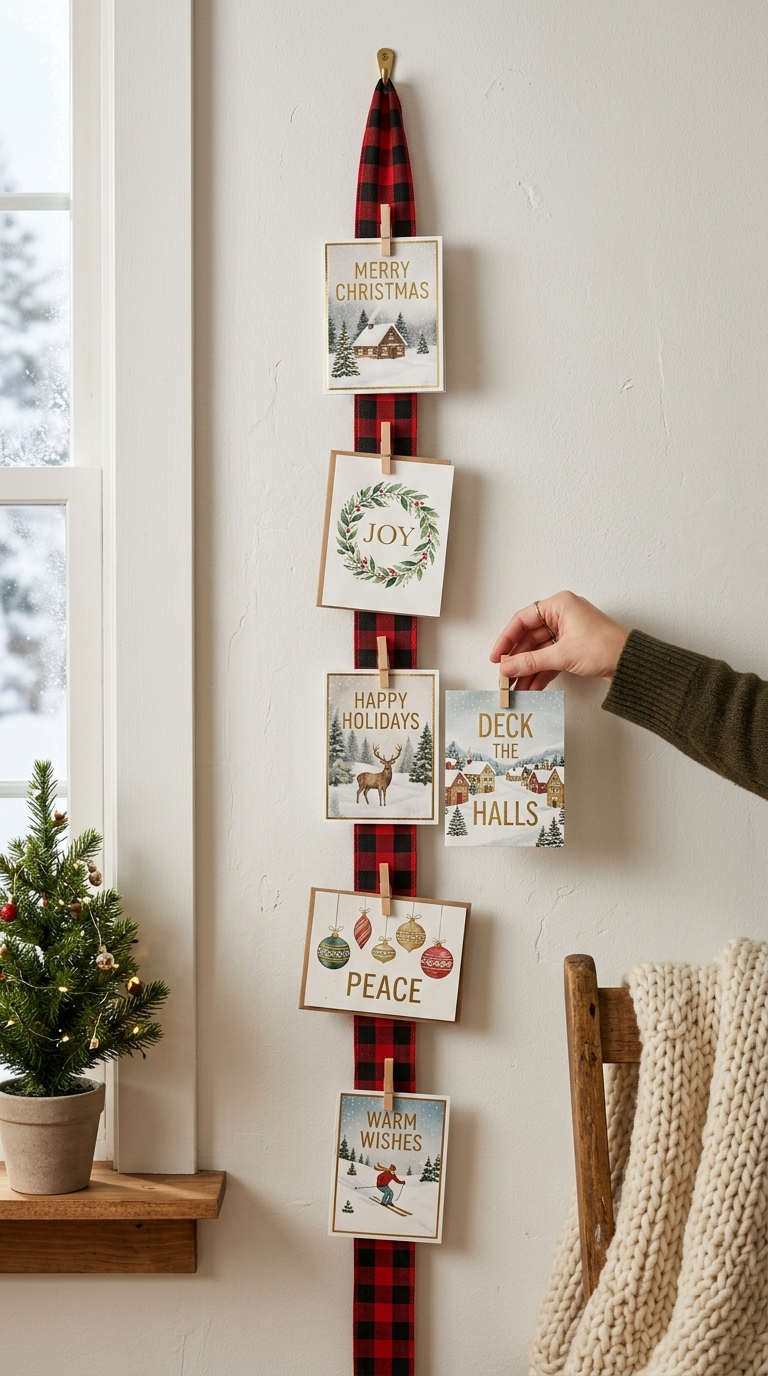
Cards pile up fast during the holidays, and this craft solves the clutter while looking cute. It takes about 10 minutes, and you probably already have everything you need.
Step-by-Step Instructions
- Cut a long piece of wide ribbon, about 3 to 4 feet, depending on your wall space.
- Tie a loop at the top for hanging, or use a thumbtack to secure it.
- Hot glue small clothespins or mini clips along the ribbon at even intervals.
- Hang the ribbon on a wall, door, or cabinet.
- Clip your holiday cards to the pins as they arrive.
Customization Ideas
Use a ribbon that matches your decor, like buffalo check or velvet. Add a small bow at the top for extra charm. You can also paint the clothespins gold or red for a polished look.
Craft 5: Mason Jar Snow Globe
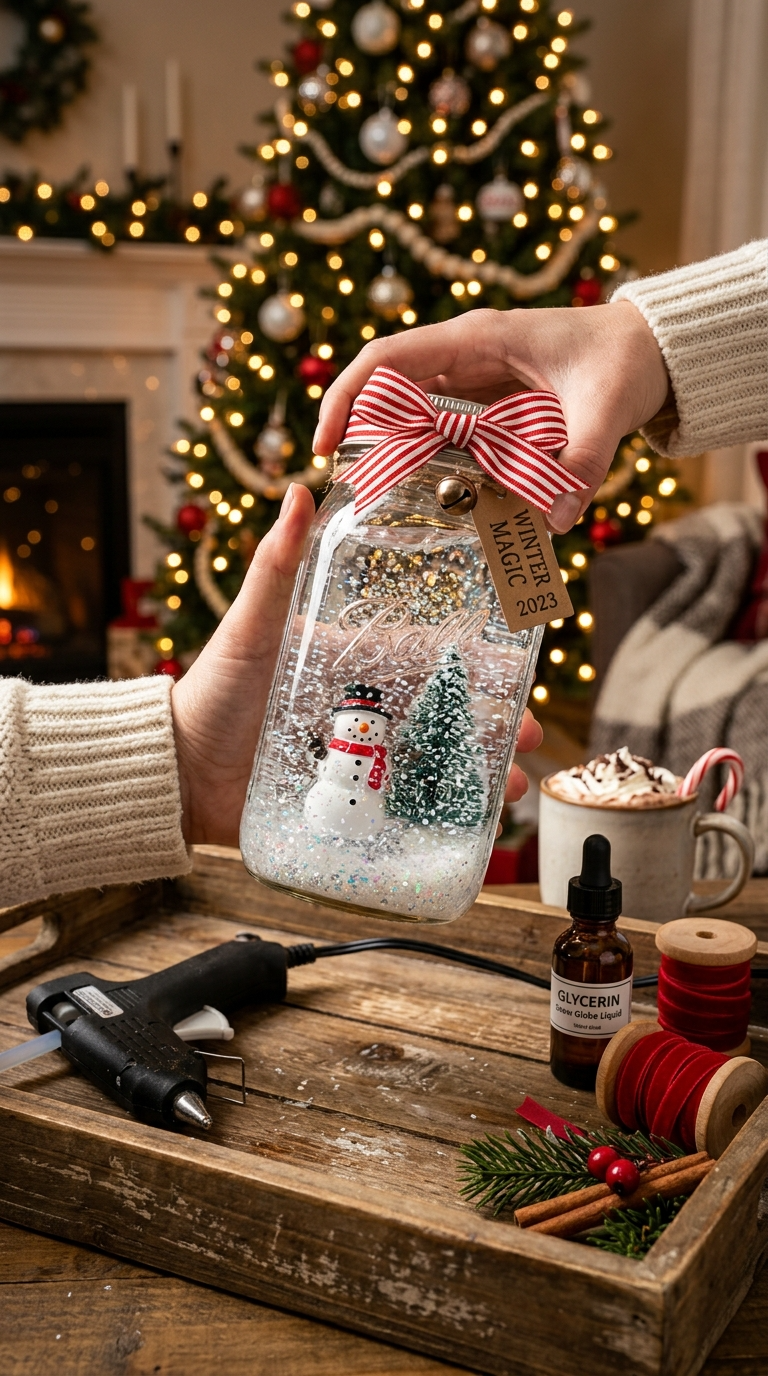
This is the crowd-pleaser. It looks magical, costs very little, and takes maybe 20 minutes. The best part? You can shake it whenever you need a little holiday cheer. Just make sure the lid is on tight, unless you want a glitter explosion on your carpet.
Materials and Tools
- Clean mason jar with lid
- Distilled water
- Clear glue or glycerin
- Fine glitter
- Small waterproof figurines or plastic trees
- Hot glue gun
- Ribbon for decorating the lid
Step-by-Step Instructions
- Glue your figurine to the inside of the lid using hot glue. Let it set completely.
- Fill the jar almost to the top with distilled water.
- Add a squeeze of clear glue or a few drops of glycerin. This helps the glitter fall slowly instead of sinking like a rock.
- Add a pinch of fine glitter. Start small and add more if needed.
- Carefully screw the lid onto the jar, making sure the figurine is submerged.
- Seal the lid with a ring of hot glue around the threads to prevent leaks.
- Tie a ribbon around the lid and shake gently to test.
Common Mistakes to Avoid
Do not use tap water, because it can get cloudy over time. Do not use too much glitter, or it will look like a blizzard instead of a snow globe. And do not skip the glue seal unless you enjoy mopping up water.
Practical Tips for Stress-Free Crafting
Set up a dedicated workspace with all your supplies within reach. Cover the table with newspaper or a cheap plastic tablecloth. Work in batches if you are making multiples, like assembly-line style. And keep a damp cloth nearby for glue mishaps. FYI, a little prep saves a lot of swearing later.
FAQ’s
What if I do not have a hot glue gun?
Use craft glue or double-sided tape for lightweight projects. For heavier items, consider a low-temp glue gun, which costs about $10 and is worth every penny.
How do I keep glitter from getting everywhere?
Work over a paper plate or a shallow box to catch the excess. You can funnel the leftover glitter back into the container. Also, wash your hands with cold water first, since warm water opens your pores and makes glitter stick harder.
Can kids help with these crafts?
Absolutely. Stick to the non-hot-glue steps for younger kids, like painting, cutting felt, or pouring snow. Older kids can handle the glue gun with supervision.
How long do these crafts take?
Most of these projects take 15 to 30 minutes each. The snow globe and felt tree might take a bit longer if you are making several.
Where can I find cheap supplies?
Dollar stores, thrift shops, and post-holiday clearance sales are gold mines. Save ribbon and jars from gifts throughout the year instead of buying new.
Will my snow globe leak?
Only if you skip the hot glue seal around the lid. Do that step, and you should be fine. If it does leak, empty it, dry everything, and reseal with a thicker bead of glue.
Final Thoughts:
You do not need to be a craft wizard to make your home feel merry and bright. These easy Christmas crafts for beginners prove that a few cheap supplies and a free afternoon are all it takes. So grab your glue gun, embrace the mess, and make something you are proud to show off. Worst case? You end up with a lopsided snowflake and a funny story. Best case? You start a new holiday tradition. Either way, you win.