
Got a tiny apartment with zero floor space and a landlord who frowns on nail holes? Same. Small-space decorating is basically Tetris with furniture, but the good news is you do not need a big budget or a workshop to make it look great. Below are five DIY projects that squeeze style into every awkward corner. Grab your glue gun and let’s get weird with it.
Why Small Space Decor Is a Different Beast
In a big house, you can hide clutter in a spare room. In a studio apartment, your clutter sleeps next to you. That is why small-space decor has to work twice as hard: it needs to be pretty, useful, and ideally foldable.
The trick is going vertical. Walls, doors, the sides of cabinets, and even the backs of shelves are prime real estate nobody uses. FYI, most renters forget about the vertical stuff entirely.
Three Rules to Keep in Mind
- Go up, not out. Shelves and hooks beat floor storage every time.
- Pick light colors. Pale walls and light wood make rooms feel bigger.
- Choose double-duty pieces. If it does not store, hold, or hide something, it has to earn its spot.
Project 1: Floating Corner Shelves
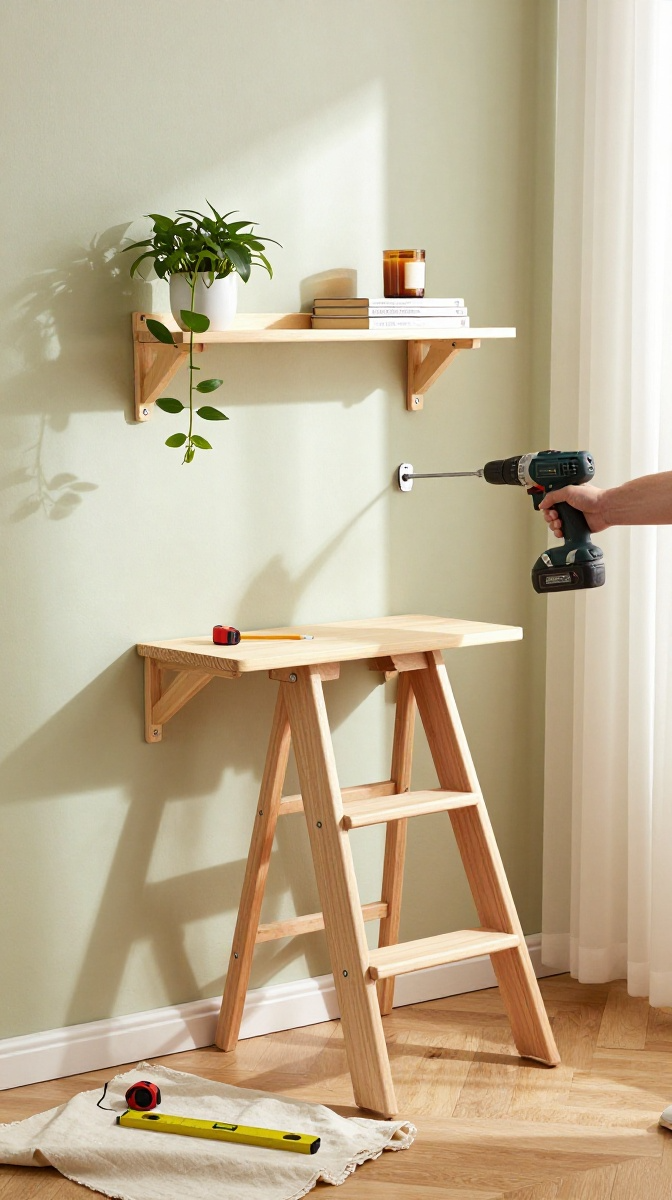
Corners are the most wasted space in any small room. A stack of floating shelves turns that dead zone into display space for plants, books, and that candle you bought and never lit.
Materials and Tools
- Two or three pre-cut wood boards (1×6 pine works great)
- L-brackets or floating shelf hardware
- Sandpaper (medium and fine grit)
- Wood stain or paint in a light shade
- Drill, level, measuring tape, pencil
- Wall anchors if you cannot find a stud
Budget swap: thrift store cutting boards make excellent small shelves. Just sand them down and seal them.
Step-by-Step Instructions
- Measure your corner and cut your boards to fit, leaving a small gap at the back for uneven walls.
- Sand every edge until smooth. Do not skip this, or your shelves will feel rough and cheap.
- Stain or paint the boards and let them dry fully, ideally overnight.
- Mark your heights on both walls with a pencil and check them with a level.
- Drill the brackets into the wall, using anchors if there is no stud.
- Set the boards on the brackets and tighten everything down.
- Style them with small plants, stacked books, and one or two tall items for balance.
Common Mistakes to Avoid
Do not overload the shelves. Small shelves look best with a few curated items, not a hoard. Also, never trust a corner to be square, because it seldom is.
Project 2: Over-the-Door Jewelry and Accessory Organizer
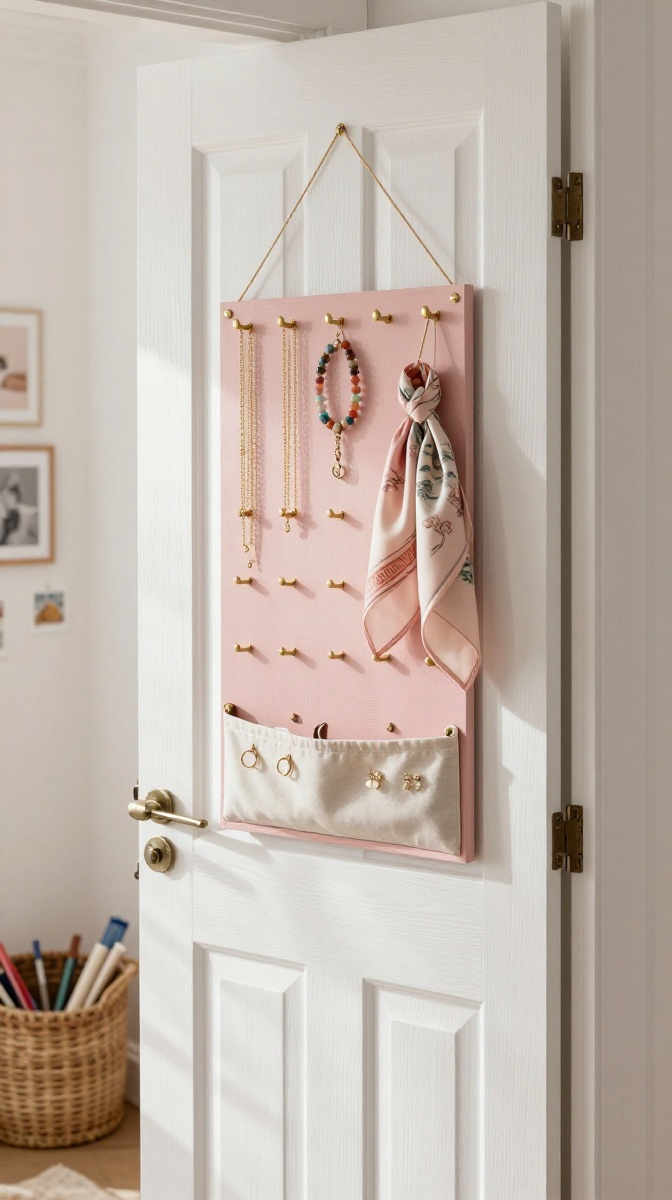
Doors are giant blank canvases that most people ignore. This organizer hangs over the top of any door and keeps your necklaces, scarves, and keys from becoming a tangled pile on your dresser.
Materials and Tools
- One flat wooden board or a sturdy canvas panel
- Small cup hooks or push pins
- Ribbon or twine
- Acrylic paint in your favorite color
- Hot glue gun, ruler, pencil
- Over-the-door hooks (or a wreath hanger)
Step-by-Step Instructions
- Paint your board and let it dry completely.
- Lay out your hooks in a grid pattern, spacing them about two inches apart.
- Mark each spot with a pencil, then screw in the hooks or press in the pins.
- Glue a loop of ribbon to the back top edge for hanging.
- Hang it over the door and load it up with jewelry, lanyards, and hair ties.
Customization Ideas
Add a small pocket made from fabric scraps to hold rings and earrings. Or paint the board with chalkboard paint and label each row so your roommate stops stealing your stuff.
Project 3: Fold-Down Wall Desk
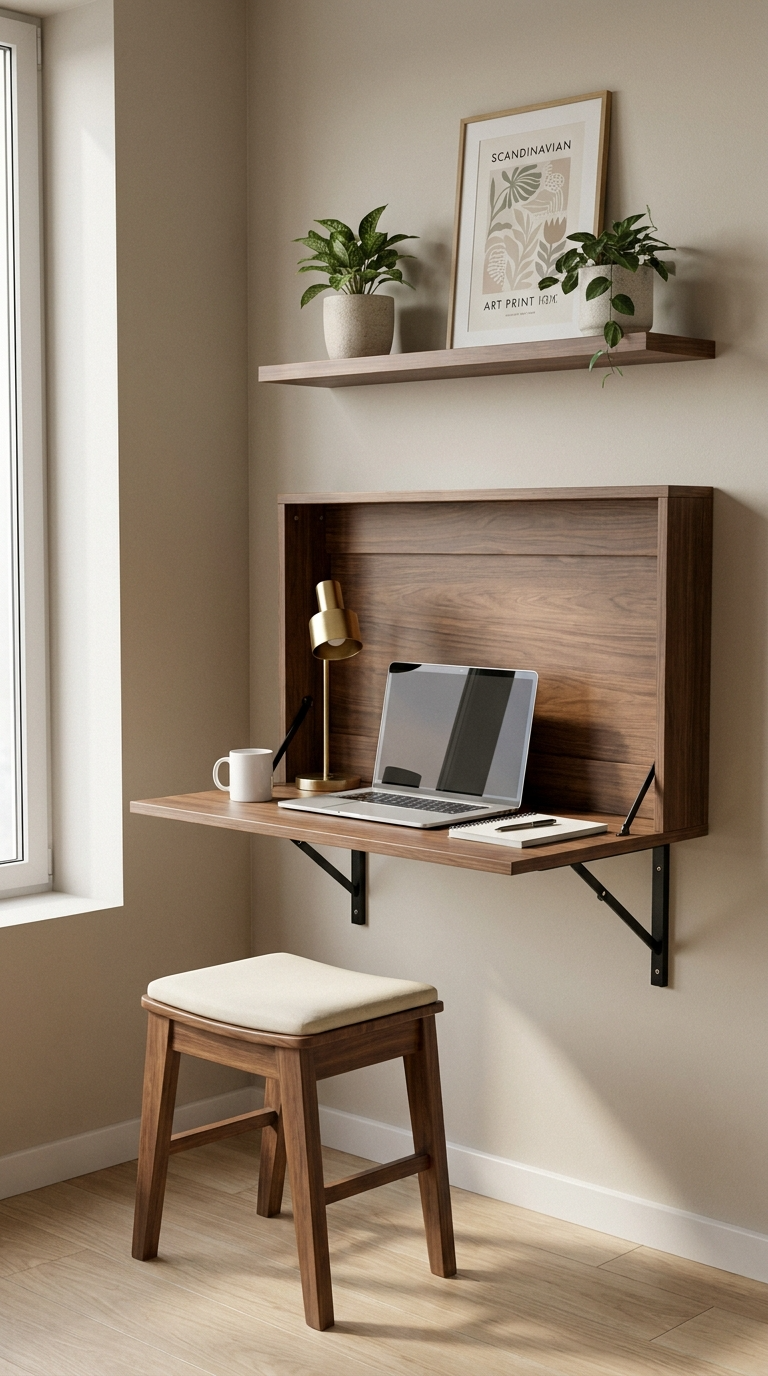
Need a workspace but do not have a spare room? A fold-down desk gives you a full table when you need it and disappears when you do not. It is the mullet of furniture: business when down, party when up.
Materials and Tools
- One wood board, about 24 by 36 inches
- Two hinges with screws
- Two folding shelf brackets or chains
- Sandpaper, paint or stain, wood sealer
- Drill, level, stud finder
Affordable substitute: a sturdy IKEA shelf and a pair of heavy-duty hinges will do the job for under twenty bucks.
Step-by-Step Instructions
- Sand and finish your board until it looks like something you would actually sit at.
- Find the studs in your wall and mark where the desk will attach.
- Mount the folding brackets to the wall first, checking level twice.
- Attach the board to the brackets with screws.
- Test the fold-down motion a few times before you trust it with your laptop.
Safety Tips
Always anchor into studs. A desk that falls mid-email is a bad day. If you rent, use heavy-duty removable adhesive strips made for shelving, but keep the weight under ten pounds.
Project 4: DIY Macrame Plant Hanger
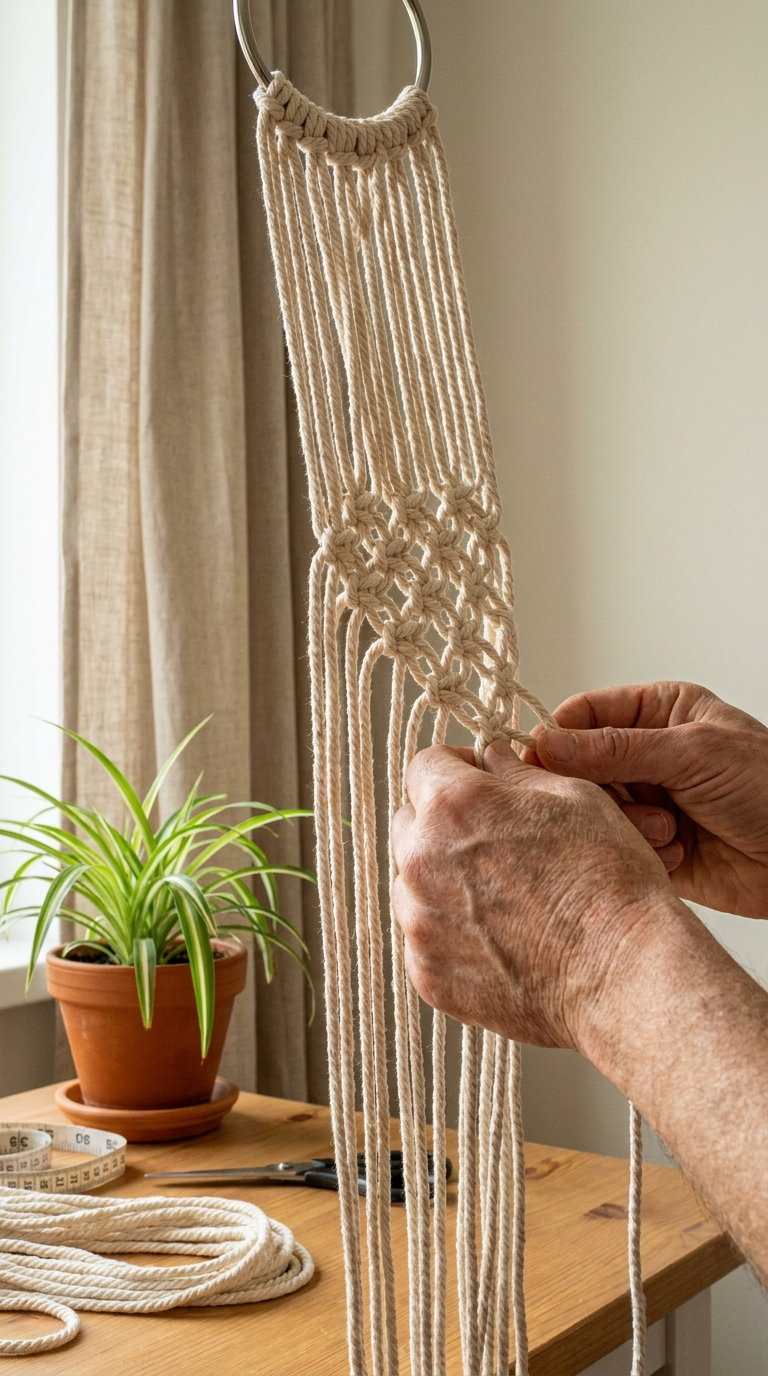
Plants make small rooms feel alive, but floor pots eat up precious square footage. A macrame hanger lifts your greenery into the air and looks way more expensive than it is.
Materials and Tools
- Cotton macrame cord, about 30 feet
- A metal ring or wooden hoop
- Scissors
- A small pot with a saucer
Step-by-Step Instructions
- Cut four strands of cord, each about seven feet long.
- Fold them in half and loop them through the ring with a simple lark’s head knot.
- Separate the strands into four pairs and tie a square knot about three inches down.
- Repeat the square knots in a staggered pattern to create a net shape.
- Slide your pot into the net and adjust the knots until it sits level.
- Hang it from a ceiling hook or a curtain rod bracket.
Troubleshooting
If your hanger tilts, one side is tighter than the other. Undo the last knot and even things out. If the cord feels slippery, mist it lightly with water and let it dry to set the shape.
Project 5: Magnetic Spice Rack on the Fridge
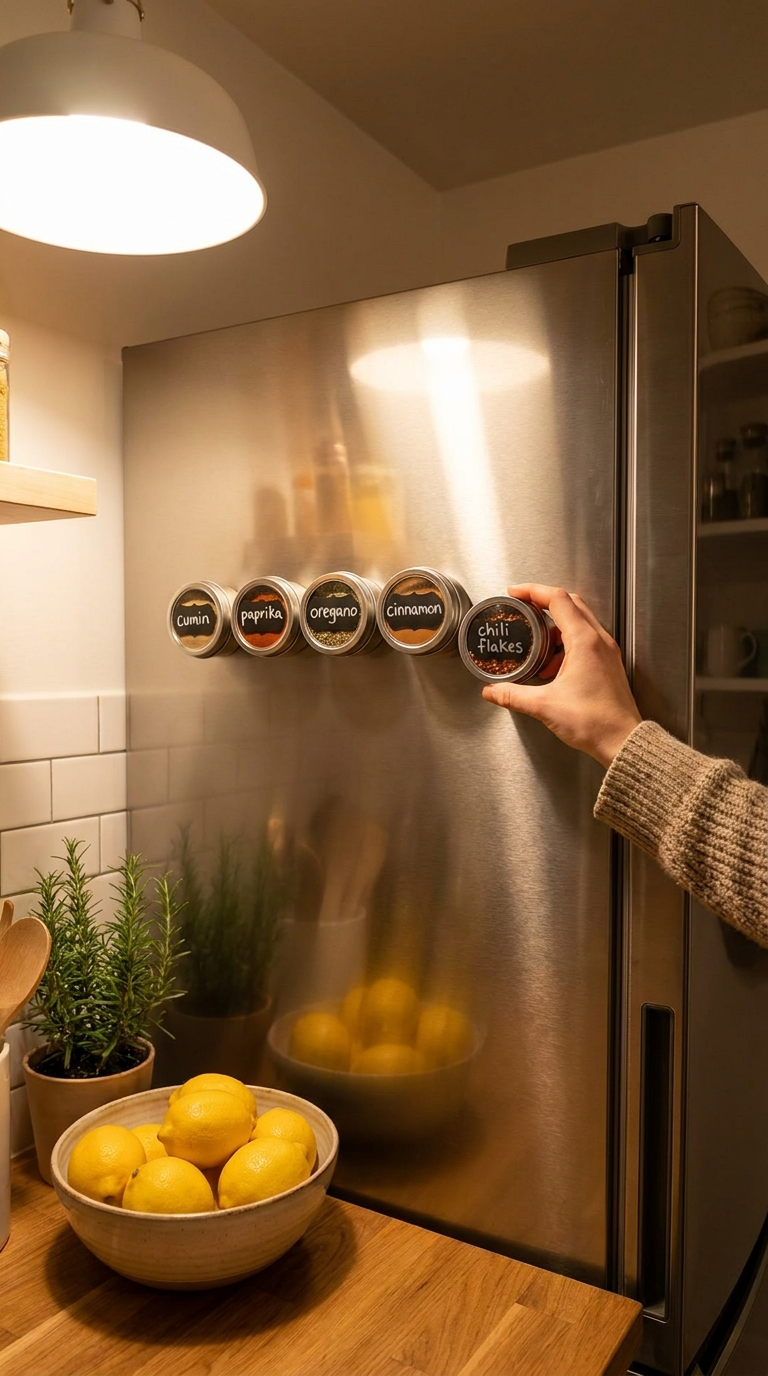
Kitchen counters in small apartments are basically decorative. Free up that space by moving your spices to the side of the fridge with a magnetic rack.
Materials and Tools
- A magnetic knife strip or magnetic spice tin set
- Small metal tins with clear lids
- Labels or a chalk marker
- Rubbing alcohol and a cloth
Step-by-Step Instructions
- Wipe the side of your fridge with rubbing alcohol to remove grease.
- Stick the magnetic strip to the fridge and press firmly for thirty seconds.
- Fill your tins with spices and label each lid.
- Snap the tins onto the strip in the order you actually cook with them.
Decorating idea: group spices by cuisine, like taco night, pasta night, and “I give up, let’s order in” night. It looks intentional and helps you grab the right thing fast.
Practical Tips for Any Small-Space Craft
Measure twice, drill once. This is the oldest rule in DIY and the one everyone ignores until they have an extra hole in the wall. Also, keep your projects light in color and weight, since dark, bulky pieces shrink a room fast.
If you rent, stock up on removable hooks, Command strips, and tension rods. They are the holy trinity of damage-free decorating, IMO.
FAQ’s
What if I live in a rental and cannot drill into walls?
Use over-the-door hooks, tension rods, and heavy-duty adhesive strips. They hold surprising amounts of weight and come off clean if you follow the directions.
How do I make a small room look bigger without painting?
Hang a large mirror opposite a window, use light-colored bedding and curtains, and keep clutter off the floor. Vertical storage helps too.
What is the cheapest DIY decor for small spaces?
Floating shelves made from thrifted wood and a macrame plant hanger cost almost nothing. Both use inexpensive materials and make a big visual impact.
How much weight can a fold-down desk hold?
If you anchor into studs with proper brackets, up to fifty pounds. With adhesive strips, keep it under ten pounds for safety.
Do magnetic spice racks damage the fridge?
No, as long as you clean the surface first and avoid sliding them around. They leave no residue when removed.
Can I do these projects without power tools?
Yes. Ask your hardware store to cut wood for you, use a hand screwdriver, and choose adhesive mounting options. It takes longer but works fine.
Go Make Something Already
Small spaces do not have to feel cramped or boring. Pick one project, raid your junk drawer, and give it a shot. Worst case, you learn something and get a funny story out of it. Best case, your tiny apartment suddenly looks like it belongs in a magazine. Now go hang a shelf or something.