
Want to make something cute for your home without spending a fortune? These easy handmade rope coasters take about 20 minutes each and cost next to nothing. Grab some rope, a glue gun, and let’s make your coffee table look like it belongs on Pinterest. No fancy tools, no meltdowns (probably).
Why Rope Coasters Are the Perfect Beginner Project
Rope coasters check every box for a stress-free craft. They are cheap, fast, and almost impossible to mess up beyond repair. If your spiral looks a little wonky, congratulations, you made it rustic.
They also double as great gifts. Stack a set of four, tie them with twine, and suddenly you are the thoughtful friend who makes things. Nobody needs to know it took you one Netflix episode.
What You Will Love About This Project
- Budget-friendly: One bundle of rope makes several coasters.
- No sewing: Just glue and go.
- Customizable: Paint, dye, or leave them natural.
- Fast results: Instant gratification, zero waiting.
Materials and Tools You Will Need
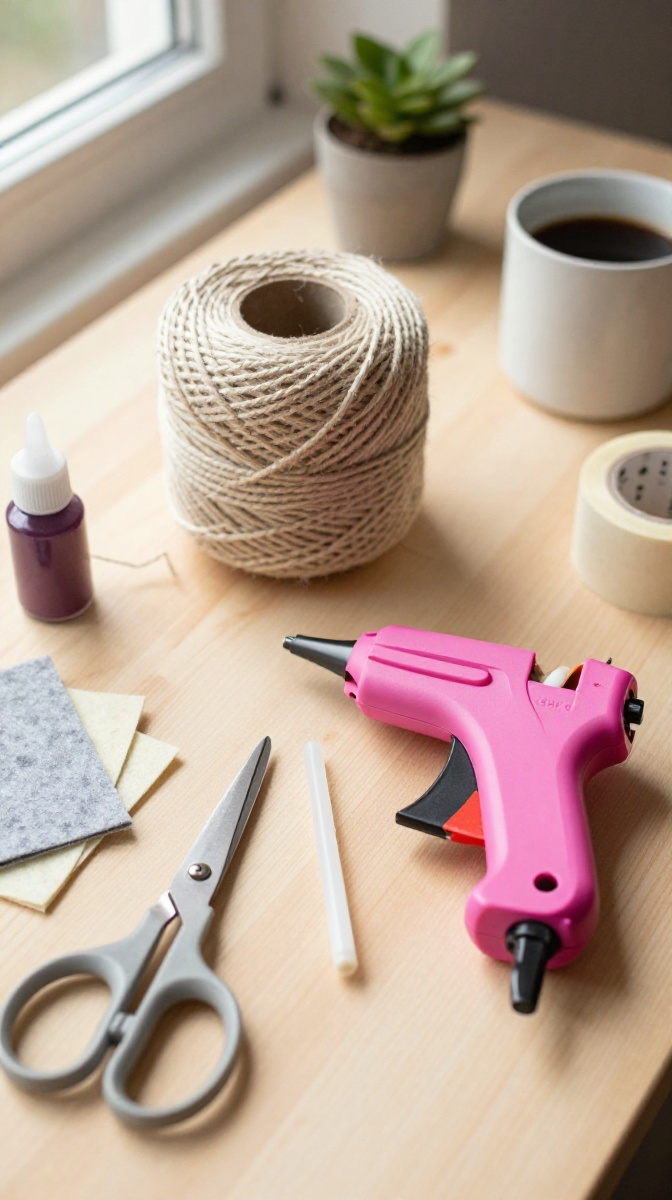
You probably already own half of this list. If not, a quick trip to the dollar store or craft aisle will sort you out.
- Cotton rope (6–8 mm thickness works best) — sisal or jute rope is a cheap substitute, but it is scratchier
- Hot glue gun with plenty of glue sticks
- Sharp scissors or heavy-duty shears
- Felt sheets or cork backing (optional, for non-slip bottoms)
- Acrylic paint or fabric dye (optional, for color)
- Painter’s tape (helps keep the spiral tight)
- Ruler or measuring tape
Pro tip: Skip the fancy craft rope if you are on a budget. Hardware store rope works just fine and costs way less.
Step-by-Step: How to Make Rope Coasters
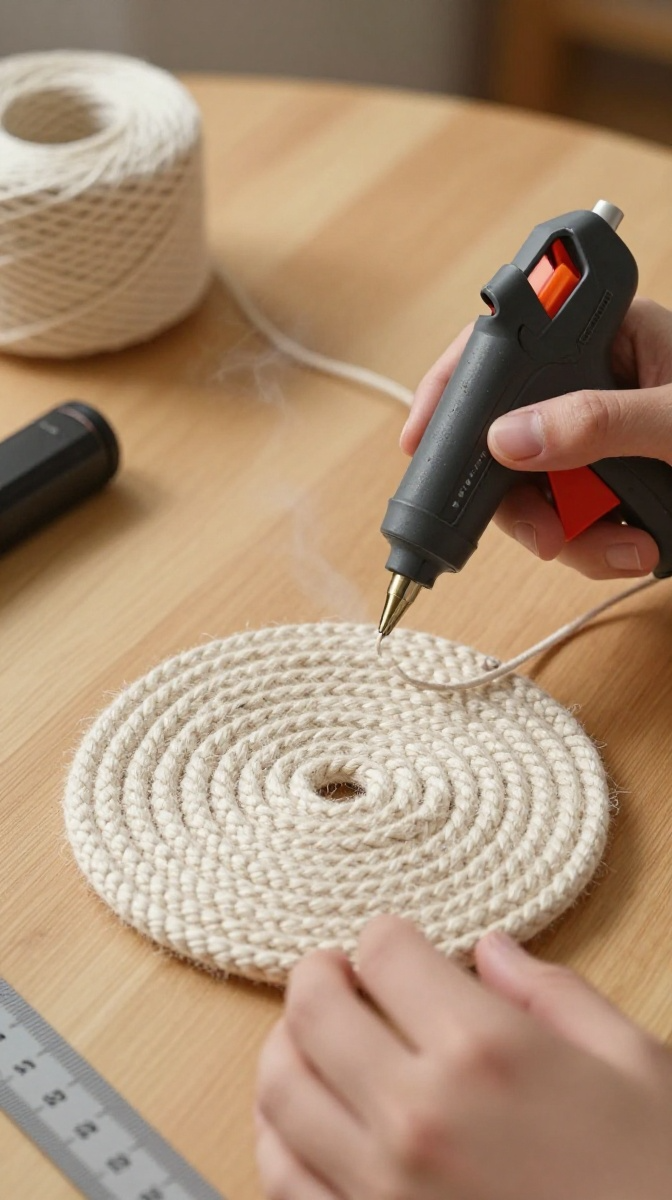
Ready? Here is the whole process from start to finish. Read it once before you start so you are not juggling a glue gun and your phone at the same time.
- Cut your rope. Snip a piece about 40–45 inches long for a standard 4-inch coaster. You can always trim extra later.
- Seal the end. Add a small dot of hot glue to the cut end so it does not fray while you work.
- Start the spiral. Coil the rope tightly into a small circle, gluing as you go. Hold each loop for a few seconds so the glue sets.
- Keep coiling outward. Continue wrapping the rope around the center, adding glue between each layer. Press down firmly as you go.
- Check your size. Once you hit about 4 inches across, stop and trim the rope, leaving a tiny tail.
- Glue the tail down. Tuck the end under the last loop and secure it with a generous blob of glue. Hold until set.
- Add a backing (optional). Cut a felt circle slightly smaller than your coaster and glue it to the bottom. This stops scratches and sliding.
- Press and cool. Flip the coaster over and press it flat under a book for a few minutes. This keeps it from warping.
That is it. You just made a coaster. Feel free to do a little victory dance.
Common Mistakes to Avoid
- Using too little glue: Weak spots mean your coaster unravels later. Be generous.
- Coiling too loosely: Gaps look messy and let crumbs sneak in.
- Rushing the press: Give the glue time to cool, or your spiral will shift.
- Forgetting the backing: Rope alone can scratch wood tables. Felt is your friend.
Fun Ways to Customize Your Coasters
Plain rope is lovely, but why stop there? Here are a few easy ways to
make them your own.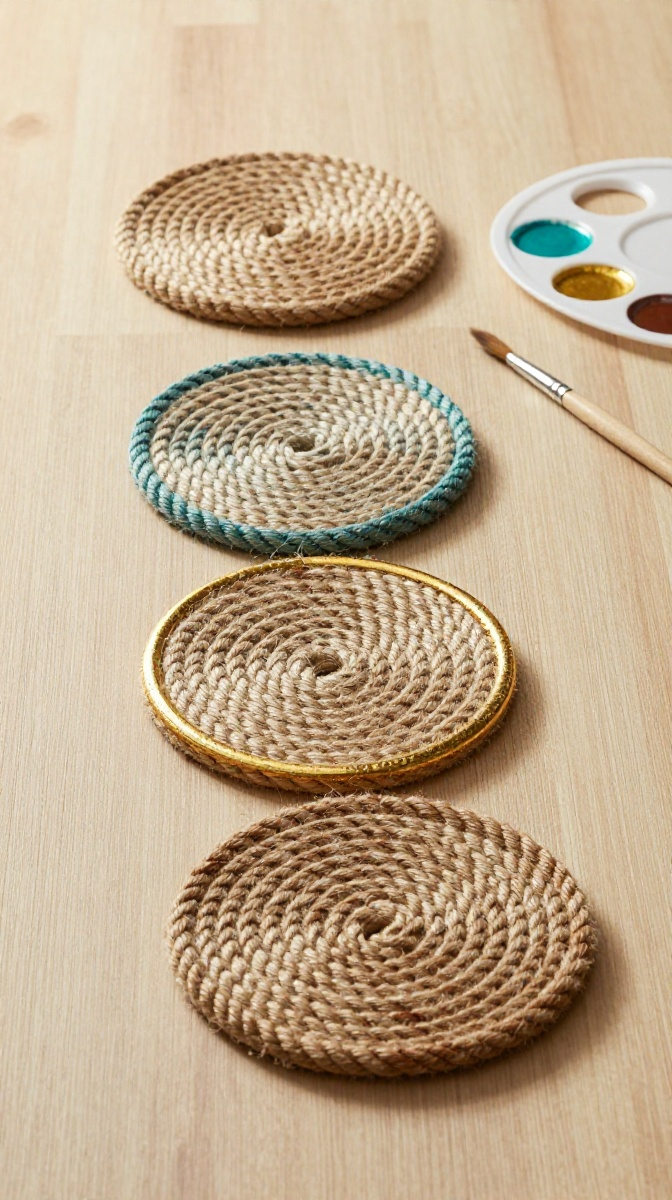
Color and Paint Ideas
- Dip-dye: Paint just the outer edge in a bright color for a modern look.
- Ombre: Use a sponge to blend two shades across the spiral.
- Metallic accents: A swipe of gold or copper paint on the rim looks fancy.
- Natural dye: Coffee or tea gives rope a warm, vintage tone.
Shape Variations
Who says coasters must be round? Try an oval for a sleek look, or a square if you are feeling bold. You can also make a giant version as a trivet for hot pans.
Tips for Displaying and Gifting

Your coasters deserve a moment in the spotlight. Stack them on a small tray, tie them with ribbon, or nestle them in a basket on the coffee table. Instant cozy vibes.
For gifts, pair a set of four with a nice mug or a bag of good coffee. Housewarming, birthdays, or “just because” — these always land well. IMO, handmade gifts beat store-bought almost every time.
Care and Cleaning
- Wipe with a damp cloth for quick cleanups.
- Spot clean stains with mild soap and warm water.
- Avoid soaking them, since wet rope takes forever to dry.
- Air dry completely before using again.
FAQ’s
What kind of rope works best for coasters?
Cotton rope is the easiest to work with and takes paint well. Jute and sisal are cheaper but rougher and shed more. For a soft, polished look, go cotton.
How long does one coaster take to make?
About 15–20 minutes once you get the hang of it. The first one might take longer while you figure out the gluing rhythm.
Can I make these without a glue gun?
You can try fabric glue or tacky glue, but it takes much longer to set. A glue gun is honestly the easiest route and they are pretty cheap.
Will hot glue hold up against cold drinks?
Yes, for normal use. Just avoid putting them in the dishwasher or soaking them in water. A felt backing also helps protect the glue from moisture.
How many coasters can I make from one rope bundle?
It depends on the rope length and thickness. A 50-foot bundle of 6 mm rope usually makes around 8–10 coasters. Not bad for one purchase.
Can I paint the rope before coiling it?
You can, but it is messy, and the paint cracks when you bend the rope. Painting after coiling gives a cleaner result.
Go Make Some Coasters Already
You have the steps, the tips, and zero excuses left. Grab that rope and fire up the glue gun. These easy handmade rope coasters are the perfect starter project, and your coffee table will thank you. Make a set, gift a set, and maybe keep a few for yourself. Happy crafting!