
Fall is the perfect excuse to make your home feel warmer, cozier, and a little more charming. This DIY project turns simple, affordable supplies into a beautiful rustic fall centerpiece you can use on a dining table, coffee table, shelf, or entryway. You do not need fancy crafting skills either—just a few materials, some creativity, and a willingness to get a little glue on your fingers.
Why This DIY Fall Decor Project Works
There is something satisfying about bringing fall colors indoors without spending a fortune on seasonal decorations. Instead of buying another expensive centerpiece that will sit in storage for eleven months, you can create one that matches your home and personal style. The idea is simple: create a rustic fall centerpiece using a small wooden tray, faux leaves, mini pumpkins, pinecones, candles, and a few decorative accents. The finished arrangement looks polished, but the process is surprisingly beginner-friendly.
Choose a Fall Color Palette
Traditional fall colors work beautifully here. Think burnt orange, warm beige, cream, muted brown, dusty green, and deep red. If bright orange is not your thing, no problem. A neutral palette of cream pumpkins, eucalyptus leaves, wood tones, and soft beige can create a much more modern look.
Materials and Tools You Will Need
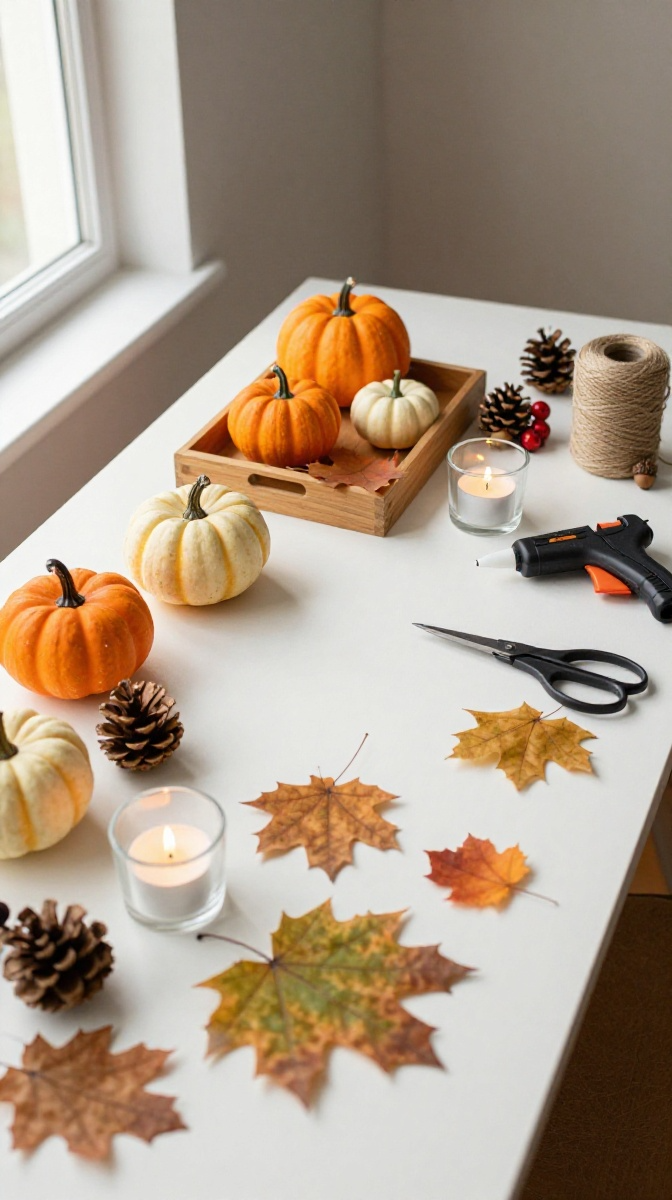
- Small wooden tray – A thrifted tray or shallow cardboard box can work as an affordable substitute.
- Mini faux pumpkins – Use orange, cream, white, or mixed colors.
- Artificial fall leaves – Faux maple, oak, or eucalyptus leaves are easy to arrange.
- Pinecones – Real pinecones are free if you can collect them, but make sure they are clean and completely dry.
- Small glass candle holders – Battery-operated candles are a safer option.
- Twine or jute string – Useful for adding rustic detail.
- Hot glue gun and glue sticks – Craft glue can be substituted for lighter decorations.
- Scissors – Use sharp craft scissors for trimming stems and leaves.
- Optional: small wooden beads, acorns, berries, or faux moss – These help fill empty spaces.
You can easily adjust this supply list according to what you already have. DIY does not mean buying an entire craft store. Check your drawers and old decorations first—you may already own half of what you need.
How to Make a Rustic Fall Centerpiece
Before you start gluing everything together, take a minute to arrange the pieces without adhesive. This little step can save you from creating what I lovingly call the “why did I glue that there?” situation.
Step 1: Prepare the Wooden Tray
Start with a clean, dry wooden tray. If the tray looks too plain, leave it natural for a farmhouse feel or lightly sand it for a softer, weathered appearance. You can also add a small strip of jute around the tray handles. Keep the decoration simple because the items inside the tray will become the main attraction.
Step 2: Create the Leaf Base
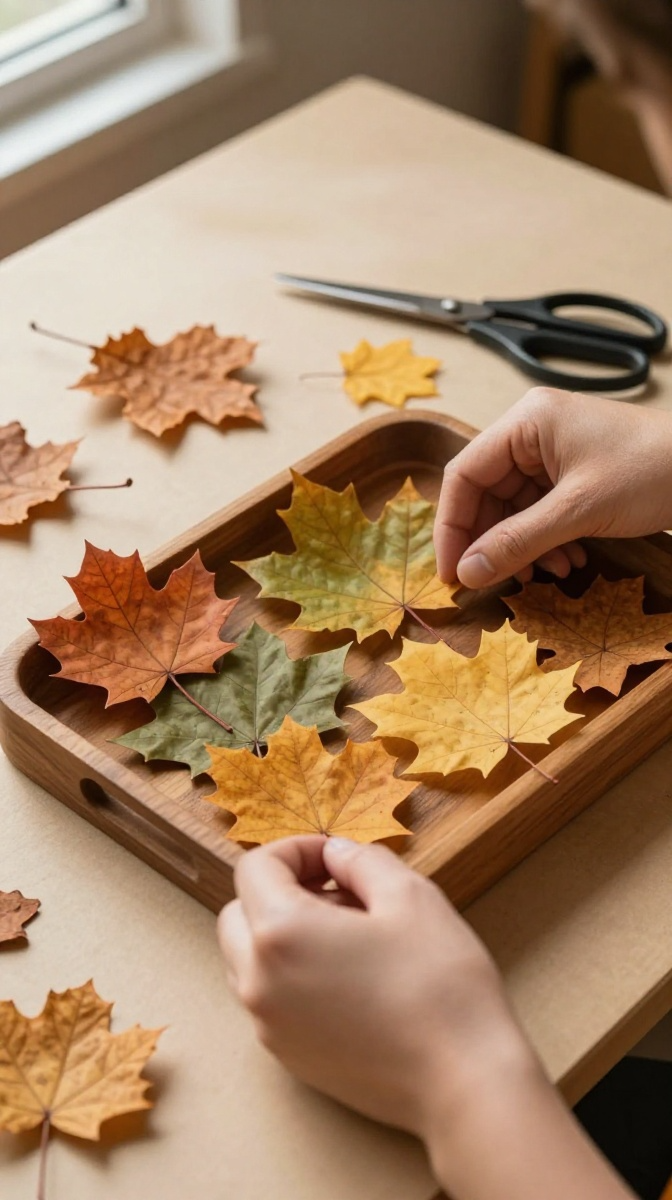
Lay several artificial leaves across the bottom of the tray. Arrange them so some leaves extend slightly over the edges. Do not make the leaves perfectly symmetrical. A slightly loose, natural arrangement looks more realistic and gives the centerpiece that casual autumn feeling. If your leaves have long plastic stems, trim them carefully with scissors or craft cutters.
Step 3: Add the Mini Pumpkins
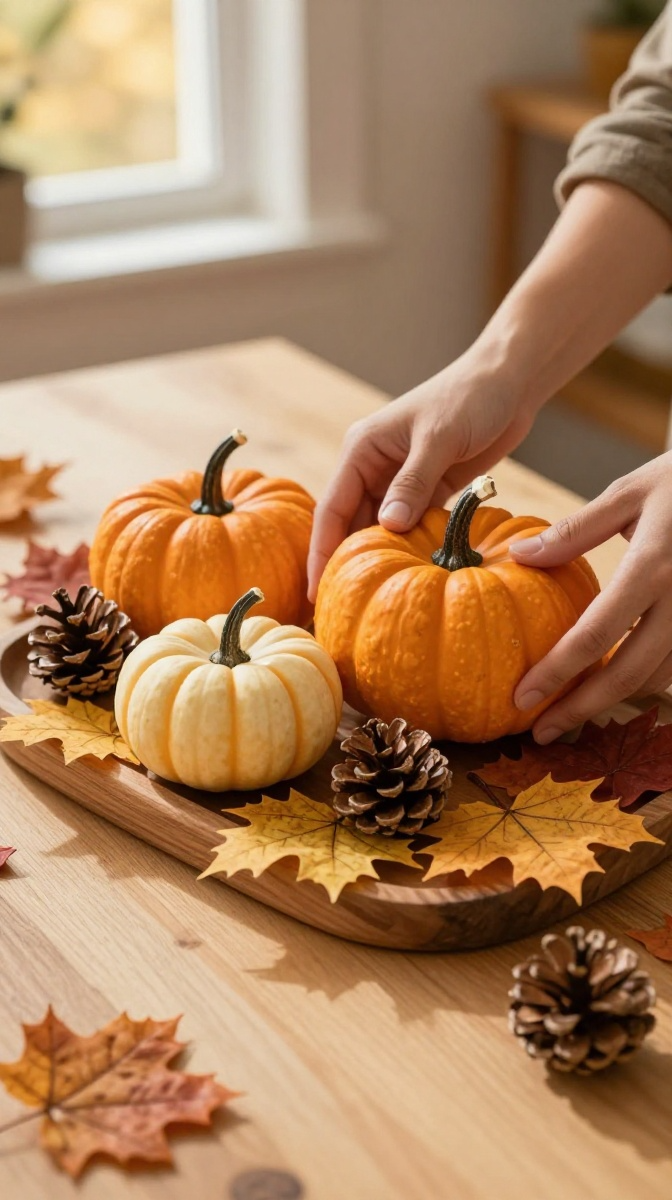
Place three to five mini pumpkins throughout the tray. Start with the largest pumpkin in the center or slightly off-center, then position smaller pumpkins around it. Try using different sizes and colors. For example, an orange pumpkin beside a cream pumpkin creates more visual interest than five identical pumpkins lined up like they are waiting for roll call.
Step 4: Add Pinecones and Natural Details
Fill the spaces around the pumpkins with pinecones, small faux acorns, berries, or wooden beads. Turn some pinecones at different angles rather than pointing them all in the same direction. These small changes make the arrangement feel fuller without requiring lots of materials.
Step 5: Add the Candles
Place one or two small candle holders into the arrangement. Battery-operated LED candles are ideal because they add a warm glow without creating an open-flame hazard. Keep the candles visible rather than completely burying them beneath leaves and decorations. You want the light to become part of the design.
Step 6: Secure Only the Pieces That Need It
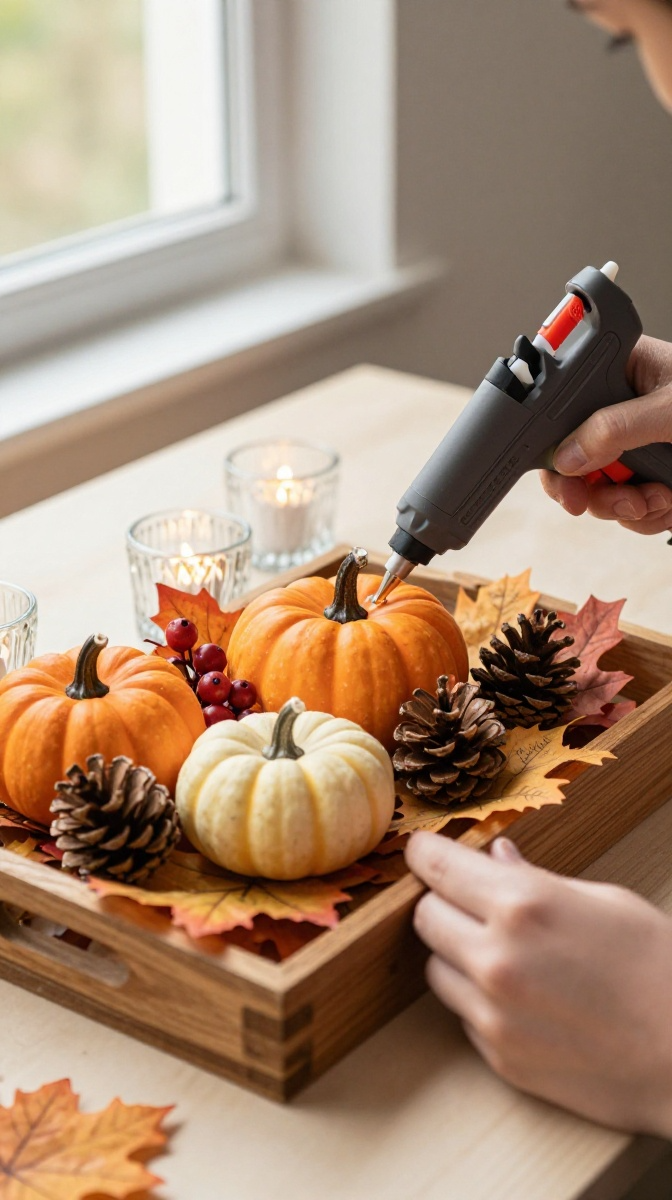
Once you are happy with the arrangement, use tiny amounts of hot glue to secure lightweight pieces that keep shifting. Do not glue everything permanently. Seasonal decorations are much easier to reuse when you can remove individual elements later. For heavier pumpkins, you may not need glue at all. Their weight should keep them in place.
Step 7: Finish With Twine and Small Accents
Wrap a short piece of twine around one pumpkin or tie a small bow around a tray handle. Finally, step back and look at the centerpiece from a few feet away. Is one side too empty? Is everything crowded in the middle? Move pieces around until the arrangement feels balanced.
Easy Design Variations for Different Homes
One of the best things about this project is how easy it is to customize.
Modern Neutral Fall Decor
Use white or cream pumpkins with beige leaves, pale wood, eucalyptus, and simple glass candle holders. Skip the bright orange if you want a calmer, minimalist appearance. This version works especially well with modern, Scandinavian, or neutral interiors.
Traditional Cozy Fall Decor
Go heavier on orange, red, golden brown, and deep green. Add pinecones, berries, plaid ribbon, and warm LED candles for that classic autumn atmosphere. This style looks fantastic on a dining table surrounded by warm lighting.
Farmhouse Fall Decor
Choose a distressed wooden tray, cream pumpkins, burlap, jute, cotton stems, and muted greenery. A small handwritten “Fall” or “Gather” sign can also work nicely. Keep the colors soft and slightly imperfect. Farmhouse decor does not need to look like it came from a showroom.
Common DIY Mistakes to Avoid
Making the Arrangement Too Crowded
More decorations do not automatically mean better decor. If every inch of the tray is covered, the individual pieces disappear. Leave a little breathing room between major elements so the pumpkins and leaves remain easy to see.
Using Only One Size of Decoration
Five identical pumpkins can make an arrangement look flat. Mix large, medium, and tiny objects to create height and depth. Place taller elements toward the back and shorter pieces toward the front.
Ignoring the Back and Sides
If your centerpiece will be visible from multiple directions, check it from all sides before finishing. Rotate the tray and make sure the leaves and pumpkins look intentional from every angle.
Using Too Much Hot Glue
Hot glue is useful, but a huge blob can become visible and messy. Use small amounts and allow them to cool before touching the pieces. And yes, hot glue burns are very effective at reminding you that you forgot the glue gun was hot.
Creative Ways to Display Your Fall Decor
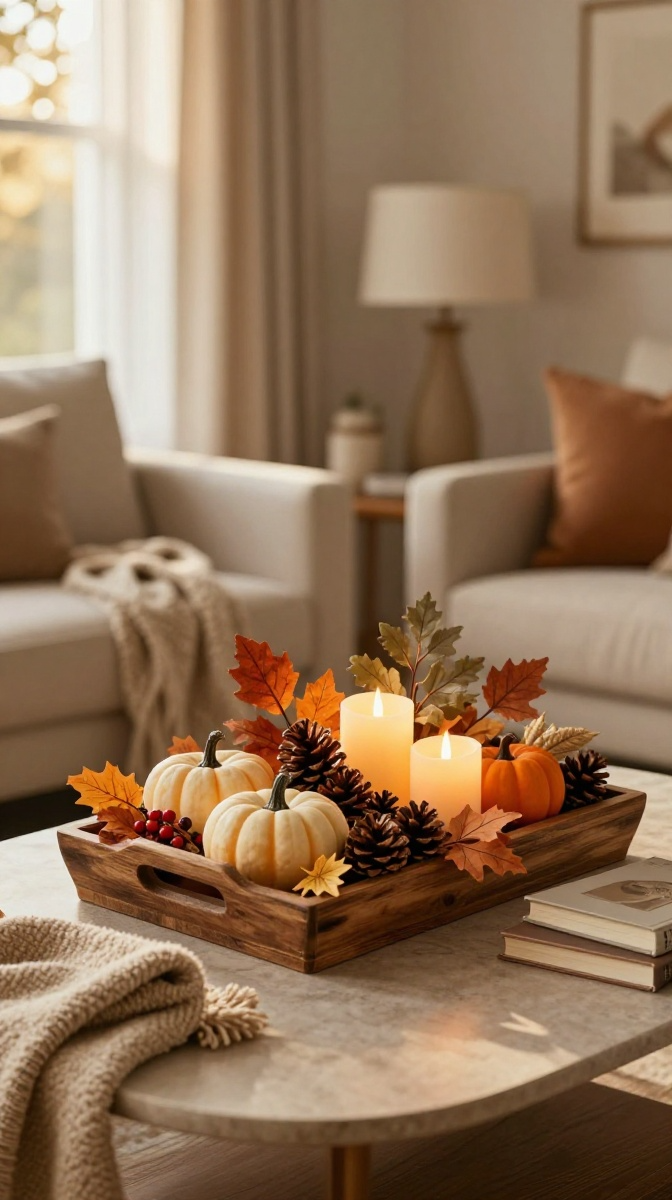
This centerpiece does not have to live on a dining table. Place it on a coffee table with a stack of neutral books. Add a cozy blanket nearby and you have an easy fall reading corner. For an entryway, use a smaller tray and combine the pumpkins with a small vase of faux branches. Guests will get the autumn welcome before they even take their shoes off. You can also place the arrangement on a kitchen island, sideboard, fireplace mantel, or console table.
Make It a Fall Gift
Want to make one for someone else? Choose colors that match their home and add a small handwritten fall card. A DIY centerpiece can make a thoughtful housewarming gift, Thanksgiving gift, hostess gift, or seasonal present without looking overly expensive.
FAQ’s
Can I make this fall centerpiece without a wooden tray?
Absolutely. Use a shallow basket, ceramic plate, serving board, metal tray, or even a sturdy cardboard box covered with kraft paper. The base mainly helps keep everything together.
Can I use real leaves instead of artificial leaves?
Yes, but real leaves will eventually dry out and become fragile. If you want the centerpiece to last throughout the season, faux leaves are easier and more practical.
How can I make this project cheaper?
Reuse decorations you already own and collect natural items such as pinecones and acorns. Thrift stores are also excellent places to find inexpensive wooden trays, baskets, and candle holders.
Are real candles safe to use?
LED candles are the safest choice, especially when the centerpiece contains faux leaves, dried materials, twine, or other flammable decorations. If you use real candles, keep them well away from decorative materials and never leave them unattended.
How long does this DIY fall decor last?
If you use mostly artificial materials, the centerpiece can last for several years. Store it in a dry container after the season and gently clean off dust before using it again.
Can I change the design for Thanksgiving?
Definitely. Add deeper autumn colors, small pumpkins, berries, greenery, or a simple “Gather” sign. You can also remove Halloween-style accents and keep the arrangement warm and elegant for Thanksgiving.
Give Your Home a Little Fall Makeover
You do not need an expensive shopping trip to make your home feel ready for fall. A simple tray, a handful of pumpkins, some leaves, pinecones, and warm lighting can completely change a space. The best part? You can customize the colors, swap the decorations, and reuse the base year after year. Start with what you already have, keep the arrangement relaxed, and let a few imperfect details make it feel handmade.