
Paper crafts get a bad rap. People hear “paper” and picture a sad little origami crane from middle school. But here’s the thing: paper is cheap, forgiving, and surprisingly gorgeous when you treat it right. These five projects can transform a blank wall or boring shelf into something guests will actually ask about. Grab your glue stick and let’s make some decor magic.
Why Paper Deserves a Spot in Your Decor Rotation
Paper is the ultimate budget-friendly craft material. A pack of cardstock costs less than a fancy coffee, and one pack can make three or four projects. That’s a win in my book.
It’s also beginner-proof. If you mess up a cut, you grab another sheet. No crying over spilled resin here. And when you’re tired of a design, you can recycle it and start fresh without guilt.
Plus, paper crafts let you test a trend before committing. Want to see if oversized florals work in your living room? Make paper versions first. Your wallet will thank you later.
Project 1: Giant Paper Flowers for Wall Drama
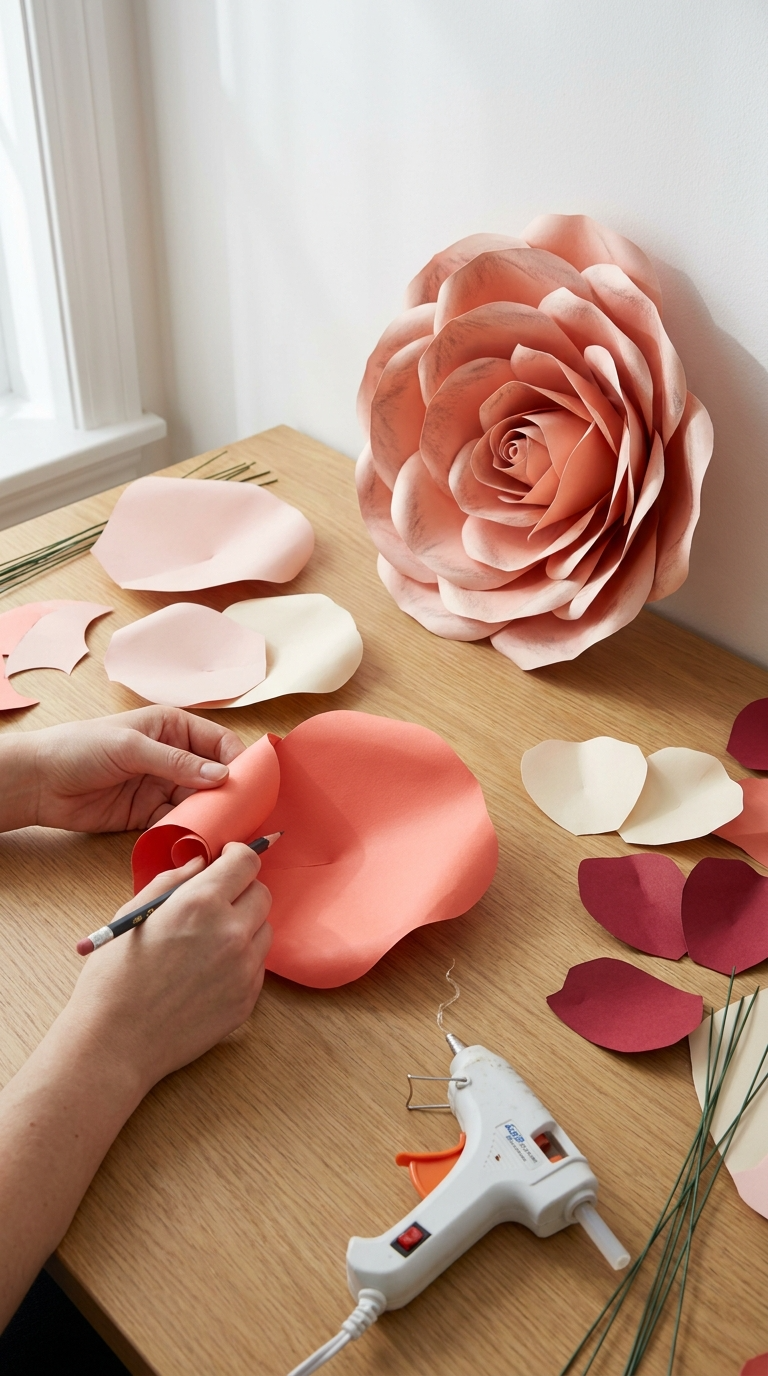
Nothing fills an empty wall faster than a cluster of oversized blooms. These look like they came from a boutique, but they’re just paper and hot glue.
Materials and Tools
- Cardstock or heavy scrapbook paper in your color palette (12×12 sheets work best)
- Floral wire or pipe cleaners for stems
- Hot glue gun and glue sticks
- Scissors or a cutting machine if you have one
- Pencil for tracing
- Free petal templates (printable ones online work great)
- Optional: chalk or ink pads for shading edges
No cardstock? Cereal boxes painted with acrylics are a solid substitute. FYI, they’re sturdier than you’d think.
Step-by-Step Instructions
- Print or draw five petal shapes in three sizes: small, medium, and large. You want about eight petals per size for a full bloom.
- Trace the petals onto your paper and cut them out. Don’t stress about perfect edges. Slight variations look more natural.
- Add dimension by curling the petal edges around a pencil. This simple trick makes flat paper look alive.
- Layer the petals from largest to smallest, gluing each layer slightly offset from the one below.
- Poke a small hole in the center and thread your floral wire through. Secure it with a dab of hot glue.
- Cover the center with a small circle of paper or a button for a polished finish.
- Arrange your flowers on the wall using removable adhesive strips or small nails.
Design Variations
Go monochrome for a modern look, or mix jewel tones for a boho vibe. Add glitter to the petal tips if you’re feeling extra. Book pages make a lovely vintage version too.
Common Mistakes to Avoid
Don’t use thin printer paper. It wilts and tears. Also, resist the urge to skip the petal curling. Flat petals equal flat-looking flowers, and nobody wants that.
Project 2: Paper Lanterns That Glow Like Real Ones
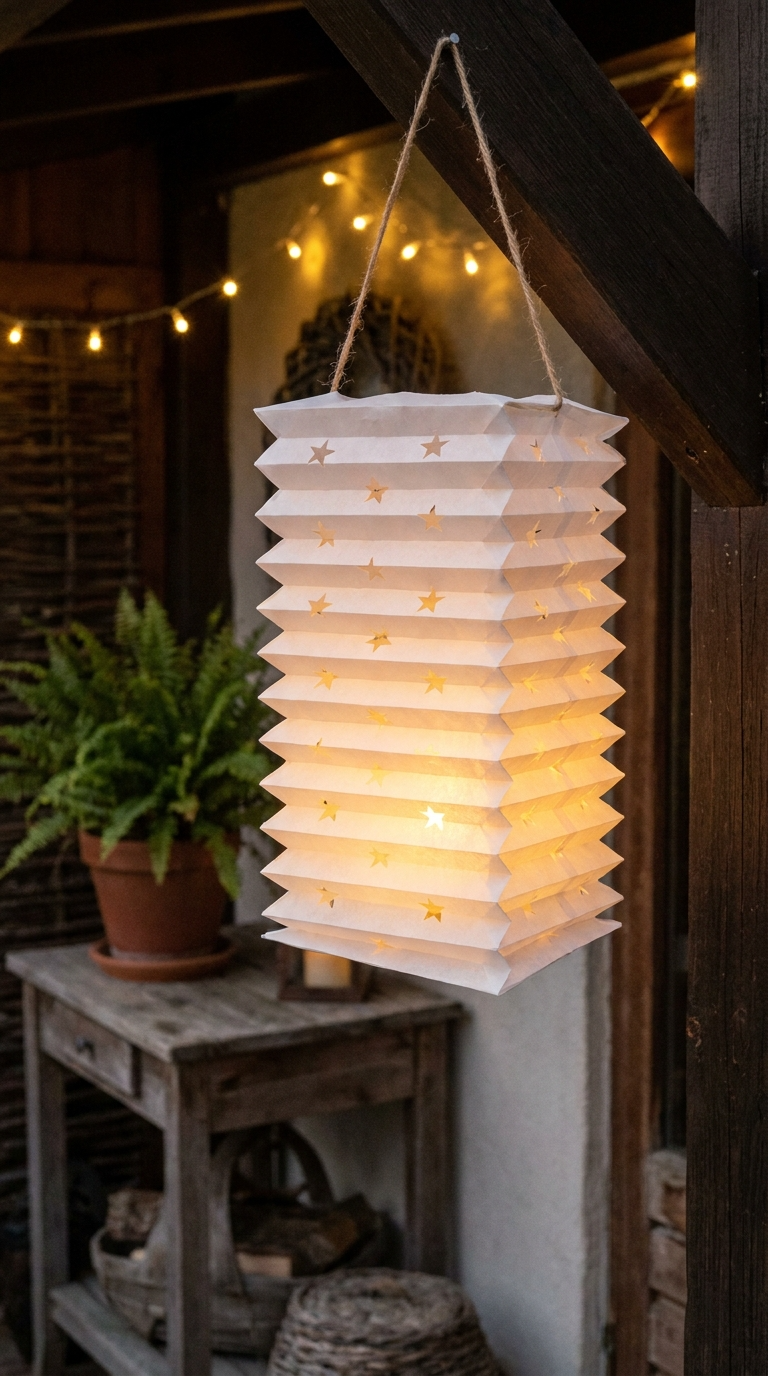
Store-bought lanterns are fine until you see the price tag. These DIY versions cost pennies and look just as good hanging from a porch or bedroom ceiling.
Materials and Tools
- Vellum paper or thin white cardstock
- Battery-operated tea lights or LED string lights
- Ruler and craft knife
- Double-sided tape or glue dots
- Bone folder or popsicle stick for creasing
- Ribbon or twine for hanging
Regular paper works in a pinch, but vellum diffuses light beautifully. IMO, it’s worth the upgrade.
Step-by-Step Instructions
- Cut your paper into a rectangle measuring 8 inches by 11 inches.
- Score horizontal lines every inch along the long side using your ruler and bone folder.
- Fold along each score line to create an accordion shape.
- Cut decorative shapes into the folds if you want light to peek through.
- Bring the two short ends together and secure with double-sided tape.
- Press the lantern gently to fan out the folds into a round shape.
- Place a battery tea light inside and hang with ribbon.
Safety Tips
Never use real candles. Paper plus open flame equals a story you don’t want to tell. Battery lights stay cool and let you nap without worry.
Project 3: Paper Mache Vases with a Modern Twist
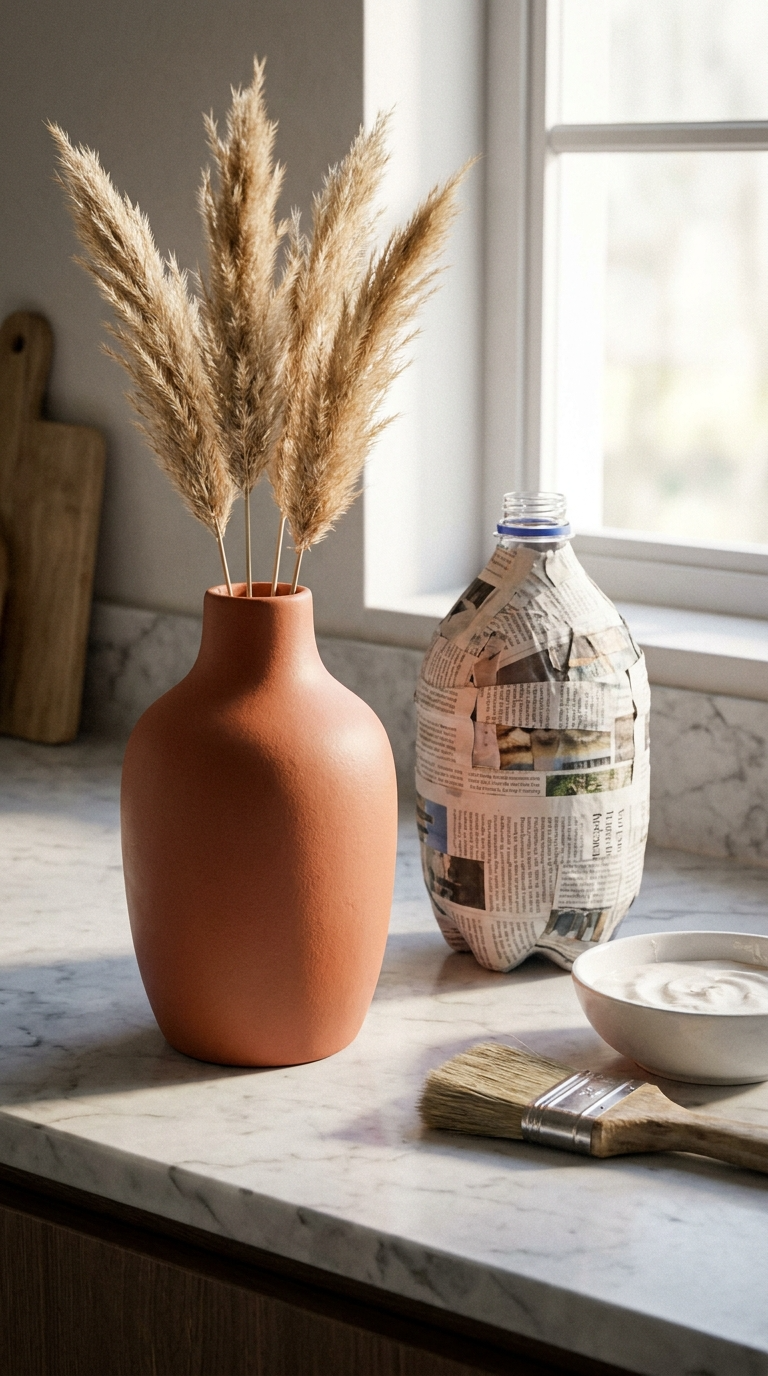
Paper mache sounds like a kids’ craft, but the right finish makes it look like ceramic. This project turns scraps into sculptural vases.
Materials and Tools
- Newspaper or scrap paper torn into strips
- Flour and water for paste (one part flour, two parts water)
- A balloon or plastic bottle as your mold
- Sandpaper for smoothing
- Acrylic paint in matte or metallic finishes
- Paintbrush and sealant spray
Step-by-Step Instructions
- Blow up a balloon to your desired vase size or cut a plastic bottle to shape.
- Mix your flour paste until it’s smooth like pancake batter.
- Dip paper strips into the paste and layer them over your mold. Cover it completely.
- Add three to four layers, letting each dry before adding the next.
- Once fully dry, pop the balloon or slide out the bottle.
- Sand the surface smooth and paint with two coats of acrylic.
- Seal with a spray finish and display with dried flowers or use as a standalone piece.
Troubleshooting Tips
If your vase sags, you used too much paste. Wipe some off and add drier strips on top. If it cracks, patch it with more paper and paste. Paper mache forgives almost everything.
Project 4: Quilled Wall Art for Serious Detail Lovers
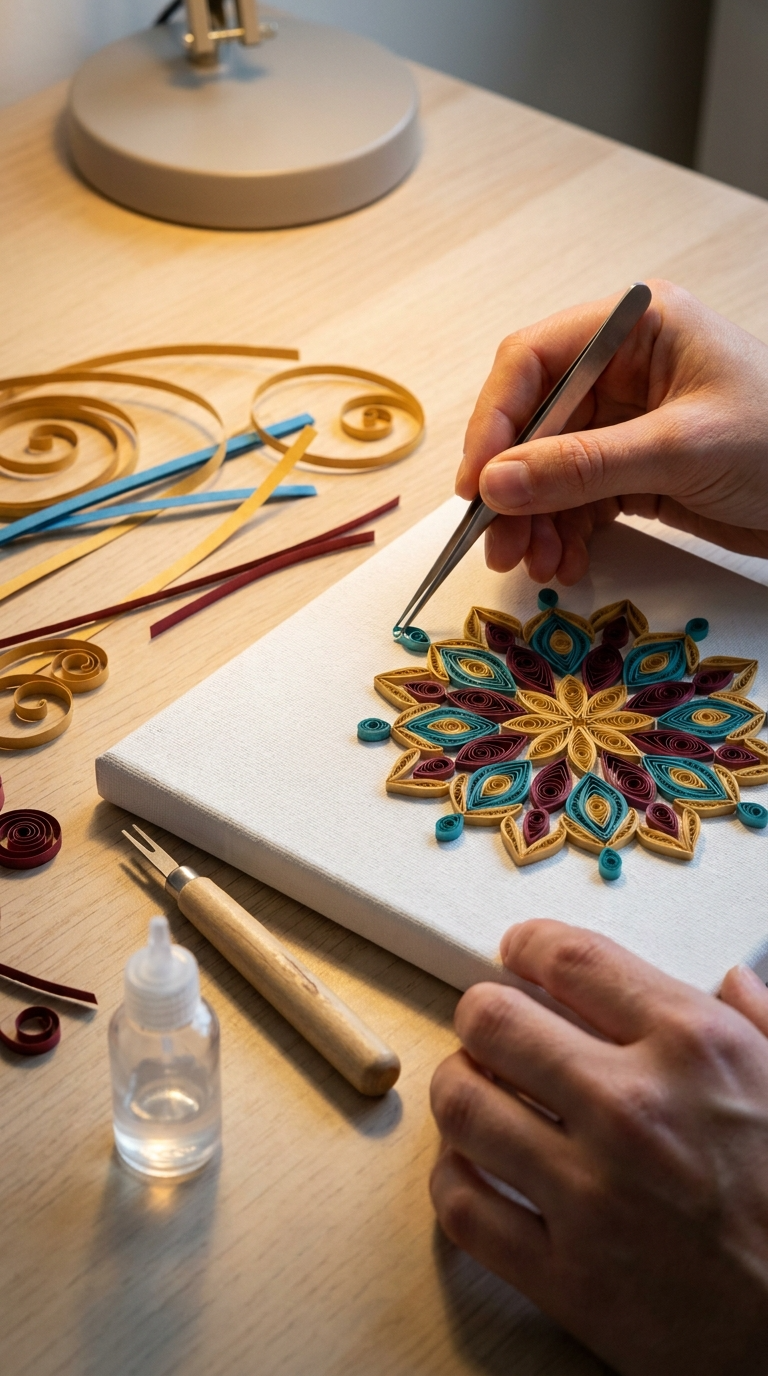
Quilling looks intimidating, but it’s just rolling thin strips of paper into shapes. The result is intricate art that costs almost nothing.
Materials and Tools
- Quilling paper strips or cut your own from cardstock
- Slotted quilling tool or a toothpick
- Craft glue with a fine tip
- Tweezers for placing shapes
- A canvas or thick cardstock as your base
- Pins or a corkboard for shaping
Step-by-Step Instructions
- Roll a strip of paper around your tool to make a coil.
- Let it loosen slightly, then glue the end to hold the shape.
- Pinch the coil into teardrops, marquise shapes, or hearts.
- Arrange your shapes on the canvas before gluing. Play with the layout.
- Glue each piece down one at a time using tweezers for precision.
- Fill in your design, leaving negative space for contrast.
- Frame it and hang. Boom, instant gallery wall.
Design Ideas
Start with simple monograms or abstract mandalas. Once you’re comfortable, try floral wreaths or animal silhouettes. Pinterest is your friend here.
Project 5: Paper Garland for Every Occasion
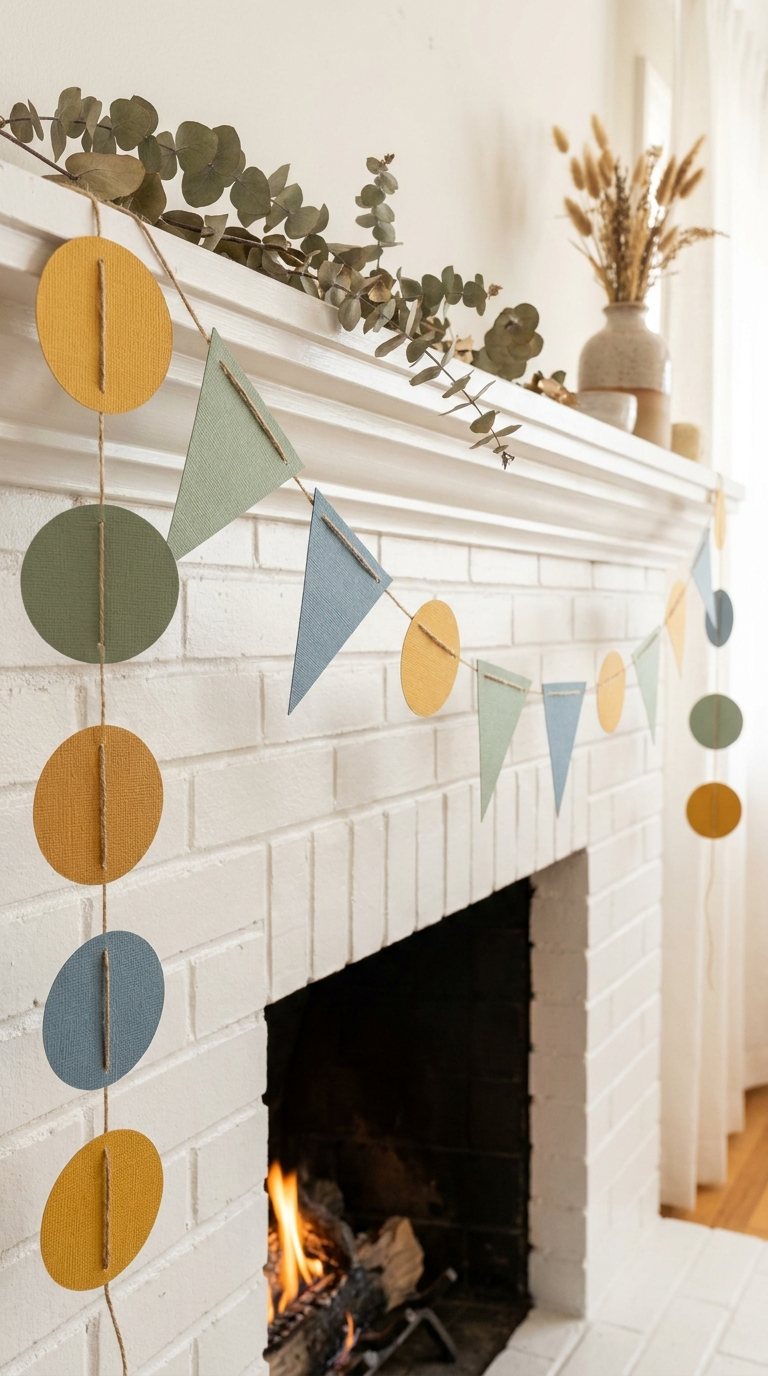
Garlands are the easiest way to make a space feel festive. They work for birthdays, holidays, or just because your wall looks lonely.
Materials and Tools
- Scrapbook paper in coordinating colors
- Twine, yarn, or ribbon
- Scissors or paper punch
- Tape or glue
Step-by-Step Instructions
- Cut your paper into circles, triangles, or any shape you like.
- Lay the shapes in a pattern along your twine.
- Fold each shape over the twine and secure with tape or glue.
- Leave a few inches of twine at each end for hanging.
- Drape it across a mantel, doorway, or headboard.
Customization Ideas
Use book pages for a literary theme. Add photos for a personalized touch. Swap paper for felt if you want something more durable.
FAQ’s
What kind of paper works best for these projects?
Cardstock and scrapbook paper are your best bets. They hold shape and take glue well. Printer paper works for practice but won’t last as long.
How do I keep paper crafts from fading?
Keep them out of direct sunlight and seal them with a UV-resistant spray if they’re near windows. Rotating your decor also helps.
Can I make these projects with kids?
Absolutely. The garland and paper mache projects are kid-friendly. Save the hot glue and craft knife steps for adults.
How do I hang paper crafts without damaging walls?
Command strips and removable adhesive putty are lifesavers. For heavier pieces, use small nails with a tiny hole that’s easy to patch.
What’s the cheapest paper option?
Reuse junk mail, old books, or newspaper. Paint them or leave them natural for a rustic look. Free is the best price.
Go Make Something Already
Paper crafts don’t need fancy supplies or a dedicated craft room. They need a little time, a little glue, and the willingness to make a mess. Pick one project, grab your supplies, and see where it takes you. Worst case, you recycle it and try again. Best case, you’ve got a new piece of decor and a new hobby. Either way, you win.