
Want candles that look like they came from a fancy boutique, but your bank account says “absolutely not”? Same. You can turn plain dollar-store candles into stunning decor pieces using stuff you probably already own. No fancy tools, no weird chemicals, and no spending $40 on a single candle holder. Let’s get into it.
Why Candle Decor Is the Easiest Budget Win
Candles are already magic. They add warmth, light, and that cozy vibe that makes any room feel instantly better. But plain white candles in ugly packaging? Not exactly Instagram-worthy.
The good news: you don’t need to buy expensive candles to get an expensive look. A little creativity goes a long way. Plain candles are basically blank canvases waiting for you to dress them up.
Plus, this project is forgiving. Mess up? Scrape it off and try again. Candles don’t judge.
What You’ll Need (Hint: Not Much)
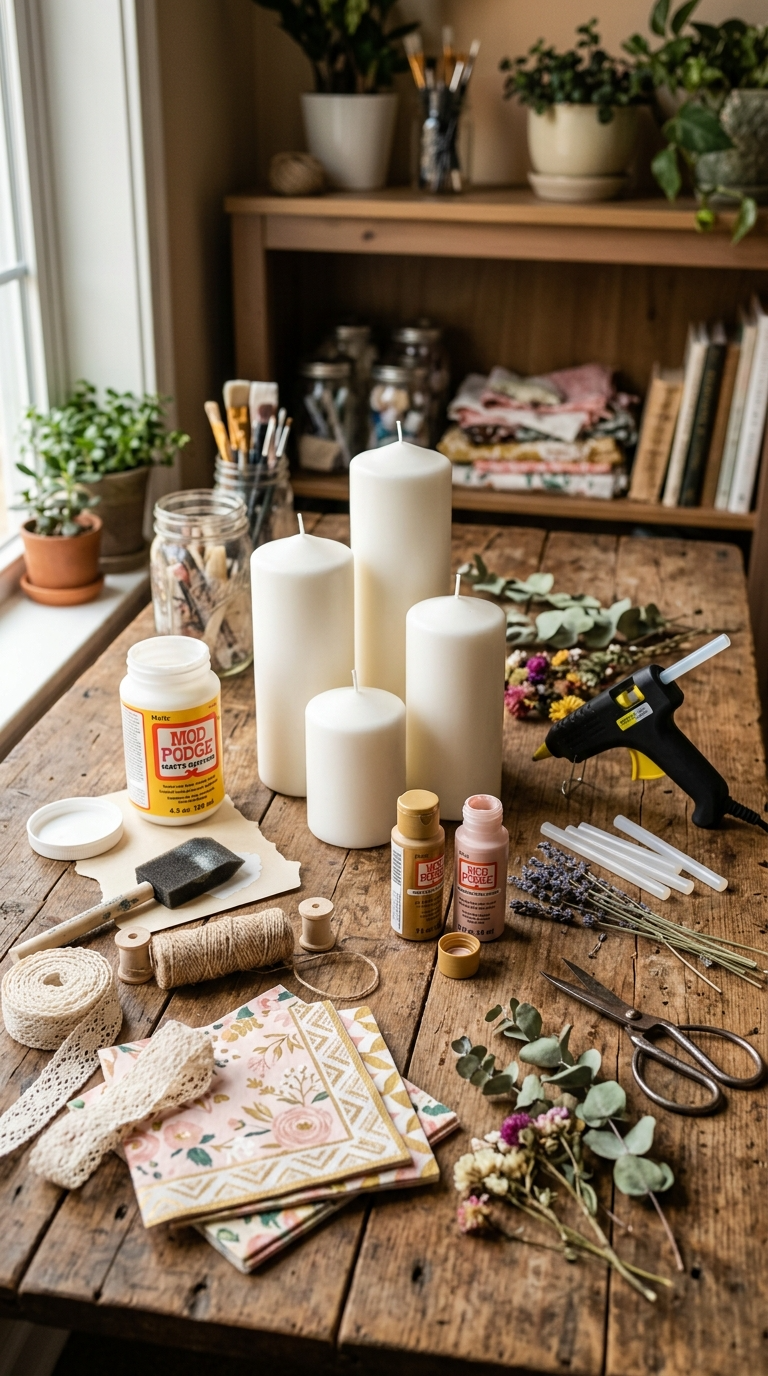
Before you start, gather your supplies. Most of this stuff is cheap, and you probably have some of it hiding in a drawer somewhere.
Materials
- Plain pillar candles or votive candles — dollar store ones work perfectly
- Old candles you want to upcycle — don’t toss those sad half-burnt ones
- Mod Podge or white school glue — Mod Podge is better, but glue works in a pinch
- Decorative napkins or tissue paper — grab those pretty ones from the party aisle
- Lace, ribbon, or twine — thrift stores are goldmines for this
- Acrylic paint — cheap craft paint is totally fine
- Gold or metallic leaf sheets — optional, but they look fancy
- Dried flowers or pressed leaves — free if you dry them yourself
- Old book pages or sheet music — for a vintage look
- Twine or jute string — for wrapping
Tools
- Scissors
- Paintbrush or foam brush
- Hot glue gun — or regular glue if you’re patient
- Wax paper — to protect your work surface
- Hair dryer or heat gun — optional, for smoothing wax
Budget swap: No Mod Podge? Mix equal parts white glue and water. No gold leaf? Metallic acrylic paint works great. No dried flowers? Raid your spice rack for star anise or cinnamon sticks.
The Main Event: 5 Candle Decor Ideas You Can Actually Pull Off
Here’s where the fun begins. Pick one idea or try them all. Each one takes less than 30 minutes (not counting drying time).
Idea 1: Decoupage Napkin Candles
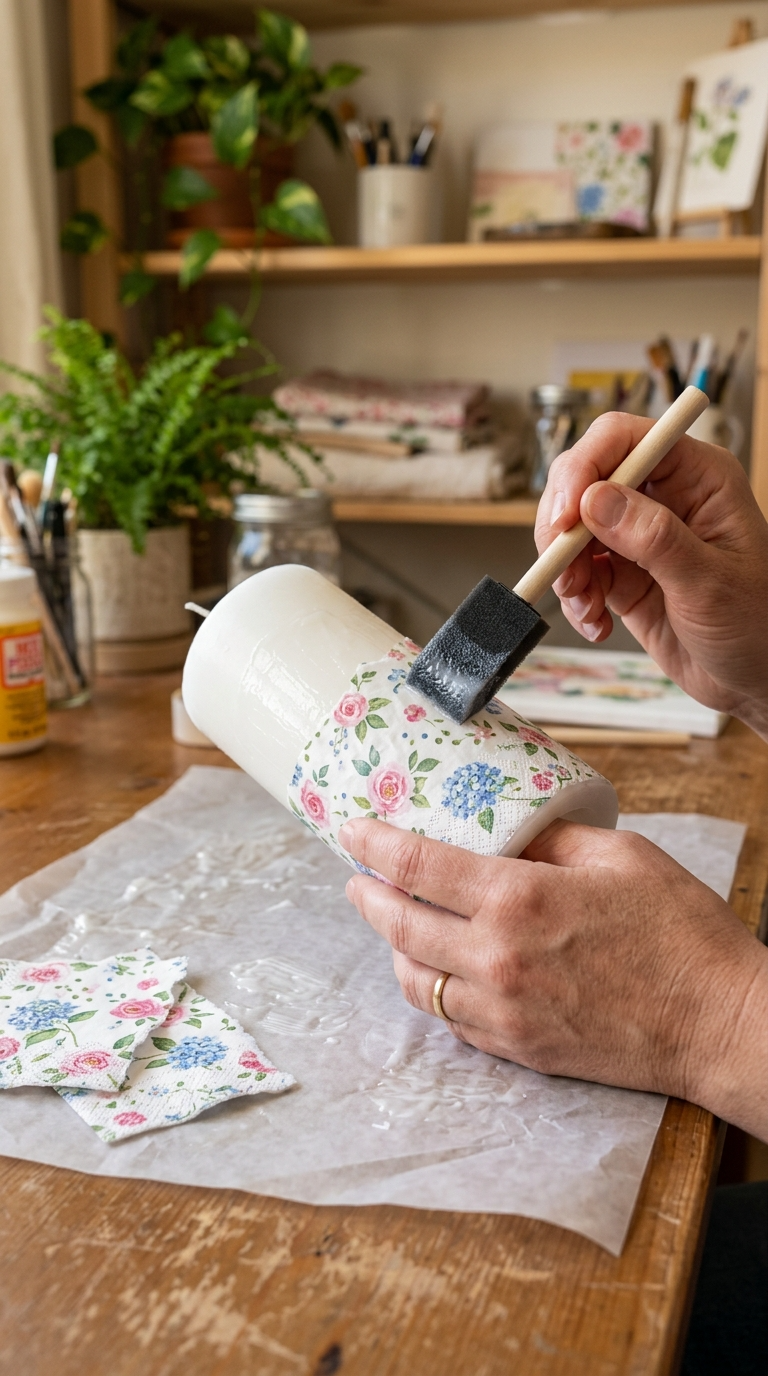
This is the easiest one, and it looks ridiculously good. You’re basically gluing pretty paper onto a candle. That’s it.
- Peel apart your decorative napkin so you’re left with just the top printed layer. The white backing layers come off easily.
- Cut or tear the napkin into designs you like — flowers, patterns, whatever speaks to you.
- Paint a thin layer of Mod Podge or diluted glue onto the candle where you want the design.
- Press the napkin piece onto the glue. Smooth it down gently with your fingers. Don’t rub too hard or it’ll tear.
- Paint another thin layer of Mod Podge over the top to seal it. Smooth out any bubbles.
- Let it dry completely. This takes about 20–30 minutes.
Pro tip: Work on one small section at a time. The glue dries fast, and you don’t want a sticky mess.
Idea 2: Lace-Wrapped Candles
Want instant vintage vibes? Wrap lace around a candle. Boom. Elegant.
- Cut a strip of lace wide enough to wrap around your candle.
- Wrap it around the middle or bottom third of the candle.
- Secure the ends with a tiny dot of hot glue. Press firmly for a few seconds.
- Optional: Add a thin ribbon or twine over the lace for extra texture.
This works best on pillar candles. Votives are too small and get fiddly.
Idea 3: Painted Geometric Designs
If you can paint a straight line, you can do this. Even if you can’t, imperfect lines look artsy.
- Clean your candle with a dry cloth to remove any dust or oil.
- Use painter’s tape to create stripes, triangles, or chevrons on the candle.
- Paint the exposed areas with acrylic paint. Two thin coats are better than one thick coat.
- Let the paint dry for about 15 minutes, then peel off the tape slowly.
- If you mess up, just paint over it. Nobody will know.
Color combo ideas: White and gold, blush pink and terracotta, navy and cream.
Idea 4: Gold Leaf Accents
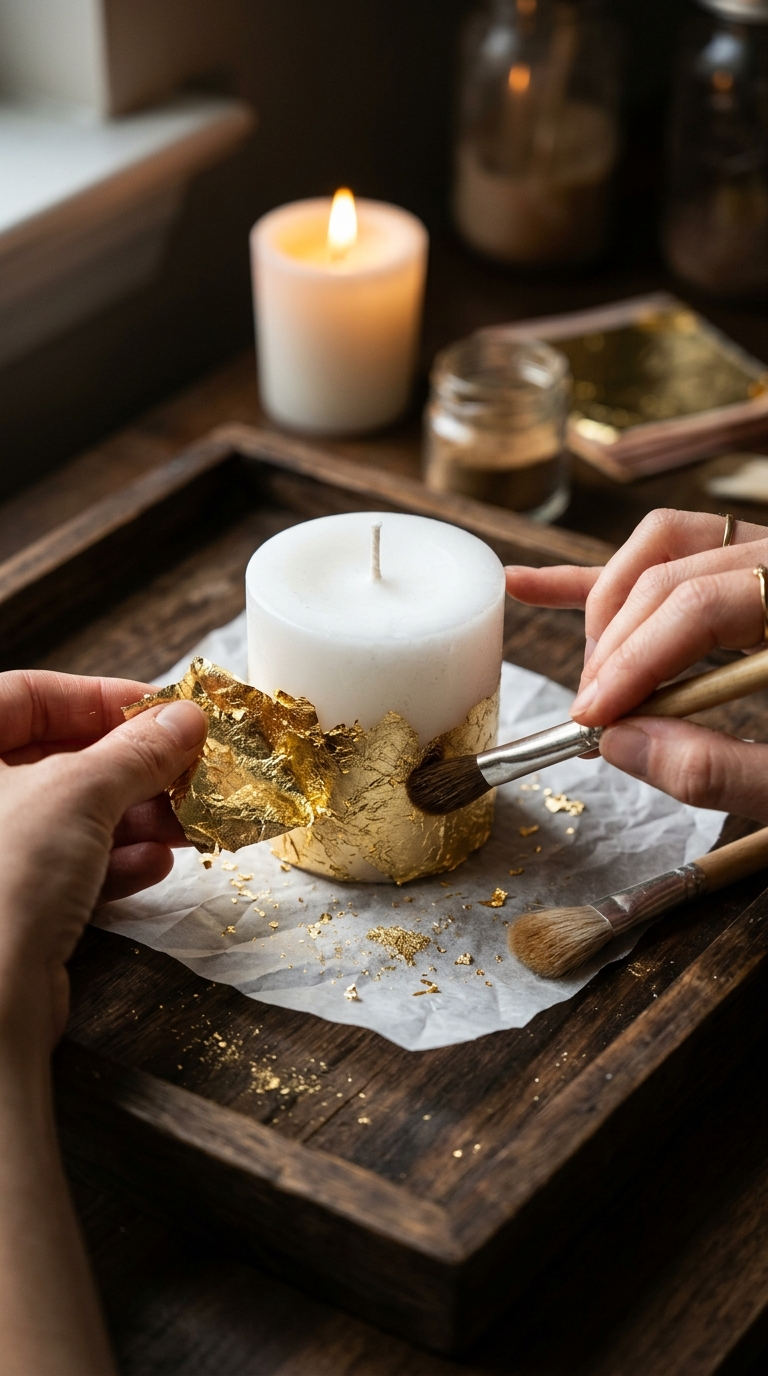
This one makes you look like a professional. Gold leaf is surprisingly cheap online, and a little goes a long way.
- Paint a thin layer of Mod Podge on the area you want to gild.
- Wait until the glue is tacky — about 30 seconds.
- Press a sheet of gold leaf onto the glue. Use a soft brush to press it down.
- Peel away the backing paper and brush off the excess gold leaf.
- Seal with another thin layer of Mod Podge.
Try gilding the rim of a votive or the bottom edge of a pillar candle. Less is more here.
Idea 5: Pressed Flower Candles
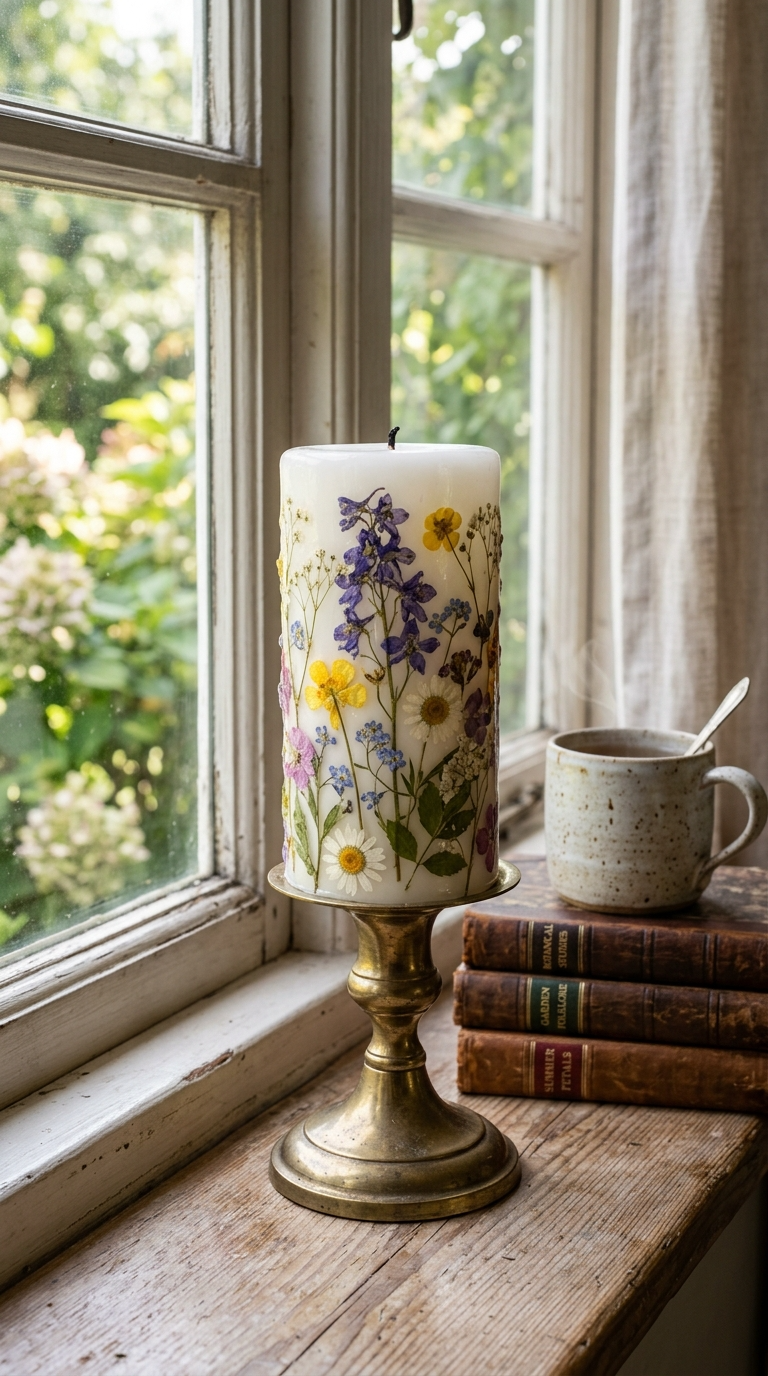
This is my personal favorite. It’s like capturing springtime on a candle.
- Press small flowers and leaves between book pages for a few days until flat and dry.
- Paint a thin layer of Mod Podge onto the candle.
- Place the dried flowers where you want them.
- Paint another layer of Mod Podge over the top to seal.
- Let it dry completely before handling.
Note: Dried flowers can be flammable. Keep them away from the flame. These are for display, not for burning. Seriously.
Safety First (Because Burnt Hair Smells Bad)
I know, I know. Safety talk is boring. But candle decor has one big rule: don’t put flammable stuff near the flame.
- Keep decorations below the wick line — at least 1 inch down from the top
- Never leave burning candles unattended — obvious, but worth saying
- Trim your wick to 1/4 inch before every burn
- Don’t burn candles with dried flowers or paper near the flame — display only
- Use a candle holder or plate to catch drips and protect surfaces
If you’re making candles to actually burn, stick to paint, lace, or ribbon below the wick. Save the paper and flowers for decorative pieces.
Common Mistakes to Avoid (Learn From My Failures)
I’ve messed up plenty of candles so you don’t have to. Here’s what to watch out for:
- Using too much glue — it oozes out and looks lumpy. Thin layers only.
- Rushing the drying time — impatient hands ruin everything. Walk away.
- Putting decorations too high — they’ll catch fire. Keep it low.
- Using thick napkins — they don’t conform to curved surfaces. Thin tissue only.
- Skipping the sealing layer — your design will peel off. Seal it.
If something goes wrong, don’t panic. Scrape it off, wipe with a damp cloth, and start over. Candles are forgiving.
How to Display, Gift, or Use Your New Candles
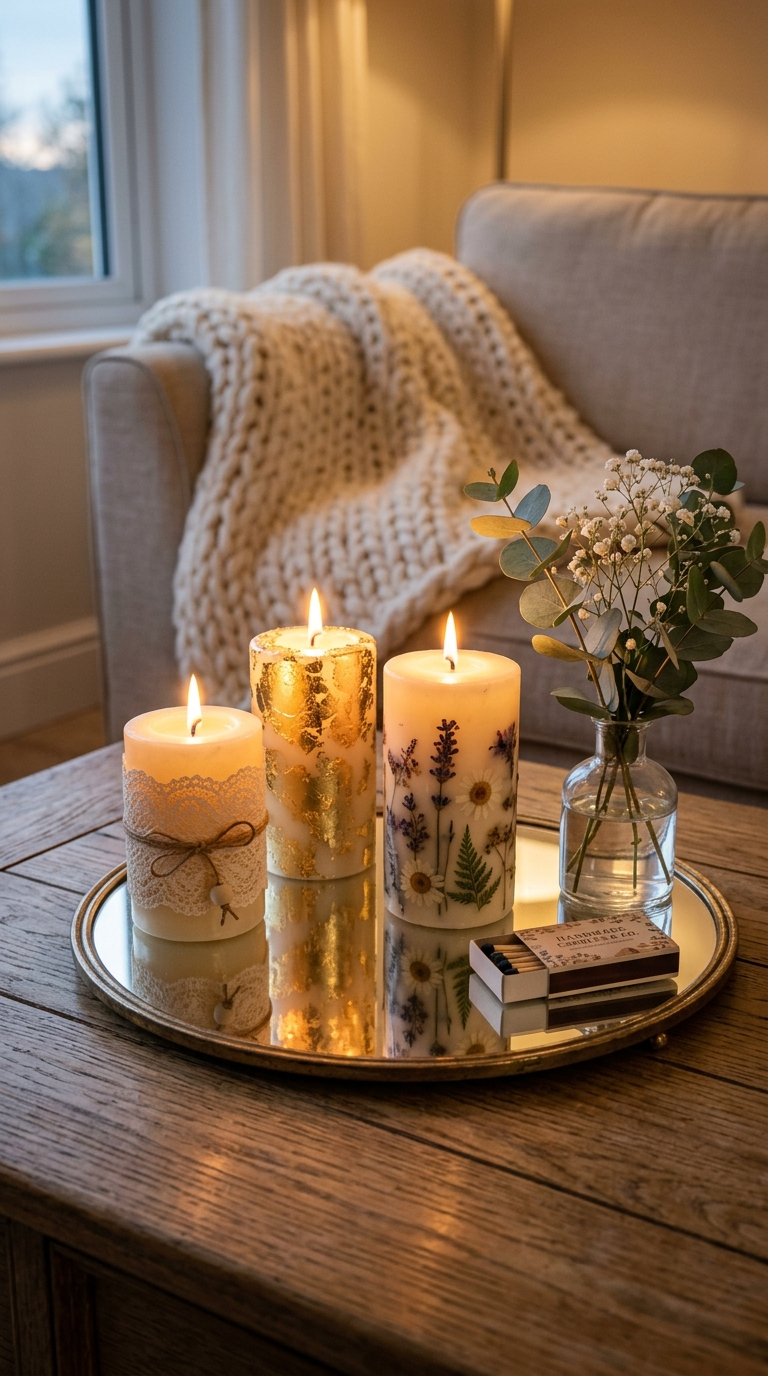
Now that you’ve made these beauties, what do you do with them?
Display Ideas
- Cluster three candles of different heights on a wooden tray
- Place them on a mirrored tray for a glam look
- Arrange them on a bookshelf between your favorite reads
- Use them as a centerpiece with fresh greenery
Gifting Ideas
- Wrap them in tissue paper and tie with twine
- Add a handwritten tag that says “Made with love (and glue)”
- Pair with a matching candle holder from the thrift store
- Put them in a cute gift bag with a mini box of matches
FYI, handmade candles make amazing gifts for teachers, neighbors, or anyone who needs a little cozy in their life.
FAQ’s
Can I actually burn decorated candles?
It depends on the decoration. Painted candles and lace-wrapped candles can be burned if the decoration stays below the wick line. Candles with paper, dried flowers, or gold leaf should be display-only. When in doubt, don’t burn it.
How long does Mod Podge take to dry?
About 20–30 minutes for a thin layer. Full cure takes 24 hours. Be patient — it’s worth it.
What if I don’t have Mod Podge?
Mix equal parts white school glue and water. It works almost as well. It dries a little cloudy, but for most projects, you won’t notice.
Can I use real flowers instead of dried ones?
Fresh flowers will wilt and mold. Always dry or press them first. You can speed up the process with a microwave flower press if you’re impatient.
How do I clean my candles if I mess up?
Wipe gently with a damp cloth. For dried glue, pick it off with your fingernail. Don’t soak the candle in water — wax and water don’t mix.
Where can I find cheap supplies?
Dollar stores, thrift shops, and your own junk drawer. Seriously, check before you buy. You probably already have half of what you need.
Go Make Something Beautiful (or At Least Something Cute)
You don’t need a big budget or fancy skills to make gorgeous candle decor. You just need a little time, a few cheap supplies, and the willingness to get your hands a bit sticky.
Start with one project. The decoupage napkin candles are the easiest, so maybe start there. If you mess up, laugh it off and try again. That’s the whole point of DIY — it’s supposed to be fun, not perfect.
Now go raid your craft stash and make something that makes you smile. And hey, if you burn your fingers on the hot glue gun, welcome to the club. We’ve all been there.